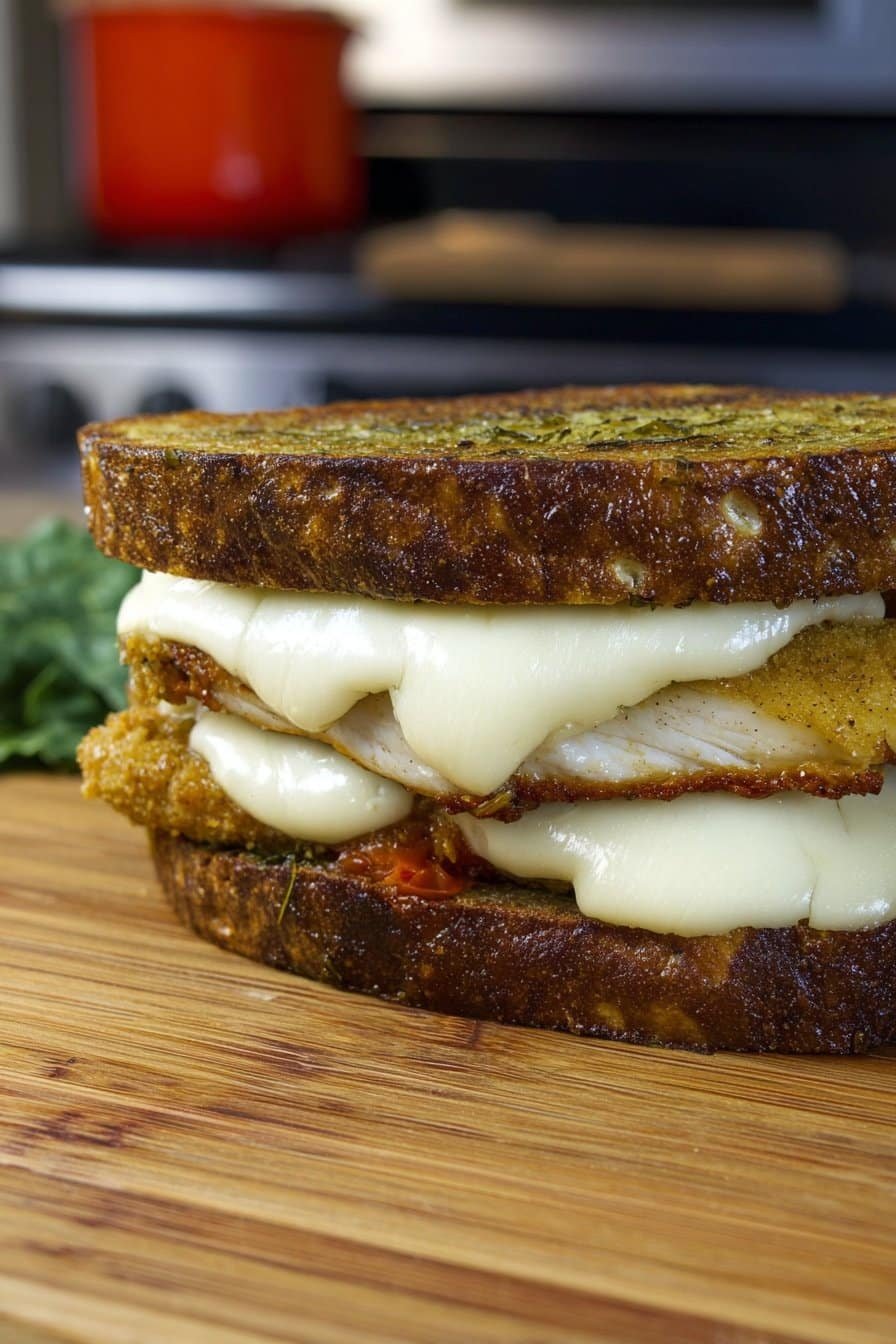
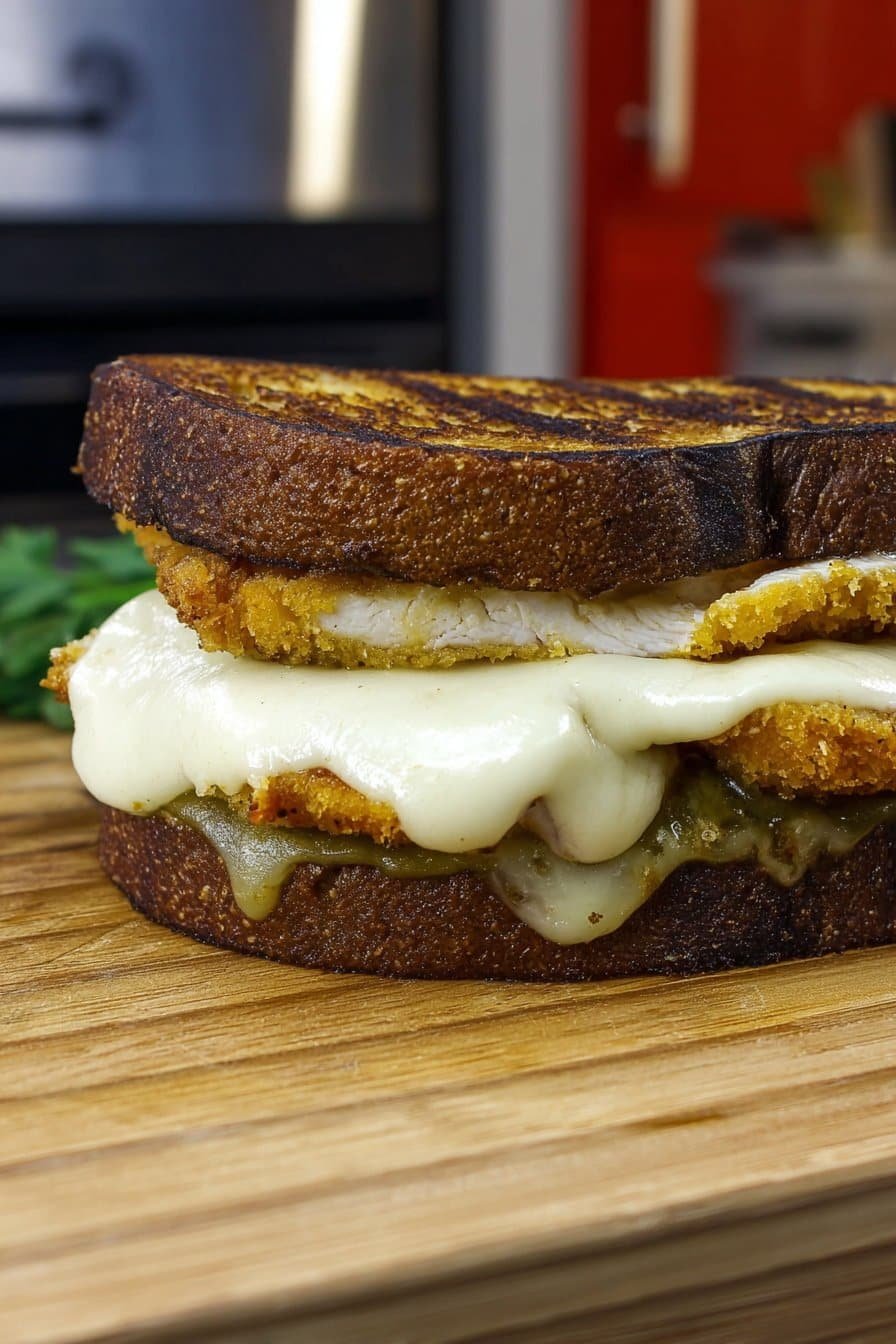
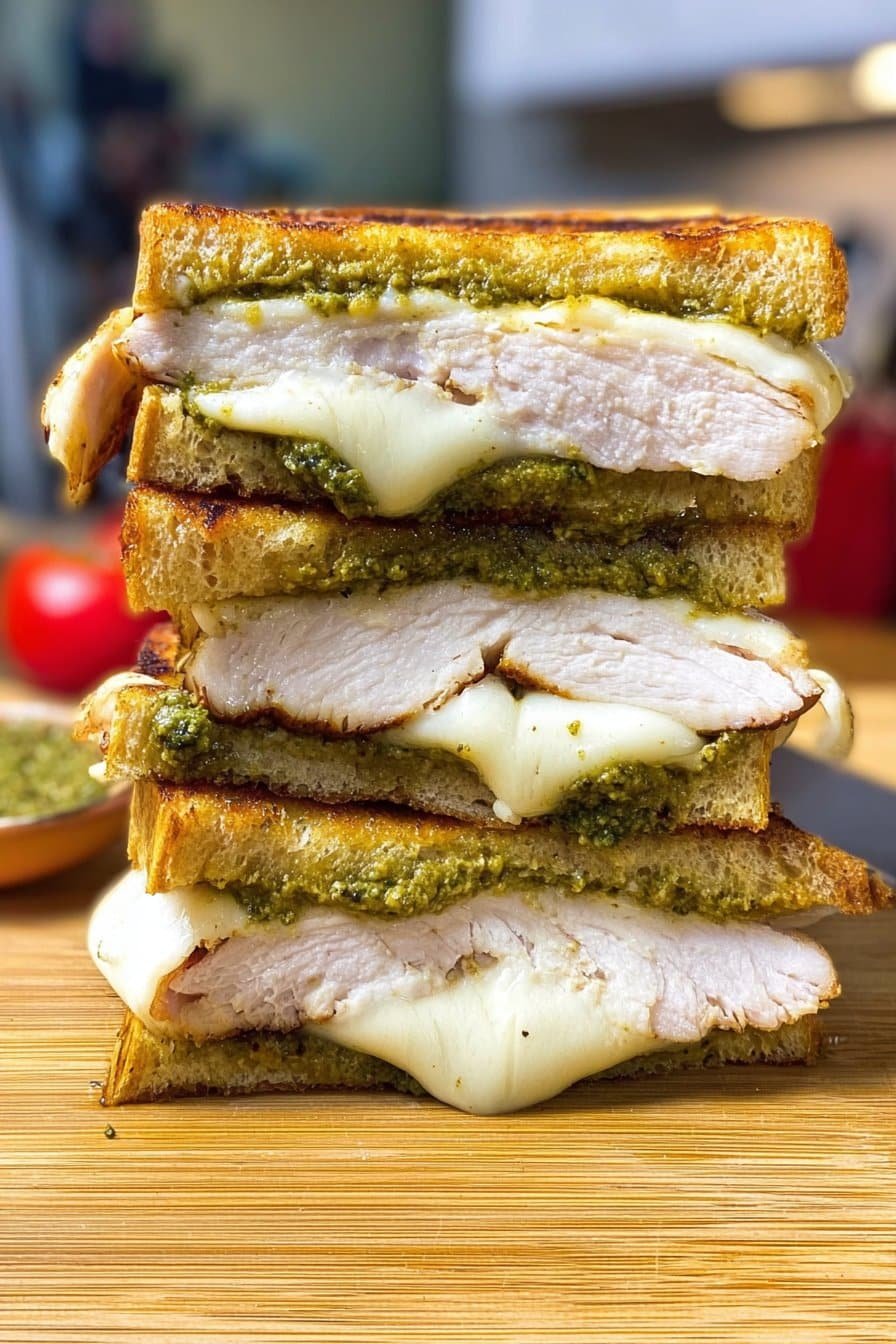
So, About This Crispy Grilled Chicken Grilled Cheese Sandwich…
You know how sometimes you just want a sandwich that’s got it all? Warm, crispy on the outside, gooey on the inside, and maybe a bit over the top? Well, this is my go-to for those days. (Which, to be fair, is more days than I’d like to admit.) The first time I made this, I think I was procrastinating laundry. My kids barged in, smelled the cheese, and suddenly everyone forgot they were “full” from lunch. The dog begged too, but he always does. Food like this, honestly, makes you forget your to-do list for a sec. Or at least makes the chores taste better.
Why You’ll Love This (Or At Least Why I Do)
I make this when it’s been that kind of day—you know what I mean. My family goes a little bonkers for it since, well, it’s fried cheese and chicken in one sandwich. (Who wouldn’t?) Sometimes I sneak a spicy mayo in there for myself. Oh, and here’s the thing: I used to dread making grilled cheese because it always stuck to the pan, but I’ve finally figured out the right heat—sort of. It does still stick sometimes, but that’s what spatulas are for, right?
What You’ll Need (Or What I Usually Grab)
- 2 slices good bread (brioche is fancy, but honestly whatever’s knocking around works)
- 1 cooked crispy chicken breast (leftover chicken tenders totally work—sometimes I even use store-bought, shhh)
- 2-3 slices melty cheese (cheddar is my mainstay, but mozzarella is great if you like the cheese pull; my grandmother swore by Kraft singles, not kidding!)
- Butter, enough to slather both sides (or mayonnaise, if you’re in a rush—trust me, it browns up nice)
- Optional: sliced tomato, a handful of pickles, or a squiggle of spicy mustard
- Salt and pepper, but only if you remember
How To Throw It Together (Or: My Not-So-Perfect Process)
- First, get your chicken ready. If you’re using leftovers, slice it so it sits nicely on the bread. If it’s cold (and you aren’t feeling lazy), zap it for a few seconds in the microwave. But sometimes I just let the pan do the work of warming it up.
- Butter (or mayo) the outside of your bread. This is the trick to that golden crust—don’t be stingy. I mean, if you’re going to do this, do it properly.
- Place one slice, butter side down, in a skillet over medium-ish heat. (Medium is safer, but I sometimes get impatient and crank it up. Don’t do that, it burns.)
- Layer on the cheese slices. This is where I usually sneak a taste. If you have time, let them melt a bit before adding the chicken, it helps things glue together.
- Add your crispy chicken, then any extras like tomato or pickles. More cheese on top if you’re feeling wild.
- Top with the other bread slice (buttered side out, don’t forget—done that too many times). Press it down gently with a spatula; not too hard or the chicken will try to escape.
- Cook for about 3-4 minutes, peeking underneath till you see golden brown. Flip it (sometimes, mine looks like a hot mess at this stage—don’t worry), then cook the other side. If the cheese isn’t melted, I sometimes cover the pan with a lid for a minute or two.
- Let it sit for a minute before slicing. Or don’t. Actually, I find it easier to cut cleanly if you wait, but who am I to judge?
Real-Life Notes (A Few Lessons Learned the Hard Way)
- If your cheese keeps sliding out, try a firmer bread. Or just accept the melty mess as part of the experience.
- Don’t rush the heat. I once tried to speed things up and ended up with a burnt crust and cold cheese. Not ideal.
- Leftover chicken nuggets? Surprisingly good in this; just slice them up. (I found this out by accident during a fridge raid.)

Variations I’ve Tried (Some Winners, Some…Not So Much)
I once swapped out the chicken for leftover turkey—pretty tasty, but a bit dry if you don’t add extra cheese. Buffalo sauce is fun, though it can get messy (not that I mind, but my youngest declared it too spicy). Oh, and avocado sounded like a good idea, but honestly, it just kind of slid out—maybe I didn’t slice it thin enough?
Equipment (Or, What You Can Probably Do Without)
A nonstick skillet is nice, but I’ve done it in a regular frying pan with extra butter. Don’t have a spatula? I’ve (very carefully) used a wide knife before—probably not recommended, but it works in a pinch.
Storage—But Honestly, It Never Lasts
If somehow you don’t eat it right away, you can wrap leftovers in foil and reheat in the oven (350F/175C for about 10 minutes). But in my house, someone always nabs the last piece before I can even think about storage. I think this sandwich is just too tempting to stick around.
How I Like to Serve It (Feel Free to Ignore)
I’m all about the classic: a bowl of tomato soup on the side and maybe some kettle chips. Sometimes we cut the sandwiches into quarters and pretend it’s tapas night. Once, my cousin dipped hers in ranch dressing—which I thought was weird until I tried it.
Pro Tips from Someone Who’s Messed Up
- Let it rest before you slice! I once got excited, cut too soon, and all the cheese made a run for it.
- Too much cheese (is that a thing?) can make flipping tricky. Actually, I find it works better if you don’t overload it.
- Press gently with the spatula; if you squash it flat, the chicken gets lost (and so does the crunch).
FAQ (Questions Friends Have Actually Asked)
- Can I make this without butter?
- Yep, mayo works great—gives a nice tang too. Or go wild and try olive oil; I did once when I ran out of both. Not bad, just different.
- What’s the best cheese?
- Honestly, whatever melts. Cheddar is my go-to, but Monterey Jack, Swiss, or even a mishmash of leftovers is fine. Once tried smoked gouda—it was a happy accident.
- Can I bake these instead of frying?
- Sure, just assemble, put on a baking tray, and bake at 400F for 10-12 mins, flipping halfway. It’s not quite as golden, but almost as good.
- How do you keep the bread from getting soggy?
- Good question! Start with a preheated pan and don’t overdo the extras—too many juicy fillings, and well, sog city.
- Where do you get your bread?
- Ha, anywhere. Supermarket sliced, bakery, sometimes leftover hamburger buns. If you want bread tips, I love this King Arthur Baking guide—their recipes are super reliable.
Oh! One More Thing (Because I Ramble)
If you’re slightly obsessed with cheese pulls (guilty as charged), check out Serious Eats’ cheese breakdown. It’ll make you want to try seventeen new combos. And if you find a new favorite, let me know. Unless it’s blue cheese. Actually, you know what? Go for it—maybe I’ll try that next time. Or maybe not.
Ingredients
- 2 boneless, skinless chicken breasts
- 1 cup panko breadcrumbs
- 1/2 cup all-purpose flour
- 1 large egg
- 8 slices sandwich bread
- 4 slices cheddar cheese
- 4 slices mozzarella cheese
- 4 tablespoons unsalted butter
- 1/2 teaspoon salt
- 1/4 teaspoon black pepper
- 1/2 teaspoon garlic powder
- 2 tablespoons mayonnaise (optional)
Instructions
-
1Pound the chicken breasts to even thickness and season with salt, pepper, and garlic powder.
-
2Dredge each chicken breast in flour, dip in beaten egg, then coat with panko breadcrumbs.
-
3Heat 2 tablespoons of butter in a skillet over medium heat. Cook the chicken breasts for 4-5 minutes per side until golden and crispy. Slice each breast in half to fit the bread.
-
4Butter one side of each bread slice. Place cheddar and mozzarella cheese on the unbuttered side, add crispy chicken, and top with another slice of bread, buttered side out.
-
5In a clean skillet over medium heat, grill the sandwiches for 2-3 minutes per side until the bread is golden and the cheese is melted.
-
6Serve hot, optionally with mayonnaise or your favorite dipping sauce.
Approximate Information for One Serving
Nutrition Disclaimers
Number of total servings shown is approximate. Actual number of servings will depend on your preferred portion sizes.
Nutritional values shown are general guidelines and reflect information for 1 serving using the ingredients listed, not including any optional ingredients. Actual macros may vary slightly depending on specific brands and types of ingredients used.
To determine the weight of one serving, prepare the recipe as instructed. Weigh the finished recipe, then divide the weight of the finished recipe (not including the weight of the container the food is in) by the desired number of servings. Result will be the weight of one serving.
Did you make this recipe?
Please consider Pinning it!!