

First Things First: The Story Behind My Halloween Whoopie Pies
Okay, so the first time I ever made Halloween Whoopie Pies, I was supposed to bring a “spooky” treat to my niece’s school party. Naturally, I left it until—wait for it—the morning of. My kitchen looked like a marshmallow exploded, and my orange food dye somehow ended up on the cat (still sorry about that, Pickles). But seriously, there’s just something about sandwiching creamy filling between pillowy chocolate cakes that gets everyone grinning—maybe it’s the sugar rush? Or maybe it’s the nostalgia. Either way, these pies are now a must-have every October in my house, even if my piping skills are a bit wonky and my kids sneak the filling when they think I’m not looking.
Why You’ll Love These Whoopie Pies
I tend to whip these up when I want something that looks a bit more impressive than it is (they’re actually dead easy, shh). My family goes nuts for the gooey filling, and honestly, I make a double batch just so I can have one or two with coffee the next day (which, side note, I think is when they taste best—if they last that long). Oh, and you can make them as spooky or as simple as you like: sprinkles, candy eyes, or just as they come. The only thing I’ve had trouble with? Trying to keep the chocolate batter off my favorite shirt. Orange stains are the actual ghosts of Halloween, I swear.
What You’ll Need (And a Few Swaps, Just in Case)
- 2 cups all-purpose flour (though, I’ve used self-raising in a pinch—just skip the baking powder)
- 1/2 cup unsweetened cocoa powder (my grandma insisted on Hershey’s, but honestly, Aldi’s own works fine)
- 1 teaspoon baking powder
- 1/2 teaspoon baking soda
- 1/2 teaspoon salt
- 1 cup brown sugar (packed; white works if that’s all you’ve got, but I like brown for the flavor)
- 1/2 cup (1 stick) unsalted butter, softened (I sometimes use margarine when the butter’s rock hard; not perfect but works)
- 1 large egg
- 1 teaspoon vanilla extract (or a splash more if you’re like me and love it)
- 1 cup buttermilk (if you don’t have this, mix a cup of milk with a tablespoon of vinegar—let it sit for five minutes; tastes nearly the same)
- For the Filling:
- 1/2 cup unsalted butter, softened
- 1 1/2 cups powdered sugar (sometimes I add a little extra if it’s too runny)
- 1 jar (7 oz) marshmallow creme (Fluff is classic, but I’ve used store brand, no one noticed)
- 1 teaspoon vanilla extract
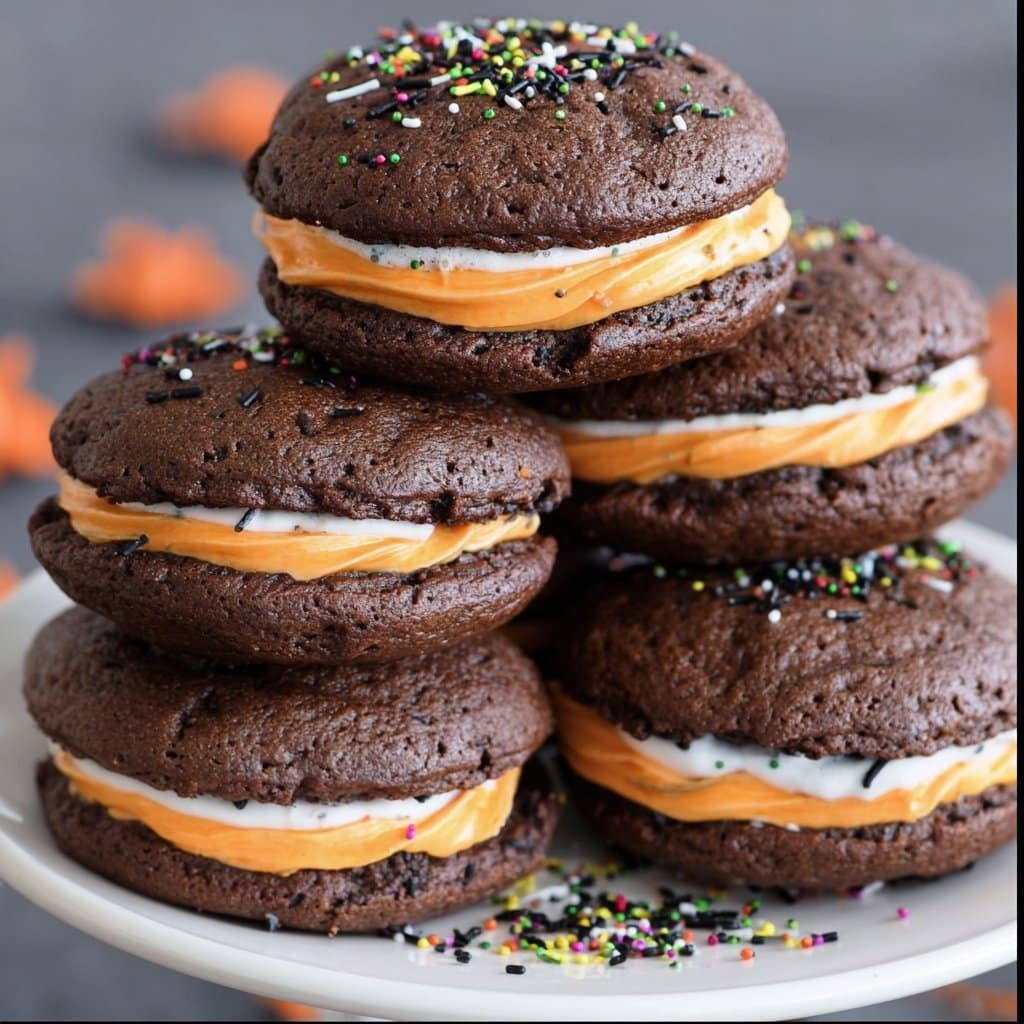
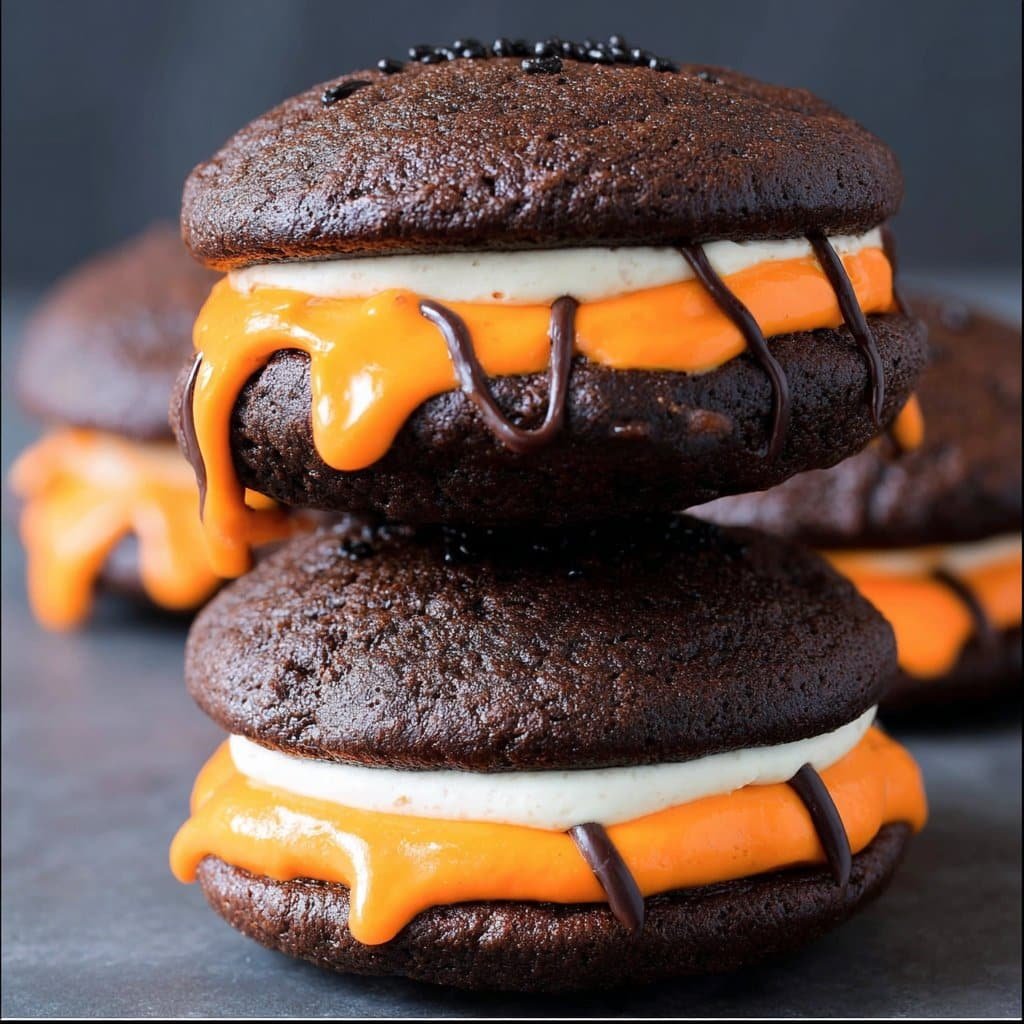
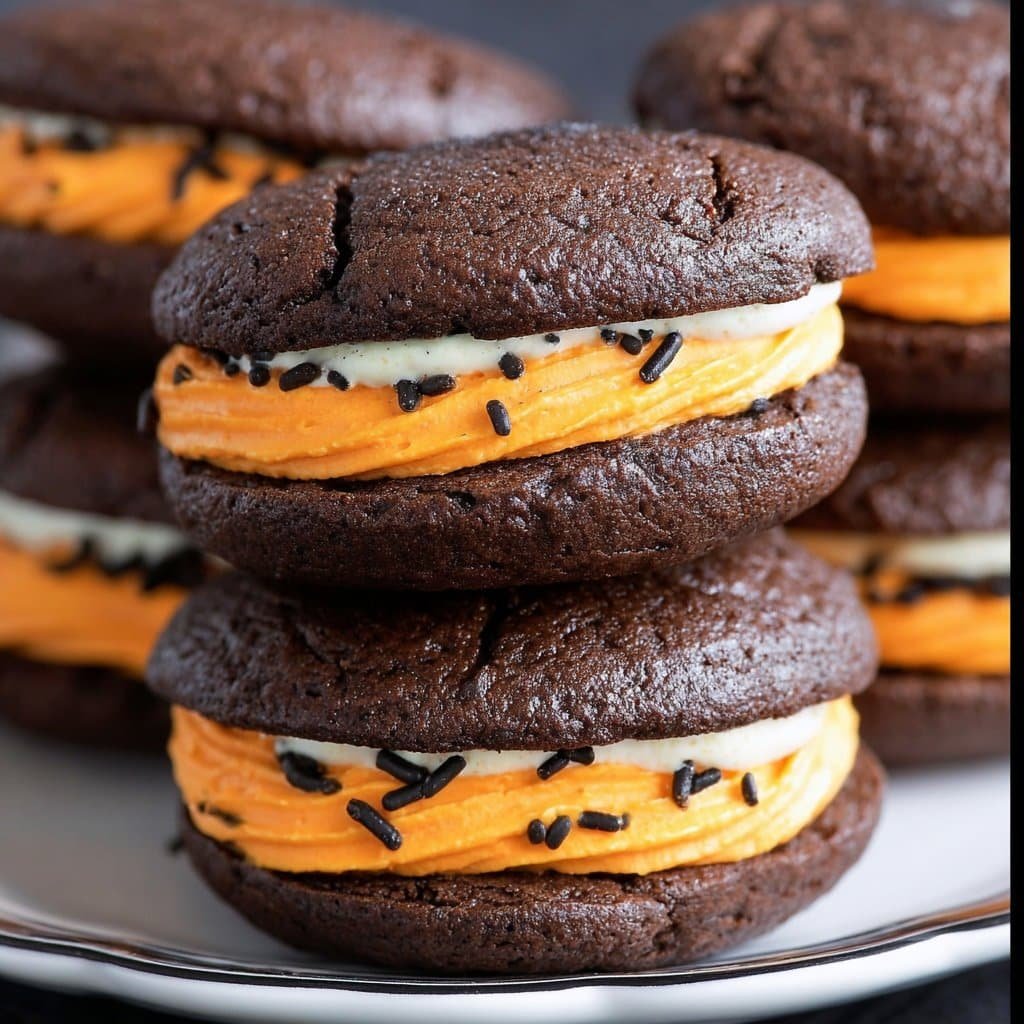
- Orange and green food coloring (optional but fun—though I may have traumatized the cat, so use with caution)
- Halloween sprinkles, candy eyes, or whatever ghoulish decorations you have lying about
How To Make Halloween Whoopie Pies (No Witchcraft Required)
- Preheat that oven to 350°F (180°C). Line two baking sheets with parchment—unless you want to chip them off later, which I don’t recommend.
- In a big bowl, whisk flour, cocoa, baking powder, baking soda, and salt. Give it a good mix. (This is where flour always ends up on my slippers. Every. Time.)
- In another bowl, cream the butter and brown sugar till it’s all light and fluffy. Use a mixer if you feel fancy (I’ve done it by hand when I can’t find the beaters—good workout for the arms, not gonna lie).
- Add egg and vanilla; beat it in. Then alternate adding the flour mix and buttermilk, starting and ending with flour. Don’t overthink it. If it looks a bit lumpy, it’s fine. This is where I sample a teensy bit of batter (don’t judge).
- Drop tablespoons of batter (or use a small ice cream scoop—though a couple of spoons work just as well) onto your trays, leaving space. They spread a little, so don’t crowd them. Bake for 10ish minutes, until they spring back when poked, or look set in the middle. Let them cool a few minutes before transferring to a rack. Or don’t, but you’ll burn your fingers—trust me.
- For the filling, beat butter till it’s soft, then slowly add powdered sugar. Mix in marshmallow fluff and vanilla. If you want, divide and tint it orange and green, or whatever colors scream Halloween to you. (Go wild! Or not. I sometimes just leave it white, because I can’t always be bothered.)
- Sandwich a dollop of filling between two cakes. Don’t press too hard—they’re a bit delicate. Decorate with sprinkles, candy eyes, or just eat as-is. Your call.
Notes from My Kitchen (You’ll Thank Me Later)
- If the filling feels too runny, stick it in the fridge for ten minutes. Actually, I find it works better if you chill it a bit before spreading—it firms up nicely.
- Bake one tray at a time if your oven’s a bit dodgy (like mine, which has a hot spot in the back, for some reason).
- Don’t panic if the cakes look wonky or aren’t perfect circles. That’s character. Or so I tell myself.
How I’ve Mixed It Up (And What Flopped)
- I once swapped the cocoa for pumpkin spice mix, thinking I’d invent the next big thing. Eh, they were okay, but everyone missed the chocolate.
- Peanut butter in the filling? Actually, so good. Mix in a spoonful or two for a twist.
- Mint extract in the filling… let’s just say, don’t go overboard. Tasted like toothpaste. Maybe start with just a drop.
What If I Don’t Have…? (Equipment Talk)
- No mixer? No drama; use a wooden spoon and a bit of elbow grease. I’ve even used a fork in a pinch (not ideal, but it works for small batches).
- If you don’t have parchment, butter your trays well and make peace with a few stuck-on bits.
- Ice cream scoop is handy, but two spoons work fine. Or just eyeball it.
How To Store (Theoretically Speaking)
Keep them in an airtight container at room temp for up to 3 days, or in the fridge if your house runs hot. But honestly, in my place? They’re gone by morning. I once tried freezing them—totally fine, just wrap individually and thaw at room temp.
My Favorite Ways To Serve (Okay, and Eat)
- I like them with a cup of tea (Yorkshire, if you’re asking). My kids dunk theirs in milk, which is apparently “the proper way.” Who am I to argue?
- Sometimes we make a little whoopie pie bar and let everyone decorate their own. Gets messy fast, but so much fun.
Learned the Hard Way: Pro Tips
- I once tried to rush cooling and filled the cakes while they were still warm—filling slid right out. Just… wait. It’s worth it.
- Don’t skip the parchment unless you love a cleaning challenge.
- If your butter’s too cold, microwave it in short bursts. But not too long, or it melts and, well, it’s a mess.
Real-Life FAQ (From Friends, Relatives, and the Odd Stranger)
- Can I make these ahead? Totally. They actually taste even better the next day. Just keep them airtight so they don’t dry out.
- Is there a gluten-free version? I haven’t tried it (yet!), but friends have swapped in a 1:1 gluten-free flour blend and said it works fine. If you do it, let me know how it goes.
- Can I use store-bought cake mix? Actually, yes—chocolate cake mix works in a pinch. Just make the cake batter a bit thicker by using less liquid than the box says. Not quite the same, but still tasty.
- How do I get the filling to be super orange? I use gel food coloring because the drops never get bright enough for me. But fair warning, a little goes a long way unless you want Halloween hands for a week.
- Do I have to use marshmallow fluff? Not really! You can mix cream cheese and a bit of butter for a tangy twist—actually, on second thought, it might be my new favorite.
P.S. If you want to get super creative with your decorations, Sally’s Baking Addiction has some wicked ideas, or for a deep dive into whoopie pie lore, check out this Serious Eats article. I learned way more about whoopie pies than I ever thought possible. Happy haunting in the kitchen!
Ingredients
- 2 cups all-purpose flour
- 3/4 cup unsweetened cocoa powder
- 1 1/4 teaspoons baking soda
- 1/2 teaspoon salt
- 1 cup granulated sugar
- 1/2 cup unsalted butter, softened
- 1 large egg
- 1 cup buttermilk
- 1 teaspoon vanilla extract
- 1 1/2 cups marshmallow creme
- 1/2 cup powdered sugar
- 1/4 cup unsalted butter, softened (for filling)
- 1/2 teaspoon orange food coloring
- Halloween-themed sprinkles (optional)
Instructions
-
1Preheat the oven to 350°F (175°C) and line two baking sheets with parchment paper.
-
2In a medium bowl, whisk together flour, cocoa powder, baking soda, and salt.
-
3In a large bowl, beat together granulated sugar and 1/2 cup softened butter until light and fluffy. Add the egg and vanilla extract, mixing well.
-
4Gradually add the dry ingredients to the wet mixture, alternating with buttermilk, until a smooth batter forms.
-
5Drop tablespoonfuls of batter onto prepared baking sheets, spacing them 2 inches apart. Bake for 10-12 minutes or until cakes spring back when touched. Cool completely.
-
6For the filling, beat together marshmallow creme, powdered sugar, 1/4 cup softened butter, and orange food coloring until smooth. Spread filling on the flat side of half the cakes, top with remaining cakes, and decorate edges with Halloween sprinkles if desired.
Approximate Information for One Serving
Nutrition Disclaimers
Number of total servings shown is approximate. Actual number of servings will depend on your preferred portion sizes.
Nutritional values shown are general guidelines and reflect information for 1 serving using the ingredients listed, not including any optional ingredients. Actual macros may vary slightly depending on specific brands and types of ingredients used.
To determine the weight of one serving, prepare the recipe as instructed. Weigh the finished recipe, then divide the weight of the finished recipe (not including the weight of the container the food is in) by the desired number of servings. Result will be the weight of one serving.
Did you make this recipe?
Please consider Pinning it!!


