
Mac and Cheese Nights (or Why This Recipe Exists)
Alright, so let me paint a picture for you. It had been a long Thursday, the rain was coming down sideways (classic), and the only thing my brain could focus on was the thought of gooey, cheesy mac and cheese with that irresistible golden breadcrumb crunch on top. I started making this for my flatmates back in uni—honestly, more often as a pick-me-up than I probably should admit, but hey, cheese is good for the soul. There were nights I’d burn the breadcrumbs a bit and claim it was “extra flavor” (nobody bought it, but they still finished their plates… eventually). Now, anytime I want a proper comfort meal—especially when all I need is one bowl and maybe three forks—this is it. Oh, and the leftovers? If they last (rarely!), somehow they’re even better cold out of the fridge. Not dignified, but I’m just being real here!
Why You’re Gonna Love Making This
I make this recipe for a bunch of reasons. My family goes absolutely bonkers for the crunchy-topped version, especially because it basically gives you the “edge pieces” with every scoop! There’s something magical about baked mac and cheese that makes it seem fancier than stovetop, even if it’s not really more work (promise). I’d say it’s also great for when I have random bits of cheese in the fridge that need using up—sometimes what looks like a disaster cheese drawer actually turns into dinner. And I used to dread making a roux, but, swear, this is super forgiving… kinda like the mac and cheese version of those forgiving sweatpants you only wear at home.
What You’ll Need (But Feel Free To Improvise)
- 500g (about 1 lb) elbow macaroni (but honestly, small shells or even penne pinch-hit just fine when I’m out)
- 4 tbsp unsalted butter—though if I’m out, I’ve used margarine… survived to tell the tale
- 4 tbsp plain flour (sometimes called ‘all-purpose’; I once tried self-raising by mistake—it puffed, but it was edible!)
- 3 cups (700ml-ish) whole milk (I find any milk works if you skip skim—makes it too thin for my taste)
- 2 cups (about 225g) sharp cheddar, shredded (my gran swore by Red Leicester, honestly, I just use what’s there—throw in a bit of mozzarella for extra gooeyness)
- 1 cup (about 115g) gruyère or Monterey Jack cheese (if you want rich flavor, or skip it if not on hand)
- 1/2 cup (50g) parmesan, grated (or just more cheddar—don’t call the cheese police on me, please)
- 1 tsp Dijon mustard (or yellow, or a nice squirt of hot sauce for a kick)
- Salt and black pepper, to taste
- Breadcrumb Topping: 1 cup panko or regular breadcrumbs (I sometimes blitz leftover crusts in the blender); 2 tbsp butter, melted; pinch of smoked paprika (totally optional, but yum)

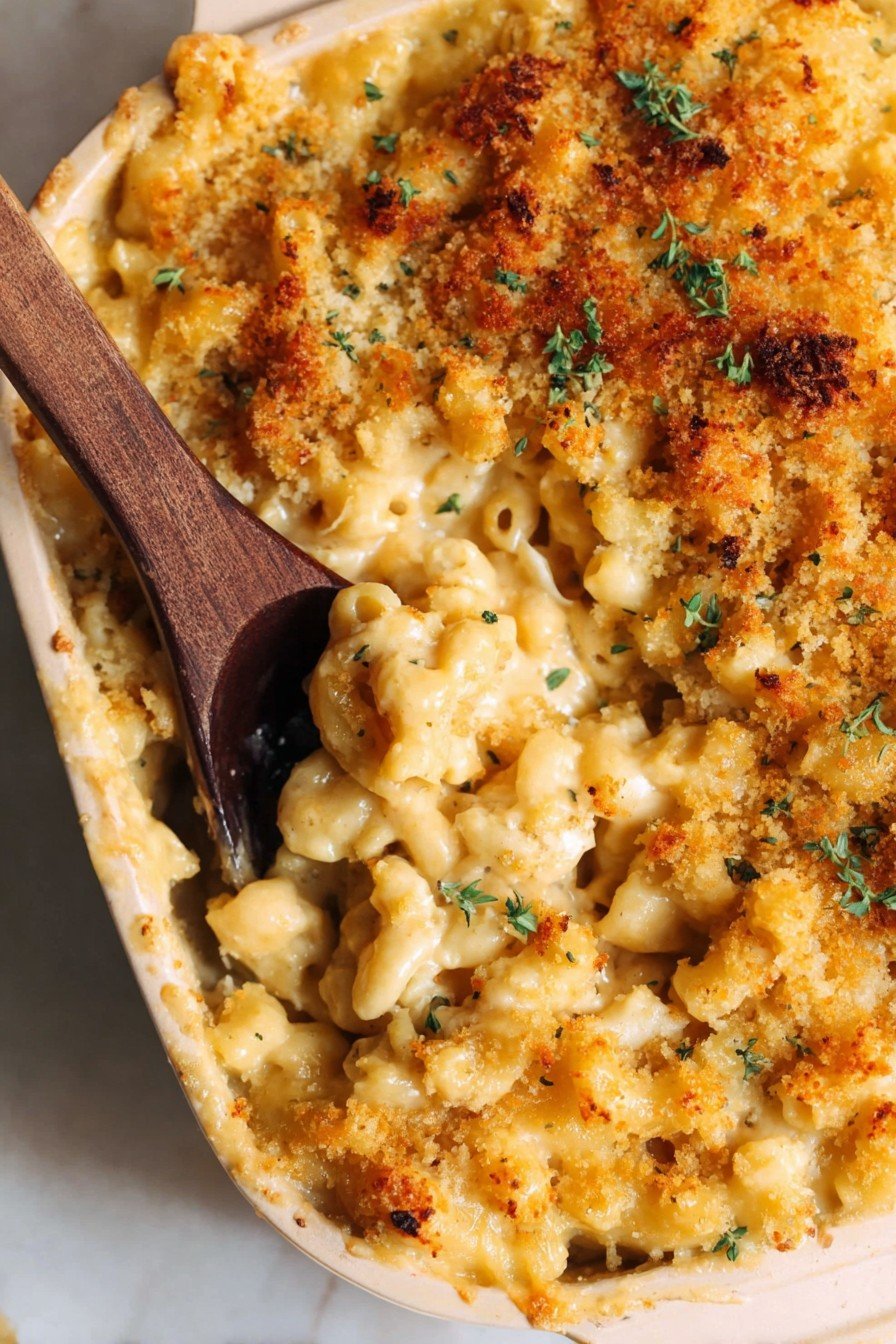
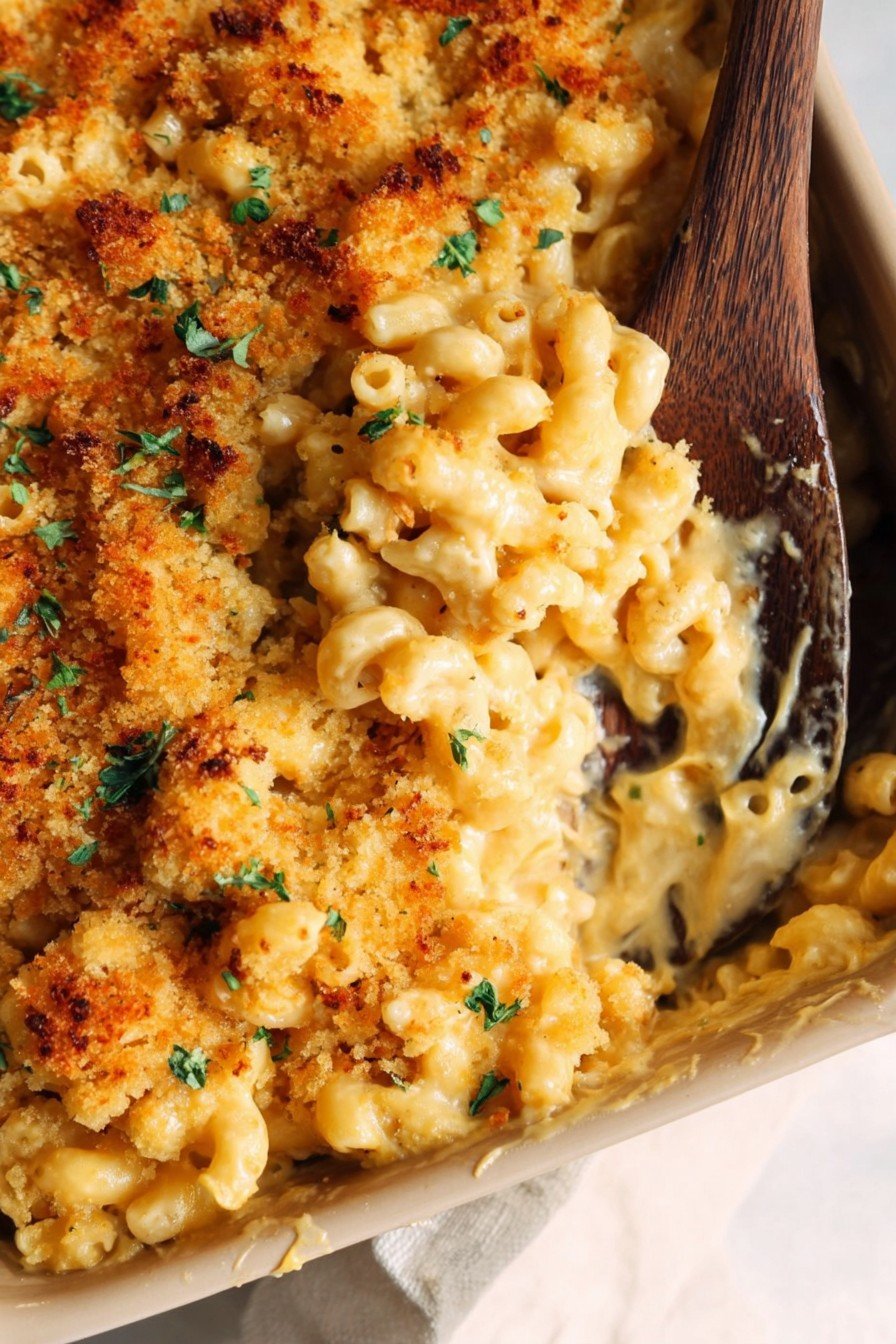
How I Actually Make It (And Where I Always Sneak a Taste)
- Preheat oven to 180°C (350°F). Butter up a 9×13-inch (23x33cm) baking dish—or if you’re like me and have only a round one, it’ll work. Set aside.
- Cook the pasta: Bring a big pot of salted water to a rolling boil, then dump in the macaroni. Go for just shy of al dente (like, a minute less than the packet says) so it doesn’t get mushy when baked. Drain, set aside, maybe sneak one just to check the saltiness (quality control, obviously).
- For the cheese sauce: Melt the butter in a medium saucepan over medium heat. Add the flour; stir and let it bubble a bit (it’ll look kind of paste-like and maybe a bit weird, but hang in there). Gradually whisk in the milk—don’t panic if it looks lumpy, keep whisking, it’ll come together.
- Keep stirring until it thickens a bit (coats the back of a spoon, that’s my test). Then off the heat, toss in the cheeses, mustard, salt, and pepper. Stir till it’s smooth. This is when I taste it and usually end up adding more cheese. Always more cheese.
- Put the drained pasta in the baking dish, pour over the cheese sauce, and mix ‘til all the nooks are filled. Sometimes I save a bit of cheese to scatter on top (because why not?).
- Mix breadcrumbs with melted butter and paprika (smells amazing already). Sprinkle generously over the pasta. If you want super crunchy bits, double the breadcrumb mix. I’m a rebel like that.
- Bake for 25-30 minutes until the top is golden and bubbling at the corners. Stand back and admire your work, but don’t try digging in immediately unless you fancy singeing your tongue.
Notes I Learned the Hard (or Cheesy) Way
- If you’re nervous about making a roux, just go slowly with the milk—actually, adding it bit by bit, not all at once, helps a lot.
- Pasta: Undercook it a bit, no really—you think you want it soft but it goes mushy if you boil it too long (been there, got the T-shirt).
- It’s not ruined if the sauce looks thin at first; it thickens up in the oven, promise.
Mixing Things Up (Don’t Judge My Experiments)
- I tossed in sautéed mushrooms and spinach once—delicious! My cousin puts bacon lardons in. Game changer.
- Smoked gouda was… interesting, but just a bit much? Tried crumbled blue cheese, quickly regretted it. Too funky, even for me.
- Gluten free: Swap macaroni and breadcrumbs for GF versions—I did once with good results, though a bit less crunchy.
Stuff You’ll Need—But Don’t Panic If You Don’t Have It
- Large pot for pasta
- Medium saucepan for sauce
- Baking dish (honestly you could do this in a deep frying pan if you’re careful—did that when my baking dish cracked, long story…)
- Whisk (or fork in a pinch, just takes some muscle)

How I Store (Or Try To) Leftovers
Cover and refrigerate up to 3 days—though honestly, in my house this survives maybe one meal if I don’t hide a container at the back. You can reheat individual portions in the microwave, or the oven if you want the topping crisp again. I found this trick from Serious Eats handy for making it taste almost as good as fresh, but that’s if you even have leftovers. Sometimes I freeze a slice, but only if I want an emergency cheese hit.
How We Like To Serve It (And a Slight Detour on Side Salads)
Normally I just plonk it in the middle of the table with forks or big spoons and let everyone dig in—it’s that kind of dish. My mum insists on a green salad (somehow it feels more virtuous that way, even if it’s mostly about the mac). Garlic bread is a winner too. Or, if I’m hosting, I’ll stick it next to roast veggies and pretend I planned a balanced meal. Oh, by the way, Bon Appétit’s green salad guide is my go-to for nice salad ideas—try it with this one!
Pro Tips (Yeah, I Messed This Up So You Don’t Have To)
- Rushing the cheese sauce is never worth it, trust me. Once I added cheese to boiling sauce and it went gritty. Better to stay patient here!
- The breadcrumb layer can look patchy—just smoosh it around with your hands, it evens out. Actually, that bit’s kind of fun.
- If you see oil separating on top after baking, don’t fret. It’s just the cheese being shy, stir it a bit and it’ll taste fine.
Real Questions I’ve Actually Been Asked (or Texted at 11pm)
- Can I make this ahead? Yep! Assemble, cover, refrigerate—just add 10 mins to baking time when doing it cold. Don’t put the cold dish in a hot oven or—ask me how I know—CRACK.
- Can I freeze it? Sort of. I tend to think the texture’s best fresh, but leftovers in small containers freeze alright. Reheat gently so the sauce doesn’t split.
- What cheeses work best? Whatever’s around, really. Cheddar’s classic, but a chunk of brie in the back of the fridge melted in once and nobody complained! Cheese snobs, look away.
- More flavor ideas? Mustard powder, a bit of nutmeg, or a swirl of sriracha on top gives a nice kick. You could try some crumbled chorizo—just don’t tell the veggie crowd.
So, there it is—my totally un-fancy, very comforting take on creamy baked mac and cheese. If you make it, let me know how yours turns out (or, be honest, if you burn the breadcrumbs at least once). Cheers!
Ingredients
- 340 g (12 oz) elbow macaroni
- 4 tablespoons unsalted butter
- 1/4 cup all-purpose flour
- 3 cups whole milk
- 2 cups shredded sharp cheddar cheese
- 1 cup shredded mozzarella cheese
- 1/2 cup grated parmesan cheese
- 1 teaspoon salt
- 1/2 teaspoon ground black pepper
- 1 cup panko breadcrumbs
- 2 tablespoons melted butter
- 1/2 teaspoon paprika (optional)
Instructions
-
1Preheat the oven to 375°F (190°C). Grease a 9×13-inch baking dish.
-
2Cook the elbow macaroni according to package instructions until al dente. Drain and set aside.
-
3In a large saucepan over medium heat, melt 4 tablespoons of butter. Whisk in the flour and cook for 1-2 minutes.
-
4Gradually add the milk, whisking constantly, until the sauce thickens. Add cheddar, mozzarella, and half of the parmesan cheese. Stir until melted and smooth. Season with salt and pepper.
-
5Combine the cooked macaroni with the cheese sauce and pour into the prepared baking dish. In a bowl, toss panko breadcrumbs with melted butter, remaining parmesan, and paprika. Spread evenly over the top.
-
6Bake for 25-30 minutes or until the topping is golden and crispy. Let cool slightly before serving.
Approximate Information for One Serving
Nutrition Disclaimers
Number of total servings shown is approximate. Actual number of servings will depend on your preferred portion sizes.
Nutritional values shown are general guidelines and reflect information for 1 serving using the ingredients listed, not including any optional ingredients. Actual macros may vary slightly depending on specific brands and types of ingredients used.
To determine the weight of one serving, prepare the recipe as instructed. Weigh the finished recipe, then divide the weight of the finished recipe (not including the weight of the container the food is in) by the desired number of servings. Result will be the weight of one serving.
Did you make this recipe?
Please consider Pinning it!!


