
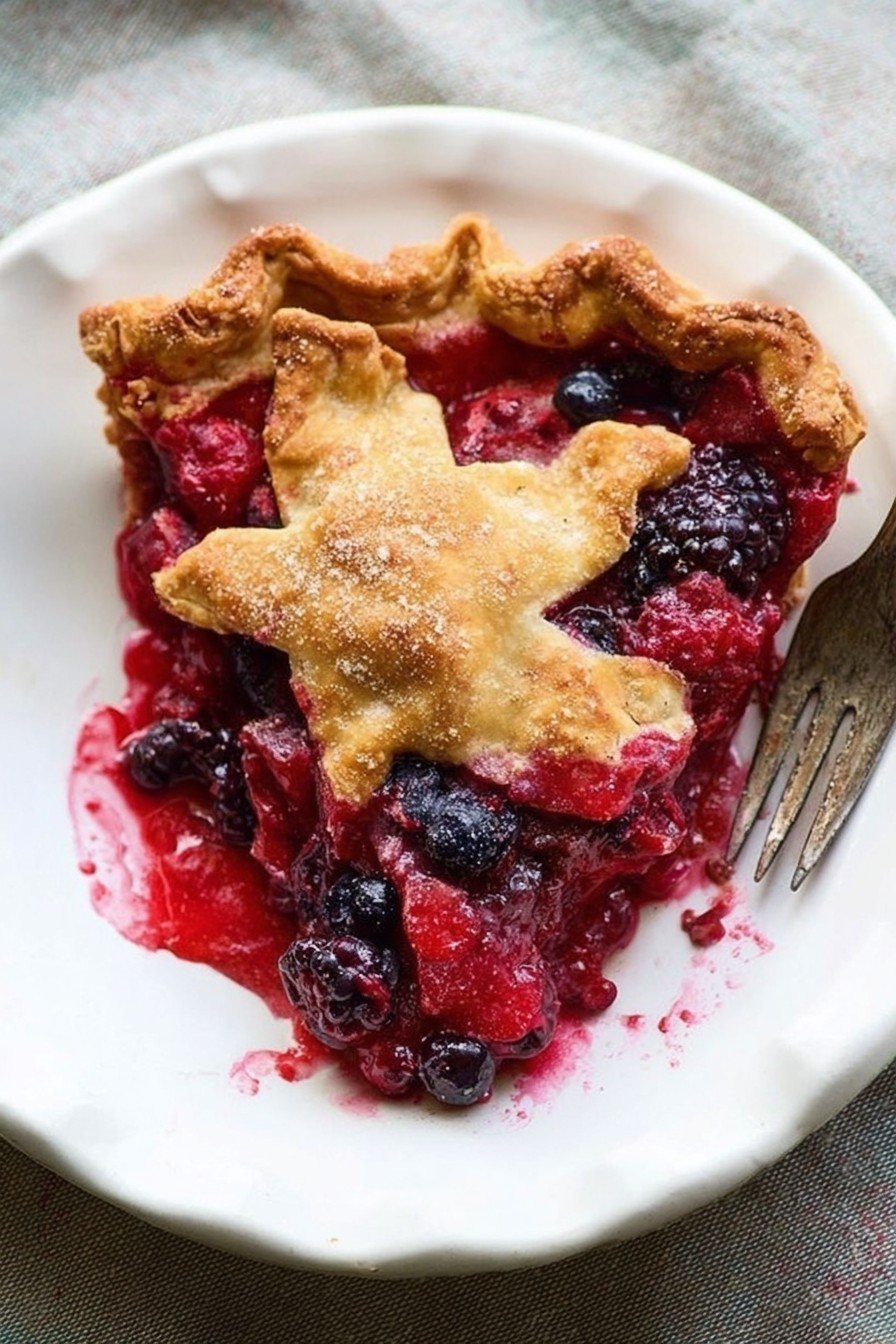
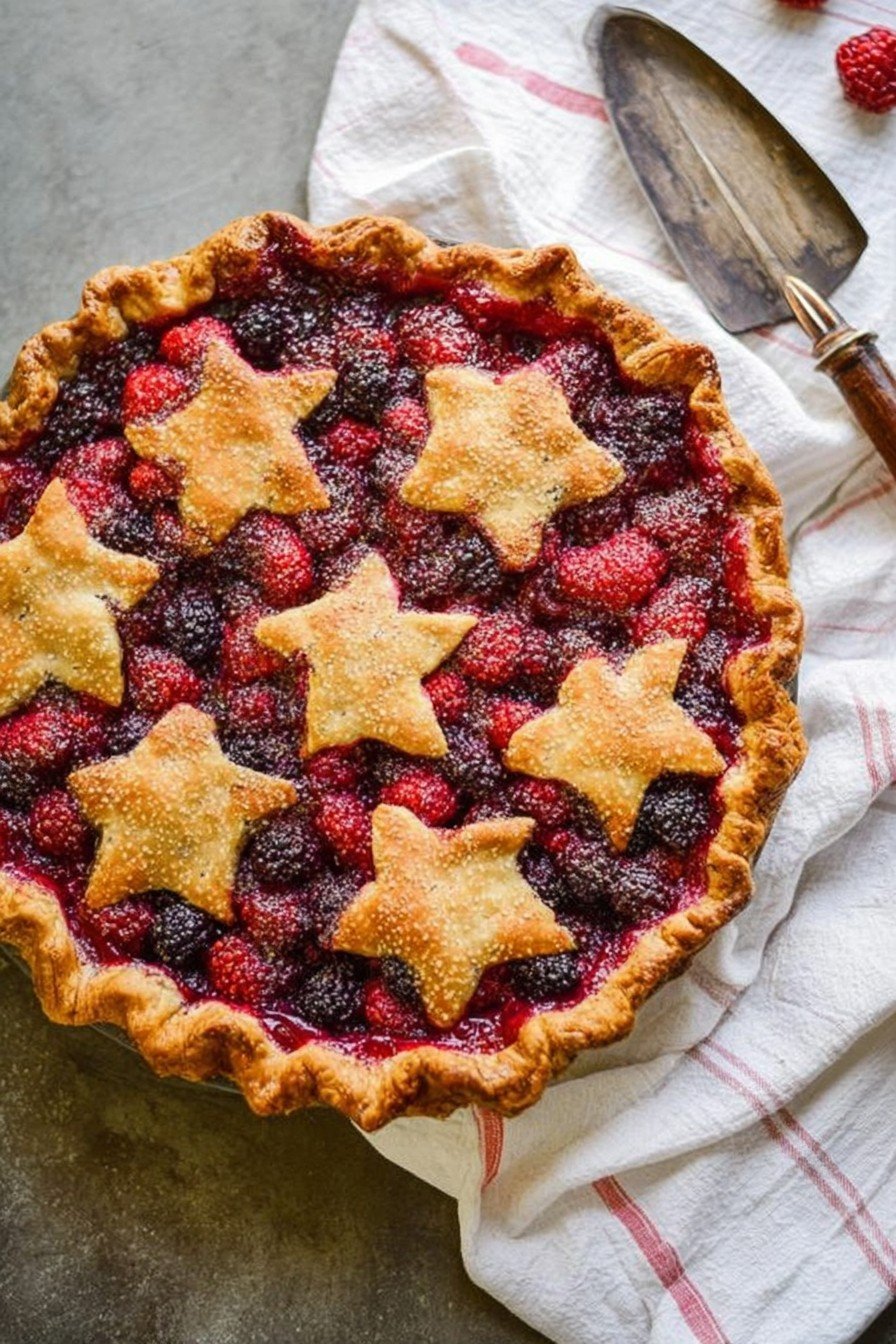
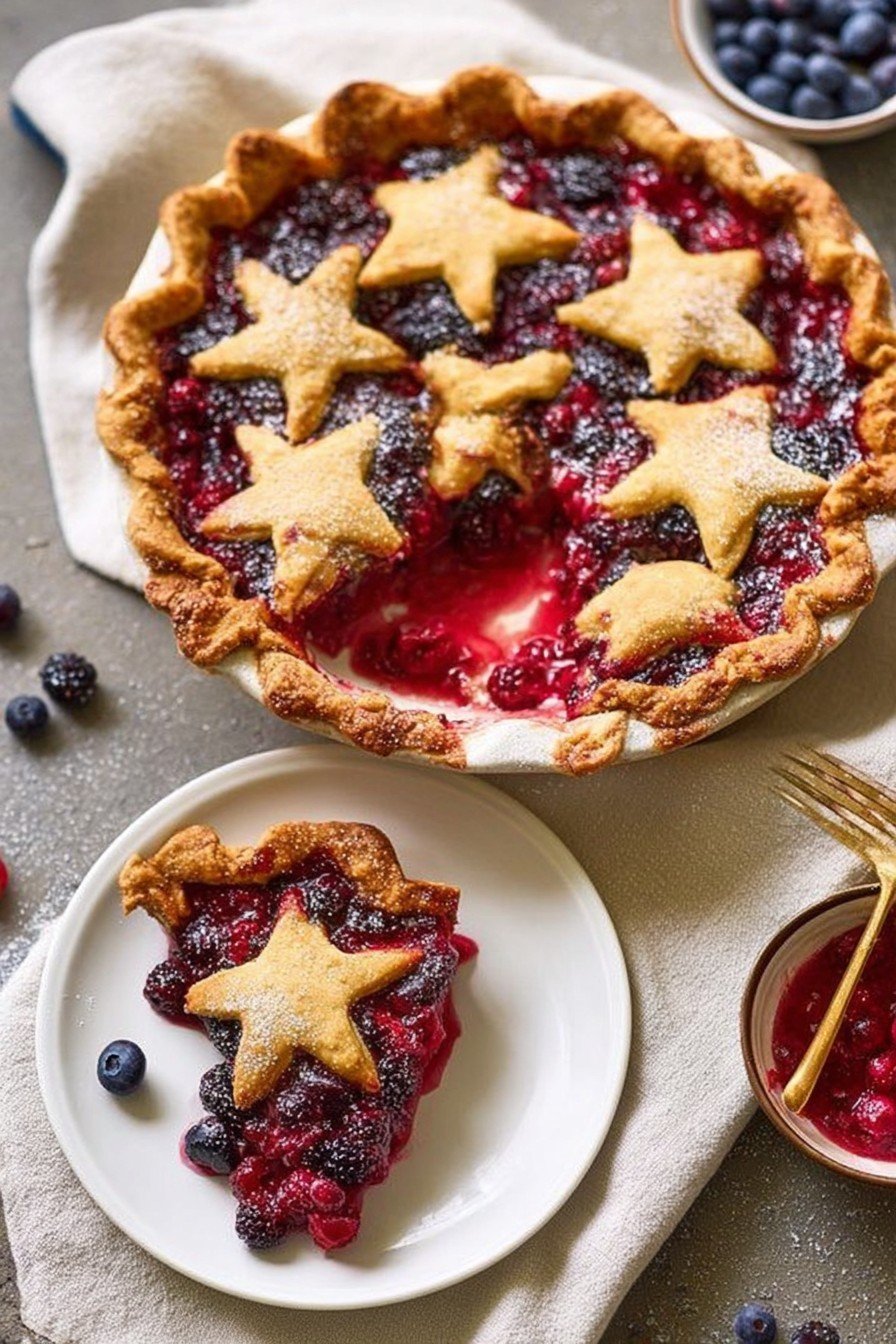
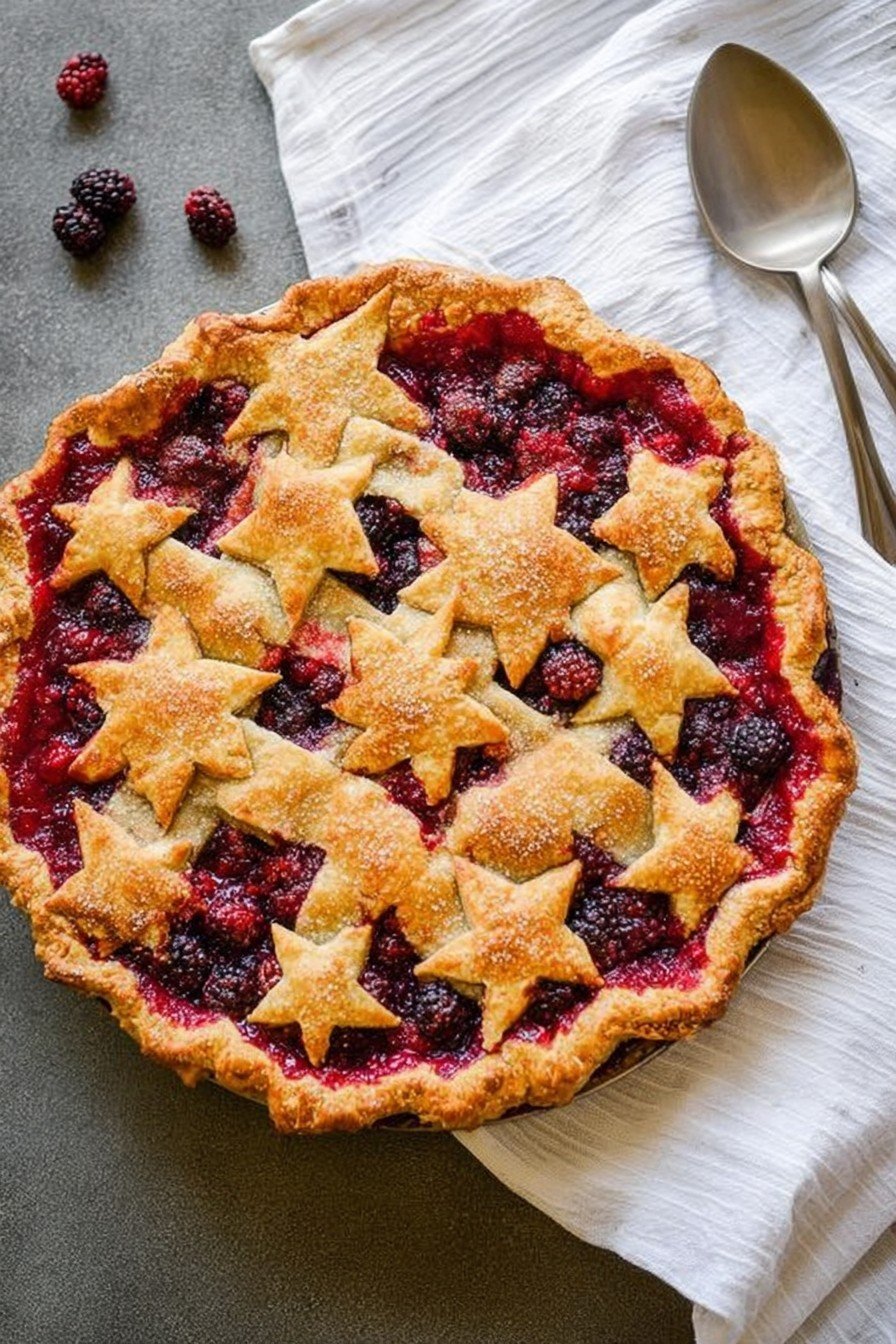
Let Me Tell You About This Bumbleberry Pie…
If you’ve never heard of Bumbleberry Pie before—well, join the club. The first time I made it, I thought someone was making fun of me. Is there a bumbleberry bush I hadn’t heard of? (Spoiler: there isn’t.) But really, it’s just a fun name for a glorious mix of all sorts of summer berries. First time I baked one, I accidentally called it “mumbleberry” pie—my son hasn’t let me live that down. Anyway, it’s now one of my top desserts, especially when berry season hits and your fridge is overflowing—someone please send help—with blueberries, raspberries, blackberries, and all the odd handfuls I pick up at the farmer’s market. I think of my grandma whenever I make this (she used rhubarb and called it ‘wild berry surprise pie’; it’s a long story for another day).
Why I Keep Making Bumbleberry Pie (and Why You’ll Want To)
I make this pie whenever the mood hits, honestly. It’s what I turn to when I’ve got a hodgepodge of berries that need using up (plus, my family goes mad for the jammy, slightly tart filling). The funny thing is, I used to be scared of making pie crusts (they’d fall apart, I’d curse, maybe threaten to microwave the whole thing), but this filling forgives all manner of sins. Hot tip: sometimes I just buy a ready-made crust if I’m pressed for time or daylight, and no one ever complains. Except my aunt, but that’s a her problem, not mine.
Grab These Ingredients (Don’t Stress Substitutions)
- 1 pie crust (homemade or store-bought—seriously, no judgement)
- 2 cups blueberries (or an extra cup of blackberries if you run short)
- 1 cup raspberries (I’ve used thawed frozen ones in winter, works just fine)
- 1 cup blackberries (if you have loganberries? No idea what those are, but go wild)
- 1/2 cup strawberries, chopped (sometimes I use apples for a tweedy taste, my gran swore by it)
- 3/4 cup white sugar (sometimes I only use half a cup if my berries are super sweet)
- 2 1/2 tbsp cornstarch (my cousin claims arrowroot is fancier, but I’m just looking for thickening, not impressing a crowd)
- Juice from half a lemon (use bottled if it’s what you have—nobody will know)
- Pinch of salt
- 1 tbsp butter (optional but, you know, butter makes everything better)
- 1 egg, beaten (for brushing on the crust for that golden look; sometimes I just skip this when feeling lazy)
How I Actually Make Bumbleberry Pie (With Some Babbling Along the Way)
- Preheat that oven to 400°F (about 200°C, or, as my mum says, “hot enough to roast socks”). Grab your pie pan—9 inches is standard but honestly, I’ve crammed it into whatever I could find.
- Roll out your crust. Or don’t, if it’s the pre-made kind. Gently press it into the pan. It’ll rip sometimes. Mash it back together—nobody will see after you pile in all those berries. Sprinkle a little flour on the bottom if you’re feeling fancy, to stop sogginess. (This is where I sneak a taste of raw dough—don’t tell anyone, it’s a bad habit.)
- Mix the filling: Toss all the berries, sugar, cornstarch, lemon juice, and a pinch of salt in a big old bowl. Give it all a good mix. If your berries are mega juicy and it looks runny, add an extra half spoon of cornstarch. Don’t panic if it looks a little weird—it sorts itself out in the end.
- Pour the berries into the crust. Dot with butter if you’re feeling indulgent. Now, cover with another crust (lattice is cute, but I usually go for a quick slap-on-and-slash technique). If you’re doing a full top, cut a few slits so it can breathe. There, it’s free.
- Brush with beaten egg for gloss, or, skip if washing extra dishes is a dealbreaker today.
- Bake in the middle rack for 35 to 40 minutes. Actually, sometimes mine needs closer to 45. You want the crust golden and the filling bubbling up a bit. If it starts smelling like jam and summer, you nailed it; if not, just wait a bit.
- This bit’s hard: cool it for at least two hours before slicing or you’ll regret it. Hot pie filling burns more than you’d think (learnt that the messy way…)
Notes Only a Home Baker Would Tell You
- If your berries are frozen and you forget to thaw them (guilty), just rinse ‘em and pat dry, but add a smidge more cornstarch. Trust me—nobody likes berry soup in the crust.
- Once I over-sugared it because I didn’t taste the berries first; now I always try a berry (or three) before mixing. Worth it.
- I think this pie tastes even better cold the next day with morning coffee (but it rarely lasts that long in my place).
What I’ve Tried (Pie Variations & a Fail or Two)
- Swapped in rhubarb instead of strawberries—tart and bright, though maybe not everyone’s cup of tea
- Added a pinch of cardamom once, just to be posh. It was…different? Not sure I’d do it again, but try if you’re the adventurous type!
- Tried a crumble topping with oats and brown sugar. Honestly, a bit much for me—pie crust wins every time.
Here’s My Take on Equipment (Don’t Panic If You’re Missing Something)
- 9-inch pie plate: Any old dish works, deeper is better for extra berries (I once used a cake tin. Bit odd-shaped but still tasty).
- Mixing bowl: Sometimes I just use a big saucepan if every bowl is in the dishwasher.
- Rolling pin: When mine vanished, I used a clean wine bottle—works a treat. Plus, looks impressive if anyone’s watching.
How I Keep (Or Fail to Keep) Leftover Pie
Just pop it in the fridge, covered, and it’ll last a couple of days. But, truthfully, it’s usually gone before it even cools the whole way round here. If (and it’s a big if) you do have leftovers, a quick zap in the microwave brings it back to life.
How We Serve It Up in My House
Hot from the oven with vanilla ice cream—no arguments. Occasionally with a dollop of thick cream if I’m having a “posh” day. My uncle likes his with a mug of strong tea, because apparently, pie isn’t just for pudding—breakfast pie is a tradition I fully support.
What Not to Rush (My Hard-Won Pro Tips)
- Let it cool—seriously. I once tried to slice it warm, and it ran everywhere. Delicious mess, but nobody calls that a pie, do they?
- Taste your berries before sugaring. If they’re sweet, pull back on the sugar, otherwise it’s just too much. (One summer, I learned that the not-so-sweet ones hide on purpose. Go figure).
- Oh, and don’t forget that slits or holes on top. Otherwise, it’ll erupt like a berry volcano—fun to watch, less fun to clean.
Pie Questions People Actually Ask Me
- Can I use all frozen berries?
- Yep. Just thaw and dry ‘em off a bit, but maybe add another spoonful of cornstarch so it sets up. No biggie.
- Do I have to make two crusts?
- Nope! I’ve done it with just a crumbly top or even just one crust on the bottom, tossed some oats and sugar on as a (lazy) topping—the crust police haven’t caught me yet.
- Is this really a Canadian thing?
- Maybe? I’ve seen it up north and in random diners. But honestly, the recipe’s traveled everywhere. Make it your own, wherever you are.
- Why is it called “bumbleberry” anyway?
- No clue. Someone took creative license and I’m grateful. Sounds better than “Whatever’s Left Pie,” eh?
- Can I add apples or rhubarb?
- Totally. I find a bit of chopped apple can help thicken things up if your berries are runny. Rhubarb is tart, but I like it for balance.
Anyway, give this pie a whirl, and if you wind up with juice dripping down your chin, you’re probably doing it right. If you ever want to swap silly baking stories, I’ve got plenty—like the time I forgot to preheat the oven and my pie just sat there looking sad—but that’s a tale for another day. Cheers and happy baking!
Ingredients
- 1 1/4 cups granulated sugar
- 1/4 cup cornstarch
- 1/4 teaspoon salt
- 1 1/2 cups fresh blueberries
- 1 1/2 cups fresh raspberries
- 1 cup fresh blackberries
- 1 cup fresh strawberries, hulled and quartered
- 2 tablespoons lemon juice
- 2 tablespoons unsalted butter, diced
- 1 package (14 oz) refrigerated pie crusts (2 crusts)
- 1 egg, lightly beaten (for egg wash)
- 1 tablespoon coarse sugar (optional, for topping)
Instructions
-
1Preheat the oven to 400°F (200°C). Place a rack in the lower third of the oven.
-
2In a large bowl, combine granulated sugar, cornstarch, and salt. Add blueberries, raspberries, blackberries, and strawberries. Drizzle with lemon juice and gently toss to combine.
-
3Fit one pie crust into a 9-inch pie dish. Spoon the berry mixture into the crust and dot with diced butter.
-
4Cover with the second crust, trim and crimp the edges, then cut several slits in the top for steam to escape. Brush with beaten egg and sprinkle with coarse sugar if desired.
-
5Bake in the lower third of the oven for 50-55 minutes, or until the crust is golden and the filling is bubbly. Shield the edges with foil if they brown too quickly.
-
6Cool completely on a wire rack before slicing and serving.
Approximate Information for One Serving
Nutrition Disclaimers
Number of total servings shown is approximate. Actual number of servings will depend on your preferred portion sizes.
Nutritional values shown are general guidelines and reflect information for 1 serving using the ingredients listed, not including any optional ingredients. Actual macros may vary slightly depending on specific brands and types of ingredients used.
To determine the weight of one serving, prepare the recipe as instructed. Weigh the finished recipe, then divide the weight of the finished recipe (not including the weight of the container the food is in) by the desired number of servings. Result will be the weight of one serving.
Did you make this recipe?
Please consider Pinning it!!


