
You know those nights when you’re too tired to wrangle with a dozen pans but want something that tastes like it’s straight from a backyard cookout? That’s exactly when I whip up these cheeseburger sliders with Hawaiian rolls. First time I made them was after a late soccer practice when my kids (and, honestly, I) were hangry and on the brink of meltdown. Quick, cheesy, and zero grilling required. Last time I made a batch, my neighbor caught a whiff and “just happened” to drop by (with her mysteriously empty Tupperware). Coincidence? You tell me. Anyway, my kitchen still smells like melted cheddar and toasted bread. Trust me, that’s not a complaint!
Why I Keep Coming Back to These Sliders
I make these when I’ve promised “real food” but my ambition is on vacation; they’re as lazy-friendly as they get. Honestly, my family goes a little bonkers for the sweet-and-savory combo — my youngest says it’s the “tastiest shortcut to burger night.” Even my picky brother-in-law eats three (and that’s saying something). Oh, and the rolls? They magically soak up the burger juices. Only thing that ever trips me up is deciding whether to go classic cheddar or sneak in some pepper jack for a surprise. Not a single complaint yet, even when I switch it up.
What You’ll Need (or Not Need, If You Wing It)
- 1 pack (12-count) Hawaiian sweet rolls (I’ve tried store-brand, but King’s Hawaiian just feels right. Any soft roll will work — brioche is a decent backup!)
- 1 pound ground beef (80/20 is my go-to, but I’ve been known to use ground turkey when the fridge is looking sad)
- 1/2 teaspoon salt, plus more to taste
- 1/4 teaspoon black pepper
- 1 teaspoon garlic powder (or a small clove fresh garlic, minced, if I feel energetic)
- 6-8 slices American or cheddar cheese (my grandma used Velveeta sometimes — not judging!)
- 1/4 cup diced onions (optional, but I usually do it for flavor. Red onions are good too if you want a sharper bite)
- 2 tablespoons melted butter (I use salted, but use what you have)
- 1 tablespoon sesame seeds (for the tops, but skip if you’re not feeling fancy)
- Pickles, ketchup, mustard (all for layering and dipping, honestly just go by your heart here)
How I Pull These Together (Usually With a Podcast On)
- Preheat your oven to 350°F (yep, get it nice and toasty — this isn’t a rush job, but don’t worry if you forget and have to wait an extra few mins… been there).
- While it’s heating up, grab a skillet and brown the ground beef over medium heat. Break it up gently; you want crumbles, not beef paste. Add the diced onion (if using) plus garlic powder, salt, and pepper as it cooks. This is where I usually sneak a bite — no shame.
- Once the beef is no longer pink and smelling awesome, drain the excess fat (or blot with paper towels, which is my lazy method when I’m already over doing dishes). Taste for seasoning — I often chuck in a little more salt.
- Slice the whole slab of Hawaiian rolls horizontally, so you’ve got a giant loaf top and bottom. Try not to squish it — easier said than done, trust me.
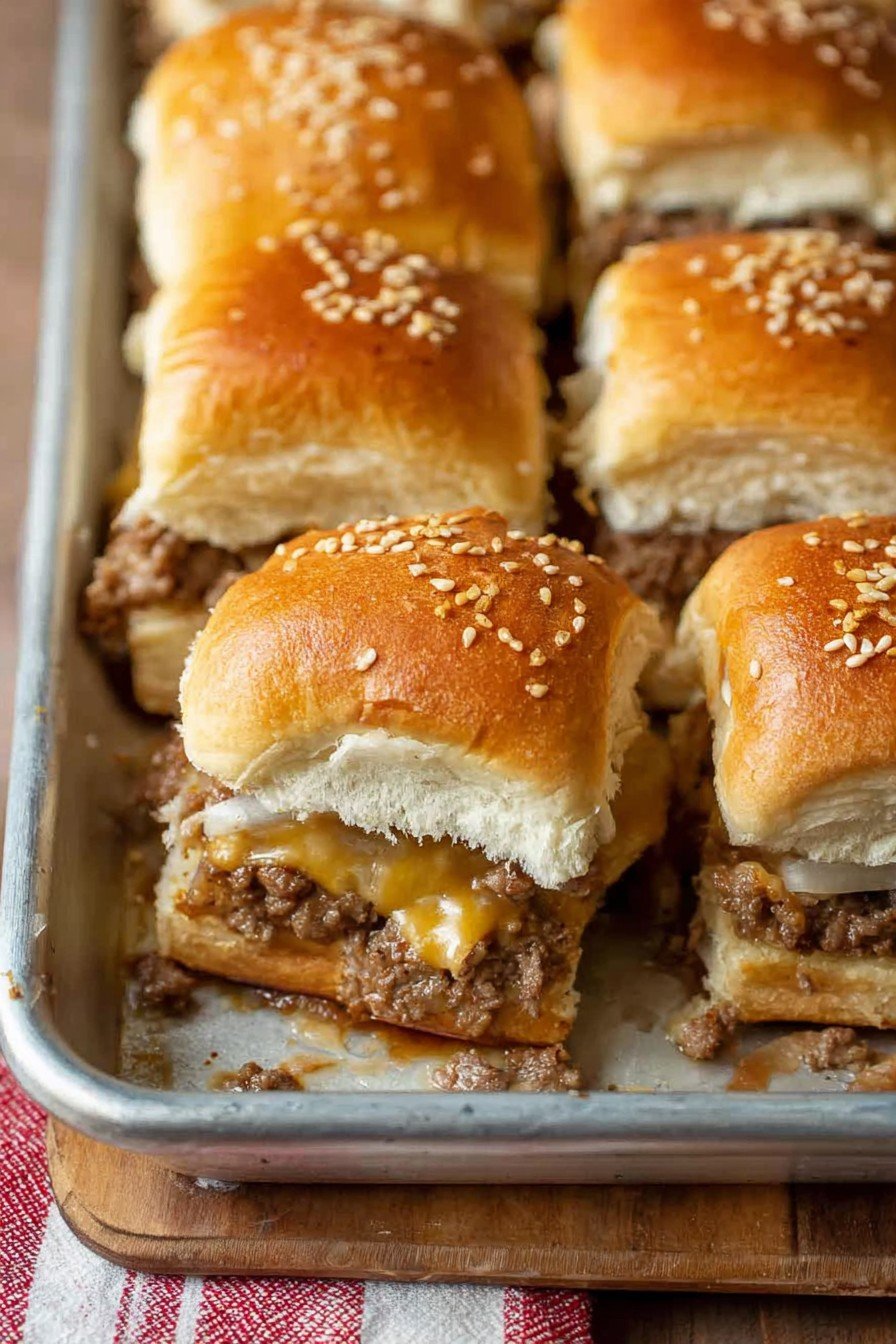
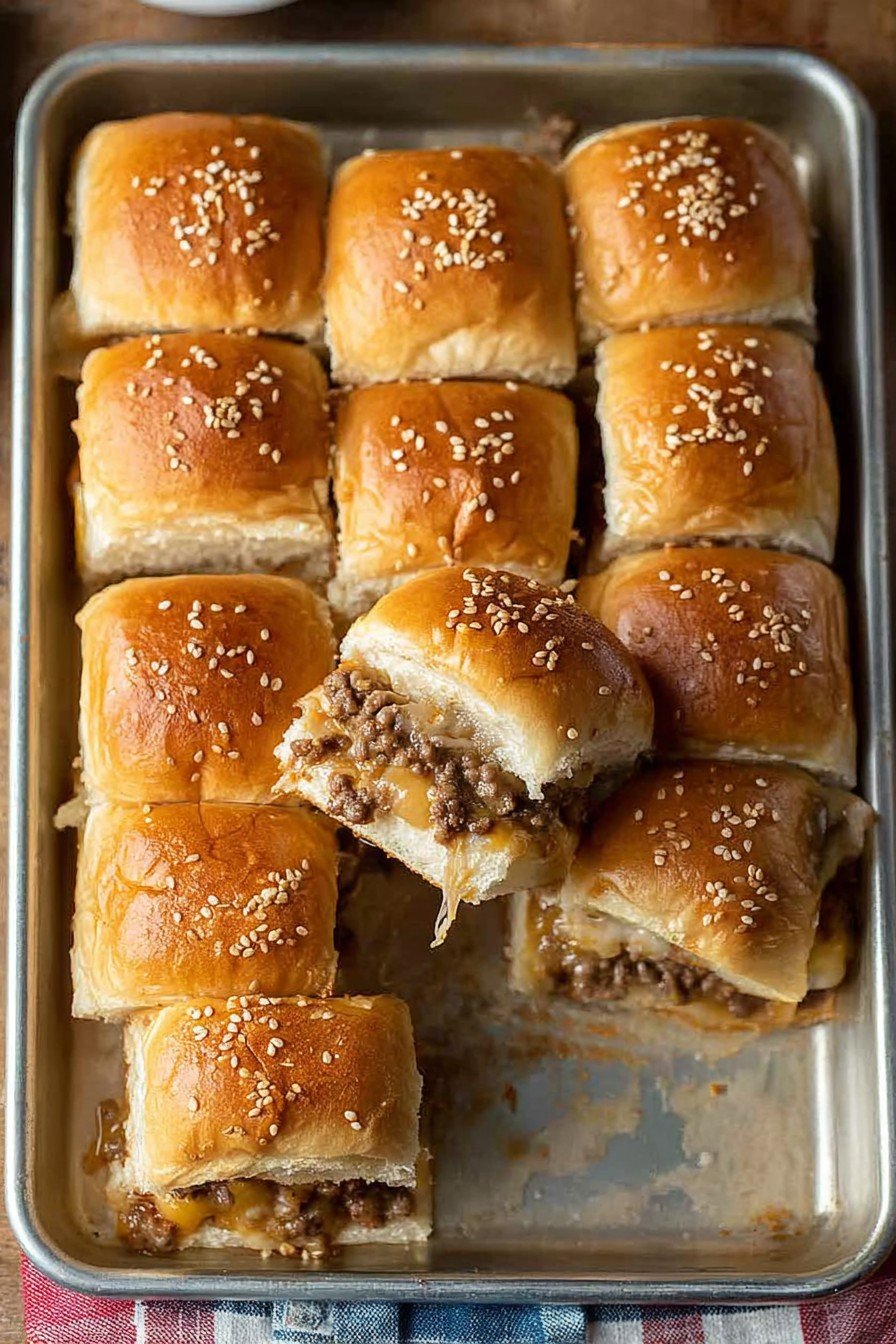
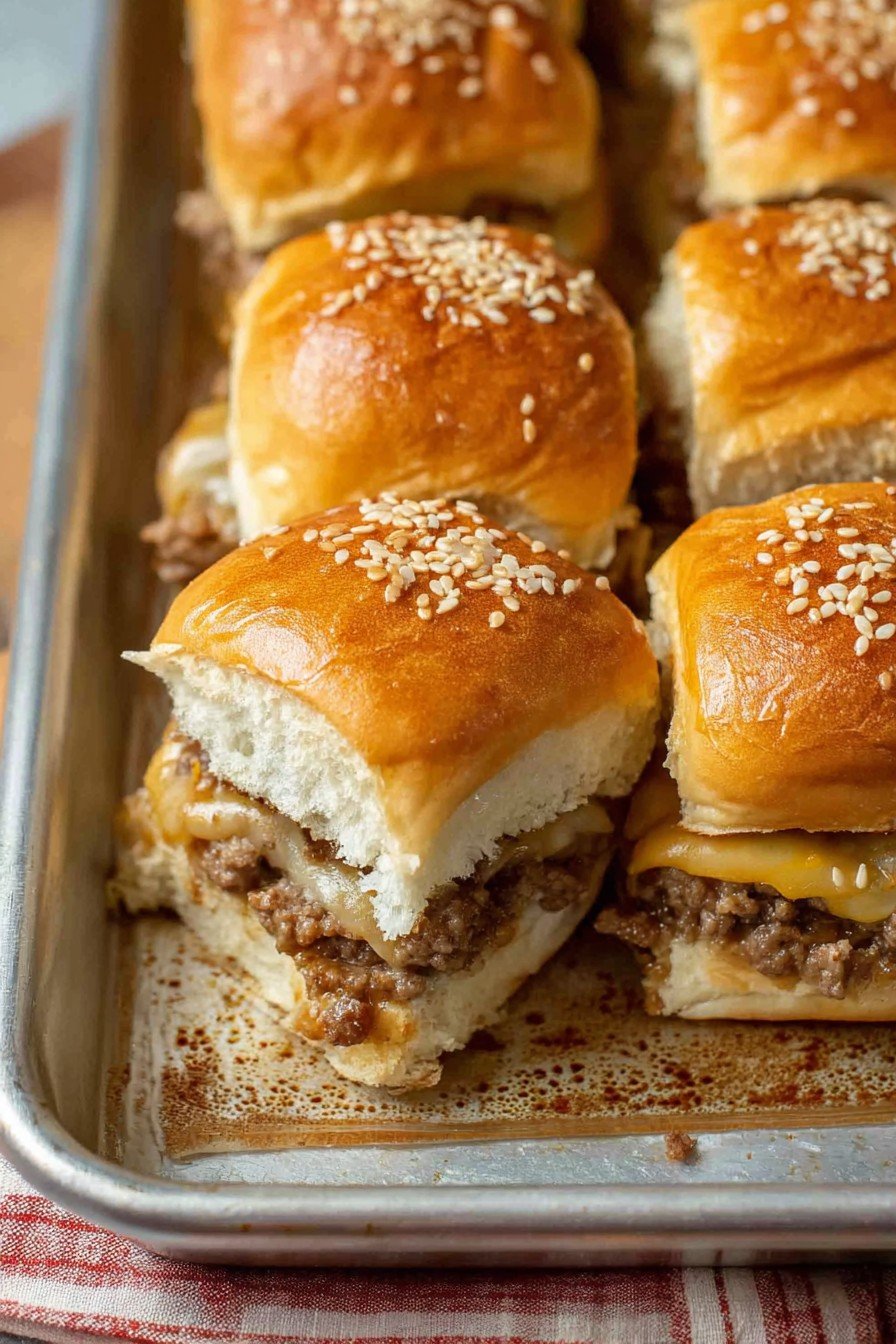
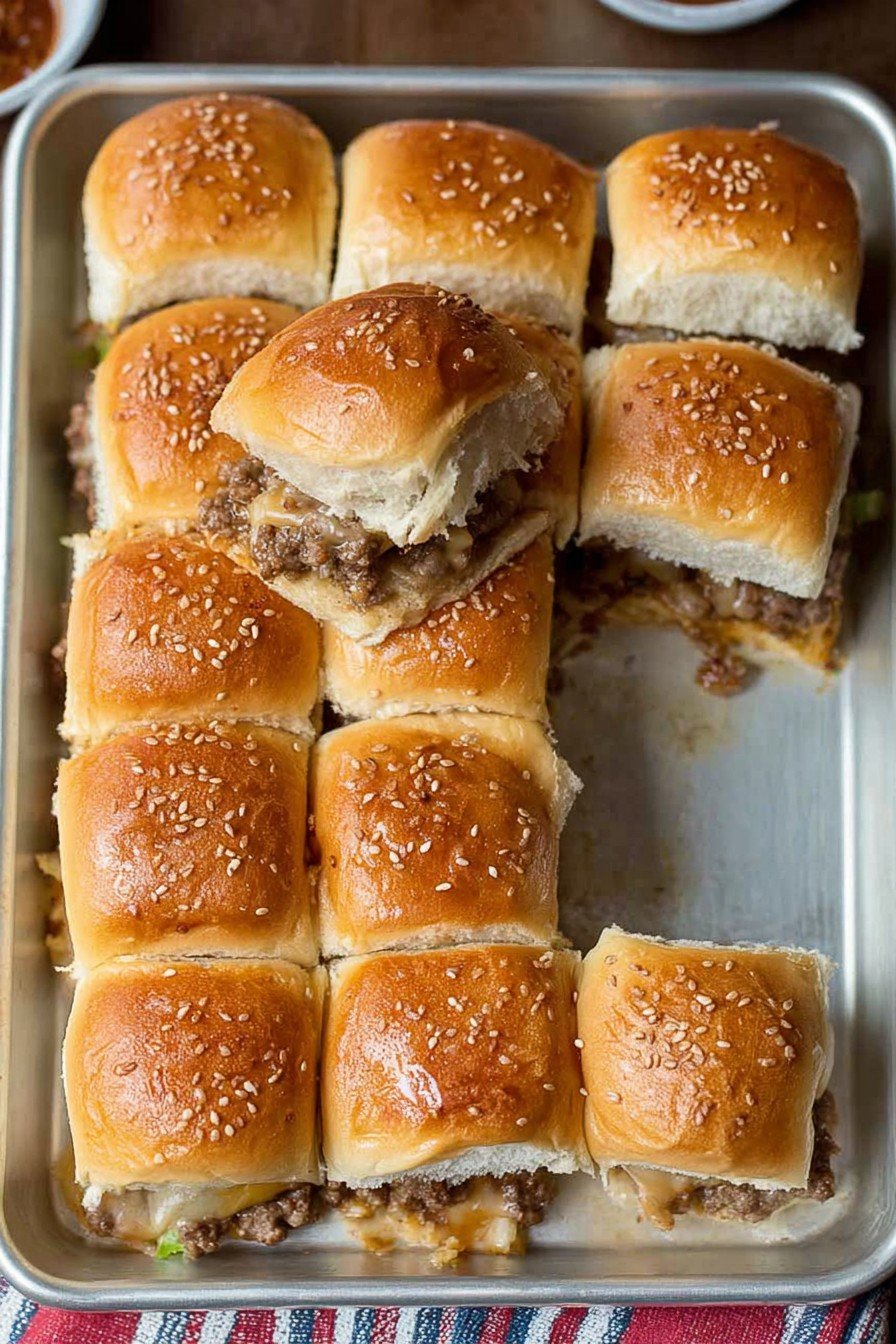
- Place the bottom half of the rolls in a 9×13 baking dish. Spread the cooked beef mixture evenly over the rolls. Layer on the cheese slices so you get good melty coverage; sometimes I tear them up so every slider gets a cheesy corner.
- Add pickles now if you’re into warm pickles (I know some folks are anti!) — or leave them out and let everyone add their own after baking; you do you.
- Place the top half of the rolls over everything like a warm little bread blanket. Brush generously with melted butter and sprinkle with sesame seeds if you’ve got ’em. If not, no biggie.
- Bake uncovered for 13-15 minutes, until the cheese is bubbling and the tops are golden. If the tops brown too quick (ovens have their moods), just throw some foil on top for the last few minutes.
- Pull ’em out, let rest for five (okay, three) minutes so you don’t burn your fingers — unless you’re braver than I am. Slice into 12 little squares and serve hot, with ketchup, mustard, or whatever else sparks joy.
Quick Notes I Wish Someone Had Told Me
- The cheese slices melt better when you overlap them a little — less goo escaping out the sides that way.
- Don’t skip the rest after baking, even if you’re staring at them drooling. They hold together better and you won’t end up with a pulled-apart mess (ask me how I know).
- If using ground turkey, add a splash of Worcestershire sauce; otherwise, it’s bland city.
Variations I’ve Actually Tried (and One Fail)
- With bacon: Layer crisp bacon over the beef. Not exactly “heart-healthy”, but oh MAN.
- With barbecue sauce instead of ketchup — totally different vibe, but in a good way.
- Once tried with jalapeños for heat, but I accidentally went overboard and cleared out the kitchen… so, maybe just a few slices.
Gear I Use (But You Don’t Need to Go Fancy)
- 9×13-inch baking dish — I once used two smaller pans when mine was MIA. Worked just fine!
- Nonstick skillet; but if your pan sticks, just scrape assertively. It’s all going in the rolls anyway.
- Bread knife for slicing the rolls in half (serrated is easiest, but some days I just use a regular knife and hope for the best)
Storing Leftovers (Not That I Ever Get Many!)
If you actually have leftovers (which is rare in my house, unless I double the recipe), let sliders cool, wrap in foil or pop in an airtight container, and refrigerate. They’ll be happy for about 2 days — maybe three tops. They reheat well in the oven, honestly, I think the flavors get even cozier the next day.
How We Serve These (and You Should Too… Or Not)
I like mine with a heap of kettle chips and a cold soda (classic American combo, right?). My kids dunk theirs in ranch. For game day, I cut up some celery — not that anyone touches it, but it looks nice. Occasionally, I’ll whip up a quick slaw if I’m trying to look like I’ve got it all together.
Stuff I Learned the Hard Way (So You Don’t Have To)
- Be patient and let it cool. Rushing just means burnt fingers and cheese everywhere. Ask me how I learned this.
- Don’t use pre-shredded cheese. I was lazy once — it never melted as nicely. Live and learn.
- If the beef looks too dry, a splash of broth (or honestly, water) perks it right up.
Questions Folks Have Actually Asked Me
- Can I make these ahead? You totally can. Assemble, cover, and refrigerate up to a day before. Bake right before serving.
- Do I have to use Hawaiian rolls? Nope! I’ve tried dinner rolls and even potato buns. But the sweet ones are special.
- Can I freeze them? Well, yes, technically, but the bread gets a bit weird. If you must, wrap tightly, thaw, and reheat — but honestly, fresh is best (don’t come at me!).
- Why does my cheese disappear? Either it melts out the sides (try more overlap), or you’re using cheese that’s too thin. Or, uh, someone is snacking early — not naming names!
- Can I make it vegetarian? I haven’t tried it myself; but probably! Something like plant-based grounds or seasoned lentils could work, just adjust seasoning a bit.
Now that I’ve typed all this up, I’m actually craving these little cheeseburger sliders again. Might make a half batch tonight, just so the house smells right. Anyway, good luck — and don’t stress if they’re a bit messy. That’s part of the fun, isn’t it?
Ingredients
- 1 pack (12-count) Hawaiian sweet rolls (I’ve tried store-brand, but King’s Hawaiian just feels right. Any soft roll will work — brioche is a decent backup!)
- 1 pound ground beef (80/20 is my go-to, but I’ve been known to use ground turkey when the fridge is looking sad)
- 1/2 teaspoon salt, plus more to taste
- 1/4 teaspoon black pepper
- 1 teaspoon garlic powder (or a small clove fresh garlic, minced, if I feel energetic)
- 6-8 slices American or cheddar cheese (my grandma used Velveeta sometimes — not judging!)
- 1/4 cup diced onions (optional, but I usually do it for flavor. Red onions are good too if you want a sharper bite)
- 2 tablespoons melted butter (I use salted, but use what you have)
- 1 tablespoon sesame seeds (for the tops, but skip if you’re not feeling fancy)
- Pickles, ketchup, mustard (all for layering and dipping, honestly just go by your heart here)
Instructions
-
1Preheat your oven to 350°F (yep, get it nice and toasty — this isn’t a rush job, but don’t worry if you forget and have to wait an extra few mins… been there).
-
2While it’s heating up, grab a skillet and brown the ground beef over medium heat. Break it up gently; you want crumbles, not beef paste. Add the diced onion (if using) plus garlic powder, salt, and pepper as it cooks. This is where I usually sneak a bite — no shame.
-
3Once the beef is no longer pink and smelling awesome, drain the excess fat (or blot with paper towels, which is my lazy method when I’m already over doing dishes). Taste for seasoning — I often chuck in a little more salt.
-
4Slice the whole slab of Hawaiian rolls horizontally, so you’ve got a giant loaf top and bottom. Try not to squish it — easier said than done, trust me.
-
5Place the bottom half of the rolls in a 9×13 baking dish. Spread the cooked beef mixture evenly over the rolls. Layer on the cheese slices so you get good melty coverage; sometimes I tear them up so every slider gets a cheesy corner.
-
6Add pickles now if you’re into warm pickles (I know some folks are anti!) — or leave them out and let everyone add their own after baking; you do you.
-
7Place the top half of the rolls over everything like a warm little bread blanket. Brush generously with melted butter and sprinkle with sesame seeds if you’ve got ’em. If not, no biggie.
-
8Bake uncovered for 13-15 minutes, until the cheese is bubbling and the tops are golden. If the tops brown too quick (ovens have their moods), just throw some foil on top for the last few minutes.
-
9Pull ’em out, let rest for five (okay, three) minutes so you don’t burn your fingers — unless you’re braver than I am. Slice into 12 little squares and serve hot, with ketchup, mustard, or whatever else sparks joy.
Approximate Information for One Serving
Nutrition Disclaimers
Number of total servings shown is approximate. Actual number of servings will depend on your preferred portion sizes.
Nutritional values shown are general guidelines and reflect information for 1 serving using the ingredients listed, not including any optional ingredients. Actual macros may vary slightly depending on specific brands and types of ingredients used.
To determine the weight of one serving, prepare the recipe as instructed. Weigh the finished recipe, then divide the weight of the finished recipe (not including the weight of the container the food is in) by the desired number of servings. Result will be the weight of one serving.
Did you make this recipe?
Please consider Pinning it!


