
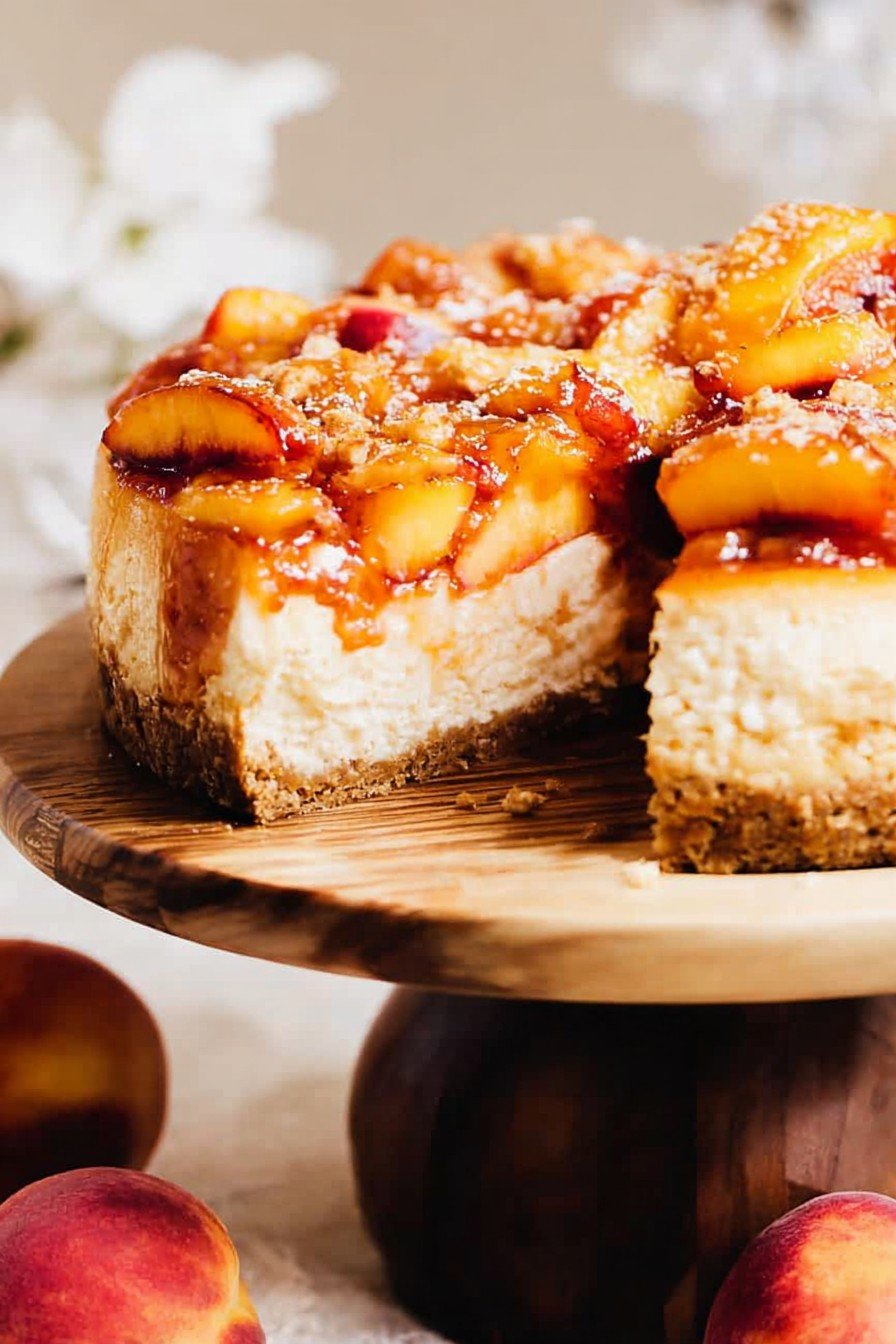
If You Love Dessert (And Who Doesn’t?), This Peach Cobbler Cheesecake Is for You
Let me just say: I never thought I’d be the type to make a “fancy” cheesecake, especially one with a double whammy of peach cobbler piled on top. But one summer, my neighbor Pam brought over something she called peach cobbler cheesecake, claiming her cousin invented it. The joke is we both know her cousin eats frozen dinners, but that’s immaterial. Either way, I was hooked. Now, every time summer peaches roll in (or, you know, I surrender to the canned ones mid-February), this is the dessert I turn to. And yes, I “taste test” at pretty much every step. Oops.
Why You’re Gonna Want to Make This
I make this when I’m not sure if I want pie or cheesecake—you shouldn’t have to pick! My family goes utterly bonkers for this because it’s rich but fruit-forward, and, to be honest, it looks fancy even if you’re slapping it together in your pajamas. (Been there. Apron on top, slippers on the feet.) Oh, and if you’re a bit nervous about the cobbler part blending with cheesecake, don’t fret; they vibe together much better than my attempt at sourdough starter ever did. Actually, I find it helps distract form any cracks in the cheesecake. Win-win.
Gather Your Ingredients (Substitutions 100% Welcome)
- 1 1/2 cups graham cracker crumbs (store brand seems fine to me, but my grandmother swears by Honey Maid)
- 1/3 cup melted butter (sometimes I sneak in brown butter, absolutely divine)
- 2 tbsp sugar (or just a heavy sprinkle if your hand slips like mine)
- 24 oz cream cheese, softened (sometimes I use whatever’s on sale, not gonna lie)
- 1 cup granulated sugar
- 1 tsp vanilla extract (imitation works if that’s all you’ve got—no judgment)
- 3 large eggs (I’ve used medium in a pinch, didn’t notice much difference)
- 1/2 cup sour cream (plain Greek yogurt works if you’re out)
- 2 cups sliced peaches (fresh is dreamy, but frozen or canned work—just drain them well)
- 1/4 cup brown sugar (sometimes I use a little honey or maple syrup if I’m feeling fancy)
- 1 tsp ground cinnamon
- 1/4 tsp nutmeg (I forget this half the time and nobody complains)
- 1 tbsp lemon juice (bottled or fresh, up to you—once used lime juice when I ran out, not bad actually)
- 3/4 cup all-purpose flour
- 1/3 cup cold butter, cubed
- 1/2 cup sugar (for the cobbler topping)
How to Make Peach Cobbler Cheesecake (With Real-Life Tips Along the Way)
- Prep your pan. Line a 9-inch springform pan with parchment, grease lightly. If the paper gets crinkly, just press on—the cheesecake won’t care.
- Make the crust. Toss together graham crumbs, sugar, and melted butter. Press the mixture into the pan with the bottom of a mug (or just your fist if you must) and bake at 350°F (about 180°C) for 10 minutes or so. Try not to eat all the crust before the rest is ready. Let it cool.
- Cheesecake filling time. Beat cream cheese until it’s smooth-ish (I’ve definitely had lumps, and hey, still delicious). Add sugar and vanilla, beat again. Then add eggs one at a time. Don’t overthink it. Finally, mix in sour cream. Pour over the crust.
- Peachy layer. Mix your sliced peaches with brown sugar, cinnamon, nutmeg, and lemon juice in a bowl. If you’re using canned, really drain ‘em well—you don’t want a soggy mess, trust me. Spoon half the peaches evenly over the cheesecake batter (just kind of dot them around—looks rustic, tastes great).
- Make the cobbler topping. Stir the flour, sugar, and a sprinkle more cinnamon if you’re wild like me. Rub in the cold butter until you get that classic sandy crumb. This is where I usually sneak a taste.
- Scatter that cobbler topping. Just toss it over the peaches as evenly as you can. I’ve definitely missed spots. It bakes up fine. Then add the rest of the peaches on top, kind of wherever.
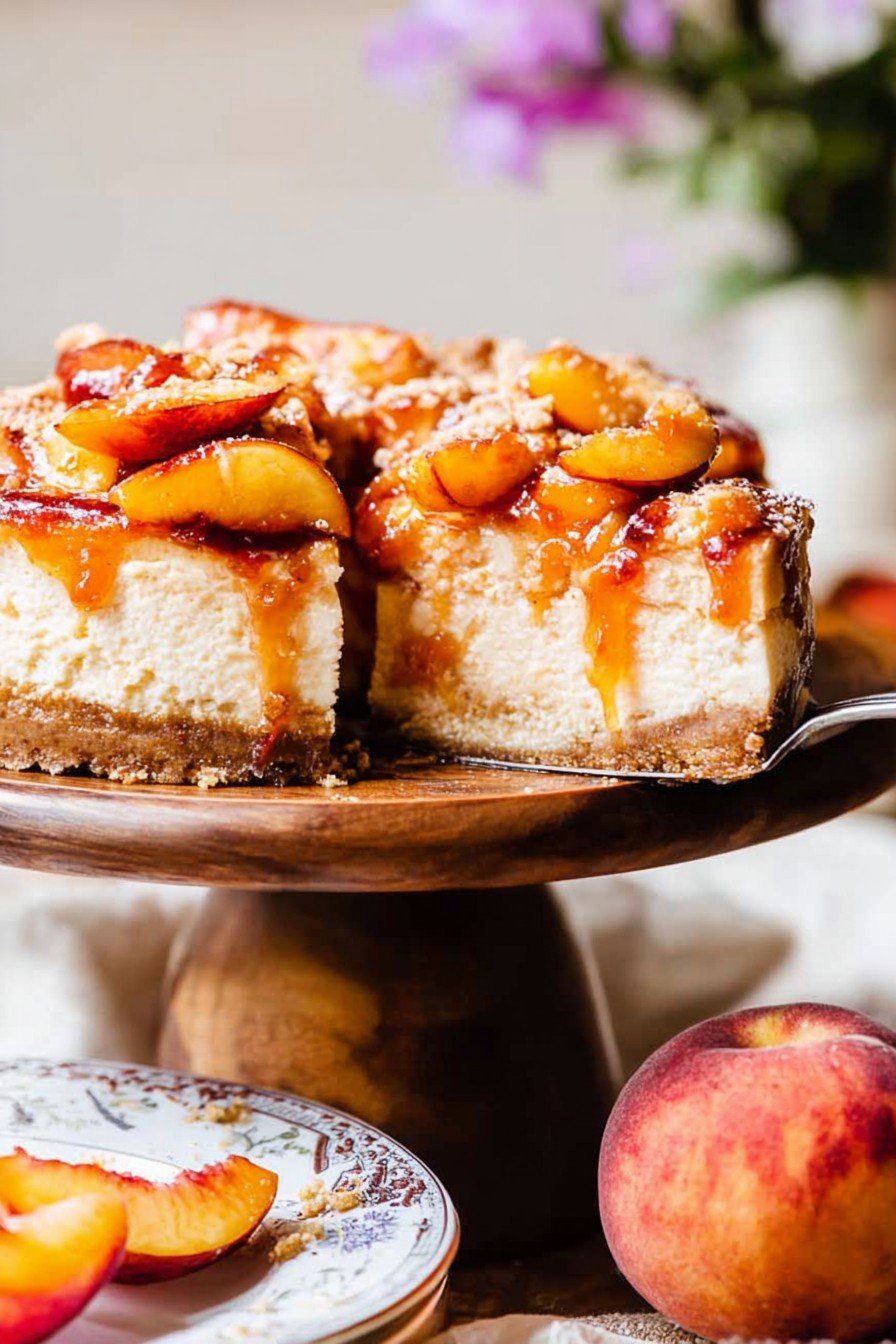
- Bake! Bake at 350°F for 55–65 minutes. Keep an eye after 50—you want it set at the edges but with the slightest jiggle in the middle. Don’t panic if it wobbles a bit; it sets up in the fridge later.
- Cool it down. Let it hang out on the counter for an hour, then chill in the fridge for at least 4 hours (overnight is even better, but who has that kind of patience?). Just don’t skip the chilling—you’ll regret it like I did that one time.
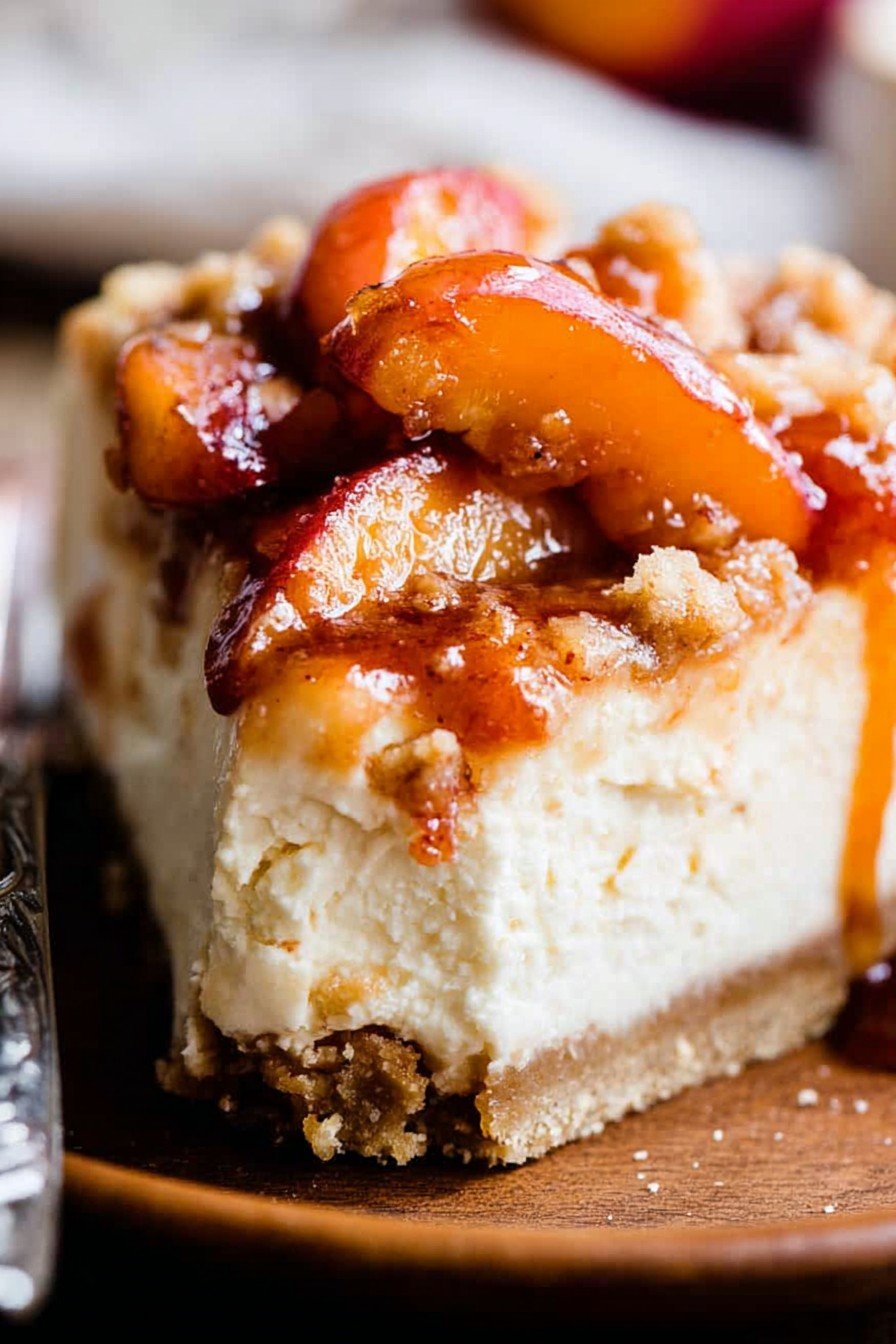
- Slice and serve. Release the pan and cut generous wedges. Eat cold, straight from the fridge, or let it warm a smidge if you’re into that.
A Few Notes From My Messy Kitchen
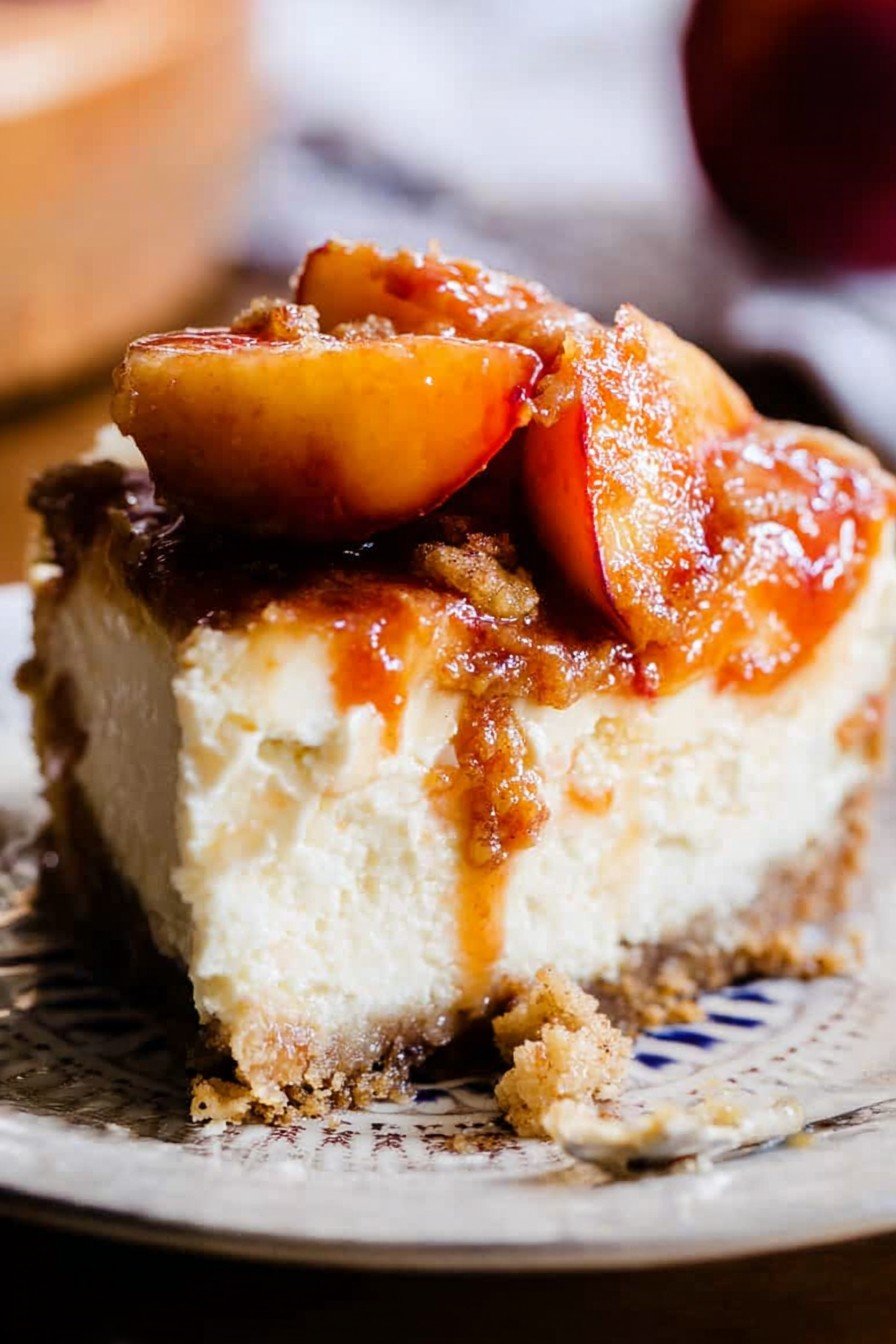
- If your cheesecake cracks, just pile on a little more peach topping. No one will ever know (unless your Aunt Linda insists on forensic dessert analysis—ignore her).
- Sometimes the cobbler layer looks a little odd before baking. That’s normal. Trust the process.
- Double the peaches for a super-fruity vibe, but your slices might get a bit slumpy. Worth it, in my opinion.
Things I’ve Tried With This Recipe (Some Worked, Some… Uhh)
- Swapped in berries instead of peaches—raspberries work, but strawberries got weirdly soggy. Not my best call.
- Added a splash of bourbon to the peaches. Hello, southern flair (when the kids aren’t eating it).
- Made mini versions in muffin tins. Super-cute, but getting them out was a pain. Maybe not for a Tuesday night.
Equipment—But Don’t Freak Out If You’re Missing Stuff
- 9-inch springform pan (though I once jerry-rigged it with a deep cake tin and parchment “slings”—messy but worked!)
- Electric mixer makes life easier; old-school wooden spoon works with some elbow grease.
- Bowl, spatula, and something heavy for pressing crust (coffee mug is my go-to)
How to Store—If You Even Get the Chance
Technically, airtight container in the fridge for up to 4 days. But honestly, in my house, it never lasts more than a day. Freezes fine, too, but sometimes the cobbler layer gets mushy after thawing.
How We Serve It
I love it plain, but if I’m feeling posh, a dollop of whipped cream (canned is fine) or even a little vanilla ice cream on the side. Sometimes we light a candle and pretend it’s someone’s birthday just for the excuse.
What I’ve Learned (The Hard Way)
- Don’t rush cooling. I once tried cutting in after an hour—hot gooey mess. You need the chill time!
- If you skip the parchment, you’ll regret it scraping stuck bits from your “nonstick” pan. Ask me how I know.
- Let your cream cheese come to room temp. If you don’t, lumpy filling. Not the worst, but not picture perfect either.
FAQ—Real Questions People Have Grilled Me With!
- Can I use canned peaches? Oh absolutely; just drain them well or the whole thing gets mushy. Learned that the sticky way.
- Do I really need a springform pan? It helps a lot, but I’ve done it in a deep cake tin with improvised parchment “handles”—just be ready for a less polished look.
- Can I make ahead? Yes! Actually, I think this tastes even better the next day. Flavor seems to blend more (maybe it’s just me…)
- What if my cheesecake cracks? Just heap on the cobbler topping—or more peaches. Call it “rustic” and steer the conversation elsewhere.
- Is this super sweet? It’s pretty sweet, but you can dial back the sugar in the cobbler topping if you like. Honestly, I prefer it a bit more tart.
Anyway, if you do give this a try, let me know how it turns out (unless it flops—then just, you know, return to sender). Promise it’s less fussy than it sounds and so, so rewarding. Happy baking, pal!
Ingredients
- 1 1/2 cups graham cracker crumbs (store brand seems fine to me, but my grandmother swears by Honey Maid)
- 1/3 cup melted butter (sometimes I sneak in brown butter, absolutely divine)
- 2 tbsp sugar (or just a heavy sprinkle if your hand slips like mine)
- 24 oz cream cheese, softened (sometimes I use whatever’s on sale, not gonna lie)
- 1 cup granulated sugar
- 1 tsp vanilla extract (imitation works if that’s all you’ve got—no judgment)
- 3 large eggs (I’ve used medium in a pinch, didn’t notice much difference)
- 1/2 cup sour cream (plain Greek yogurt works if you’re out)
- 2 cups sliced peaches (fresh is dreamy, but frozen or canned work—just drain them well)
- 1/4 cup brown sugar (sometimes I use a little honey or maple syrup if I’m feeling fancy)
- 1 tsp ground cinnamon
- 1/4 tsp nutmeg (I forget this half the time and nobody complains)
- 1 tbsp lemon juice (bottled or fresh, up to you—once used lime juice when I ran out, not bad actually)
- 3/4 cup all-purpose flour
- 1/3 cup cold butter, cubed
- 1/2 cup sugar (for the cobbler topping)
Instructions
-
1Prep your pan. Line a 9-inch springform pan with parchment, grease lightly. If the paper gets crinkly, just press on—the cheesecake won’t care.
-
2Make the crust. Toss together graham crumbs, sugar, and melted butter. Press the mixture into the pan with the bottom of a mug (or just your fist if you must) and bake at 350°F (about 180°C) for 10 minutes or so. Try not to eat all the crust before the rest is ready. Let it cool.
-
3Cheesecake filling time. Beat cream cheese until it’s smooth-ish (I’ve definitely had lumps, and hey, still delicious). Add sugar and vanilla, beat again. Then add eggs one at a time. Don’t overthink it. Finally, mix in sour cream. Pour over the crust.
-
4Peachy layer. Mix your sliced peaches with brown sugar, cinnamon, nutmeg, and lemon juice in a bowl. If you’re using canned, really drain ‘em well—you don’t want a soggy mess, trust me. Spoon half the peaches evenly over the cheesecake batter (just kind of dot them around—looks rustic, tastes great).
-
5Make the cobbler topping. Stir the flour, sugar, and a sprinkle more cinnamon if you’re wild like me. Rub in the cold butter until you get that classic sandy crumb. This is where I usually sneak a taste.
-
6Scatter that cobbler topping. Just toss it over the peaches as evenly as you can. I’ve definitely missed spots. It bakes up fine. Then add the rest of the peaches on top, kind of wherever.
-
7Bake! Bake at 350°F for 55–65 minutes. Keep an eye after 50—you want it set at the edges but with the slightest jiggle in the middle. Don’t panic if it wobbles a bit; it sets up in the fridge later.
-
8Cool it down. Let it hang out on the counter for an hour, then chill in the fridge for at least 4 hours (overnight is even better, but who has that kind of patience?). Just don’t skip the chilling—you’ll regret it like I did that one time.
-
9Slice and serve. Release the pan and cut generous wedges. Eat cold, straight from the fridge, or let it warm a smidge if you’re into that.
Approximate Information for One Serving
Nutrition Disclaimers
Number of total servings shown is approximate. Actual number of servings will depend on your preferred portion sizes.
Nutritional values shown are general guidelines and reflect information for 1 serving using the ingredients listed, not including any optional ingredients. Actual macros may vary slightly depending on specific brands and types of ingredients used.
To determine the weight of one serving, prepare the recipe as instructed. Weigh the finished recipe, then divide the weight of the finished recipe (not including the weight of the container the food is in) by the desired number of servings. Result will be the weight of one serving.
Did you make this recipe?
Please consider Pinning it!


