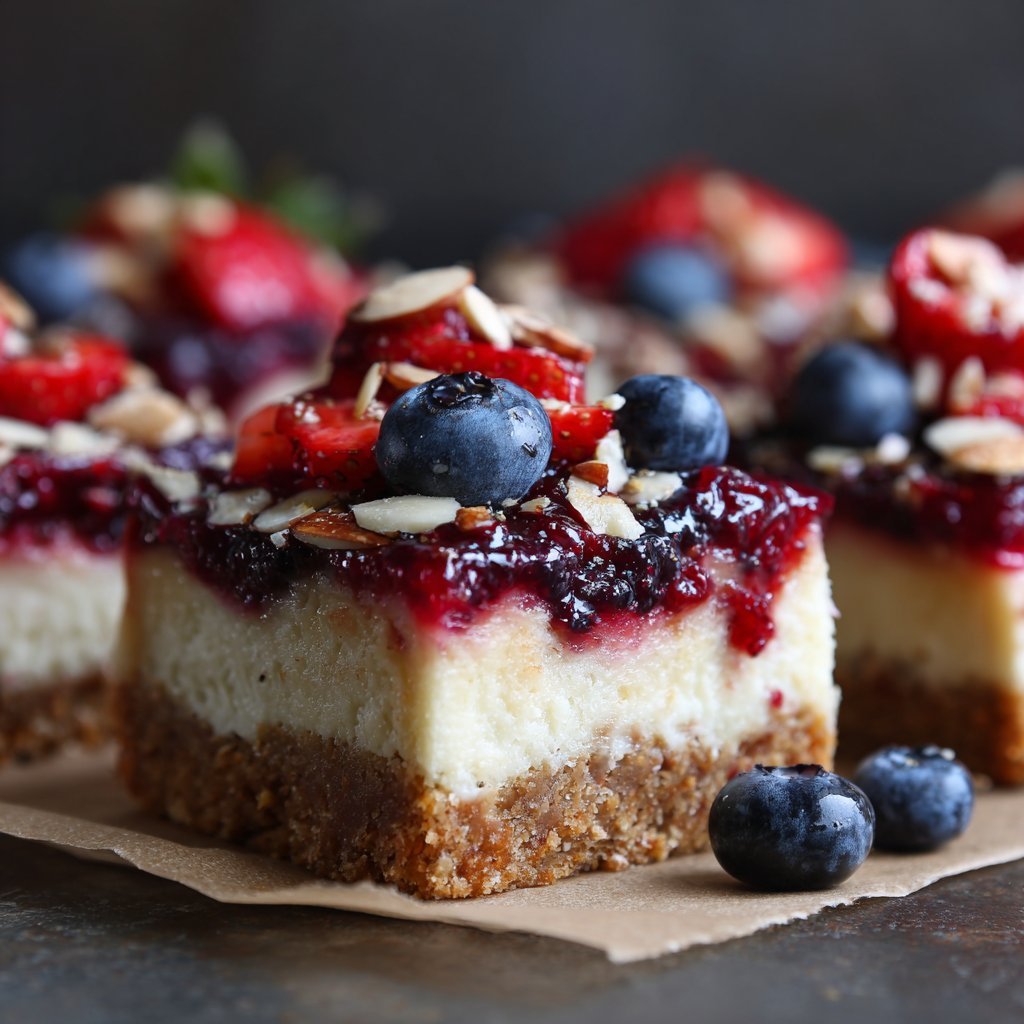
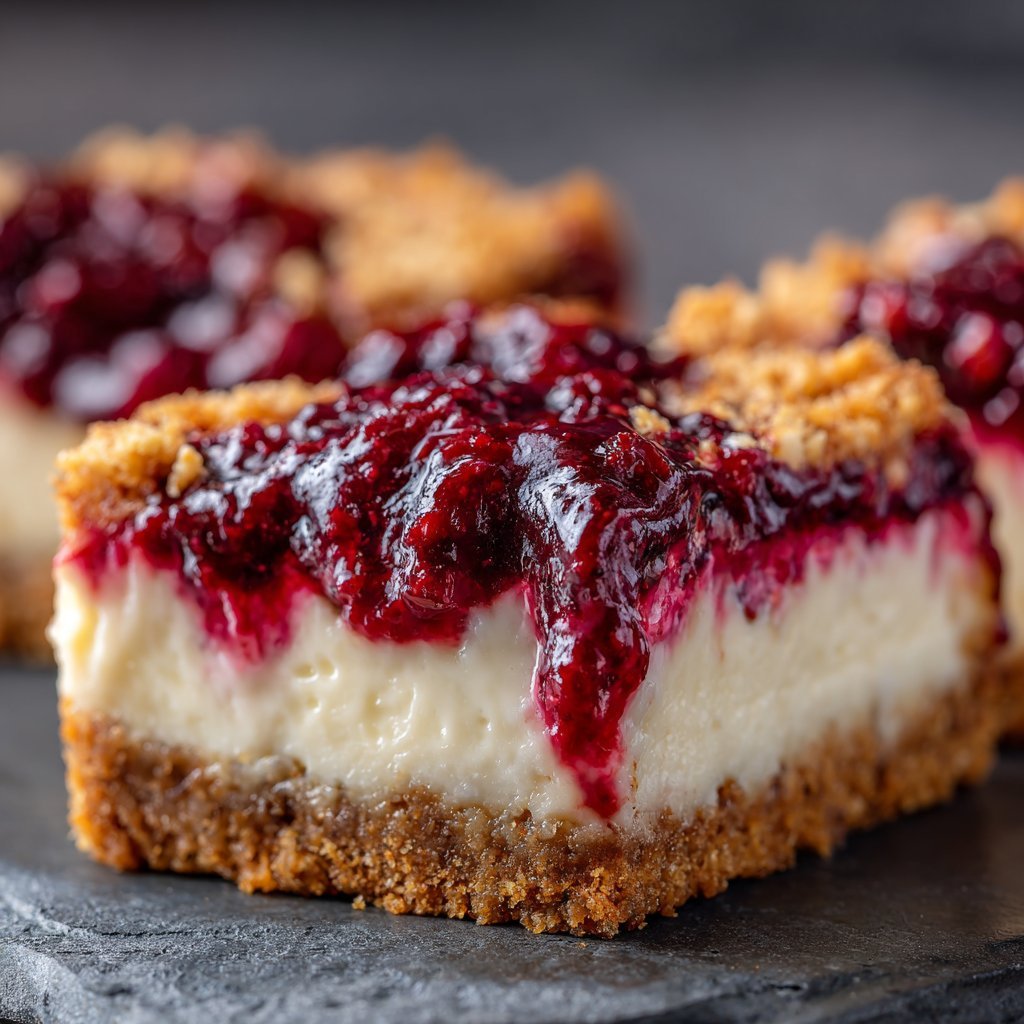
Hey y’all! So, you know those recipes that just scream summer potluck or, honestly, any darn day you need a little sweet treat? This Berry Cheesecake Bars with Almond Crust recipe is it for me. I first tinkered with this years ago for a family reunion, and lemme tell ya, they vanished faster than I could even grab a second one. It’s got that classic creamy cheesecake vibe but without all the faff of a water bath or worrying about cracks. Plus, that almond crust? Game changer. Seriously.
Why I Think You’ll Dig These
Okay, look, I’m not gonna give you a list of boring ‘benefits.’ I make these when I want something impressive but also kinda low-key effort-wise. They’re way less temperamental than a full cheesecake (no judgment if you’ve battled cracks like I have!). My family goes absolutely bonkers for the combo of the tart berries and that slightly sweet, nutty crust. (Confession: I usually have to hide a few pieces just for myself.) They transport well, too, which is key if you’re headed to a gathering. And honestly, they just make your kitchen smell like pure happiness while they’re baking.
Gather ‘Round: What You’ll Need
Here’s the stuff you’ll need. Don’t stress too much about perfection, this is home cooking!
- For the Almond Crust:
- 1 & 1/2 cups all purpose flour
- 1/2 cup finely ground almonds (almond flour works perfectly here, or just blitz some whole almonds in a food processor)
- 1/2 cup granulated sugar
- 1/4 teaspoon salt
- 1 cup cold unsalted butter, cut into cubes (or I sometimes use salted butter and just omit the extra salt)
- 1 egg yolk
- For the Cheesecake Layer:
- 3 (8 ounce) blocks cream cheese, softened (Seriously, SOFTENED is key. Leave it out for an hour or two. Trust me on this.)
- 3/4 cup granulated sugar
- 1/4 cup sour cream or plain Greek yogurt (I usually have Greek yogurt on hand, so that’s my go-to)
- 1 teaspoon vanilla extract (or if you’re feeling fancy, a tiny bit of vanilla bean paste is lovely)
- 2 large eggs
- For the Berry Layer:
- 2-3 cups mixed berries (fresh or frozen work! If using frozen, don’t thaw ’em first.) I love a mix of raspberries, blueberries, and maybe a few sliced strawberries.
- 2 tablespoons sugar (optional, depends how sweet your berries are and how tart you like it)
- 1 tablespoon cornstarch (if your berries are super juicy, this helps thicken things up)
Let’s Get Cooking! The Lowdown on How To Do It
Okay, deep breath. It’s easy, promise.
First things first, preheat your oven to 350°F (175°C). Grab a 9×13 inch baking pan. You’ll want to line it with parchment paper, leaving some overhang on the sides. This is *so* important for getting the bars out easily later. Seriously, don’t skip this. Or do and regret it, your call!
The Crust Situation
Alright, crust time. Whisk together the flour, ground almonds (or almond flour), sugar, and salt in a medium bowl. Cut in the cold butter. You can use a pastry blender, your fingers, or a food processor. I usually pulse it in my food processor until it looks like coarse crumbs. Then, add the egg yolk and pulse/mix just until it starts to come together into clumpy bits.
Press this mixture evenly into the bottom of your prepared pan. I use the bottom of a glass or a flat measuring cup to get it nice and compact. Poke it all over with a fork. Bake this for about 15-18 minutes, or until the edges look lightly golden. It’s gonna smell amazing. Let it cool on a wire rack while you make the filling.

The Cheesecake Filling Bit
While the crust cools, get your filling ready. Make sure that cream cheese is properly softened! Beat the softened cream cheese in a large bowl until it’s super smooth and creamy. Add the sugar and beat again until combined. Mix in the sour cream (or yogurt) and vanilla.
Now, add the eggs, one at a time, beating on low speed just until each egg is incorporated. This is where I usually sneak a taste of the batter. Don’t overmix once the eggs are in, okay? Overmixing can add too much air and make it puff up and crack. We want smooth and creamy, not a science experiment gone wrong.
Berry Bonanza!
In a separate little bowl, gently toss your berries with the optional sugar and cornstarch (if using). Don’t mash ’em up too much.
Putting It All Together (The Fun Part)
Pour the cheesecake filling over the cooled crust. Smooth the top with a spatula.
Now, dot the berry mixture evenly over the top of the cheesecake layer. You can leave them as individual berries or gently swirl them into the top layer with a knife. Don’t go crazy swirling or the berries might sink too much. A light swirl is all you need.
Pop the pan into your preheated oven. Bake for 35-45 minutes. It’s done when the edges are set and the center is *just* slightly jiggly when you gently shake the pan. Don’t wait until the very center is totally firm, it’ll keep cooking as it cools.
Let it cool on the wire rack completely. I mean completely. Like, for a couple of hours. Then, and this is crucial, cover it and chill it in the fridge for at least 4 hours, but honestly, I find it works better if you chill it overnight. This makes it easier to cut and the flavors meld beautifully.
Notes from My Kitchen (Lessons Learned)
- Always use full-fat cream cheese. Low-fat just doesn’t give you that rich texture we’re aiming for. I learned that the hard way once.
- Room temperature ingredients, especially the cream cheese and eggs, make a world of difference in getting a smooth filling.
- If your berries are really large, you might want to chop them a little so they distribute better.
- Don’t skip the parchment paper! Seriously. Getting a whole sheet out makes slicing a breeze. I usually buy pre-cut sheets from Amazon like these ones, saves faffing about with scissors.

Funky Variations I’ve Tried
You can totally play around with this! I’ve used pecans or walnuts in the crust instead of almonds, which gives a different but still lovely flavor. A mix of lemon zest in the cheesecake filling is divine, especially with blueberries. I once tried doing a chocolate swirl on top, but the chocolate was too heavy and it just kinda sunk to the bottom in weird blobs. So, maybe stick to fruit unless you’re feeling adventurous!
Tools That Help (and Workarounds!)
You’ll need a 9×13 pan (obvs!). A food processor is super handy for the crust, but like I mentioned earlier, you can totally do it by hand with a pastry blender or fork. A stand mixer or hand mixer makes the filling easy peasy, but you could do it with a whisk and some elbow grease if you had to. And a good rubber spatula for scraping the bowl!
Storing Your Precious Bars
Keep these bad boys in an airtight container in the fridge. They’ll last for 3-4 days, though honestly, in my house it never lasts more than a day! You can also freeze them, wrapped tightly, for up to a couple of months. Thaw them in the fridge.
Serving Suggestions (My Faves)
Cut them into squares or rectangles. A dusting of powdered sugar on top is always a good idea. Sometimes we serve them with a little extra fresh berry sauce drizzled over or just a dollop of whipped cream. They’re also pretty great straight out of the fridge on a hot day.
Pro Tips (Learned from Mistakes, Mostly)
- Make sure your cream cheese is soft, soft, soft. I once tried rushing this step and regretted it because I had little cream cheese lumps in my filling, which is a bummer.
- Don’t overbake! That slight jiggle is your friend. Overbaked cheesecake is dry cheesecake.
- Chill time isn’t optional. It makes cutting so much cleaner and improves the texture. Trust me on this one, I’m form the school of ‘impatience is a virtue’ but not with these bars.
FAQs You Might Be Wondering
Q: Can I use different fruit?
A: Absolutely! Peaches, cherries, a mix of stone fruit… go wild! Just chop larger fruit into bite-sized pieces.
Q: My crust is too crumbly! What happened?
A: Hmm, maybe not enough cold butter worked in? Or perhaps the egg yolk wasn’t fully incorporated? You could try pressing it *really* firmly into the pan, or next time add a tiny splash of cold water if it seems too dry before pressing.
Q: Why did my berries sink?
A: That can happen, especially with heavy or juicy fruit. Make sure your cheesecake filling isn’t too warm, and don’t swirl the berries too deeply. Using the cornstarch coating helps too!
Q: Can I use frozen berries? Do I thaw them?
A: Yep, frozen is fine! And nope, don’t thaw ’em. Just toss them with the sugar and cornstarch (if using) while they’re still frozen and dot them right onto the filling. They’ll release their juices as they bake.
Q: Is almond flour the same as ground almonds?
A: Pretty much! Almond flour is usually more finely ground and made form blanched almonds (no skins). Ground almonds might be a bit coarser and contain skins. Either works just fine in this crust!