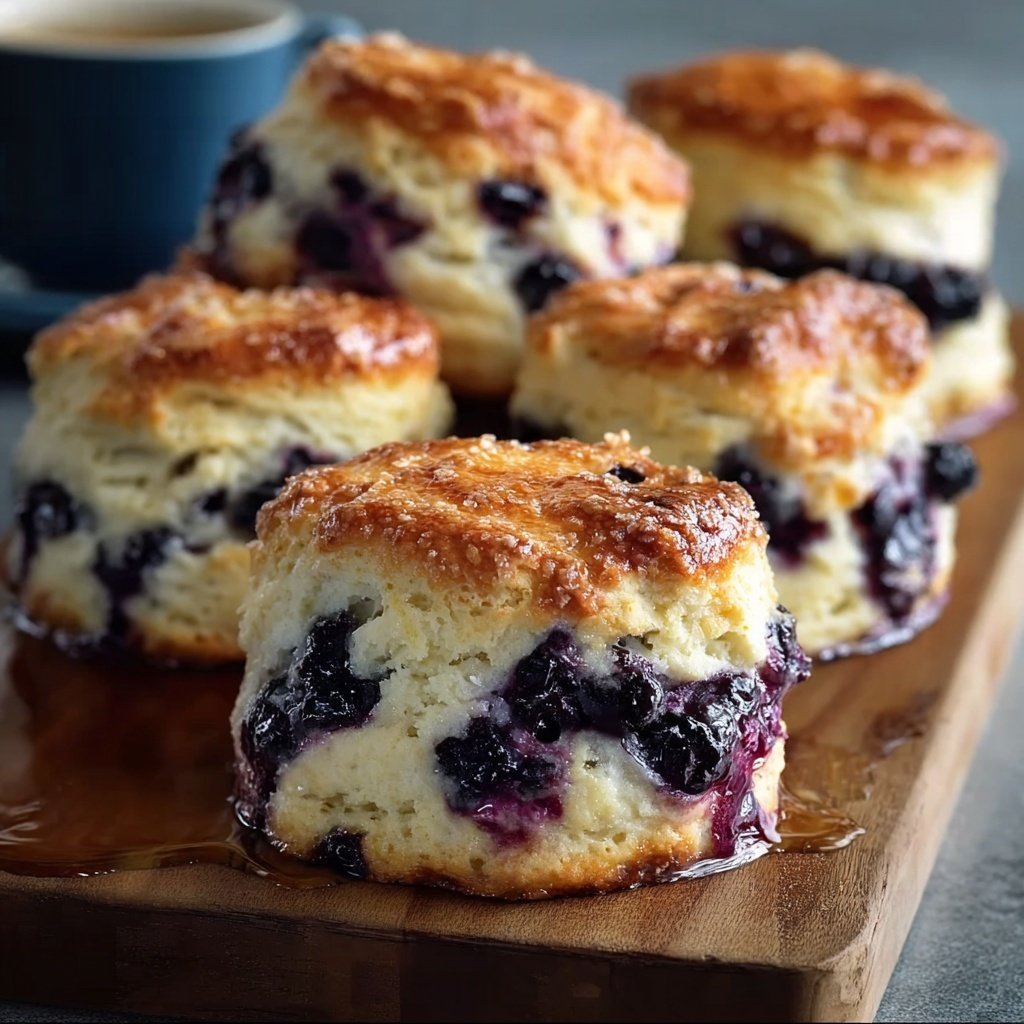
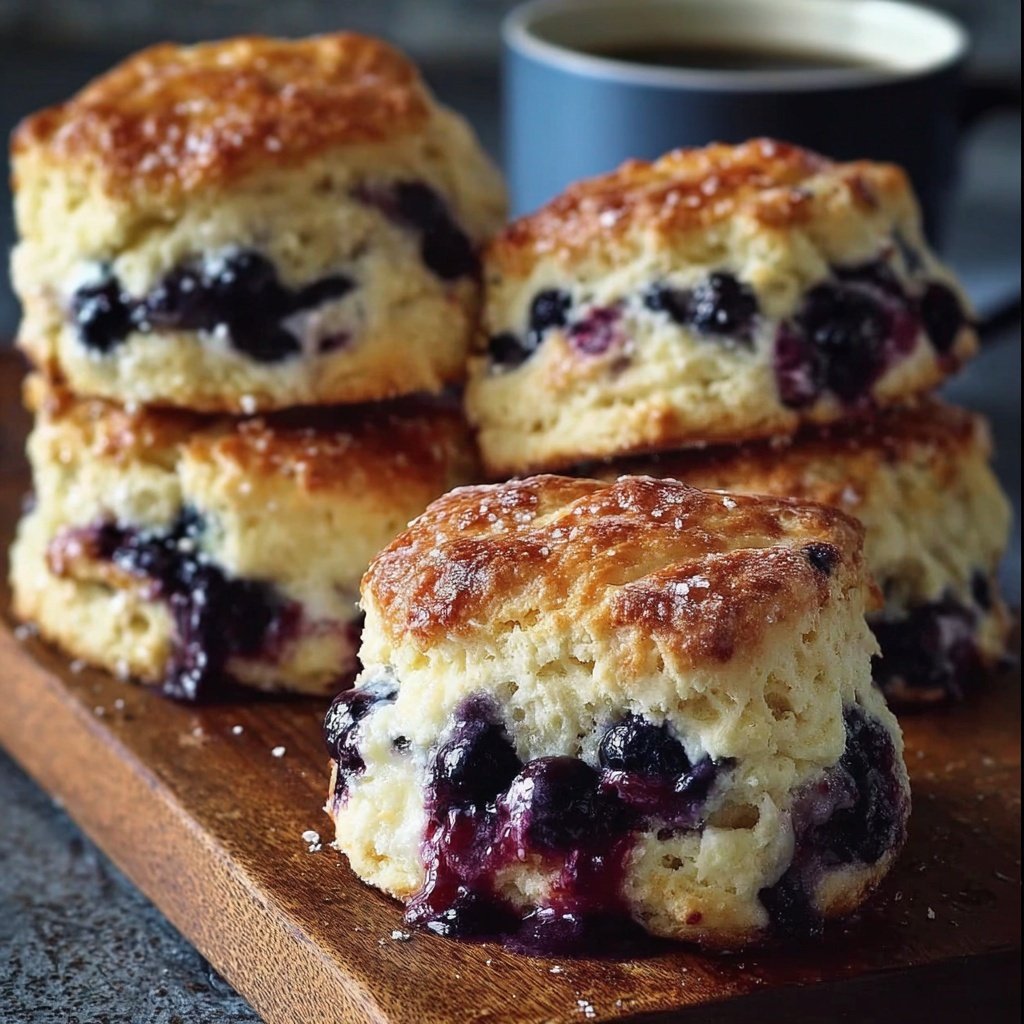
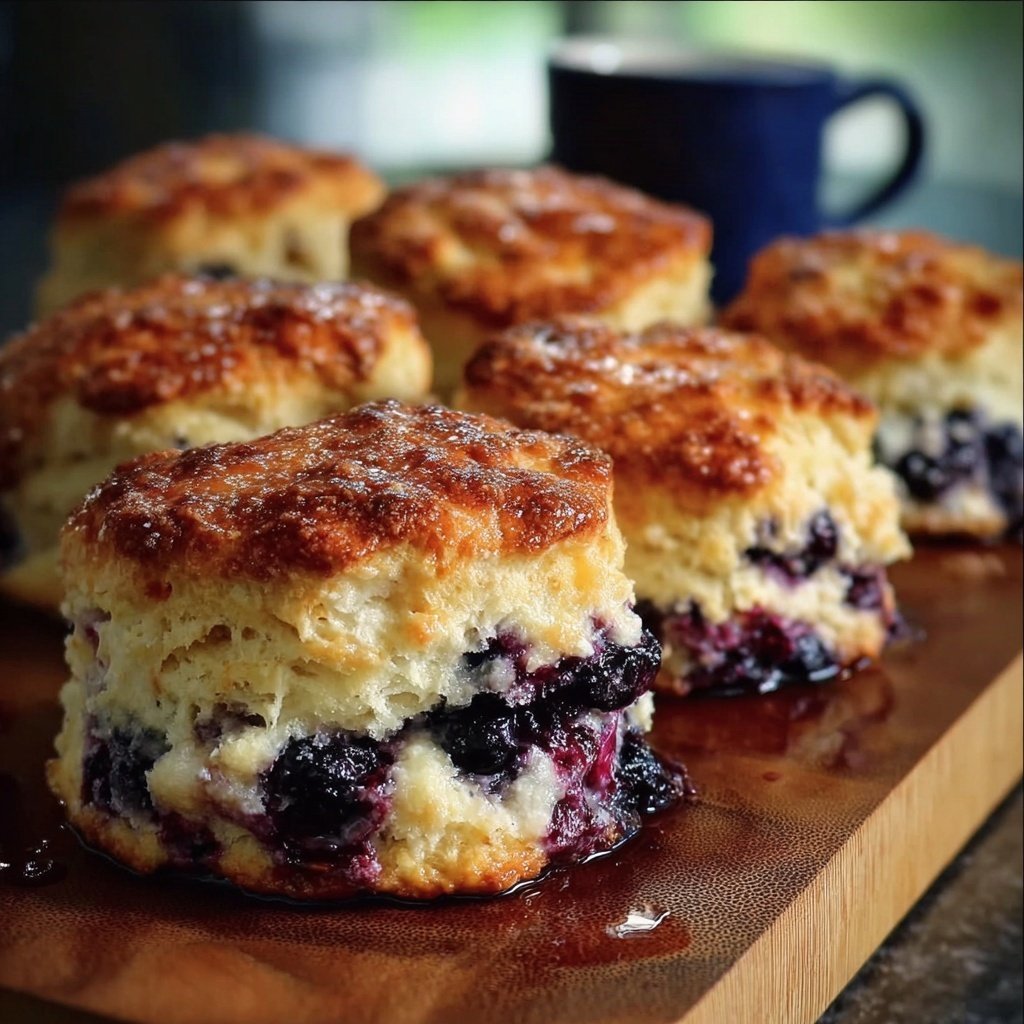
Let’s Talk About Blueberry Biscuits (And My Mild Obsession)
Okay, so picture this: it’s a rainy Saturday morning, the dog is barking at the mailman again, and all I can think about is that batch of blueberry biscuits I made last weekend. You know, the kind that’s a little too soft in the middle and has blueberries bursting out the sides. My cousin called them ‘blueberry scones that decided to chill out’—which, fair. Anyway, I started making these a couple of years ago after a disastrous attempt at sourdough (let’s not discuss that brick). Ever since, these biscuits have become my little secret weapon for impressing brunch guests and bribing my kids out of bed. Not to toot my own horn, but… well, toot toot.
Why You’ll Love This (Apart From the Blueberries Everywhere)
I make these when I don’t want to fuss too much but still want something that feels like a hug in food form. My family goes crazy for them because they’re not too sweet, and the berries get all jammy inside (plus, who doesn’t love a purple breakfast?). I used to struggle with dough sticking everywhere—honestly, half the fun is getting your hands a little messy. And if you’ve ever had one of those store-bought biscuits that just taste like sadness, this recipe will redeem the genre for you.
What You’ll Need (And What You Can Get Away With Swapping)
- 2 cups all-purpose flour (sometimes I sneak in half whole wheat, but don’t tell my kids)
- 1 tablespoon baking powder (my grandmother insisted on Clabber Girl, but I grab whatever’s in the cupboard)
- 1/4 cup granulated sugar (I’ve used brown sugar when I’m out—gives it a deeper vibe)
- 1/2 teaspoon salt (I go a little heavy here; I like that sweet-salty thing)
- 5 tablespoons cold unsalted butter, cubed (salted is fine, just skip a pinch of the salt above)
- 3/4 cup milk (any kind, really—almond milk in a pinch, and once I even used half-and-half when I’d run out, rich but wow)
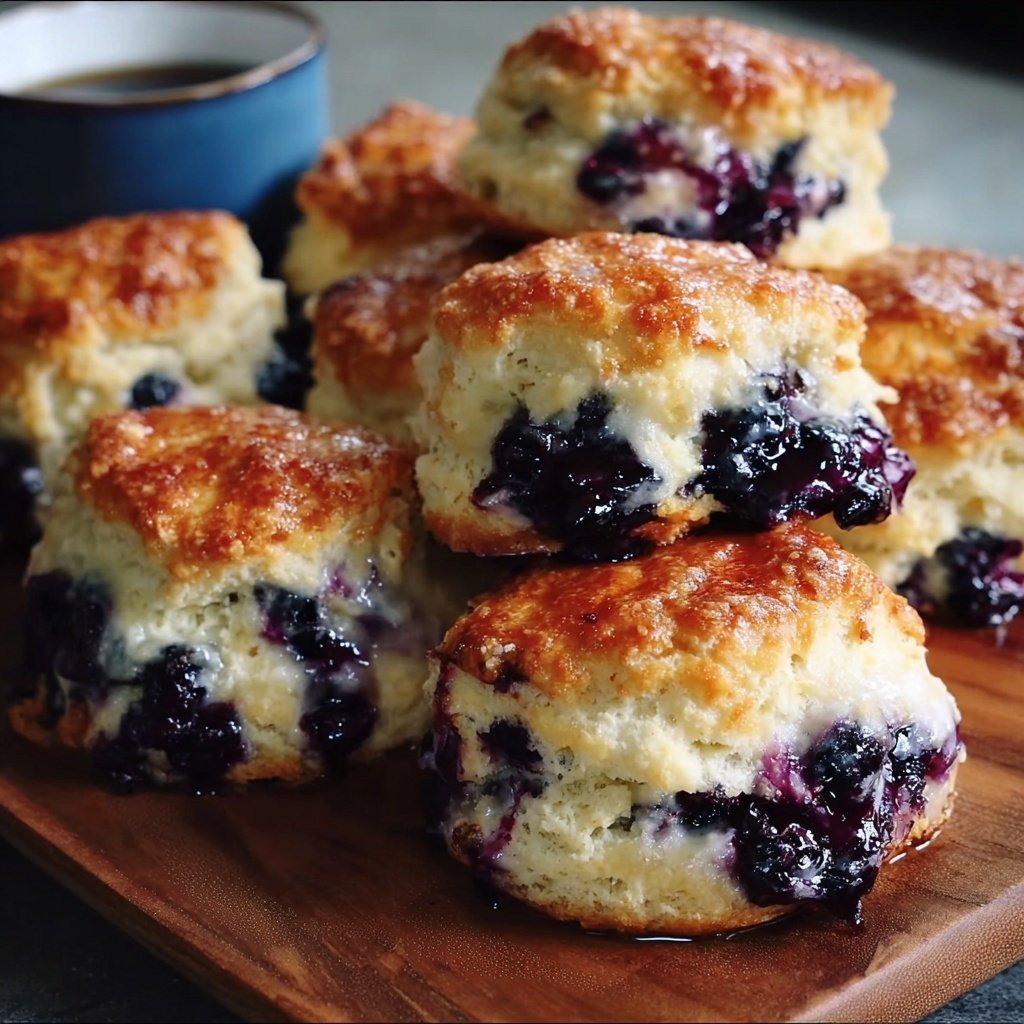
- 1 cup fresh blueberries (frozen is totally fine, just don’t thaw them, or you’ll have blue streaks everywhere—ask me how I know)
- Optional: 1 teaspoon lemon zest (I forget this half the time and it’s still great)
How To Make These: The Good, The Messy, The Delicious
- Preheat your oven to 425°F (220°C). Or just somewhere north of 400 if your oven runs hot like mine.
- In a biggish bowl, whisk together the flour, baking powder, sugar, and salt. I rarely sift, unless I’m feeling fancy.
- Add those cubed cold butter bits. This is where you get your hands in—just squish the butter into the flour until it looks like lumpy sand. If you’ve got a pastry cutter, go wild, but fingers work fine (and are more fun, honestly).
- Pour in the milk and add the lemon zest if you remembered it. Stir gently with a wooden spoon or spatula. Don’t overmix—clumps are OK.
- Gently fold in the blueberries. If you’re using frozen, just toss ‘em straight in—don’t even bother thawing. (I learned that the hard way.)
- Turn the dough out onto a floured countertop. Pat it into a blob about an inch thick. This is where I usually sneak a blueberry or two, no shame.
- Cut into rounds or just sort of shape rustic squares with a knife—nobody’s checking. Place them on a parchment-lined baking sheet. If your dough’s sticky, just flour your hands and pretend it’s intentional.
- Bake 13 to 16 minutes until golden on top. Don’t stress if some blueberry juice leaks out—the messy ones always taste best.
- Cool for a few minutes, then eat while warm. I mean, you can let them cool, but who does that?
Notes From My (Sometimes Messy) Experiments
- If your kitchen is super hot, stick your butter in the freezer for 10 minutes before starting. Actually, I find it works better if everything’s chilly.
- Don’t worry if the dough looks a bit weird and shaggy; it bakes up just fine—honestly, my best batch looked like a pancake disaster before going in.
- I once forgot the sugar entirely. Still edible, but maybe not my best work.
Different Twists I’ve Tried (And One That Flopped)
- Subbed in raspberries—delicious, a little more tart.
- Added white chocolate chips—kids loved it, but I thought it was a bit much.
- Tried spelt flour once. Wouldn’t recommend unless you like very dense biscuits (maybe you do!).
The Stuff You (Mostly) Need
- Mixing bowl (any size, as long as it fits your arm for stirring)
- Wooden spoon or spatula
- Baking sheet (covered in parchment makes cleanup so much easier, but foil’s worked for me in a pinch)
- Pastry cutter (but your hands are free and always the right size, right?)
- Measuring cups/spoons—though I’ve definitely eyeballed the sugar before and lived to tell the tale
Don’t let a lack of gadgets stop you—once used a wine bottle as a rolling pin (true story).
How To Store (If There Are Any Left)
Technically you can keep these in an airtight container on the counter for two days, or in the fridge for up to four. But honestly, in my house, they never last more than a day—someone always sneaks the last one in the night. If you do find yourself with extras, pop them in the toaster oven to crisp up, or, if you’re feeling wild, microwave for 10 seconds and slather with butter.
Serving Them Up (My Favorite Ways)
I love them split open with a little salted butter and a dab of honey. My brother piles on whipped cream, which I think is a crime but hey, to each their own. If you’re going the brunch route, they pair weirdly well with crispy bacon (salty meets sweet—yum). And if you want to get fancy, check out this homemade blueberry jam recipe from Serious Eats—not sponsored, just genuinely love their stuff.
Lessons I’ve Learned (Usually The Hard Way)
- I once tried rushing the butter step and ended up with flat, limp biscuits—don’t do it, cold butter is your friend.
- Don’t overwork the dough! It gets tough. I tend to think less is more here.
- Keep an eye on the oven; mine runs hot and has a mind of its own, so I check at 12 minutes just in case.
You Asked, I Answered (Honestly)
- Can I use frozen blueberries? Oh yeah, I do it all the time. Just toss them in frozen—don’t thaw! Otherwise, you’ll have blue streaks everywhere.
- Can these be made vegan? Probably! Swap the butter for a good vegan stick (I’ve heard Earth Balance is solid) and use your favorite plant milk. Someone told me coconut oil worked, but I haven’t tried it yet.
- Why are my biscuits flat? Happens to the best of us—usually it’s warm butter or overmixing. Or, on second thought, maybe your baking powder is old?
- Do I need to add lemon zest? Nah—nice if you have it, not essential. I forget half the time and nobody complains.
- What’s the difference between these and scones? Honestly? Not much. Scones are a little richer, but I like these better for breakfast. They’re less fussy.
- Where do you get your blueberries? When they’re in season, I go to the local farmer’s market—best flavor by a mile. Otherwise, frozen from the grocery, just basic store brand (here’s some tips on picking good ones from Bon Appetit if you’re curious).
By the way, if you’re into more biscuit adventures, there’s a great (and pretty funny) biscuit troubleshooting guide from King Arthur Baking—worth a peek if you want to get nerdy about crumb texture.
Anyway, hope these blueberry biscuits bring your kitchen a little more joy, a little more mess, and a whole lot of flavor. Enjoy!
Ingredients
- 2 cups all-purpose flour
- 1/4 cup granulated sugar
- 1 tablespoon baking powder
- 1/2 teaspoon salt
- 1/2 cup unsalted butter, cold and cubed
- 3/4 cup whole milk
- 1 cup fresh blueberries
- 1 teaspoon vanilla extract
Instructions
-
1Preheat the oven to 425°F (220°C) and line a baking sheet with parchment paper.
-
2In a large bowl, whisk together the flour, sugar, baking powder, and salt.
-
3Cut in the cold butter using a pastry cutter or your fingers until the mixture resembles coarse crumbs.
-
4Stir in the milk and vanilla extract until just combined, then gently fold in the blueberries.
-
5Drop spoonfuls of dough onto the prepared baking sheet, spacing them about 2 inches apart.
-
6Bake for 16-18 minutes, or until the biscuits are golden brown. Allow to cool slightly before serving.
Approximate Information for One Serving
Nutrition Disclaimers
Number of total servings shown is approximate. Actual number of servings will depend on your preferred portion sizes.
Nutritional values shown are general guidelines and reflect information for 1 serving using the ingredients listed, not including any optional ingredients. Actual macros may vary slightly depending on specific brands and types of ingredients used.
To determine the weight of one serving, prepare the recipe as instructed. Weigh the finished recipe, then divide the weight of the finished recipe (not including the weight of the container the food is in) by the desired number of servings. Result will be the weight of one serving.
Did you make this recipe?
Please consider Pinning it!!