Okay, Seriously, This Cheesecake…
Alright, pull up a chair! So, you know how sometimes you just need a dessert that feels like a big, warm hug? Like, it’s comforting but also feels a bit fancy, without actually being difficult? Yeah, that’s this blueberry crumble cheesecake for me. It’s the one I always go back to. I remember the first time I tried making it, I was a bit nervous about cheesecakes – they have a reputation, right? But this one? It’s honestly dead easy, and the smell of those blueberries bubbling with that buttery crumble topping… well, let’s just say it’s pure heaven. My neighbour, Brenda, actually corners me at the mailbox asking if I’ve made ‘that blueberry thing’ recently. It’s *that* good.
Why This Will Be Your New Go-To
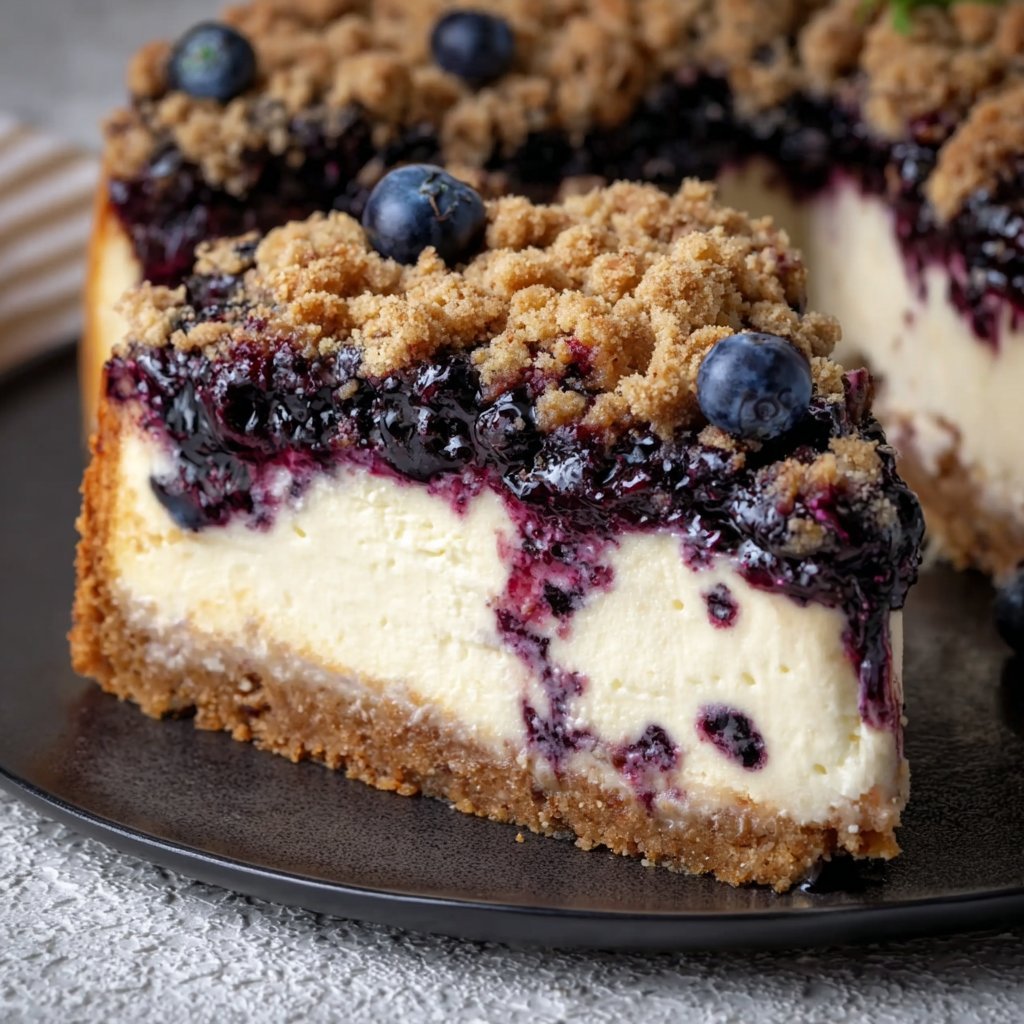
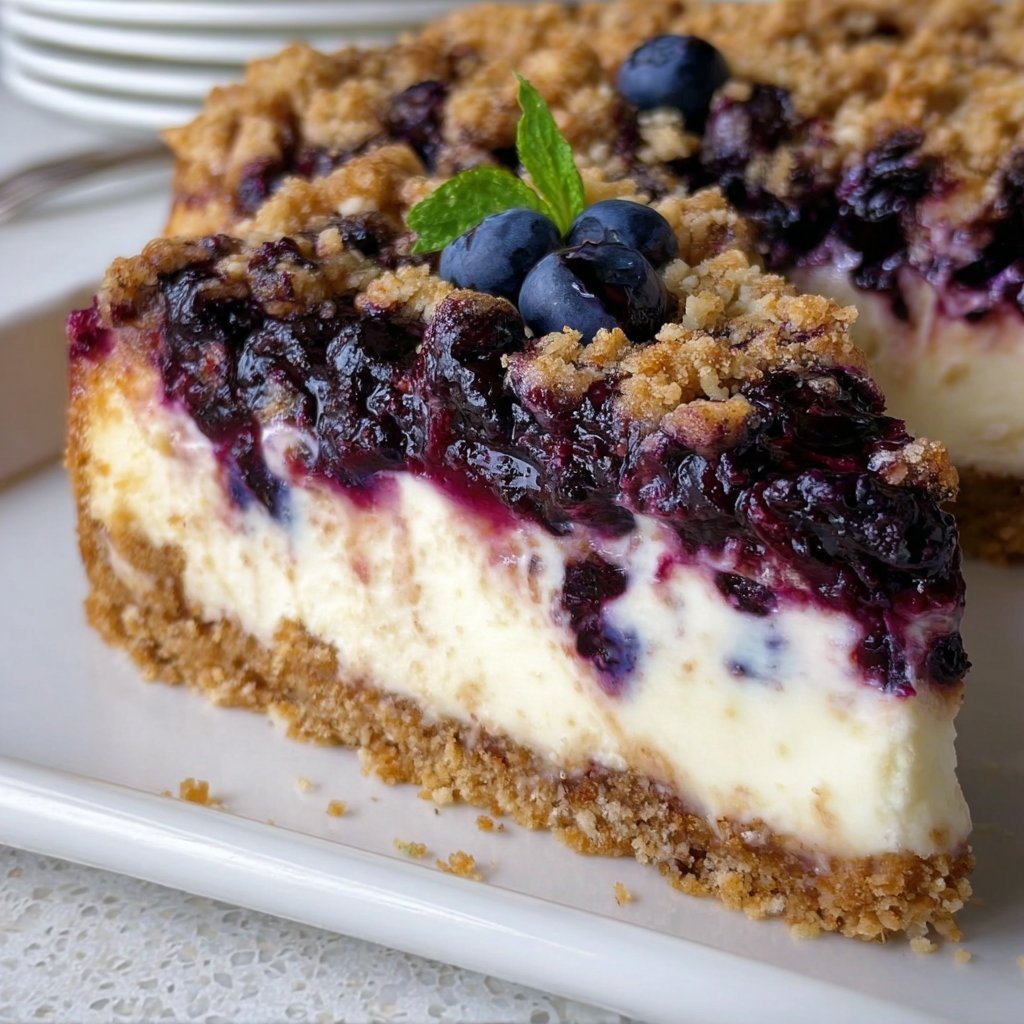
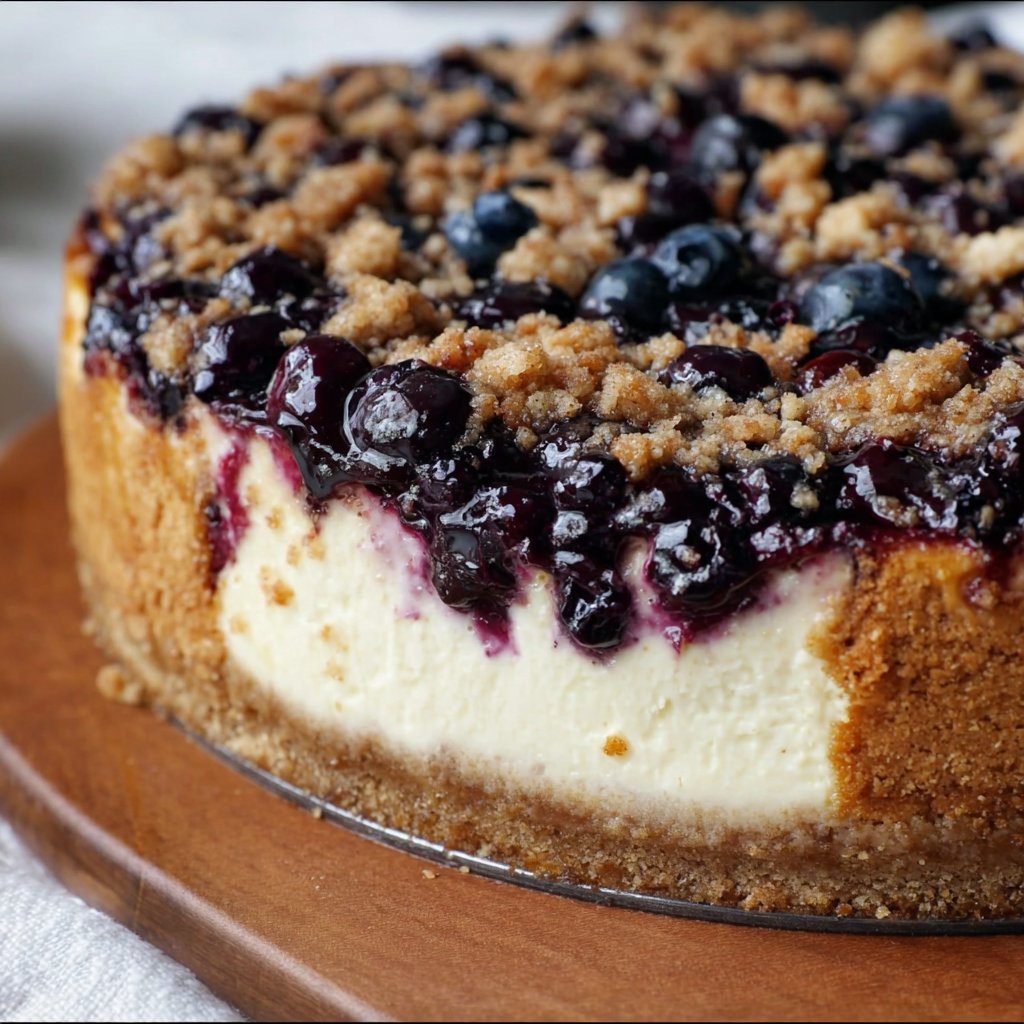
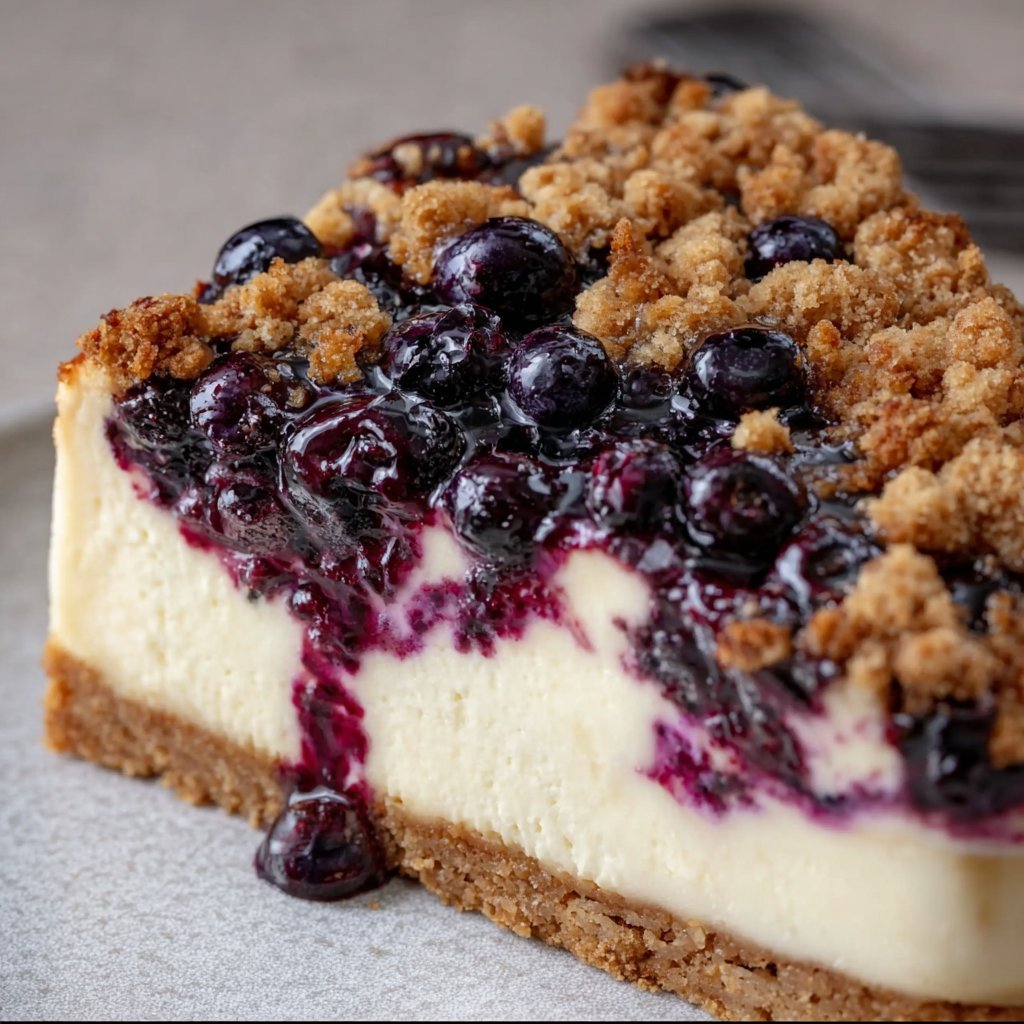
Okay, so why *this* one? First off, it doesn’t require a water bath. HALLELUJAH. Cheesecakes cracking is my personal baking nemesis, and this recipe just sidesteps that drama completely, thanks to the glorious crumble topping covering everything up anyway! It’s got that creamy, tangy cheesecake base that makes your eyes roll back a little, but then you get that sweet pop from the blueberries and the crunchy, buttery goodness form the crumble. It’s just… a symphony of textures and flavors. I make this when I need a guaranteed win, maybe when company’s coming or, let’s be real, when I just need a really good treat day all to myself. My kids go absolutely bonkers for the crumble part, so it’s a great way to get them excited about dessert (as if they needed help with that!). It’s also stunning to look at, which always makes you feel like a proper baker, even if you totally messed up dinner. (Ask me how I know!) Plus, blueberries are, like, healthy, right? So it’s practically a health food. 😉
Stuff You Need (Ingredients!)
Okay, let’s get down to brass tacks. Here’s what you’ll want to round up. Don’t stress too much, baking is supposed to be fun!
For the Crust:
- About 1 ⅓ cups graham cracker crumbs (that’s roughly one standard box of graham crackers, crushed. You can totally use digestive biscuits if you’re across the pond, or even vanilla wafers in a pinch! My mom always used Nilla wafers, actually.)
- ½ cup unsalted butter, melted (yeah, unsalted is best here so you can control the saltiness, but salted works too, just maybe use a tiny bit less salt elsewhere)
- 2 tablespoons granulated sugar (or a bit more if you like a sweeter crust)
- A pinch of salt
For the Cheesecake Filling:
- 3 packages (8 oz each) cream cheese, softened (make sure it’s proper brick cream cheese, not the spreadable stuff! And for the love of all that is holy, let it soften on the counter for a couple of hours. It makes ALL the difference.)
- ¾ cup granulated sugar
- 2 large eggs (room temperature is better, it helps everything mix smoothly)
- 1 teaspoon vanilla extract (use the good stuff if you have it!)
- ¼ cup sour cream or plain Greek yogurt (sour cream is traditional and adds that classic tang, but yogurt is a decent swap if that’s all you’ve got)
- 2 tablespoons all-purpose flour (this helps prevent cracks, sneaky little trick!)
For the Blueberry Layer:
- 2 cups fresh or frozen blueberries (no need to thaw form frozen! I often use frozen because who has fresh blueberries year-round, right? But fresh are amazing when they’re in season.)
- ¼ cup granulated sugar (adjust this based on how sweet your berries are)
- 1 tablespoon lemon juice (freshly squeezed is best, adds a lovely brightness)
- 1 tablespoon cornstarch
For the Crumble Topping:
- ½ cup all-purpose flour
- ½ cup granulated sugar
- ½ cup unsalted butter, cold and cut into small cubes (cold is key here for that lovely crumbly texture)
- ½ teaspoon cinnamon (optional, but highly recommended!)
Let’s Make It Happen! (Directions)
Okay, deep breaths, we got this! Preheat your oven to 350°F (175°C). Grab a 9-inch springform pan. This is non-negotiable, trust me, getting a cheesecake out of a regular pan is a nightmare.
- **Crust Time:** In a medium bowl, stir together the graham cracker crumbs, melted butter, sugar, and salt until it looks like wet sand. Press this mixture firmly into the bottom of your springform pan. Use the bottom of a glass or a measuring cup to really pack it down. Bake for about 8-10 minutes until it’s lightly golden and smells yummy. Let it cool a bit while you make the filling.
- **Blueberry Bliss:** While the crust is baking (or cooling), toss the blueberries, sugar, lemon juice, and cornstarch together in a medium saucepan. Cook over medium heat, stirring occasionally, until the mixture thickens and the berries start to burst, about 5-7 minutes. It should look jammy but still have some whole berries. Set aside to cool slightly.
- **Cheesecake City:** Now for the star! Make sure your cream cheese is nice and soft. In a large bowl (or the bowl of a stand mixer), beat the softened cream cheese and the ¾ cup sugar together until it’s super smooth and creamy, no lumps allowed! Scrape down the sides of the bowl often.
- Add the eggs, one at a time, mixing on low speed just until combined after each. Don’t overmix after adding the eggs, that’s important!
- Stir in the vanilla extract, sour cream (or yogurt), and the 2 tablespoons of flour. Mix on low speed until just combined. Don’t beat it vigorously, we don’t want to incorporate too much air.
- **Assembly Line:** Pour about half of the cheesecake batter over the cooled crust in the springform pan. Spoon half of the blueberry mixture over the batter. Gently swirl it in with a knife or toothpick, but don’t mix it completely, you want those lovely swirls!
- Pour the remaining cheesecake batter over the blueberry layer. Spoon the remaining blueberry mixture on top. Swirl again. This is where I usually sneak a tiny spoonful of the remaining blueberry stuff form the pan… it’s mandatory for quality control, obviously.
- **Crumble Crunch:** In a clean bowl, combine the flour, ½ cup sugar, and cinnamon (if using). Cut in the cold, cubed butter using your fingers or a pastry blender until the mixture resembles coarse crumbs. It should clump together a bit when you squeeze it.
- Sprinkle this glorious crumble topping evenly over the top of the cheesecake batter. Don’t worry if it looks a bit messy or uneven – that’s part of its charm!
- **Bake Time:** Carefully place the springform pan on a baking sheet (to catch any drips – it happens!) and bake in the preheated oven for about 60-75 minutes. How do you know it’s done? The edges should look set and perhaps lightly golden, but the center will still be a bit jiggly (like a firm jelly). It will set up as it cools.
- **Cool Down:** Turn off the oven, crack the door open slightly (you can stick a wooden spoon handle in the door), and let the cheesecake cool inside the oven for about an hour. This slow cooling helps prevent cracking.
- Remove from the oven and let it cool completely on a wire rack. Once it’s room temperature, cover loosely with plastic wrap and refrigerate for at least 4-6 hours, but overnight is *always* better. It needs that time to chill and firm up properly. Seriously, resist cutting into it too soon!
And that’s it! You’ve made a masterpiece. Pat yourself on the back.
Things I’ve Learned (Trial and Error!)
Okay, so I’ve made this a few times, and picked up a couple of things along the way. Firstly, *really* make sure your cream cheese is soft. Like, scary soft. It makes mixing so much easier and prevents lumps. Secondly, don’t overmix the batter once the eggs are in. It can make the cheesecake puff up too much and then sink, sometimes leading to cracks. Just mix until combined. And finally, chilling time is crucial. Trying to slice it too soon is like trying to cut butter with a string – messy!
What Else Can You Do? (Variations)
Oh, I’ve played around a bit! You could swap the blueberries for raspberries or mixed berries, or even sliced peaches (though peaches can release a lot of liquid, so maybe cook them down a bit more). A friend once suggested adding a little almond extract to the filling instead of vanilla, which was actually quite nice! I tried making it with gluten free graham crackers once, and that worked out fine, but I completely failed when I tried using frozen mixed tropical fruit for the topping… let’s just say it was a watery disaster. Stick to berries or cooked fruit that holds its shape better!
Stuff You’ll Need (Equipment Check)
You’ll definitely need a 9-inch springform pan. As I said, essential! A couple of mixing bowls, a saucepan for the berries, a hand mixer or stand mixer is super helpful for the filling (doing it by hand is possible but, um, tiring!), and a baking sheet to go under the springform. If you don’t have a stand mixer, a decent hand mixer will get the job done just fine.
Keeping It Fresh (Storage)
Store any leftovers (lol, *if* there are any) in the refrigerator, covered. It’s best eaten within 3-4 days, though honestly, in my house its never lasts more than a day or two if people know it’s in there! You can freeze slices too, wrapped really well, for a couple of months. Thaw them overnight in the fridge.
How I Like to Serve It
This is perfect just as it is, served cold straight from the fridge. Sometimes, if I’m feeling extra, I’ll add a little dollop of whipped cream on top of each slice. My family always insists on a scoop of vanilla ice cream alongside it though, which I have to admit, is a pretty darn good combo. Or, if you have any leftover blueberry sauce form step 2, a little extra drizzle is never a bad idea.
Lessons From My Screw-Ups (Pro Tips)
Okay, learn from my mistakes! I once tried rushing the chilling step, and ended up with a crumbly, sad mess when I cut into it. Patience is key here! Also, don’t forget to scrape down the sides of your mixing bowl when making the filling – you don’t want hidden lumps of cream cheese. And seriously, don’t open the oven door halfway through baking unless you absolutely have to peek; sudden temperature changes are a cheesecake’s worst enemy!
Burning Questions Answered (FAQ)
People ask me things about this recipe sometimes, here are a few:
Can I use frozen blueberries? Yes! Absolutely. No need to thaw them before adding them to the saucepan either. They might take a minute or two longer to cook down.
Do I *really* need a springform pan? Honestly? Yeah. Trying to get a cheesecake out of a regular cake pan without it collapsing is a skill I haven’t mastered, and I wouldn’t risk it with this beauty. They’re not too expensive, worth the investment if you plan on making cheesecakes.
My cheesecake cracked! What did I do wrong? Oh, it happens! It can be from overmixing, baking at too high a temperature, or cooling too quickly. But guess what? With *this* recipe, the crumble topping covers up any cracks! See? Told you it was forgiving. For future cheesecake endeavors, try a water bath, don’t overmix, and cool slowly in the oven with the door propped open.
Can I make this ahead of time? YES. Please do! It’s actually better the next day after it’s had plenty of time to chill and for the flavors to meld. It keeps well for a few days in the fridge too.
Where do you get your vanilla extract? Oh, I’m pretty loyal to King Arthur Baking for my extracts and flours. They have amazing quality stuff, worth checking out their site. Sometimes I’ll pick up local vanilla form a spice shop if I find a good one!
Okay, I think that covers most of it! Give this Blueberry Crumble Cheesecake a go, you won’t regret it. Happy baking!


