Okay, so confession time. I am *not* one of those people who plans out fancy breakfasts the night before. Nope. My morning routine usually involves panic searching for socks and maybe, just maybe, grabbing a banana on the way out the door. But this… this chocolate-chia pudding thing? It’s my secret weapon. I stumbled on it years ago when I was trying to eat, y’know, a *little* healthier, and honestly, it tasted too good to be good for you. My kids thought I was giving them chocolate mousse form the fridge! Bless their little cotton socks.
Why I’m Obsessed With This Stuff
Right, so why is this my jam? Because it’s stupid easy, that’s why. I make this when I need something sweet but don’t want the sugar crash, or when I’m out of yogurt and need a quick breakfast alternative. My husband, who usually eye-rolls anything with ‘chia’ in the name, actually asks for it now! It’s also fantastic for meal prep because you just make a big batch and scoop it out all week. And listen, I am the queen of forgetting ingredients, so the fact that this only needs like, four main things? Game changer.
What You’ll Need (Don’t Sweat It Too Much)
Here’s the basic lineup. Don’t feel like you have to be exact, cooking should be fun, not stressful, right?
- Chia Seeds: About 1/2 cup. Any kind works. I usually buy the big bag at the bulk store, seems cheaper.
- Milk: 2 cups. I use almond milk ’cause that’s what’s usually in my fridge, but honestly, cow’s milk, oat milk, coconut milk (the kind in the carton, not the can!) – whatever you got. My neighbour swears by cashew milk for creaminess, gotta try that sometime.
- Cocoa Powder: 1/4 cup. Use unsweetened, the good stuff if you have it! I love the King Arthur Baking cocoa, it just tastes more chocolatey? But seriously, any cocoa you have is fine.
- Sweetener: 1/4 cup, give or take. Maple syrup is my go-to, but honey, agave, or even just regular sugar works. Adjust to your taste! I sometimes use a sugar substitute if I’m being super mindful.
- Vanilla Extract: A teaspoon. Don’t skip this! It really makes the chocolate pop.
- Salt: A tiny pinch. Like, just a flake or two. Seriously, salt makes chocolate taste better.

Let’s Make Some Pudding! (It’s Too Easy)
Alright, here’s the non-recipe recipe:
- Grab a bowl. Not too small, you gotta whisk.
- Pour in the milk.
- Add the cocoa powder, sweetener, vanilla, and salt.
- Whisk it all up! Get rid of those cocoa lumps. This is where I usually sneak a taste of the chocolate milk base. Don’t judge.
- Now, dump in the chia seeds.
- Whisk again! Make sure those seeds aren’t clumped at the bottom.
- Okay, here’s the crucial part: Let it sit for 5 minutes.
- Whisk *again*! This is super important, trust me. If you don’t do this second whisk, you’ll end up with a weird solid layer of chia at the bottom and watery chocolate on top. Been there, done that, it’s not pretty.
- Now, pour it into jars or little bowls or whatever you want to serve it in. Or just cover the big bowl. Your call.
- Stick it in the fridge for at least 2 hours. Overnight is even better, I think it gets thicker and the flavours meld more.
Stuff I’ve Learned (So You Don’t Have To)
- Seed Quality Matters: Old chia seeds just don’t thicken as well. If your pudding is watery, your seeds might be past their prime.
- Whisk Twice!: Seriously, cannot stress this enough. That second whisk is your friend.
- Sweeten to Taste: The 1/4 cup is just a guideline. If you like it less sweet or more sweet, just adjust it. You can always add more sweetener *after* it’s chilled too.
- Don’t Panic About Texture: If it’s too thick, stir in a little more milk. If it’s too thin, well, you probably need more chia or your seeds are old.

Mix It Up! (Some Worked, Some… Didn’t)
I’ve played around a bit. Here are a few things I’ve tried:
- Peanut Butter Chocolate: Stir in a couple tablespoons of peanut butter (or almond butter!). Delicious! It makes it extra thick and rich.
- Spicy Chocolate: A tiny pinch of cayenne pepper. Gives it a fun little kick! Don’t go overboard unless you’re brave.
- Mint Chocolate: A drop or two of pure peppermint extract. Yummy, like a mint chocolate chip ice cream.
- Overnight Oats Mashup: I once tried adding a spoonful of rolled oats to see if it would be like a chocolatey overnight oats. It got really gloopy and not in a good way. Stick to just chia for this one, kids.
Tools of the Trade (Keep it Simple)
Honestly, you don’t need much. A bowl, a whisk, and something to put the pudding in. That’s it. If you don’t have a whisk, a fork works perfectly fine, it just takes a little more elbow grease to get the cocoa mixed in smoothly. A measuring cup and spoons are helpful too, naturally.

Keeping It Fresh (Good Luck!)
This pudding keeps in the fridge for about 4-5 days. Just keep it covered. Though honestly, in my house its never lasts more than a day or two! I usually make a double batch on Sunday so we have it ready for a few mornings.
Serving Suggestions (How I Like It)
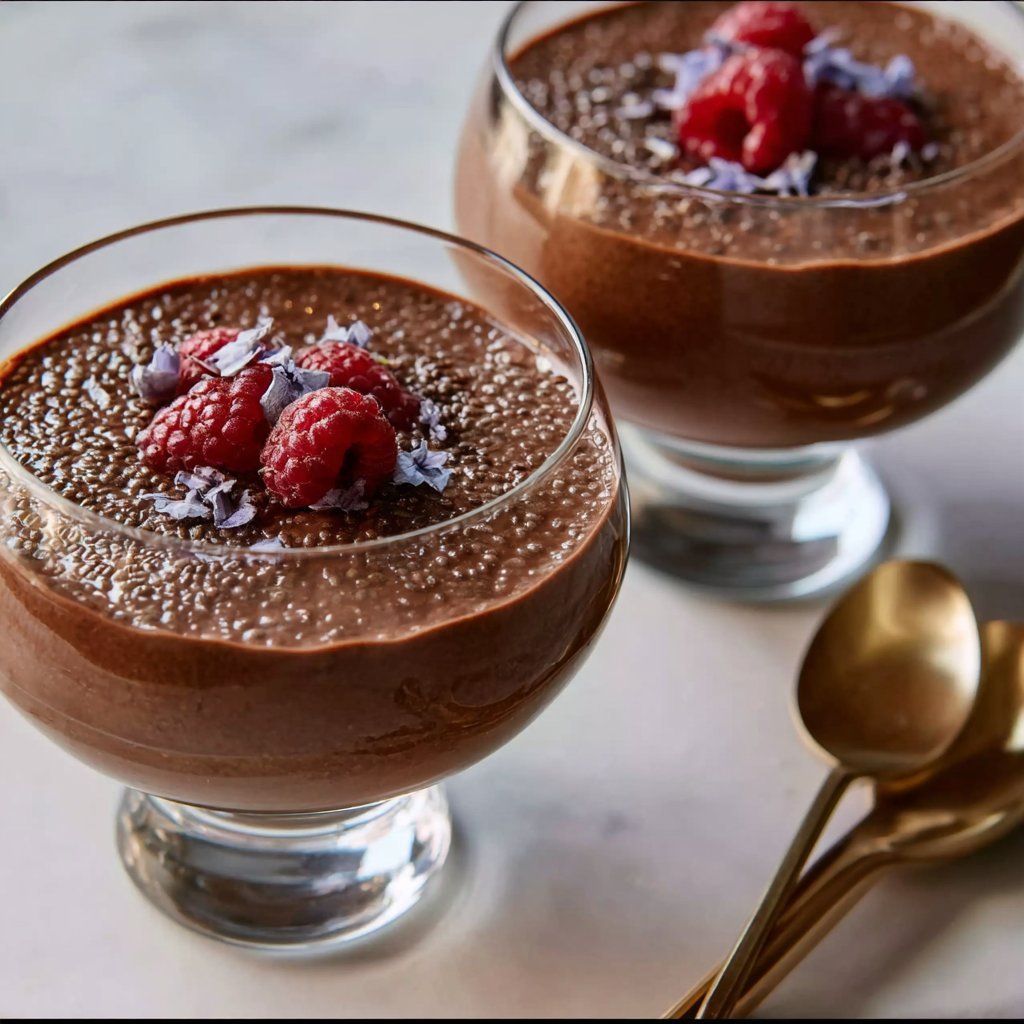
You can eat it plain, it’s great as is. But I love adding toppings! Fresh berries (strawberries, raspberries are my fave), a sprinkle of granola for crunch, maybe some shredded coconut, or even a few chocolate chips if I’m feeling decadent. A dollop of whipped cream? Why not!
Pro Tips (Lessons From My Screw-Ups)
- Don’t Add Chia First: If you dump the chia seeds in before mixing the cocoa and sweetener into the milk, they start absorbing liquid *immediately* and it’s much harder to get a smooth, lump-free base. I once tried rushing this step and regretted it because I had cocoa clumps floating in weird semi-gelled milk. Mix the liquids/powders first!
- Taste Test Before Chilling: Make sure the sweetness is right before you put it in the fridge. It’s harder to mix in sweetener evenly once it’s gelled up.
FAQs (Stuff People Ask Me)
Got questions? Fair enough!
Q: Can I use less sugar?
A: Absolutely! Start with less, taste it, and add more if you want. You can even omit the sweetener completely if you’re really avoiding sugar – the cocoa can be a bit bitter though.
Q: Why isn’t mine thickening?
A: Hmm, couple things. Did you use enough chia seeds? Was it 1/2 cup for 2 cups of liquid? Also, sometimes old chia seeds lose their gelling power. Or maybe it didn’t chill long enough? Give it more time! And don’t forget that second whisk!
Q: Can I heat this up?
A: I mean, you *could*, but it gets a weird, slightly slimy texture when heated because of the chia seeds. It’s definitely meant to be eaten cold. Stick to hot cocoa if that’s what you’re craving!
Q: Is this healthy?
A: Well, it’s got chia seeds which are full of fiber and omega-3s! And if you use a healthy milk and less sugar, yeah, I’d say it’s a pretty good-for-you treat compared to like, ice cream or brownies. It’s all about balance, right? (And maybe what toppings you pile on! 😉) Check out Healthline’s take on chia seeds if you’re curious about the nitty gritty.
Anyway, hope you try this out! It’s seriously become a staple in my kitchen.
Ingredients
- 1/4 cup chia seeds
- 1 cup plant-based milk (almond, soy, or oat)
- 2 tablespoons unsweetened cocoa powder
- 2 tablespoons maple syrup or other sweetener
- 1/2 teaspoon vanilla extract
- Pinch of salt
Instructions
-
1In a medium bowl or jar, combine the chia seeds, plant-based milk, cocoa powder, maple syrup, vanilla extract, and salt.
-
2Whisk or stir vigorously to ensure there are no clumps of chia seeds or cocoa powder.
-
3Let the mixture sit for 5-10 minutes, then stir again to break up any clumps that may have formed.
-
4Cover the bowl or jar and refrigerate for at least 4 hours, or preferably overnight, until the pudding has thickened.
-
5Stir the pudding before serving. If it’s too thick, add a splash more milk. If it’s too thin, add a tiny bit more chia seeds and let it sit for another 30 minutes.
-
6Serve chilled, optionally topped with fresh fruit, nuts, or chocolate shavings.
Approximate Information for One Serving
Nutrition Disclaimers
Number of total servings shown is approximate. Actual number of servings will depend on your preferred portion sizes.
Nutritional values shown are general guidelines and reflect information for 1 serving using the ingredients listed, not including any optional ingredients. Actual macros may vary slightly depending on specific brands and types of ingredients used.
To determine the weight of one serving, prepare the recipe as instructed. Weigh the finished recipe, then divide the weight of the finished recipe (not including the weight of the container the food is in) by the desired number of servings. Result will be the weight of one serving.
Did you make this recipe?
Please consider Pinning it!!


