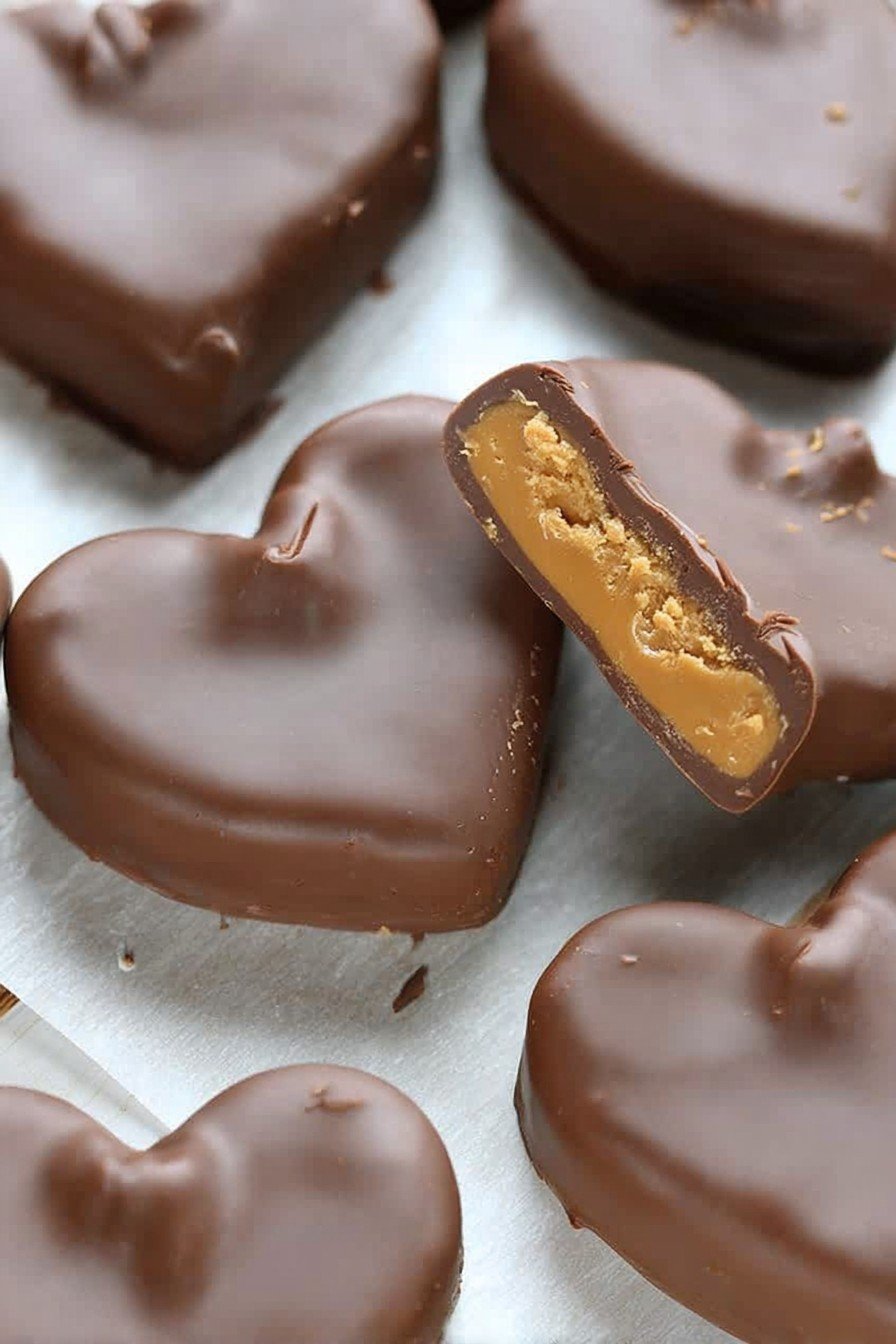
Let Me Tell You About Chocolate Peanut Butter Valentine’s Heart
Oh gosh, if you’d told me ten years ago I’d be making fancy-looking chocolate hearts for Valentine’s Day (instead of frantically grabbing a last-minute box at the petrol station—yes, really), I probably would’ve laughed. But here we are! This recipe’s kinda been my little secret for when I want to look impressive with totally minimal effort. The first time I brought one to my friend’s Galentine’s get-together, I honestly thought it would flop—I’d only seen things like this on Instagram and assumed they’d be a faff. But, nope, it actually worked! Now my niece demands it every year, and—true story—my brother tried to hide a piece in the vegetable drawer. Not subtle, Dave.

Why I Keep Making This Year After Year
I make this Chocolate Peanut Butter Valentine’s Heart because it’s the one dessert my whole family agrees on—rare, I know. My husband (the alleged peanut butter hater) gobbles it up. It’s not fussy, which is great for me because I’m usually juggling too many things. And, it’s almost impossible to mess up. Honestly, the biggest mishap I’ve had was forgetting to butter the mould once. Just trust me on that one.
It’s sort of an edible love letter—even if I get a little sloppy when smearing the chocolate, everyone still cheers. (Maybe it’s the sugar rush talking.) I think the combination of salty peanut butter and creamy chocolate is the reason, but, you know, who’s to say? Oh, and sometimes, I’ll add some sprinkles—my daughter calls it her “chocolate artwork.”
The Stuff You Need (and the Swaps I Rely On)
- 250g chocolate (I use semisweet most days, but once used all milk chocolate when that’s all I had—still tasty. My gran claims dark is best. I’m not gonna fight her on it.)
- 3/4 cup smooth peanut butter (crunchy works if you want texture; I’ve even used almond butter once during a peanut crisis, and it was fine!)
- 2 tablespoons unsalted butter (or margarine in a pinch; I honestly can’t tell the difference in this recipe)
- 1/2 cup powdered sugar (or, if you’re me and run out, regular sugar—just don’t tell the sugar police)
- Pinch of sea salt (totally optional, but I think it brightens things up a bit)
- Optional: Sprinkles, flaked salt, mini chocolate chips—whatever little bits you find at the back of the cupboard
How I Throw It All Together
- Prep your heart shape. You can use a silicone heart mould or just line a baking tray (or any random dish, honestly) with parchment and sketch out a heart shape with a pencil underneath. I sometimes just eyeball it. Don’t overthink it!
- Melt the chocolate. Ok, so you can do the whole double boiler thing, but most days, I just use the microwave in 30-second blasts, stirring in between. Burnt chocolate is the worst. Trust me—I’ve forgotten it in there more than once.
- Pour half the chocolate into the mould. Give the pan a little wiggle so it spreads out into the corners (this is usually when I sneak a taste off the spatula; whoops).
- Mix up the peanut butter filling. In a separate bowl, stir together the peanut butter, butter, powdered sugar, and salt. It’ll look kind of thick and weird at first—that’s totally fine. As long as it’s mixable, you’re good.
- Add the peanut butter layer. I dollop it gently onto the set chocolate and use the back of a spoon to nudge it out toward the edges. If you want a thinner filling, just use a bit less. On second thought, I’d probably regret that—it’s the best part.
- Pour the rest of your chocolate over the top. Try to get it as even as possible, but if it seeps down the sides, whatever. Just means more chocolate at the edges. Sometimes I have to melt a bit more chocolate if I get carried away tasting…
- Decorate. Quick! Before it sets—chuck on some sprinkles, more salt, chocolate chips, or whatever else is lying around. One time my son added rainbow nonpareils. It was a look.
- Chill out. Stick it in the fridge for at least an hour or until firm. My family starts asking if it’s ready after twelve minutes. Patience is not our strong suit.
- Pop it out and slice. If you used parchment, you can just lift it; if you used a silicone mould, it should come out pretty easily. If there’s a little drama getting it out, I just trim off the broken bits (taste test time again, clearly).
Little Notes From Messing Around With This
- If you forget to let the bottom layer set just a little before adding the peanut butter, it’ll sometimes swirl together—looks kinda cool though!
- I’ve tried both freezing and refrigerating; honestly, fridge is better or else it goes kinda rock hard.
- If your chocolate seizes, add a splash of coconut oil (or any neutral oil—honestly, it’s all the same for this) to loosen it up. I learned the hard way after melting chocolate in a Pyrex dish that wasn’t quite dry—oops.
Variations (and My Epic Failures)
- Once I subbed the peanut butter for cookie butter—tastes brilliant, but it was way sweeter so maybe dial back the sugar.
- Tried swirling in raspberry jam one year. Actually, it was kind of messy, but my friend Kim said it was her favourite.
- Tried white chocolate once—looked lovely, but the flavour isn’t for me (maybe better for white choc mega fans anyway?)
- Added a dash of cayenne once. That… didn’t go over well. Won’t do that again.

About Tools—But Don’t Sweat It
- Silicone heart moulds are fun if you have ‘em, but parchment in a dish totally works. I even used a round cake pan in an emergency—just cut it into wedges instead of heart shapes!
- You’ll need a couple of bowls (I only own two good ones, honestly, and I just wash as I go if I need extras)
- Spatula and a spoon are my trusty sidekicks
How I Actually Store It (Spoiler: It Never Lasts Long)
Store your heart in an airtight container in the fridge, where it’ll technically last a week. Though honestly, in my house, it never lasts more than a day—my family turns into dessert ninjas at night. If you want it a bit softer, leave it out at room temp for ten minutes before digging in. Keeps the chocolate from shattering all over the counter, which I learned last Valentine’s.

How We Like to Serve It
I love to slice it into neat (or, okay, kind of ragged) wedges and pile them up on a platter. Sometimes I add a dollop of whipped cream and a few berries—if I’m feeling fancy. My daughter likes hers with a little mug of hot cocoa. It’s the after-dinner treat on game night for us, but who’s policing when you eat chocolate?
Lessons Learned The Hard Way (Pro Tips, I Guess)
- I once tried to rush the chilling step and popped it in the freezer for “just a few minutes”… ended up needing a hammer to crack it out (don’t be me. Just chill, literally.)
- If you go overboard with the powdered sugar, the filling gets super stiff and a bit chalky.
- And honestly, if your chocolate isn’t melted smooth, just plough ahead—chunks taste just as good (maybe better?).
Questions I’ve Actually Gotten (No Robots Here)
- Can I make this nut-free? Yup! I’ve tried sunflower seed butter for a school treat—it’s a bit earthier but works.
- Can I use a cookie cutter instead of a heart mould? Sure, if it’s big and deep enough—just line the base really well or the chocolate will escape everywhere (learned that one the hard way).
- How far ahead can I make it? Probably two or three days; in my experience, it somehow tastes even better after a day in the fridge!
- What if I don’t have powdered sugar? I blitz normal sugar in a food processor, or sometimes just wing it and use a bit less.
Funny thing, last time I made this my cat tried to steal a bit when I was looking for sprinkles. He’s not usually into sweet stuff… guess it’s that good!
Ingredients
- 1 1/2 cups semisweet chocolate chips
- 1/2 cup creamy peanut butter
- 2 tablespoons unsalted butter, softened
- 1/2 cup powdered sugar
- 1 teaspoon vanilla extract
- Pinch of salt
- Sprinkles or pink/red sugar pearls for decoration (optional)
Instructions
-
1Line a baking sheet with parchment paper and set out a heart-shaped silicone mold or cookie cutter.
-
2Melt the chocolate chips in a microwave-safe bowl in 30-second intervals, stirring until fully smooth.
-
3Spoon half of the melted chocolate into the heart-shaped mold, making sure to coat the sides evenly. Place in the fridge for 5 minutes to set.
-
4In a medium bowl, mix together peanut butter, softened butter, powdered sugar, vanilla extract, and salt until fully blended and smooth.
-
5Fill the chocolate-coated hearts with the peanut butter mixture, leaving a little space at the top.
-
6Cover the filling with the remaining melted chocolate. Refrigerate for at least 15 minutes, or until completely set. Decorate with sprinkles if desired before serving.
Approximate Information for One Serving
Nutrition Disclaimers
Number of total servings shown is approximate. Actual number of servings will depend on your preferred portion sizes.
Nutritional values shown are general guidelines and reflect information for 1 serving using the ingredients listed, not including any optional ingredients. Actual macros may vary slightly depending on specific brands and types of ingredients used.
To determine the weight of one serving, prepare the recipe as instructed. Weigh the finished recipe, then divide the weight of the finished recipe (not including the weight of the container the food is in) by the desired number of servings. Result will be the weight of one serving.
Did you make this recipe?
Please consider Pinning it!!


