Okay, So Let’s Make Some Chicken Skewers!
Hey there! You know those nights when you *really* want something delicious but you’re kinda short on time, or maybe just plain lazy? Yeah, me too. Loads of times. These Grilled Ranch Garlic Parmesan Chicken Skewers? They were born form one of those nights! I swear, the first time I threw these together, it was because I found a random packet of ranch seasoning in the back of the pantry and had some chicken needing to be cooked. Didn’t expect much, honestly. But holy cow, my whole family devoured them. Like, *demolished* them. Now they’re on repeat rotation, especially when the weather’s nice enough to fire up the grill. It’s become one of my go-to easy dinners, and I bet it’ll be yours too.
Why I Always Come Back to This Recipe
Seriously, this is my weeknight hero right here. I make this when I’m feeling a bit uninspired or just need a win in the kitchen. My kids (and let’s be honest, the grown-ups too) go absolutely bonkers for these because they’re packed with flavor and they’re just *fun* to eat on a stick, right? (Who doesn’t love food on a stick??) They’re also deceptively simple – hardly any prep, quick cooking time, and minimal cleanup if you use disposable skewers and maybe even foil on your grill grate. Plus, grilling just makes everything taste better, doesn’t it? It adds that little bit of smoky char that’s impossible to replicate indoors. I mean, you *can* make these inside (more on that later!), but the grill is where it’s at for maximum yum factor. It’s perfect for a backyard BBQ, a simple family dinner, or even meal prep (though honestly, they usually disappear way too fast for that!).
What You’ll Need (Ingredients!)
This part is super easy. You probably have half of this stuff already.
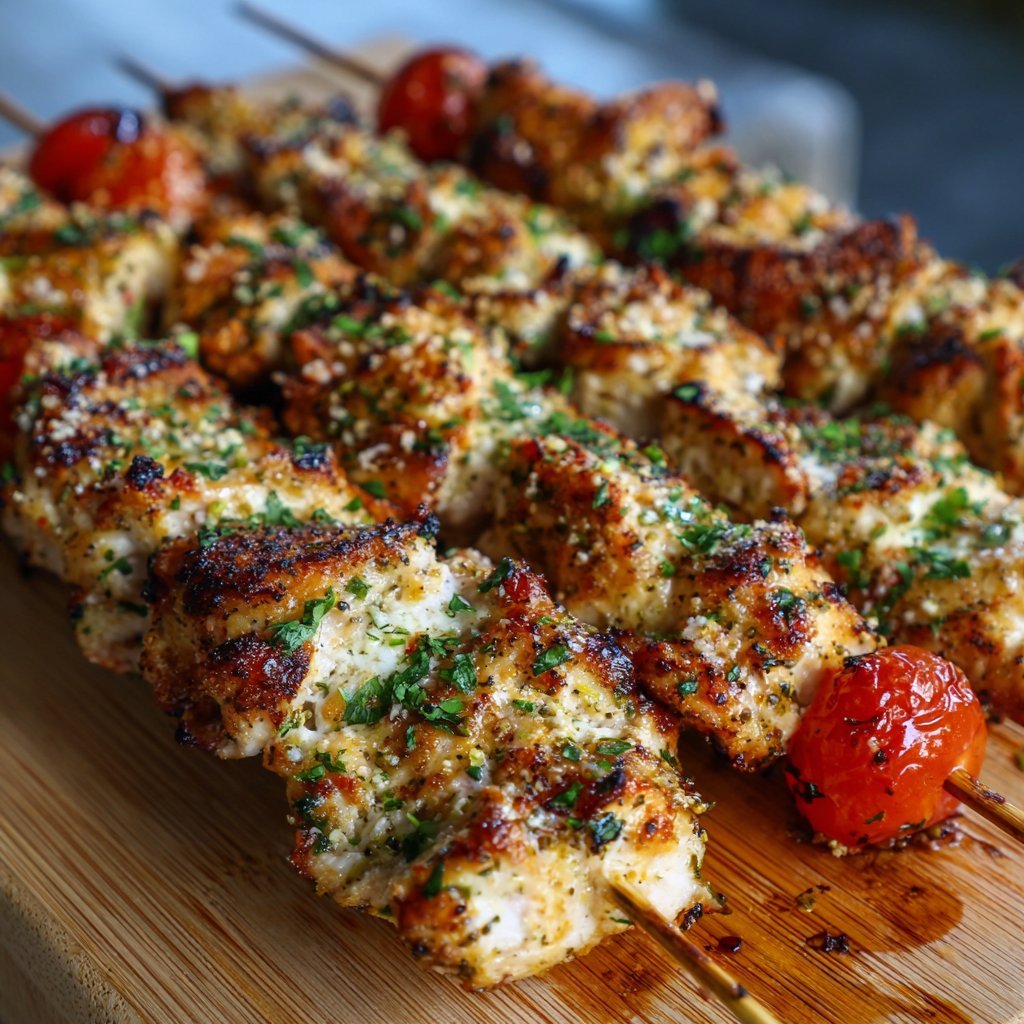
- **Boneless, Skinless Chicken:** About 1.5 to 2 pounds. I usually use thighs ’cause they stay juicier, but breasts work great too! Just try to cut ’em into roughly even-sized pieces, maybe an inch or so squares. Consistency helps with even cooking, y’know?
- **Dry Ranch Seasoning Packet:** You know, the stuff you use for dip? One standard packet is usually enough. I always keep these on hand.
- **Garlic:** Like, 4-5 cloves, minced. Or honestly, if I’m feeling really lazy, I’ll use a big spoonful (maybe a tablespoon?) of the pre-minced stuff form a jar. It’s not quite as pungent, but it totally works in a pinch.
- **Olive Oil:** About a quarter cup. Just need enough to coat everything and help the seasoning stick.
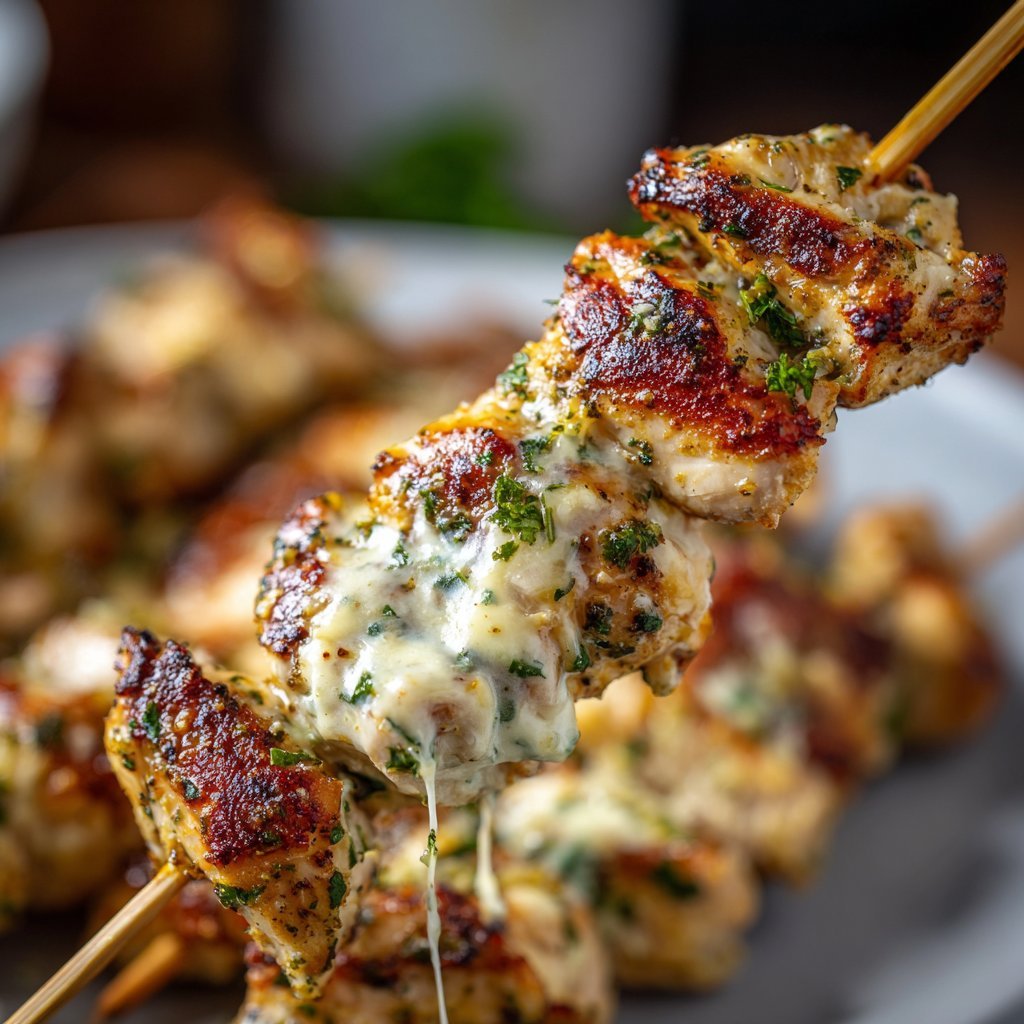
- **Parmesan Cheese:** This is key! About half a cup of *grated* Parmesan. Freshly grated is always best for flavor, but the stuff in the green can? Yeah, that’s perfectly fine here. No judgment!
- **Salt and Black Pepper:** Just a little bit, to taste. The ranch seasoning has salt, so don’t go crazy with it at first. You can always add more later.
- **Optional Stuff:** A pinch of red pepper flakes if you like a little heat. Maybe a little paprika for color and depth. Totally up to you.
Putting It All Together: The How-To
This is where the magic happens! And don’t worry, it’s really straightforward.
- **Prep the Chicken:** Get your chicken pieces cut up if you haven’t already. Try to make them similar in size, like I said before.
- **Make the Marinade:** In a medium-sized bowl, whisk together the olive oil, ranch seasoning packet, minced garlic, grated Parmesan cheese, and a little salt and pepper.
- **Marinate:** Toss the chicken pieces in the bowl with the marinade. Make sure every piece is nicely coated. Cover the bowl with plastic wrap and pop it in the fridge. Let it hang out for at least 30 minutes, but an hour or two is even better if you have the time. (You *can* go longer, up to 4-6 hours, but sometimes the texture can get a little… weird if the acid in the ranch sits too long, so I tend to stick to a couple hours max).
- **Get Skewering:** If you’re using wooden skewers, make sure you soaked them in water for at least 30 minutes beforehand! This stops ’em from burning up on the grill. Thread the marinated chicken pieces onto the skewers. Don’t pack them too tightly, leave a little space between the pieces so the heat can get all around. I usually get about 4-5 good-sized pieces on each skewer.
- **Preheat the Grill:** Fire up your grill to a medium-high heat. You want it hot enough to get a nice sear but not so hot that it burns the outside before the inside cooks. Aim for maybe 400-450°F (around 200-230°C). Clean those grates and maybe give ’em a little rub with some oil so nothing sticks.
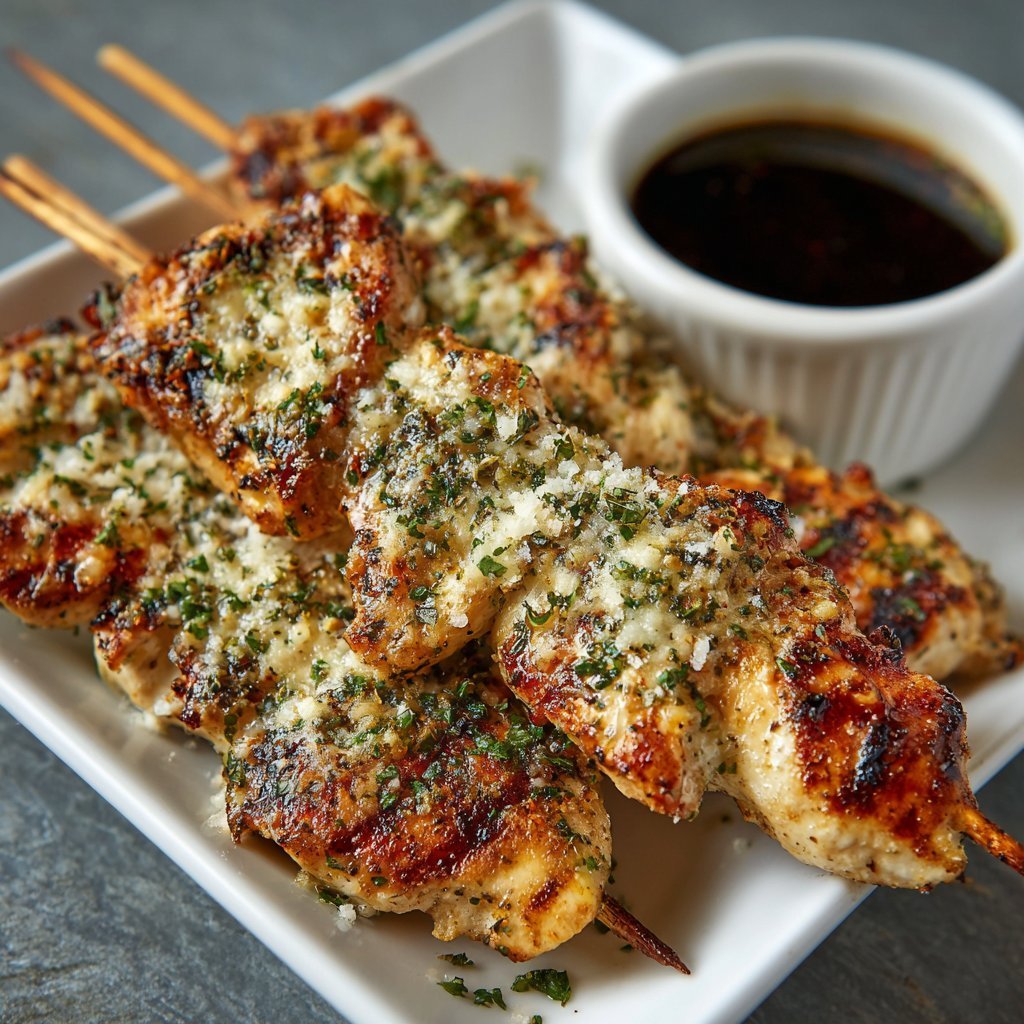
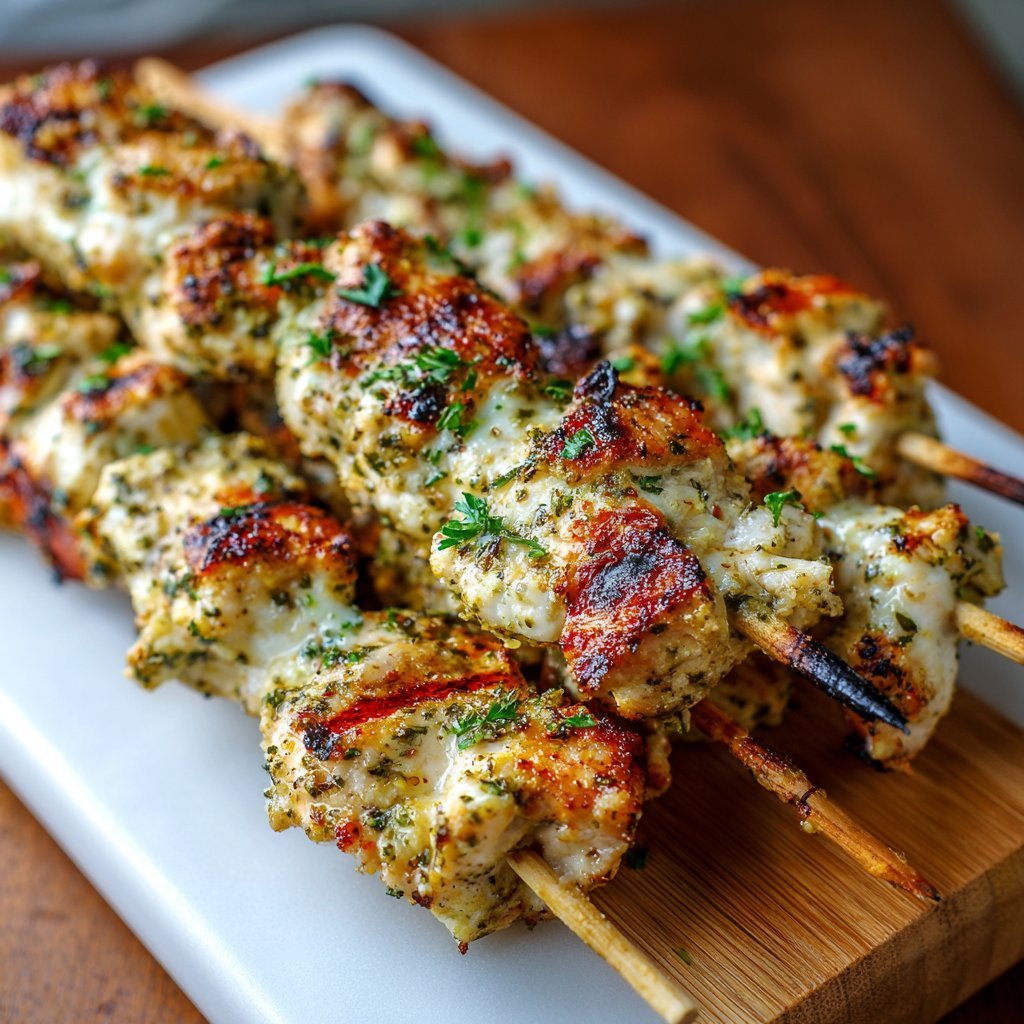
- **Grill ‘Em Up:** Carefully place the skewers on the hot grill grates. Close the lid and let ’em cook for about 4-6 minutes per side. The total cooking time will depend on your grill and how big your chicken pieces are, but figure maybe 10-15 minutes total. You’re looking for nice grill marks and cooked-through chicken (no pink inside!).
- **Rest:** Once they’re cooked, take the skewers off the grill and let them rest on a plate for 5 minutes before serving. This helps keep those juices inside!
See? Told you it was easy peasy.
A Few Things I’ve Figured Out (Notes!)
- Soaking wooden skewers is non-negotiable unless you like burnt stick bits in your food. Trust me on this.
- Don’t over-marinate. Learned that the hard way once, the chicken got a bit mushy. Gross.
- Grill temperature is key; too low and they steam, too high and they burn on the outside before they’re cooked inside. Medium-high is the sweet spot.
- Definitely don’t crowd the grill. Give ’em room to breathe and get those good grill marks. If you cram ’em all on, they just kinda steam instead of grill.
Mix It Up! (Variations)
I’ve played around with this recipe a bit over time. Sometimes I’ll thread some bell pepper chunks or red onion pieces in between the chicken. That adds extra flavor and color, definitely recommend that. Adding a little smoked paprika to the marinade gives it a nice smoky depth too. Oh, and I once tried adding a tiny drizzle of honey to the marinade before grilling… *don’t do that*. It caramelized way too fast and everything just turned into burnt, sticky chicken. Big fail! Stick to savory variations for this one, they work best.
Tools of the Trade (Equipment)
Basically just a few things:
- **Large Bowl:** For mixing and marinating.
- **Skewers:** Wooden or metal. If you don’t have a ton of metal ones, wooden are cheap and easy, just remember to soak ’em!
- **Grill:** Gas or charcoal, doesn’t matter.
- **Tongs:** Essential for flipping!
If you don’t have an outdoor grill or the weather is cruddy, you can totally make these on a grill pan on your stovetop or even under the broiler in your oven. Adjust cooking times accordingly, of course. They won’t have that outdoor smoky flavor, but they’ll still be mighty tasty!
Keeping Leftovers (LOL)
Okay, so theoretically, you can store any leftovers in an airtight container in the fridge for 3-4 days. You can reheat them in the microwave or a skillet. But honestly, in my house it never lasts more than a day! They’re just too good to leave sitting around.
What to Serve With These Bad Boys
These skewers are super versatile. We usually serve them over a bed of rice (white, brown, whatever you like!) or with a big green salad. They’re also amazing alongside grilled corn on the cob or some roasted potatoes. Basically, anything you’d serve at a BBQ or cookout is a winner here. My personal favorite is definitely rice though, the chicken juices kinda mingle with the rice and it’s just… perfection.
Lessons Learned the Hard Way (Pro Tips!)
* **Soak those wooden skewers:** I know I said it before, but it’s worth repeating. I once tried rushing this step and regretted it because the ends of my skewers caught fire. Not ideal.* **Cut chicken pieces evenly:** I messed this up once and had a mix of perfectly cooked pieces and some that were still a bit raw in the middle while others were starting to dry out. Take the extra minute to get them roughly the same size.* **Don’t skip the rest:** Letting the chicken rest for a few minutes after grilling keeps it nice and juicy. If you cut into it right away, all those yummy juices run out. Sad face.* **Don’t overcook:** Chicken can dry out quickly, especially breast meat. Keep an eye on it and use a meat thermometer if you’re unsure (it should reach 165°F or 74°C).* **Use fresh ingredients where possible:** While jarred garlic and canned parm work, fresh really does elevate the flavor profile if you have the time and inclination.
Got Questions? I Got Answers! (FAQ)
* **Q: Can I bake these instead of grill?**
A: Yep, totally! Thread them on skewers, place ’em on a baking sheet lined with foil (for easy cleanup!), and bake at about 400°F (200°C) for maybe 20-25 minutes, flipping halfway through. They won’t have the char, but they’ll still be good.
* **Q: What if I don’t have ranch seasoning mix?**
A: Hmm, that’s kinda the star here. You *could* try approximating it with a mix of dried dill, chives, parsley, garlic powder, onion powder, salt, and pepper… but honestly, a packet is just so easy and gives that specific flavor profile. I’d just grab a packet form the store!
* **Q: Can I use frozen chicken?**
A: Sure, just make sure it’s completely thawed before you cut and marinate it. Trying to cut frozen chicken is just asking for trouble, and the marinade won’t soak in properly.
* **Q: My chicken keeps sticking to the grill! Help!**
A: Ah, bummer! Make sure your grill grates are clean *and* hot before you put the skewers on. You can also lightly oil the grates right before placing the chicken. Don’t try to flip them too early – if they’re sticking, they probably aren’t ready to be turned yet. Wait another minute or two and try again.
* **Q: How far in advance can I marinate the chicken?**
A: I usually do 30 minutes to 2 hours, max 4-6 hours is my absolute limit, like I mentioned earlier. Any longer and it can mess with the texture, ya know?
So there you have it! My ridiculously easy, totally delicious Grilled Ranch Garlic Parmesan Chicken Skewers recipe. Give it a whirl, I promise you won’t be disappointed. Let me know how it turns out! Happy grilling!
Ingredients
- 1.5 lbs boneless, skinless chicken breasts or thighs, cut into 1-inch cubes
- 2 tbsp olive oil
- 1 packet (1 oz) ranch seasoning mix
- 1 tbsp garlic powder
- 1/2 cup grated Parmesan cheese
- 1/4 tsp black pepper
- Wooden or metal skewers (soaked if wooden)
Instructions
-
1In a large bowl, combine the olive oil, ranch seasoning mix, garlic powder, grated Parmesan cheese, and black pepper. Mix well to create a paste.
-
2Add the cubed chicken pieces to the bowl and toss until evenly coated with the ranch-parmesan mixture.
-
3Thread the coated chicken pieces onto the skewers. Do not overcrowd the skewers, leaving a little space between pieces for even cooking.
-
4Preheat your grill to medium-high heat. Lightly oil the grill grates to prevent sticking.
-
5Place the chicken skewers on the preheated grill. Grill for 10-12 minutes, flipping occasionally, until the chicken is cooked through and has nice grill marks. The internal temperature should reach 165°F (74°C).
-
6Remove from the grill and let rest for a few minutes before serving.
Approximate Information for One Serving
Nutrition Disclaimers
Number of total servings shown is approximate. Actual number of servings will depend on your preferred portion sizes.
Nutritional values shown are general guidelines and reflect information for 1 serving using the ingredients listed, not including any optional ingredients. Actual macros may vary slightly depending on specific brands and types of ingredients used.
To determine the weight of one serving, prepare the recipe as instructed. Weigh the finished recipe, then divide the weight of the finished recipe (not including the weight of the container the food is in) by the desired number of servings. Result will be the weight of one serving.
Did you make this recipe?
Please consider Pinning it!!