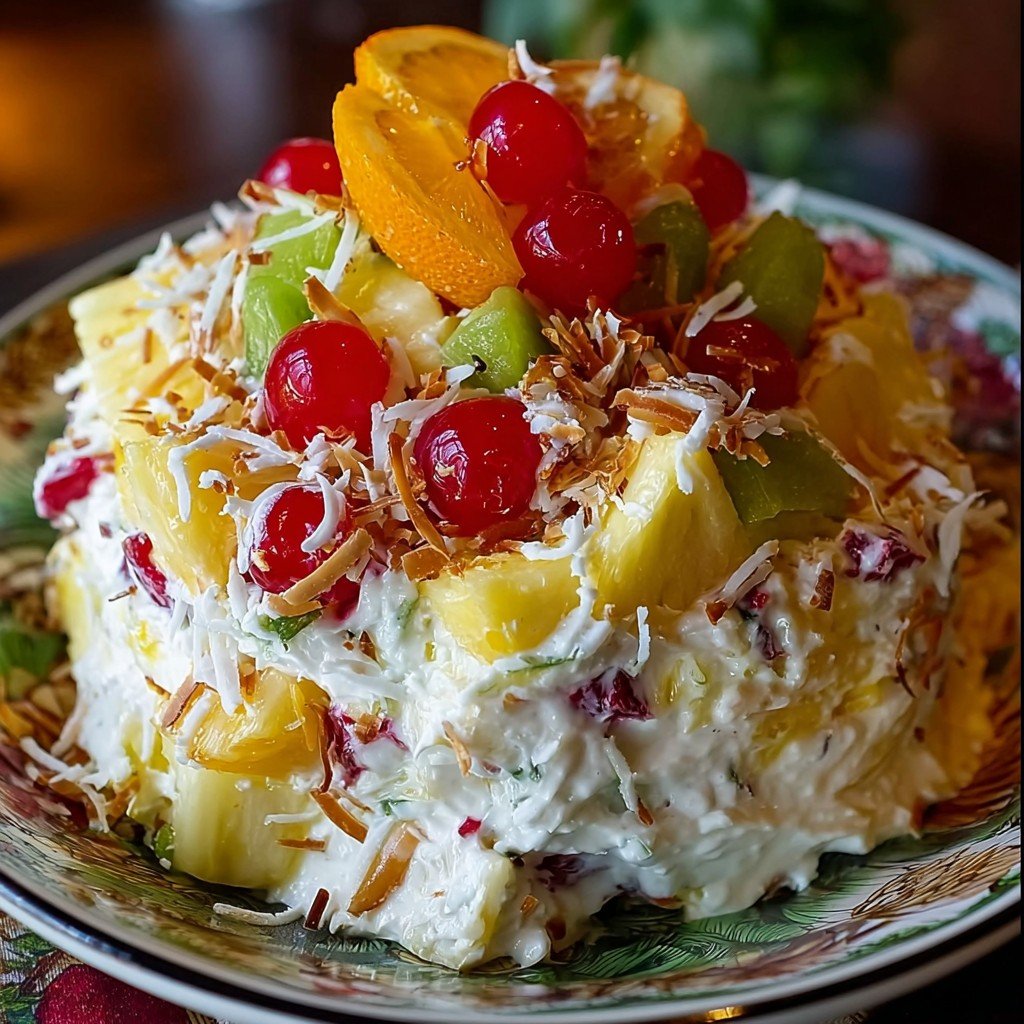
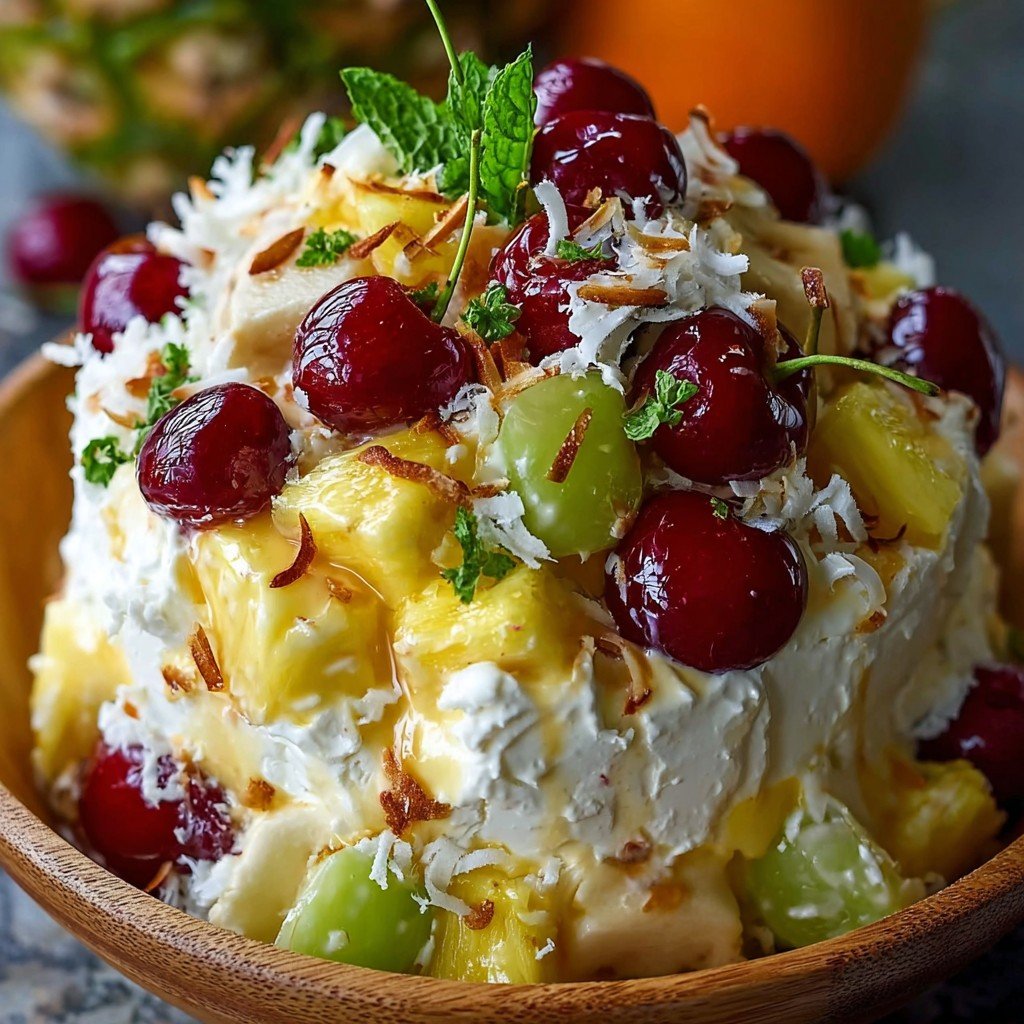
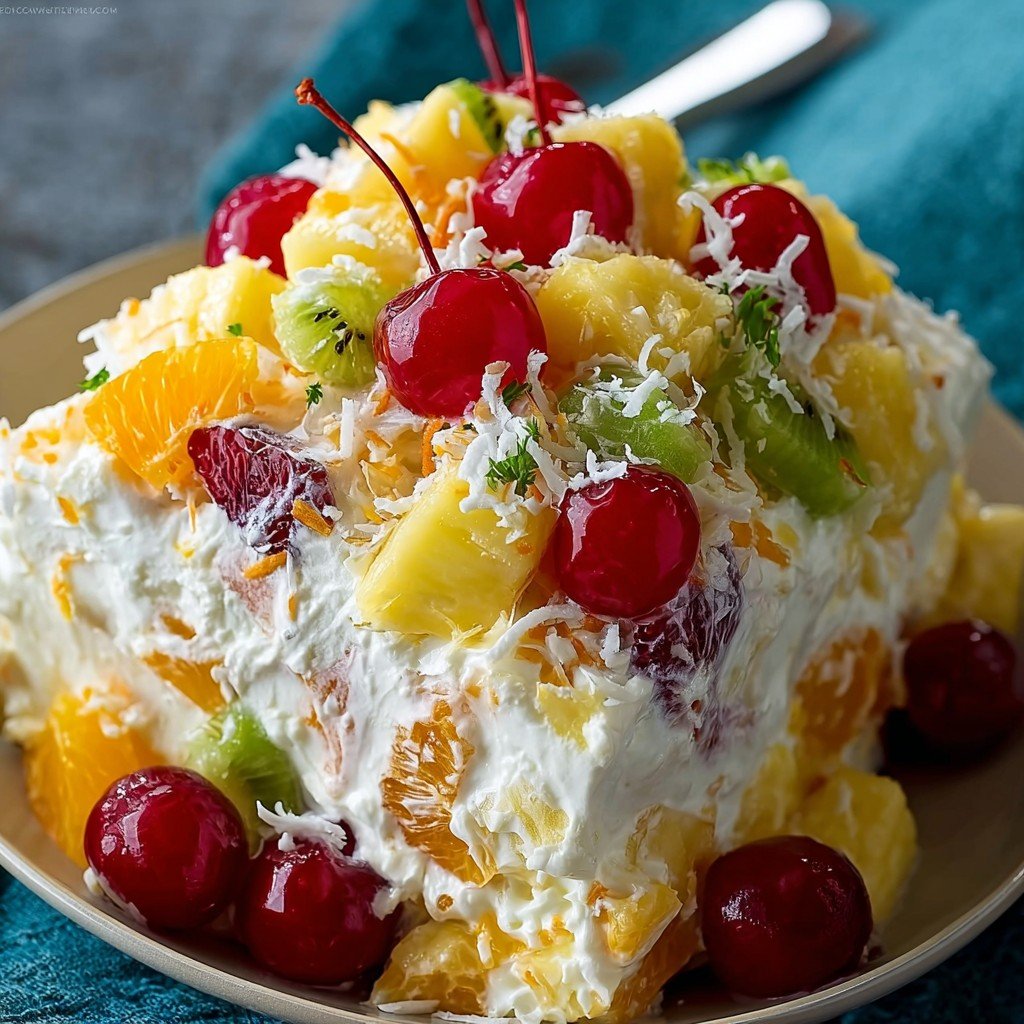
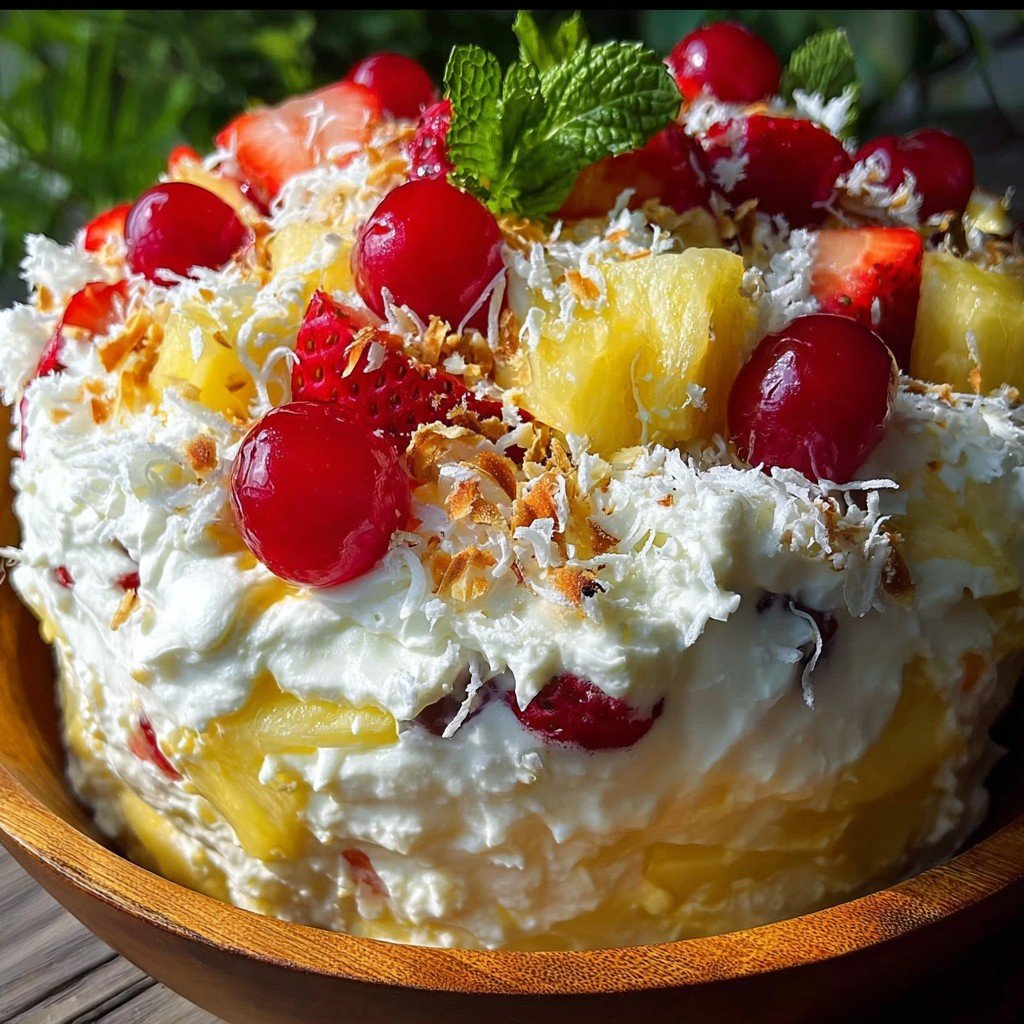
If you’ve ever needed a dish to bring to a neighborhood BBQ and thought, “Please, let this be easy and actually taste good,” this Hawaiian Cheesecake Salad is the answer to your snack-time prayers. No joke, I first ran into it at Aunt Jean’s Fourth of July potluck and—well, let’s just say I may or may not have gone back for thirds. It’s cheerful as a beach vacation and just as chill to throw together. My kid once called it “tropical dessert clouds,” which is honestly spot on (bonus: it travels well, though if you faceplant into the leftovers when you get home, I won’t judge).
Why You’ll Love This (No, Seriously)
I make this when I want to feel a little fancy but don’t have the patience for real cheesecake and—let’s be honest—when I want to use up whatever canned fruit is threatening to stage a coup in my pantry. My family goes a bit bonkers for it because it’s like eating sunshine. And if you’ve ever wrestled with clumpy cream cheese, promise, this is totally forgiving (but, word to the wise, don’t try to cut corners here…once, I didn’t let my cream cheese warm up and, yeesh, lumpy central). Actually, I find it works better if you don’t overthink it.
These Are The Ingredients (Swaps Welcome)
- 8 oz cream cheese, softened (Grandma swears by Philadelphia but, honestly, store brand does the trick)
- 1/3 cup powdered sugar (I’ve used regular sugar in a pinch, but, eh, I think powdered gives it that silky finish)
- 1 teaspoon vanilla extract (sometimes I splash in a little extra—who’s gonna stop me?)
- 1 (8 oz) tub whipped topping, thawed (Cool Whip, but any non-dairy whipped topping flies)
- 1 cup fresh strawberries, sliced (Or frozen if you forgot to shop. Defrost first!)
- 1 cup pineapple chunks, drained (Canned or fresh both work, but canned is miles easier)
- 1 cup mandarin oranges, drained (Don’t skip draining or it’ll be soup—made that mistake, whoops)
- 1 banana, sliced (Honestly, totally optional. Sometimes I just forget it exists)
- 1 cup mini marshmallows (Entirely optional, but my niece insists they’re the best part)
How To Make Hawaiian Cheesecake Salad (Mess Is Part Of The Fun)
- In a big-ish bowl, toss in your softened cream cheese. Add powdered sugar and vanilla. Now, grab a hand mixer or just go at it with a sturdy spoon; mix until it’s as smooth as you can get it (honestly, if a few streaks remain, nobody will notice).
- Fold in the whipped topping—gently is key. You want it fluffy, not sad and deflated. This is where I usually sneak a taste. Quality control, y’know?
- Dump in the strawberries, pineapple, mandarin oranges, and banana (if you remembered it). Carefully combine so you don’t bruise the fruit. It’ll look a tad wonky at first; that’s normal.
- Toss in those mini marshmallows, if you’re team marshmallow. Stir them through. If it looks wrong, trust the process, it comes together!
- Chill in the fridge for at least an hour, or, if you’re like me and running behind, just as long as it takes you to clean up the kitchen.
- Give it a quick gentle mix right before serving. The fruit sometimes settles—plus, I use this as my opportunity for one last cheeky bite.
Random Notes Only Someone Who’s Messed This Up Can Tell You
- If your cream cheese is too cold, you’ll wrestle forever. Microwave it for 10 seconds. Not a second more or it gets weirdly melty.
- Accidentally bought fruit cocktail? Toss it in; it’s not traditional, but I’ve done it and nobody complained (except my cousin, but he complains about everything)
- Don’t overmix once fruit is in. Or you’ll end up with mashed fruit. Unless that’s your thing?
How I’ve Switched It Up (Some Good, Some Flops)
- I threw in shredded coconut once—yep, tropical, but my husband said it felt like eating a loofah. Not my best.
- Cherries instead of strawberries gives it kind of a sundae vibe. Works pretty well!
- If you’re out of bananas, use extra berries. Or skip fruit entirely and just go marshmallow crazy.
Oh, Equipment…You Really Only Need Two Things
Large mixing bowl and a hand mixer. I’ve beaten it with a wooden spoon, too, when my mixer was stuck behind a pile of kids’ art supplies. Extra workout for your arm? Maybe.
How To Store (If There’s Any Left, Ha!)
Pop leftovers in an airtight container in the fridge; lasts a couple days, but honestly, in my house it’s gone in twenty-four hours. Oh, bananas get mushy if you wait too long—just saying.
Serving It Up (My Favorite Part!)
I love plonking big scoops into hollowed-out pineapple halves. My dad just grabs a bowl straight from the fridge. If you’re feeling fancy, top with a cherry.
Pro Tips I Learned The Hard Way
- Once, I tried to rush the chilling. Ended up with runny salad. No one likes runny cheesecake salad. Let it chill, trust me.
- Add marshmallows last so they don’t get all gunky.
- Drain the fruit—seriously, no shortcuts here unless you like fruit soup (I do not!)
FAQ (Because Friends Always Ask!)
Can I make this the night before?
Totally, actually I think this tastes better the next day (just maybe hold off on the banana until morning—I learned that bit the hard way).
Can I use fresh whipped cream?
Sure thing! It’s a bit lighter and less sweet, but that’s good too. If you’re short on time, tub stuff is totally fine.
Is there a dairy-free version?
I haven’t tried it myself, but my vegan neighbor swaps in non-dairy cream cheese and coconut whipped topping. She says it’s still delish.
Does this really need marshmallows?
Nope! It’s your show. I love them (my dentist probably doesn’t). Totally optional.
What if I don’t have an electric hand mixer?
Grab a wooden spoon and channel your inner pioneer. It works; takes more elbow grease. Good for the biceps though.
Anyway, if you get sidetracked making this and it still comes out a bit wonky, that’s half the point. Life’s not perfect; neither is my salad. And it’s always a hit.
Ingredients
- 8 oz cream cheese, softened (Grandma swears by Philadelphia but, honestly, store brand does the trick)
- 1/3 cup powdered sugar (I’ve used regular sugar in a pinch, but, eh, I think powdered gives it that silky finish)
- 1 teaspoon vanilla extract (sometimes I splash in a little extra—who’s gonna stop me?)
- 1 (8 oz) tub whipped topping, thawed (Cool Whip, but any non-dairy whipped topping flies)
- 1 cup fresh strawberries, sliced (Or frozen if you forgot to shop. Defrost first!)
- 1 cup pineapple chunks, drained (Canned or fresh both work, but canned is miles easier)
- 1 cup mandarin oranges, drained (Don’t skip draining or it’ll be soup—made that mistake, whoops)
- 1 banana, sliced (Honestly, totally optional. Sometimes I just forget it exists)
- 1 cup mini marshmallows (Entirely optional, but my niece insists they’re the best part)
Instructions
-
1In a big-ish bowl, toss in your softened cream cheese. Add powdered sugar and vanilla. Now, grab a hand mixer or just go at it with a sturdy spoon; mix until it’s as smooth as you can get it (honestly, if a few streaks remain, nobody will notice).
-
2Fold in the whipped topping—gently is key. You want it fluffy, not sad and deflated. This is where I usually sneak a taste. Quality control, y’know?
-
3Dump in the strawberries, pineapple, mandarin oranges, and banana (if you remembered it). Carefully combine so you don’t bruise the fruit. It’ll look a tad wonky at first; that’s normal.
-
4Toss in those mini marshmallows, if you’re team marshmallow. Stir them through. If it looks wrong, trust the process, it comes together!
-
5Chill in the fridge for at least an hour, or, if you’re like me and running behind, just as long as it takes you to clean up the kitchen.
-
6Give it a quick gentle mix right before serving. The fruit sometimes settles—plus, I use this as my opportunity for one last cheeky bite.
Approximate Information for One Serving
Nutrition Disclaimers
Number of total servings shown is approximate. Actual number of servings will depend on your preferred portion sizes.
Nutritional values shown are general guidelines and reflect information for 1 serving using the ingredients listed, not including any optional ingredients. Actual macros may vary slightly depending on specific brands and types of ingredients used.
To determine the weight of one serving, prepare the recipe as instructed. Weigh the finished recipe, then divide the weight of the finished recipe (not including the weight of the container the food is in) by the desired number of servings. Result will be the weight of one serving.
Did you make this recipe?
Please consider Pinning it!