Let Me Tell You About My Latest Breakfast Obsession…
Alright, you know those mornings when you practically sleepwalk into the kitchen and just stand there, staring at the counter, waiting for breakfast to magically appear? Yeah, that was every Tuesday for me until I started making these healthy oatmeal bars. Honestly, it started with me trying to clear out a half-used bag of rolled oats and some overripe bananas (from that phase where I thought I’d eat them before they went spotty). Now, these oat bars are sort of my answer to breakfast when I haven’t planned ahead—can I get an amen?
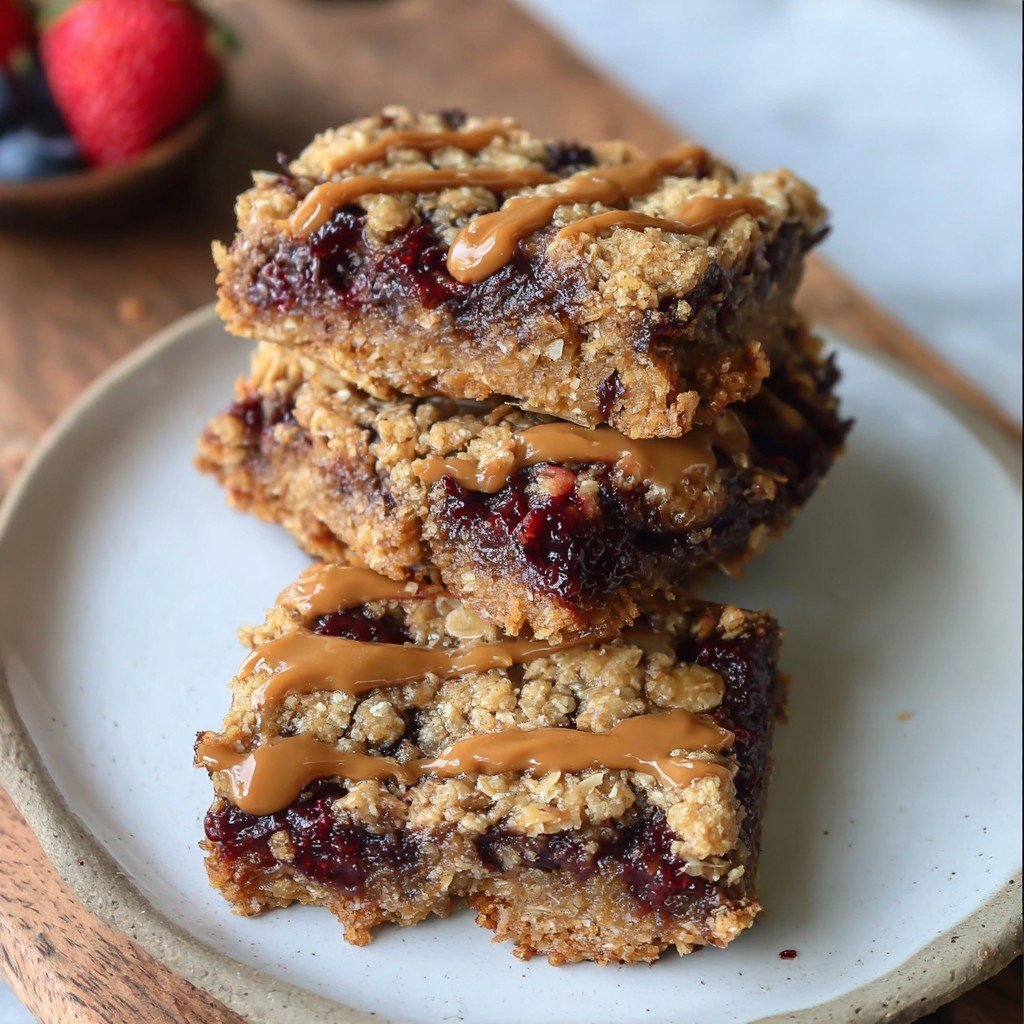
Last week, my nephew called them “breakfast that pretends to be dessert,” which I’ll take as very high praise. And hey, full disclosure: I’ve eaten these for a midnight snack more than once, especially after a rough day. Also, if you’ve ever caught yourself trying to make a ‘healthy’ treat and just wound up with a bland brick, let me say—you won’t find that kind of nonsense here. These are genuinely tasty!
Why I Keep Coming Back to These Bars
So, I make these oatmeal bars when I really need something portable (and less sad than yesterday’s dry toast). My kids actually ask for seconds, which never happens with so-called “healthy” food around here. They’re good for breakfast, yes, but they double as snacks when everyone gets that 3 pm slump. (Also, if you need to disguise chia seeds for picky eaters—this is your best shot, trust me.)
I used to get so frustrated with recipes that required like, a hundred specialty flours. This one? You mix everything up in one bowl—less washing up, more coffee time. The hardest part is not eating the raw batter, if I’m honest.
The Ingredients—Plus a Few Workarounds
- 2 cups rolled oats (If I’m out, I’ve even used quick oats—works, but chewier. My friend Lisa swears by sprouted oats, but that seems fancy.)
- 2 ripe bananas, mashed (Don’t worry if they’re a bit past it—that’s actually better!)
- 1/2 cup natural peanut butter (or almond butter, or sunflower seed butter for allergies—whatever’s lingering in the fridge)
- 1/4 cup pure maple syrup (or honey, but then, well, not vegan—don’t tell my vegan pals I tried this swap once)
- 1/4 cup unsweetened applesauce (I’ve subbed pumpkin puree too when I had leftovers!)
- 1 tsp vanilla extract (My grandmother always insisted you measure this over the bowl because she said “spilling a bit is good luck.”)
- 1/2 tsp ground cinnamon (or a mix of 1/4 tsp cinnamon and 1/4 tsp nutmeg if you want to get fancy)
- 1/4 tsp salt
- 1/4 cup mini dark chocolate chips (Optional, obviously. Or raisins, or chopped walnuts if you’re feeling healthy-ish)
- 2 tbsp chia seeds (Optional; I just throw them in if I remember—they disappear in the mix)
Here’s How I Usually Throw These Together
- Preheat your oven to 350°F (175°C). Grab an 8×8-inch pan, line it with parchment paper, or if you’re out, a little oil rubbed around does the trick. (I’ve used a loaf tin in a pinch—makes taller bars. Go figure.)
- Mash the bananas in a big bowl—this is kind of therapeutic, and to be honest, sometimes I let my kiddo do it just for fun (& a bit of chaos).
- Stir in the peanut butter, maple syrup, applesauce, and vanilla extract till it looks sort of like pudding. Don’t worry if it looks gloppy at this point—it always does.
- Add oats, cinnamon, salt, and chia seeds. Stir everything together—this is where I usually sneak a tiny taste (quality control, obviously).
- Fold in the chocolate chips or whatever you’re using. I keep half back to sprinkle on top so it looks Instagram-fancy, but obviously no one at home cares.
- Scoop the mixture into your lined pan. Smooth it out—use the back of a spoon or just your hand if no one’s watching. Sprinkle the rest of the chocolate chips on top, if you saved any.
- Bake for 25–30 minutes. Mine is usually golden on top and smells like breakfast plus dessert had a baby. If you want a firmer bar, just leave it in a few minutes longer.
- Let it cool completely before slicing. And really, I mean it—trust me, I once tried to cut them hot and it was a crumbly mess (though still delicious, if you like eating with a fork).
A Few Notes (Learned the Hard Way!)
- If your bananas are tiny, you might need a splash more applesauce—nobody likes a dry bar.
- Don’t overthink the nut butter; every kind I’ve tried works, though tahini was a bit odd, if I’m honest.
- Cool before slicing! Actually, the bars hold together better the next day, so they’re great for prepping ahead (who knew?).
Some Variations I’ve Messed Around With
- Used pumpkin puree once—turned out great, very autumn vibes.
- Swapped chocolate chips with chopped dates or dried cranberries; was surprisingly tasty!
- Tried protein powder—yeah, kind of chalky, won’t fool me again!
- Added shredded coconut on a whim; my partner loved it, I thought it made things a bit too sweet, but there you go.
Don’t Worry About Fancy Equipment
I’ll be honest, I feel slightly fancier when I line the pan with baking parchment, but honestly, you can just oil it up well and they’ll pop out just fine. If your pan’s a bit wonky—same here, no one’s inspecting, I promise.
How I Store Them (If They Survive That Long!)
Keep them in an airtight container, and they stay good at room temp for about 2 days, or up to a week in the fridge. But honestly, in my house, they’re lucky to last till tomorrow.
You can freeze them, too—just stack with parchment between. Push comes to shove, they thaw in about 20 min on the counter, but my partner likes eating them straight from the freezer (says it’s like mini oat ice creams, jury’s out).
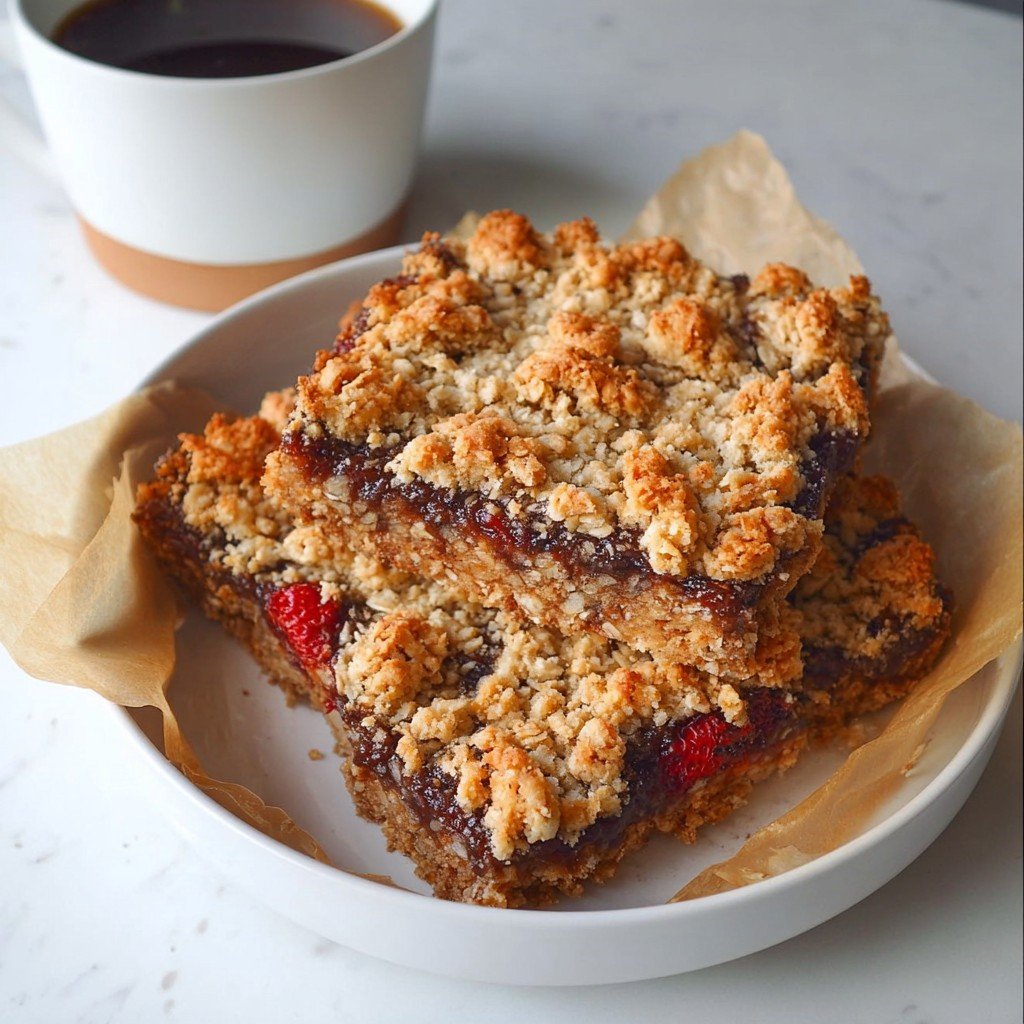
How We Eat These—Morning, Noon, or Night
I think they’re best with a mug of milky tea (or plant milk, if you want to keep things fully vegan). My daughter likes hers crumbled over coconut yogurt with berries, which looks very pretty. Sometimes we just grab a chunk on the go—it’s portable breakfast at its finest. On weekends, I’ve even tossed cubes of the bars into a little bowl with extra fruit and called it breakfast salad (sounds odd, tastes great).
Pro Tips (Picked Up The Hard Way)
- I once tried to rush the cooling step—don’t! They’ll fall apart faster than you can say “rookie mistake.”
- Mix the wet ingredients really well before adding oats, or you get those weird nut butter streaks (I mean, doesn’t hurt the flavor, but looks odd).
- If you want super even bars, chill the pan in the fridge before cutting—makes slicing less messy, though sometimes I’m too impatient for that.
Questions I Actually Get (and My Real Answers)
- Can I use steel cut oats? Nope, tried once—it’s just too tough. Stick to rolled or quick oats for your own sanity.
- Are they actually sweet enough? If your bananas are super ripe, yes! Otherwise, you might want an extra spoon of syrup (go on, I won’t tell).
- Help, my bars don’t bind! Make sure you’re using enough banana, and let them cool. Or maybe add an extra spoonful of nut butter. It fixes most problems in life, right?
- Any way to make these oil free? Yep, as long as you don’t grease the pan with oil—just line with parchment, and use applesauce as called for. Easy as pie, honestly.
- Can’t eat nuts—what’s the swap? Sunflower seed butter’s my go-to, but I’ve heard pumpkin seed butter works too. My cousin uses tahini but I thought it was a bit strong, so maybe use less at first.
One last thing: if you happen to drop chocolate chips on the floor while you’re making these, that’s just extra luck (if you don’t have a dog, anyway).
Ingredients
- 2 cups rolled oats (If I’m out, I’ve even used quick oats—works, but chewier. My friend Lisa swears by sprouted oats, but that seems fancy.)
- 2 ripe bananas, mashed (Don’t worry if they’re a bit past it—that’s actually better!)
- 1/2 cup natural peanut butter (or almond butter, or sunflower seed butter for allergies—whatever’s lingering in the fridge)
- 1/4 cup pure maple syrup (or honey, but then, well, not vegan—don’t tell my vegan pals I tried this swap once)
- 1/4 cup unsweetened applesauce (I’ve subbed pumpkin puree too when I had leftovers!)
- 1 tsp vanilla extract (My grandmother always insisted you measure this over the bowl because she said “spilling a bit is good luck.”)
- 1/2 tsp ground cinnamon (or a mix of 1/4 tsp cinnamon and 1/4 tsp nutmeg if you want to get fancy)
- 1/4 tsp salt
- 1/4 cup mini dark chocolate chips (Optional, obviously. Or raisins, or chopped walnuts if you’re feeling healthy-ish)
- 2 tbsp chia seeds (Optional; I just throw them in if I remember—they disappear in the mix)
Instructions
-
1Preheat your oven to 350°F (175°C). Grab an 8×8-inch pan, line it with parchment paper, or if you’re out, a little oil rubbed around does the trick. (I’ve used a loaf tin in a pinch—makes taller bars. Go figure.)
-
2Mash the bananas in a big bowl—this is kind of therapeutic, and to be honest, sometimes I let my kiddo do it just for fun (& a bit of chaos).
-
3Stir in the peanut butter, maple syrup, applesauce, and vanilla extract till it looks sort of like pudding. Don’t worry if it looks gloppy at this point—it always does.
-
4Add oats, cinnamon, salt, and chia seeds. Stir everything together—this is where I usually sneak a tiny taste (quality control, obviously).
-
5Fold in the chocolate chips or whatever you’re using. I keep half back to sprinkle on top so it looks Instagram-fancy, but obviously no one at home cares.
-
6Scoop the mixture into your lined pan. Smooth it out—use the back of a spoon or just your hand if no one’s watching. Sprinkle the rest of the chocolate chips on top, if you saved any.
-
7Bake for 25–30 minutes. Mine is usually golden on top and smells like breakfast plus dessert had a baby. If you want a firmer bar, just leave it in a few minutes longer.
-
8Let it cool completely before slicing. And really, I mean it—trust me, I once tried to cut them hot and it was a crumbly mess (though still delicious, if you like eating with a fork).
Approximate Information for One Serving
Nutrition Disclaimers
Number of total servings shown is approximate. Actual number of servings will depend on your preferred portion sizes.
Nutritional values shown are general guidelines and reflect information for 1 serving using the ingredients listed, not including any optional ingredients. Actual macros may vary slightly depending on specific brands and types of ingredients used.
To determine the weight of one serving, prepare the recipe as instructed. Weigh the finished recipe, then divide the weight of the finished recipe (not including the weight of the container the food is in) by the desired number of servings. Result will be the weight of one serving.
Did you make this recipe?
Please consider Pinning it!


