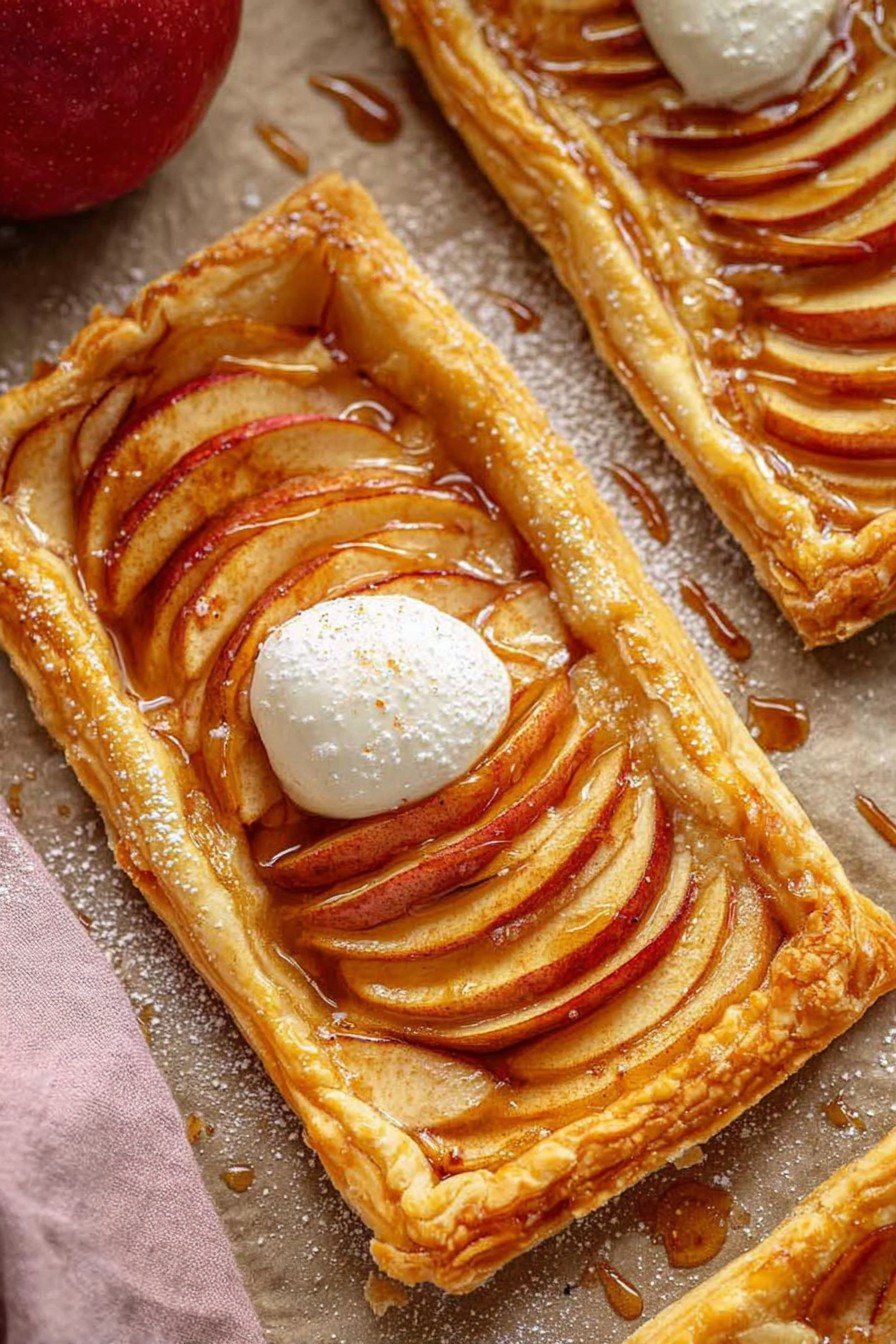
Let Me Tell You About My Go-To Lazy Dessert…
You ever get those days where you want something sweet, something that looks way more impressive than the time you put in (because who needs more to do)? Well, this Puff Pastry Apple Tart is my not-so-secret weapon for everything from last-minute dinners to half-baked brunches. Oh, that reminds me—once, I totally forgot it was in the oven because my neighbor asked if they could borrow my broom (yes, really), but all was not lost; it just caramelized a bit extra and my family pretended it was ‘intentional gourmet’. So, if you’ve ever felt slightly chaotic in the kitchen, friend, you’re in excellent company.
Why You’ll Fall for This Tart
I make this when I want zero stress but also something that gets everyone asking, “Did you really make this yourself?” (Kind of smug, but I’ll take it.) My family goes crazy for it—especially since I insist on slicing the tart unevenly on purpose, so we argue over who gets the big piece. And honestly, when it’s cold out and apples are cheap, there’s just nothing cozier. I used to blow way too much time making fussy pastry from scratch, but now? Frozen puff pastry is my best mate. No one’s the wiser. Anyway, the only real hassle was peeling apples until I discovered leaving the skin on is, frankly, less work and totally fine if you’re not feeding picky folks. I mean, who are we, the Queen?
Here’s What You’ll Need (Plus My Secret Switch-Ups)
- 1 sheet frozen puff pastry, thawed (I’ve occasionally used two if the apples look lonely on one; just overlap them)
- 2 medium apples (Granny Smith if I’m feeling tart, or Gala when I want a sweeter vibe—but honestly, any apple will do in a pinch)
- 2 tablespoons granulated sugar (brown sugar in a rush works; my grandmother always insisted on white, but try both and see what you like)
- 1 teaspoon cinnamon (sometimes a half-and-half of cinnamon and nutmeg for a bit more warmth)
- 1 tablespoon unsalted butter, chopped into little bits (or salted; just maybe skip the pinch of salt below… unless you like it salty, no judgment!)
- 1 egg, beaten (for the ‘wow, glossy’ finish—if you’re out, just use a splash of milk)
- A pinch of salt (optional, but I toss it in because I read somewhere it “brings out the flavor”—sure, okay)
- 1 tablespoon apricot jam, for glaze (sometimes I use honey or skip it entirely when I can’t be bothered)
Okay, Here’s How To Throw It Together (No Overthinking Required!)
- Preheat your oven to 400°F (200°C). If your oven runs hot (like mine weirdly does since that one power outage), maybe aim for 375°F. Line a baking sheet with parchment paper or the back of whatever you remember to grease. I mean, the pastry usually doesn’t stick, but don’t quote me… Just makes life easier.
- Roll out the puff pastry on a lightly floured board. I don’t even bother with a rolling pin most days—just press it out with my fingers until it’s roughly an 8×12-inch rectangle. Good enough. Place it on your prepared baking sheet.
- Using a sharp knife, score a border around the edges (about 1/2 inch in), but don’t cut all the way through—tricky at first, but you get the hang of it. This little trick puffs the edges up all fancy-like. Sometimes I get too enthusiastic and go right through, but hey, rustic, right?
- Slice your apples thin—about 1/8-inch if you’re looking for numbers, but honestly, just try to keep them all about the same so they cook evenly. I don’t peel them (see above: laziness), but you totally can. Layer the apples in overlapping rows from one end to the other. Or make a pattern if you’re feeling fancy. Sometimes I just scatter them on and call it ‘abstract.’
- Sprinkle your sugar and cinnamon (and salt if you’re adding it) evenly over the apples. Dot with the bits of butter (this is where I usually sneak a piece of raw apple—so good).
- Brush the edges of the pastry with the beaten egg (you won’t use it all; save the rest for an omelet, or feed it to the dog, I dunno). This gets you that crisp golden finish. If you don’t have a brush, your finger will work—wash your hands, obviously.
- Bake for about 20-25 minutes, or until the pastry is puffed and golden and the apples look soft and delicious. Don’t worry if they look a bit odd at first—apples shrink up and the pastry always gets its act together by the end. If it’s not browning the way you want, broil for a minute (but stay right there—ask me about the smoked tart incident of 2021).
- While it’s still warm, heat the apricot jam for a moment in the microwave (I usually forget this step and just blob it on cold, but warming does help). Brush or spoon (or dab messily) over the apples for that shiny, bakeryshop finish. Or skip this if you’re in a hurry—it still tastes ace.
- Let the tart cool a smidge before slicing, otherwise the molten apple makes for a comedy show when served—ask me how I know.
A Few Notes (Learned the Hard Way)
- If your pastry isn’t thawed all the way, trying to rush it just makes it rip—patience, my friend. Let it sit out while you slice the apples.
- Warm jam is easier to spread, but honestly, if it clumps up in one spot, I just call that the ‘jackpot apple’ piece and move on.
- If you use very juicy apples, you might get a bit of soggy bottom—Paul Hollywood would scold me, but I don’t care. Still tastes good.
- Sometimes the edges rise unevenly. Just tap them down gently—doesn’t have to be perfect.
If You Fancy a Change, Try These
- Pear instead of apple—lovely, and I toss in a handful of chopped nuts (walnut or pecan) for crunch.
- Swap apricot jam for honey or even a drizzle of caramel. Actually, I tried raspberry jam once and it was weirdly tart; don’t recommend unless you love a sharp bite.
- A little lemon zest over the apples is fresh as heck. Or a sprinkle of cardamom if you want a fancy ‘twist’.
Tools I Use (and a Few Quick Fixes)
- Baking sheet and parchment paper. But, on those days when I can’t find the paper? I just butter the heck out of the sheet and hope for the best. Worse comes to worst, you just have to scrape a bit.
- Pastry brush for the egg—though I’ve used my (clean) fingers or even a bit of paper towel in a pinch.
- Microwave for the jam, but if you don’t have one, just run the jar under hot tap water for a few seconds.
- Sharp knife for the apples, though I used a mandoline once and it made the slices too thin—lesson learned.
Can You Save It For Later? (Not In My House!)
Sure, you can store leftovers in an airtight container at room temp for a day or two (maybe three in winter, but by then it’s a bit soggy). I pop leftovers in the oven at 300°F for about ten minutes to crisp up. Though, honestly, my crew usually devours it warm, right out of the oven—so storage is more theory than practice here.
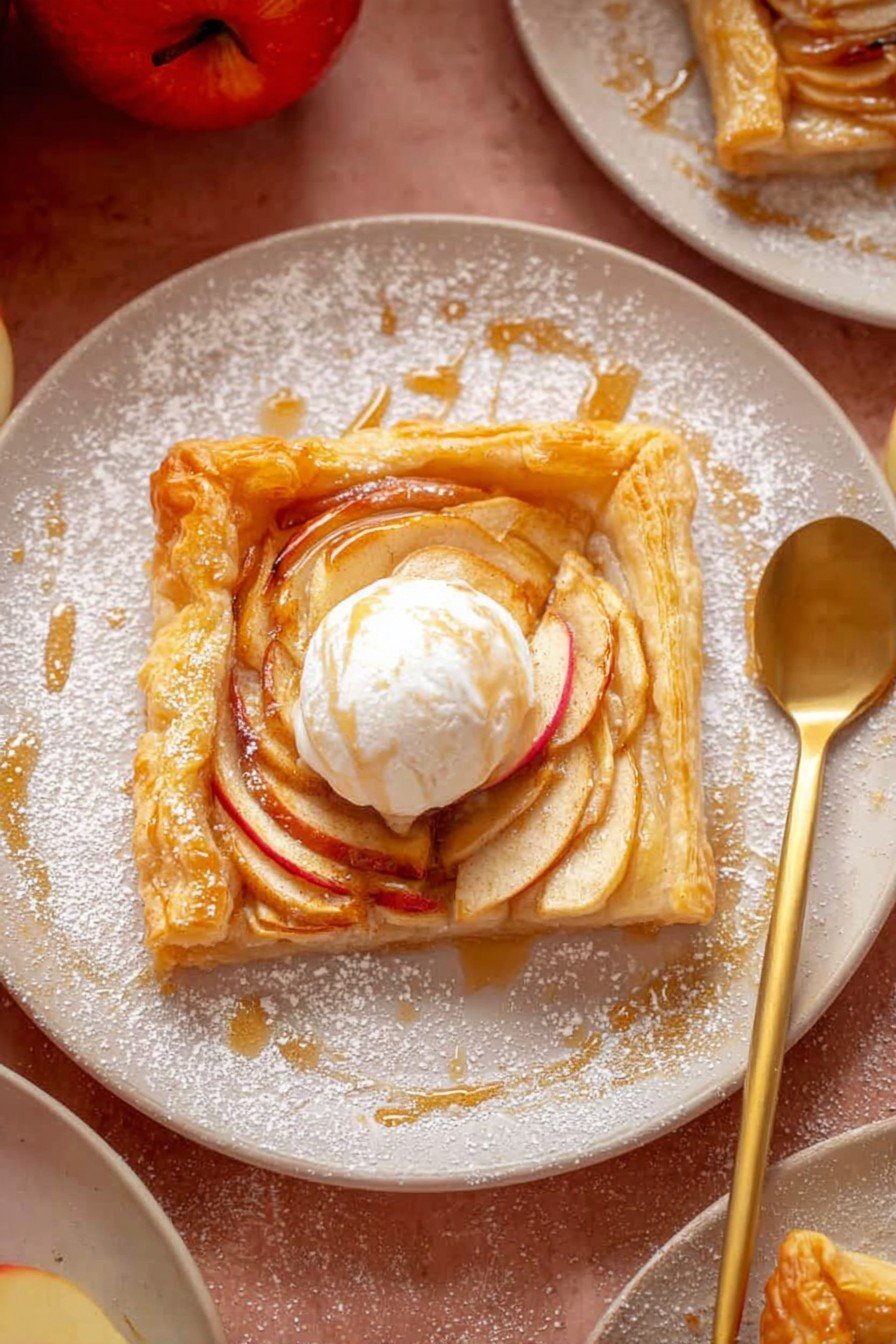
How I Serve It (Don’t Judge My Custard Habit)
This tart is best warm, by the way—sometimes with a scoop of vanilla ice cream if I’m feeling generous, or (don’t laugh) I pour cold store-bought custard over my slice because it reminds me of childhood Sundays in England. One of my friends swears by a dollop of crème fraîche, but I think it’s posh for a weeknight. Cups of tea or even coffee on the side—mandatory!
Things I’ve Messed Up (So You Don’t Have To)
- I once tried baking from frozen pastry—just don’t. It puffs weird and turns a bit gummy in the middle.
- Rushed the egg wash step one time, missed spots, and the tart came out looking patchy. Now I give it a good once-over, even if I have to go back because actually, I find it works better that way.
- Used too-thick apple slices once—they stayed half-raw while the pastry went brown. Keep the apples thin-ish, trust me.
FAQs—Your Questions, My Kitchen Table Answers
- Do I have to peel the apples? Nah, not unless you really want to. The skins soften up fine. And less waste, which feels nice!
- Can I use store-brand pastry? Absolutely—I’ve tried all sorts, including the fancy stuff when it’s on sale. I honestly can’t taste a major difference, but maybe you’ll notice.
- What if my tart gets soggy? Oh, it happens. I just reheat briefly to crisp up, or own it. Soggy tart is still edible tart!
- Can I make this ahead? Yes…but I think it tastes better the next day after a quick warm-up. But fresh is best, if you can swing it.
- My edges burned—what did I do? Probably oven’s too hot or you put it too close to the top. Happens to the best of us, mate!
So, there you have it! The (almost) foolproof Puff Pastry Apple Tart. Easy enough for a weekday, pretty enough for showing off, and relaxed enough that even if things go a bit sideways, you still end up with something sweet and satisfying. Which, at the end of the day, is really my kinda cooking.
Ingredients
- 1 sheet frozen puff pastry, thawed (I’ve occasionally used two if the apples look lonely on one; just overlap them)
- 2 medium apples (Granny Smith if I’m feeling tart, or Gala when I want a sweeter vibe—but honestly, any apple will do in a pinch)
- 2 tablespoons granulated sugar (brown sugar in a rush works; my grandmother always insisted on white, but try both and see what you like)
- 1 teaspoon cinnamon (sometimes a half-and-half of cinnamon and nutmeg for a bit more warmth)
- 1 tablespoon unsalted butter, chopped into little bits (or salted; just maybe skip the pinch of salt below… unless you like it salty, no judgment!)
- 1 egg, beaten (for the ‘wow, glossy’ finish—if you’re out, just use a splash of milk)
- A pinch of salt (optional, but I toss it in because I read somewhere it “brings out the flavor”—sure, okay)
- 1 tablespoon apricot jam, for glaze (sometimes I use honey or skip it entirely when I can’t be bothered)
Instructions
-
1Preheat your oven to 400°F (200°C). If your oven runs hot (like mine weirdly does since that one power outage), maybe aim for 375°F. Line a baking sheet with parchment paper or the back of whatever you remember to grease. I mean, the pastry usually doesn’t stick, but don’t quote me… Just makes life easier.
-
2Roll out the puff pastry on a lightly floured board. I don’t even bother with a rolling pin most days—just press it out with my fingers until it’s roughly an 8×12-inch rectangle. Good enough. Place it on your prepared baking sheet.
-
3Using a sharp knife, score a border around the edges (about 1/2 inch in), but don’t cut all the way through—tricky at first, but you get the hang of it. This little trick puffs the edges up all fancy-like. Sometimes I get too enthusiastic and go right through, but hey, rustic, right?
-
4Slice your apples thin—about 1/8-inch if you’re looking for numbers, but honestly, just try to keep them all about the same so they cook evenly. I don’t peel them (see above: laziness), but you totally can. Layer the apples in overlapping rows from one end to the other. Or make a pattern if you’re feeling fancy. Sometimes I just scatter them on and call it ‘abstract.’
-
5Sprinkle your sugar and cinnamon (and salt if you’re adding it) evenly over the apples. Dot with the bits of butter (this is where I usually sneak a piece of raw apple—so good).
-
6Brush the edges of the pastry with the beaten egg (you won’t use it all; save the rest for an omelet, or feed it to the dog, I dunno). This gets you that crisp golden finish. If you don’t have a brush, your finger will work—wash your hands, obviously.
-
7Bake for about 20-25 minutes, or until the pastry is puffed and golden and the apples look soft and delicious. Don’t worry if they look a bit odd at first—apples shrink up and the pastry always gets its act together by the end. If it’s not browning the way you want, broil for a minute (but stay right there—ask me about the smoked tart incident of 2021).
-
8While it’s still warm, heat the apricot jam for a moment in the microwave (I usually forget this step and just blob it on cold, but warming does help). Brush or spoon (or dab messily) over the apples for that shiny, bakeryshop finish. Or skip this if you’re in a hurry—it still tastes ace.
-
9Let the tart cool a smidge before slicing, otherwise the molten apple makes for a comedy show when served—ask me how I know.
Approximate Information for One Serving
Nutrition Disclaimers
Number of total servings shown is approximate. Actual number of servings will depend on your preferred portion sizes.
Nutritional values shown are general guidelines and reflect information for 1 serving using the ingredients listed, not including any optional ingredients. Actual macros may vary slightly depending on specific brands and types of ingredients used.
To determine the weight of one serving, prepare the recipe as instructed. Weigh the finished recipe, then divide the weight of the finished recipe (not including the weight of the container the food is in) by the desired number of servings. Result will be the weight of one serving.
Did you make this recipe?
Please consider Pinning it!


