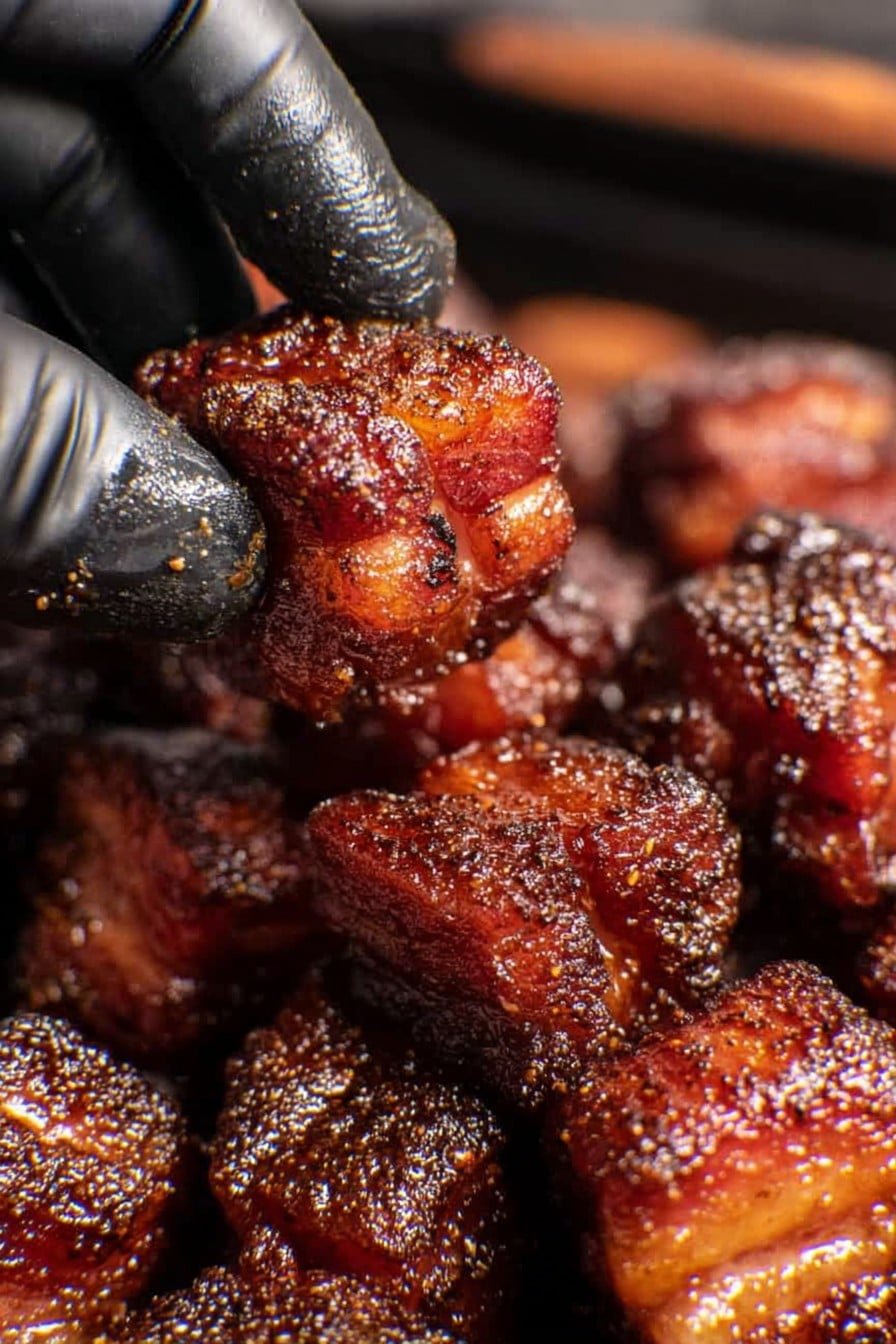
Let Me Tell You About These Pork Belly Burnt Ends
Alright, so here’s the thing: first time I made smoked pork belly burnt ends, I legit thought the whole neighborhood would show up just from the smell wafting out of my backyard. It’s one of those recipes that has you dancing between the smoker and your kitchen, sneaking little bites and trying not to inhale every sticky nugget before the family gets to it. My uncle Ron says they taste like smoky porky candy — which, honestly, sounds weird until you try them. The only problem? You might need to hide a batch for yourself.
Why I Keep Making These – And Why You’ll Probably Love ‘Em
I make these when I want to impress – or, more often, when I need an excuse to hang by the smoker with something frosty in hand. My family goes bananas for these because they’re equal parts sweet, smoky, sticky, and melt-in-your-mouth. I used to think burnt ends were for barbecue pros, but honestly, the hardest part is keeping my dog from snatching a chunk off the cooling rack. (Also, fair warning: the sticky glaze will get everywhere. But, I’m convinced it’s worth the cleanup.)
What You’ll Need (Plus My Lazy Substitutes)
- 1 slab pork belly (about 3 pounds, skin off) – Sometimes I get from the butcher, but the supermarket version is fine. My neighbor Dave insists on that fancy heritage stuff; I don’t notice a huge difference once it’s sauced.
- 3 tablespoons yellow mustard – Spicy brown works, or honestly, I’ve used plain old ketchup in a pinch. Not traditional but it did the job.
- 1/4 cup barbecue dry rub – I use whatever’s hanging around, usually something smoky and sweet. Grandma swore by Lawry’s, but I’ve made my own too (with questionable results once – too much paprika that time.)
- 1/2 cup brown sugar – Light or dark, whatever you’ve got.
- 1/3 cup honey – I’ve used maple syrup before; wasn’t the same sticky finish but pretty decent. (Don’t skip some kind of syrup, though.)
- 1 stick (1/2 cup) unsalted butter, cut into bits
- 2/3 cup barbecue sauce – Your favorite. The sticky, sweet kind, not the thin vinegar ones. Store brand works, I promise.
- 1 tablespoon apple cider vinegar – I have, like, five kinds of vinegar. Use white if that’s what you’ve got, but cider is best here.
How To Actually Make Smoked Pork Belly Burnt Ends (With My Wandering Thoughts)
- Get your pork belly ready: Pat the slab dry. (This is also where my cat appears out of nowhere.) Chuck it onto a big cutting board and dice into cubes – about 1.5 inches, but honestly, just aim for roughly even so everything cooks at the same pace.
- Mustard time: Toss the pieces in a bowl and goop on the mustard. Use your hands (this is a little gross, but fun). The goal: get everything coated, no dry spots. Wash your hands—trust me.
- Rub down: Sprinkle dry rub over the cubes. Use more than you think you need. Toss again. If your dry rub is clumpy or old, just break it up with your fingers. No stress.
- Let it sit: I usually let these sit 15-20 minutes on the counter, mostly because I’m tidying up or searching for my lighter. Gives the rub time to stick a bit.
- Fire up the smoker: Preheat your smoker to 250°F (about 120°C). I go with cherry wood if I’ve got it—apple or hickory are fine too. Don’t overthink it. If it’s raining I’ve even used my oven (doesn’t taste the same, but still good, sort of…)
- Get smokin’: Set the pork belly cubes on a wire rack or straight onto your smoker grate, leaving a little space between. This is not the time to crowd the pan. Close it up and smoke for about 2 to 2.5 hours. They’ll look a little dried out by the end; that’s normal–they’re just soaking up smoke.
- Second round: Sauce and sweeten: Dump the cubes (careful, super hot!) into a tray or foil pan. Scatter over the brown sugar, drizzle honey all over, dot the butter cubes among the meat, and pour in vinegar plus the barbecue sauce. Then use tongs to jumble everything up. (This is where I usually sneak a taste, if no one’s looking.)
- Back to the smoker: Cover the tray with foil and slap it back onto the smoker for another hour. Be ready for that amazing caramelly smell to draw people in.
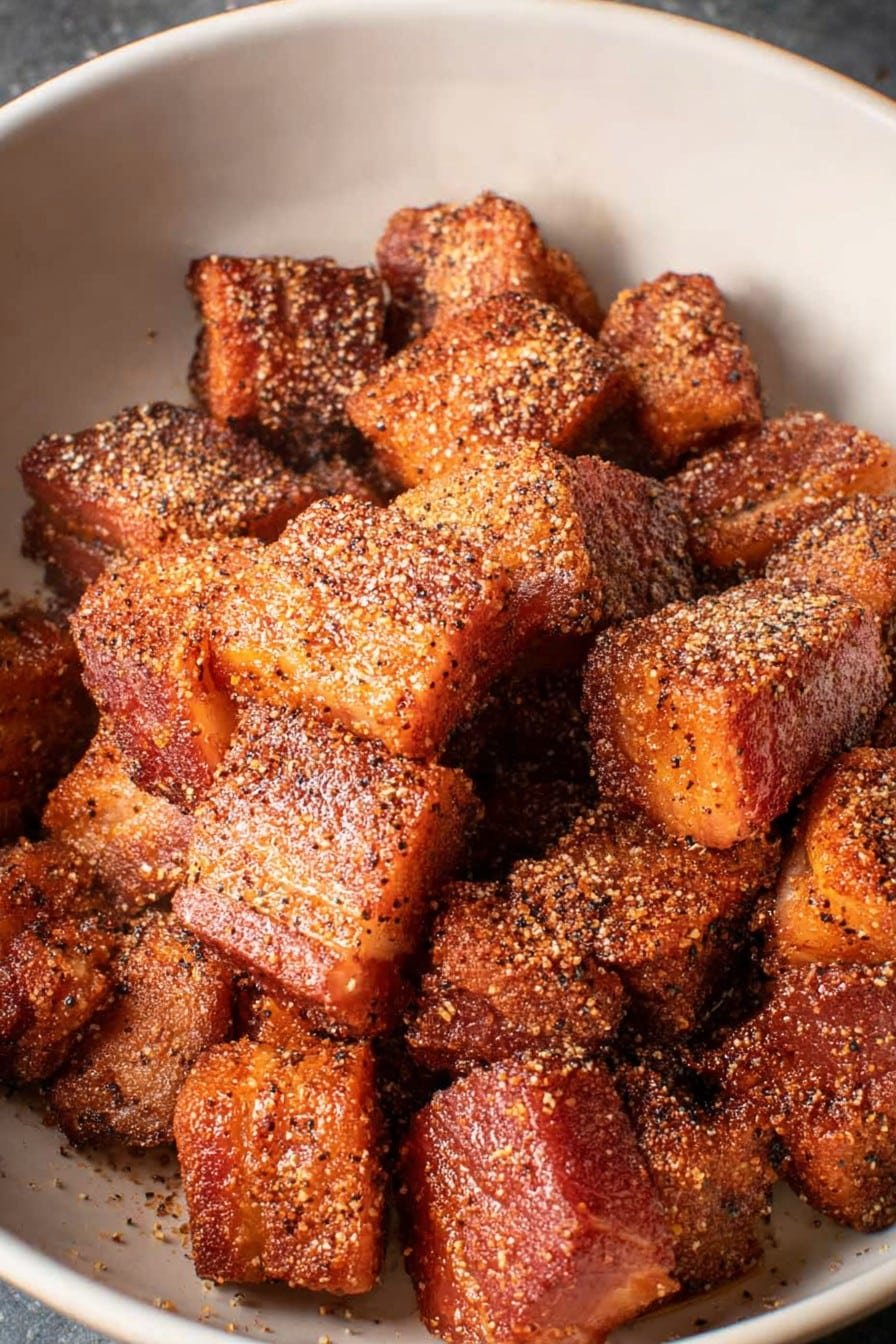
- The sticky finish: Remove the foil and let everything cook uncovered for 30-ish more minutes. Stir things up every so often; you want them tacky, glazed, and shimmering. If they look almost too dark, you’re doing it right.
- Let ’em cool (briefly): Take off the heat and let them sit (I know, so hard). The glaze will thicken as they cool. Eat warm, preferably with a cold drink and extra napkins.
Notes From the Trenches
- One time I skipped the mustard step out of sheer laziness – and they didn’t crisp up right. Always use some kind of slather!
- I sometimes make a double batch and freeze half. They do reheat surprisingly well in a low oven, though I think fresh is best. Actually, I find it works better if you let them cool a bit before freezing.
- If you get distracted and forget to stir near the end, you might get a few caramelized bits stuck to the pan, but they’re actually pretty tasty (and fun to scrape up).
Variations I’ve Messed Around With
- Once I tried a maple chipotle glaze instead of regular barbecue–it was a hit at my neighbor’s game night.
- I made a batch with hot honey, and wow, that was next level. For real heat fans only, though.
- For science, I swapped in tofu cubes to make a veggie version. That, uh, didn’t go so well (don’t recommend unless you really know your tofu).
- Sometimes I add a splash of whiskey to the sauce before glazing, which is probably not traditional, but it’s fun and adults usually love it.
What If I Don’t Have Special Equipment?
Look, a real smoker is ideal (I use a pellet grill), but you can actually fake it with a regular grill: set up for indirect heat, throw a foil pouch of wood chips in there, and keep the temp low. Or, like I admitted earlier, you can totally use an oven, but do yourself a favor and add a bit of liquid smoke to the rub. It’s kind of cheating, but hey–I won’t tell!
Storing (If You Have Leftovers, Which Is Rare)
I pop leftovers in a lidded container in the fridge. They’ll hold up for 3-4 days, but honestly, in my house, they mysteriously vanish within 24 hours – my partner swears it wasn’t them. If you wanna freeze, wrap tight in foil then bag. Thaw overnight and warm in the oven at 275°F (135°C) till hot and sticky again.
How We Serve ‘Em
Burnt ends are basically finger food in my book (watch the kids for sauce mustaches). We put a pile on a big platter and just let folks dig in with toothpicks, but I’ve also stuffed them in slider buns with pickles – total hit at my cousin’s birthday. Sometimes for game day, I’ll toss a few into mac and cheese. (Try that one, trust me.)
Laughably Honest “Pro Tips”
- I once tried cranking up the heat to finish faster—not smart. The glaze burned and I had to soak the pan for days.
- If you get impatient (like me), remember: the longer, lower cook time actually gives you that amazing tender interior. Rushing just makes chewy bites.
- Read the ingredient list twice, because I always forget something at the store and have to improvise.
Community Questions (a.k.a. My Friends Won’t Stop Texting Me)
- “Can I use pork shoulder instead of pork belly?”
- You can, but it’s just not the same. Pork belly gives you all that rich, melty fat. Shoulder turns out a bit more like standard barbecue chunks, not bad, just different.
- “Do I really need a wire rack?”
- Nope! You can put the cubes right on the smoker grate—or on a foil-lined tray. A rack just makes cleanup easier. I’ve lost a few through the grates (those are the chef’s bites, in my book.)
- “Is it worth making my own dry rub?”
- If you’re feeling fancy, sure! But store-bought works fine, and once you add all the sticky stuff, it doesn’t matter much. Save homemade for special occasions or when you’re feeling competitive.
- “Are these spicy?”
- Not really—unless your rub is. Add chili flakes if you want a kick. My aunt claims kids won’t eat them if they’re too hot, but you know your crew best.
- “Can I finish them under the broiler for extra crisp?”
- You can! A minute or two on a sheet pan does the trick, but don’t wander off—trust me, I’ve set off the smoke alarm more than once.
So… that’s my bona fide, totally imperfect guide to making smoked pork belly burnt ends. If you’ve got a yard, a smoker, and a little time, give it a go—just be ready for the neighbors to “happen by” right about dinnertime.
Ingredients
- 1 slab pork belly (about 3 pounds, skin off) – Sometimes I get from the butcher, but the supermarket version is fine. My neighbor Dave insists on that fancy heritage stuff; I don’t notice a huge difference once it’s sauced.
- 3 tablespoons yellow mustard – Spicy brown works, or honestly, I’ve used plain old ketchup in a pinch. Not traditional but it did the job.
- 1/4 cup barbecue dry rub – I use whatever’s hanging around, usually something smoky and sweet. Grandma swore by Lawry’s, but I’ve made my own too (with questionable results once – too much paprika that time.)
- 1/2 cup brown sugar – Light or dark, whatever you’ve got.
- 1/3 cup honey – I’ve used maple syrup before; wasn’t the same sticky finish but pretty decent. (Don’t skip some kind of syrup, though.)
- 1 stick (1/2 cup) unsalted butter, cut into bits
- 2/3 cup barbecue sauce – Your favorite. The sticky, sweet kind, not the thin vinegar ones. Store brand works, I promise.
- 1 tablespoon apple cider vinegar – I have, like, five kinds of vinegar. Use white if that’s what you’ve got, but cider is best here.
Instructions
-
1Get your pork belly ready: Pat the slab dry. (This is also where my cat appears out of nowhere.) Chuck it onto a big cutting board and dice into cubes – about 1.5 inches, but honestly, just aim for roughly even so everything cooks at the same pace.
-
2Mustard time: Toss the pieces in a bowl and goop on the mustard. Use your hands (this is a little gross, but fun). The goal: get everything coated, no dry spots. Wash your hands—trust me.
-
3Rub down: Sprinkle dry rub over the cubes. Use more than you think you need. Toss again. If your dry rub is clumpy or old, just break it up with your fingers. No stress.
-
4Let it sit: I usually let these sit 15-20 minutes on the counter, mostly because I’m tidying up or searching for my lighter. Gives the rub time to stick a bit.
-
5Fire up the smoker: Preheat your smoker to 250°F (about 120°C). I go with cherry wood if I’ve got it—apple or hickory are fine too. Don’t overthink it. If it’s raining I’ve even used my oven (doesn’t taste the same, but still good, sort of…)
-
6Get smokin’: Set the pork belly cubes on a wire rack or straight onto your smoker grate, leaving a little space between. This is not the time to crowd the pan. Close it up and smoke for about 2 to 2.5 hours. They’ll look a little dried out by the end; that’s normal–they’re just soaking up smoke.
-
7Second round: Sauce and sweeten: Dump the cubes (careful, super hot!) into a tray or foil pan. Scatter over the brown sugar, drizzle honey all over, dot the butter cubes among the meat, and pour in vinegar plus the barbecue sauce. Then use tongs to jumble everything up. (This is where I usually sneak a taste, if no one’s looking.)
-
8Back to the smoker: Cover the tray with foil and slap it back onto the smoker for another hour. Be ready for that amazing caramelly smell to draw people in.
-
9The sticky finish: Remove the foil and let everything cook uncovered for 30-ish more minutes. Stir things up every so often; you want them tacky, glazed, and shimmering. If they look almost too dark, you’re doing it right.
-
10Let ’em cool (briefly): Take off the heat and let them sit (I know, so hard). The glaze will thicken as they cool. Eat warm, preferably with a cold drink and extra napkins.
Approximate Information for One Serving
Nutrition Disclaimers
Number of total servings shown is approximate. Actual number of servings will depend on your preferred portion sizes.
Nutritional values shown are general guidelines and reflect information for 1 serving using the ingredients listed, not including any optional ingredients. Actual macros may vary slightly depending on specific brands and types of ingredients used.
To determine the weight of one serving, prepare the recipe as instructed. Weigh the finished recipe, then divide the weight of the finished recipe (not including the weight of the container the food is in) by the desired number of servings. Result will be the weight of one serving.
Did you make this recipe?
Please consider Pinning it!


