Let Me Tell You About Strawberry Kiss Cookies (Just Real Quick)
Okay, picture this: It’s rainy, everyone’s a little grumpy, and you just need that tiny bit of comfort. That’s when I first made these Strawberry Kiss Cookies. Not some magical handed-down recipe; just me, determined to use up some strawberry jam before it turned weird in the fridge (don’t act like you don’t have jars like this too). My sister, who swears she “doesn’t like cookies” (liar), ate five in one sitting. Could be the nostalgia, or the fact they’re so easy you can pull them together while half-watching your favorite show. Either way, they disappeared—and now they’re sort of my signature emergency treat.
Oh—side note: if you make them when strawberries are actually in season, you’ll look like a kitchen genius. But honestly, the jar stuff works just grand most of the time.
Why I Keep Coming Back to This Recipe
I pull these out when everyone needs cheering up. Or when, ahem, I forget I’ve promised to bring dessert—again. They’re not fussy, thank goodness. My family goes a bit bonkers for them. My daughter says they taste like summer holidays in a bite (I think she’s laying it on a bit thick, but she eats the dough, so…) Occasionally, the cookies look a bit lumpy. I used to care, but now I just call them “rustic”. Best part: the kitchen smells like an actual bakery for hours after. Except for that one time I burnt the bottoms—pro tip: don’t try to multitask laundry with baking.
What You’ll Need (and What I Mess With)
- 1 cup unsalted butter, softened (I’ve used salted when that’s all I had and just skipped the pinch of salt—honestly, not a disaster)
- 3/4 cup granulated sugar (sometimes I do half white, half brown if I’m feeling rebellious or out of sugar)
- 1 large egg (my friend only keeps medium, so she adds a splash of milk—works fine)
- 2 teaspoons vanilla extract (been known to use less if I’m running low, just tastes a bit less, well, vanilla-y)
- 2 cups all-purpose flour (I once swapped a quarter cup for almond flour; it made them softer—good, but not essential)
- 1/4 teaspoon salt (not needed if you use salted butter—promise, I’ve checked)
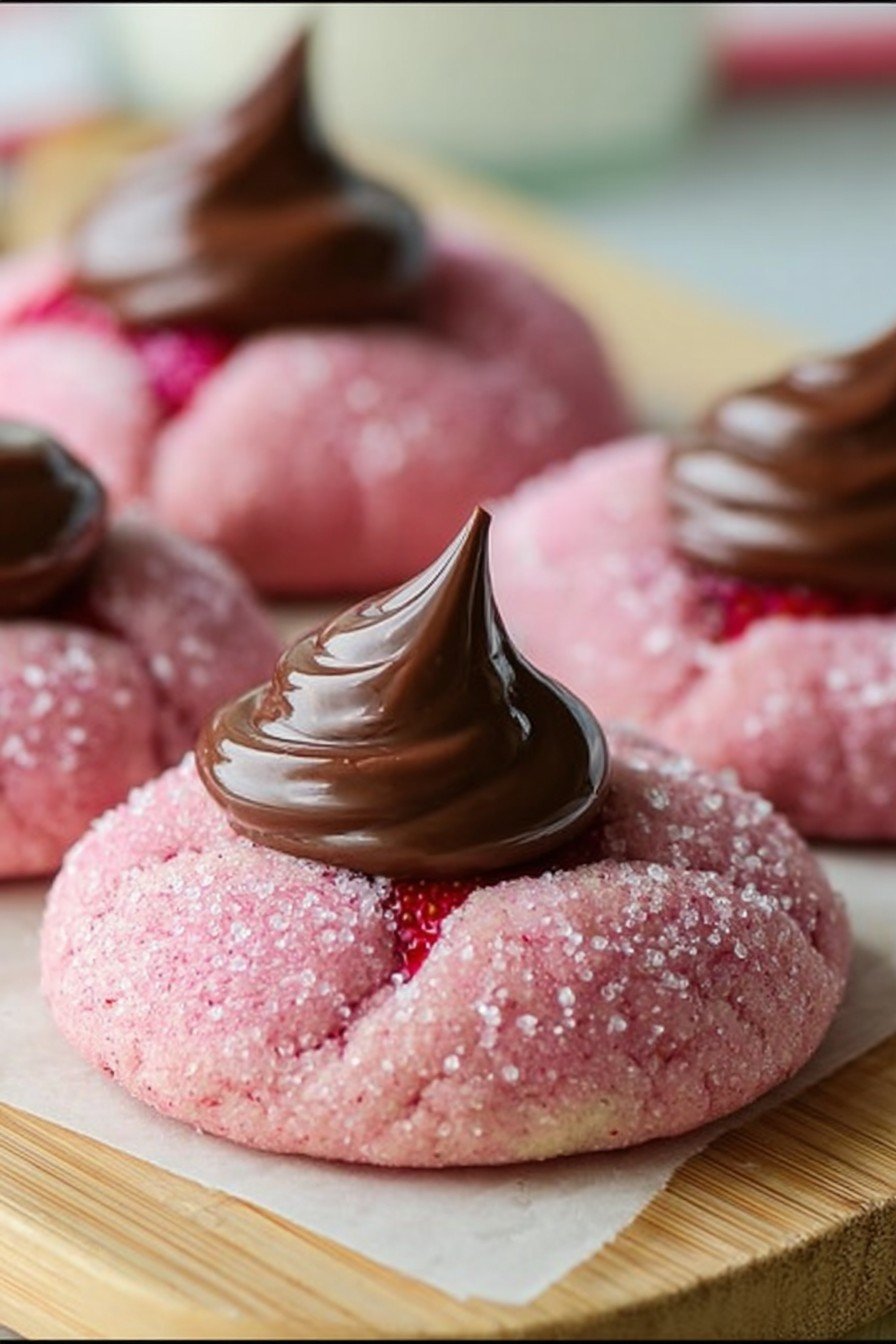
- 1/2 cup strawberry jam (my gran always swore by Bonne Maman, but honestly, store brand is just peachy—actually, strawberry-y, oh you know what I mean)
- Extra: a few whole strawberries, hulled and quartered, for the top (optional—sometimes I skip if they’re pricey)
How I Throw These Together (Don’t Overthink It)
- Preheat your oven to 350F (or 180C if you go by Celsius). Get out a baking sheet and line it with parchment paper—or grease if you forgot to buy some (guilty).
- Cream the butter and sugar in a big bowl until it’s fluffy. (This is where I usually sneak a taste, mainly for scientific reasons…)
- Add the egg and vanilla, then mix again. It might look kind of weird and separated at first; that’s normal. Don’t panic. Give it a couple more stirs.
- Dump in the flour and salt. Stir until a dough forms. It’ll seem crumbly at first—keep the faith and maybe use your hands if your mixer is huffing and puffing. Works either way.
- Take about a heaping teaspoon of dough and roll into balls (about a walnut, but honestly, I just eyeball it). Plonk them spaced about 2 inches apart on your tray.
- Press your thumb (or the back of a teaspoon, if you’re fancy) into the center of each ball to make a little well. Don’t press so hard you go straight through—trust me.
- Fill each well with about half a teaspoon of strawberry jam. If you overfill, it bubbles over—looks dramatic, tastes awesome, just messier.
- If you feel cheffy (or bought strawberries for show), pop a strawberry piece on top of the jam. Not essential, but pretty.
- Bake for 11 to 14 minutes—mine are usually spot on at 12. Edges should be faintly golden. Don’t wait for them to go fully brown or it’s too late!
- Let them cool a bit on the tray (here’s where I usually burn my mouth because I can’t wait). Transfer to a rack when you remember.
Stuff I’ve Learned the Hard Way (Notes)
- If your dough’s too sticky, fridge it for 20 minutes. Or… just proceed and accept sticky hands—it bakes up fine either way.
- If you’re low on jam, mix in a scoop of another flavor (I tried raspberry once; not half bad, but strawberry feels more like a hug).
- The cookies do spread a bit, so don’t crowd the tray unless you want a mutant cookie blob (been there, tasted good, just not cute).
Variations I’ve Actually Tried (With Mixed Success)
- I swapped the strawberry jam for apricot—tasty, but not quite right, maybe too tart.
- Lemon zest in the dough? YES. Makes it extra bright, try it if you’re into that sort of thing.
- Once, I thought Nutella instead of jam would be amazing. Actually, it just kind of disappeared in the bake—so maybe skip that.
What You Actually Need (Plus, My Quick Fixes)
- Mixing bowl: Any old bowl, really. I’ve used a salad bowl once in desperation. Worked.
- Hand mixer or a wooden spoon (mixing by hand counts as exercise, right?)
- Baking sheet and parchment (Or if your tray’s a bit warped… just stick something under the wonky side. It’ll do.)
- Cup measures—unless you’ve lost yours, in which case a coffee mug gets close. (I did check, my mug is almost exactly a cup.)
How to Keep Them (If You Even Need To)
I store them in a tin with a layer of wax paper between stacks, but honestly, in my house they never last more than a day, so don’t stress. If somehow you have leftovers, they’ll keep at room temp for about 3 days (maybe longer, but mine always vanish).
How We Serve These at My Place
I love them with tea—Earl Grey if I’m feeling fancy, or just builder’s tea. My mum dunks hers, I like mine plain. My son claims they taste better cold from the fridge, but what does he know? If you want to get posh, a dusting of powdered sugar looks cute, though I forget half the time.
The Stuff I Wish Someone Told Me (Pro Tips)
- I once tried to skip chilling the dough when it was hot out—and my cookies melted together. Not the best idea, unless you want “cookie bark.”
- If you find the jam gets too runny and makes a mess, just use a little less. Actually, less is more here.
- Baking two trays at once? Rotate them halfway unless you like one batch crispy and the other, well, slightly underwhelming.
Your Questions, My Honest Answers (FAQ Style)
Can I use a different kind of jam?
Absolutely; try whatever you’ve got. Just prpbably stick to chunks rather than the super jelly kind because that tends to escape everywhere. (Not that I’m speaking form traumatic experience…)
Can you freeze these?
Yup, freeze the raw dough balls and stuff ‘em when you bake. I wouldn’t freeze baked cookies, they get a bit sad in texture.
What if I don’t have vanilla?
You’ll live! Maybe add a tiny splash of almond extract, or honestly, just skip it once. The cookie still shines, promise.
What about gluten-free?
A friend tried with a 1:1 gluten-free flour mix; she said they were a tad crumbly but still demolished by her crew. Just nudge the bake time down by a minute.
Can I double the batch?
Heck yes, and some days that’s just called for. Just don’t crowd your oven or you might as well bake one giant, lumpy jam biscuit.
Oh—one last thing, and it’s not exactly a cookie tip: but isn’t it funny how baking something tiny and sweet just sort of brightens the place up? Anyway, if you try these, let me know if your family’s as shameless about sneaking them as mine is.
Ingredients
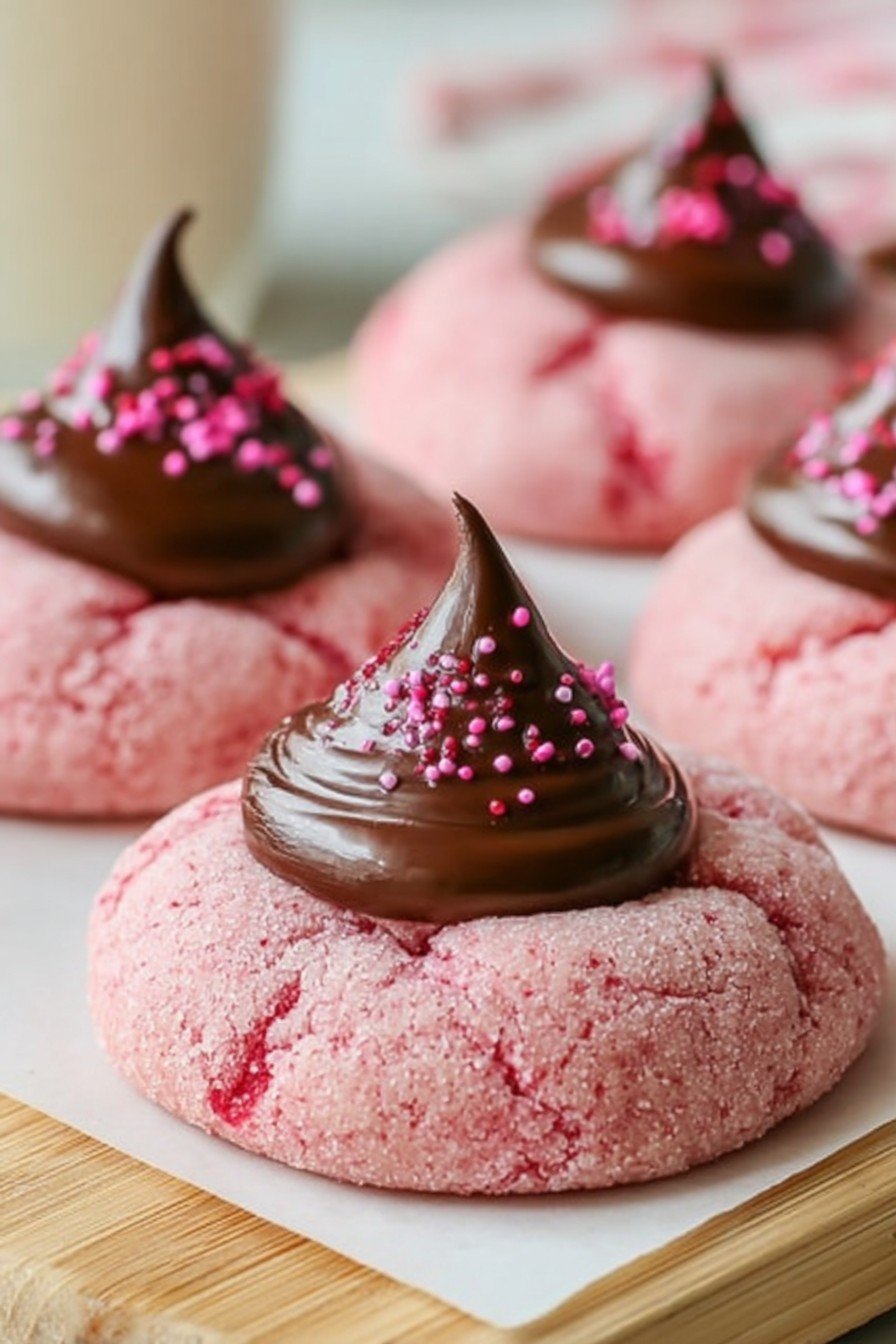
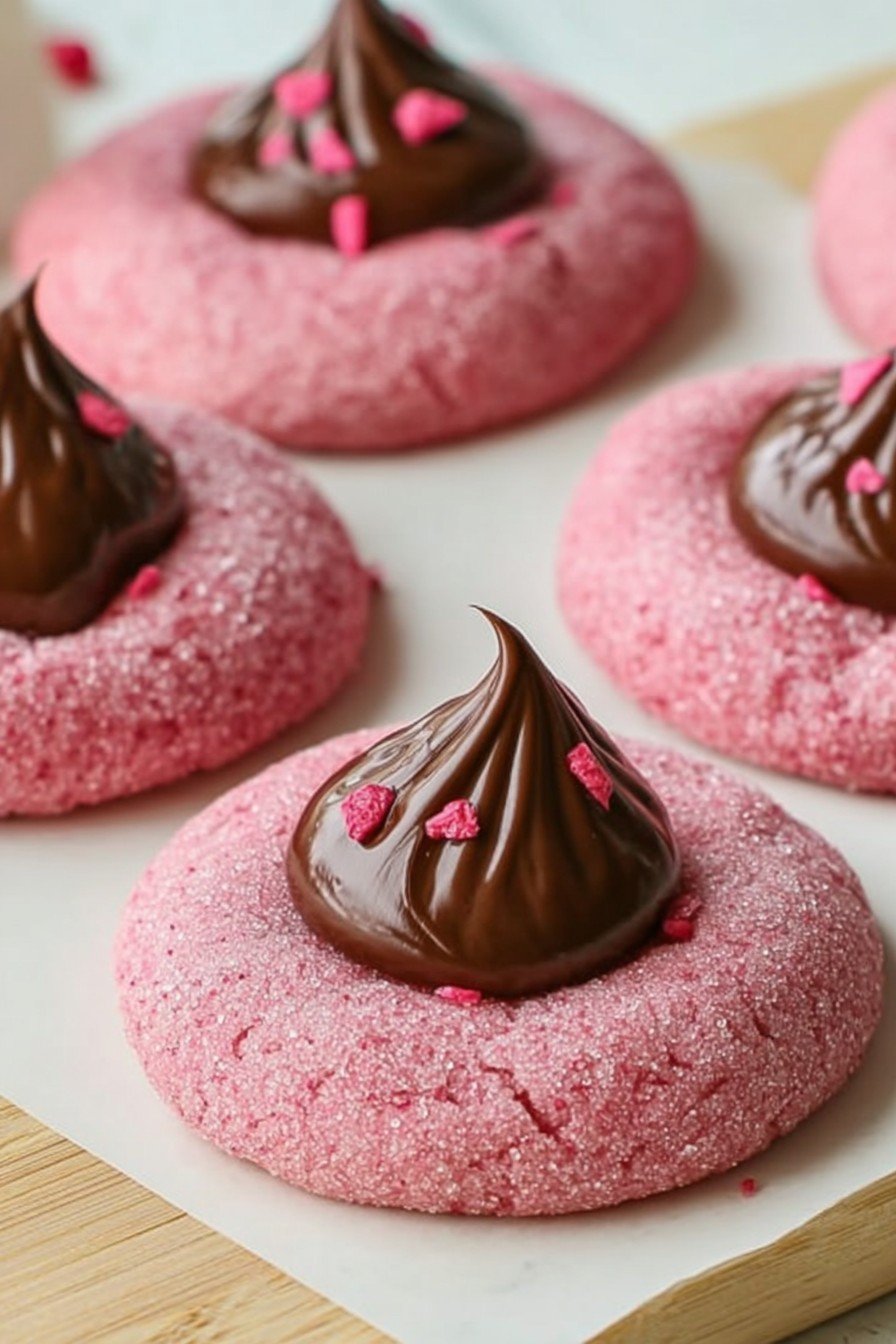
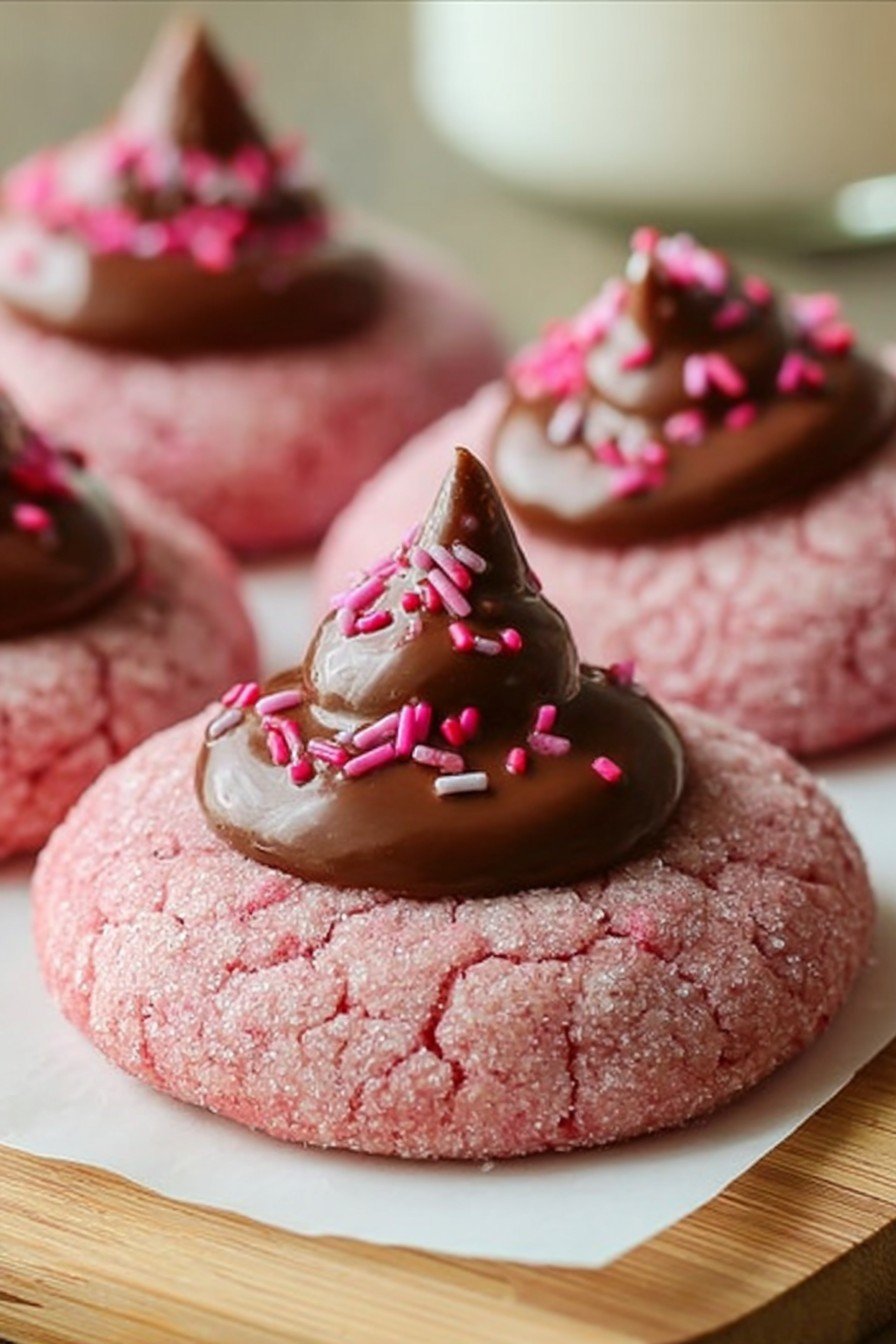
- 1 box (15.25 oz) strawberry cake mix
- 1/3 cup vegetable oil
- 2 large eggs
- 1/2 teaspoon vanilla extract
- 1/2 cup powdered sugar (for rolling)
- 24 milk chocolate kisses, unwrapped
- Optional: pink or red sprinkles
Instructions
-
1Preheat the oven to 350°F (175°C) and line a baking sheet with parchment paper.
-
2In a large bowl, combine the strawberry cake mix, vegetable oil, eggs, and vanilla extract. Mix until a soft dough forms.
-
3Roll the dough into 1-inch balls, then coat each ball in powdered sugar. Place them 2 inches apart on the prepared baking sheet.
-
4Bake for 8-10 minutes, or until the cookies are just set. Do not overbake.
-
5Remove the cookies from the oven and immediately press a chocolate kiss into the center of each cookie. Optionally, top with sprinkles.
-
6Let the cookies cool on the baking sheet for 5 minutes, then transfer to a wire rack to cool completely.
Approximate Information for One Serving
Nutrition Disclaimers
Number of total servings shown is approximate. Actual number of servings will depend on your preferred portion sizes.
Nutritional values shown are general guidelines and reflect information for 1 serving using the ingredients listed, not including any optional ingredients. Actual macros may vary slightly depending on specific brands and types of ingredients used.
To determine the weight of one serving, prepare the recipe as instructed. Weigh the finished recipe, then divide the weight of the finished recipe (not including the weight of the container the food is in) by the desired number of servings. Result will be the weight of one serving.
Did you make this recipe?
Please consider Pinning it!!


