Okay, so let me tell you, I *love* tiramisu. Like, REALLY love it. But making a whole big dish? Dipping all the ladyfingers just right, layering it carefully… it’s a bit of a faff, isn’t it? Especially when you just want a quick sweet fix *now*. One afternoon, I was craving that flavour but only had about ten minutes before friends were coming over (classic me, right?) and I looked at the leftover ladyfingers and cream cheese and just thought… what if? And behold, the 10 Minute Tiramisu Ball was born!
Why I’m Obsessed With These Little Guys
Honestly? They’re an absolute doddle to make. I make this when I’m feeling lazy (which is often, let’s be real) or when unexpected guests pop ’round. My family goes utterly crazy for these because they taste like proper tiramisu, but in a fun, bite sized package. Plus, no raw eggs, which is a bonus for some people! And honestly, anything that takes ten minutes and involves chocolate and coffee is a win in my book. They just look fancy enough without any effort.
Bits You’ll Need (Ingredients!)
Here’s the lowdown on what goes in. Don’t worry if you don’t have the exact thing, you can totally mess about a bit.
- About 200 250g ladyfinger biscuits (Savoiardi are traditional, but honestly, whatever plain hard biscuit you’ve got knocking about might work. I’ve even used crushed shortbread in a pinch, didn’t taste *exactly* like tiramisu but was still yummy!)
- 125g cream cheese, softened (Full fat is best for texture, trust me. But reduced fat will do if thats all you have, they just might be a touch softer.)
- 50g icing sugar (powdered sugar)
- 2-3 tablespoons strong brewed coffee, cooled (Espresso is ideal, obviously, but honestly, any strong coffee will do. Instant coffee mixed with a tiny bit of hot water works form me when I’m desperate.)
- 1 tablespoon coffee liqueur or dark rum (Totally optional! But adds a nice grown up kick. If you’re making these for kids or prefer non alcoholic, just skip this or add a tiny splash of vanilla extract instead.)
- Cocoa powder, for rolling (Get decent stuff if you can, it makes a difference. I like using Callebaut cocoa powder, it’s just lovely and dark.)
- Optional: A little grated dark chocolate for extra fanciness.

Right, Let’s Make ‘Em (The How To)
Seriously, this is easy peasy. Get stuck in.
- First up, you gotta smash those biscuits. The easiest way is in a food processor until they’re fine crumbs. If you don’t have one, stick ’em in a Ziploc bag and bash ’em with a rolling pin. It’s surprisingly good for stress relief!
- In a medium bowl, beat the softened cream cheese and icing sugar together until it’s smooth and lovely. You don’t need electric beaters, a spoon is definately fine.
- Pour in the cooled coffee and the liqueur/rum (if you’re using it). Mix it all up.
- Now, add the biscuit crumbs to the wet mixture. Stir it all together. It’s going to look a bit like… well, like wet biscuit crumbs mixed with cream cheese. Don’t worry if it seems a little dry at first, just keep mixing. You’re aiming for a consistency that you can roll into balls, kind of like playdough. Actually, I find it works better if you let it sit for literally two minutes before rolling, just gives the crumbs a second to soak everything up.
- Get a plate or shallow dish and put a generous amount of cocoa powder on it.
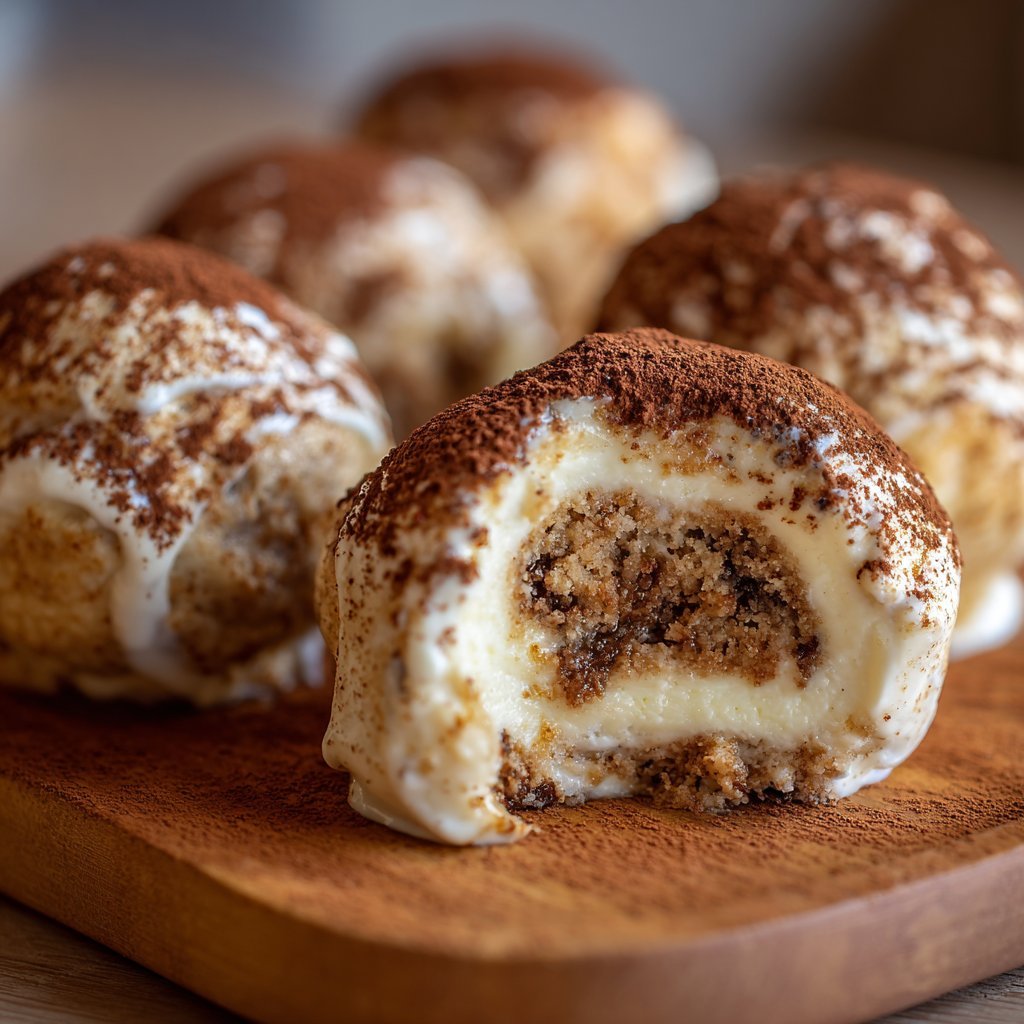
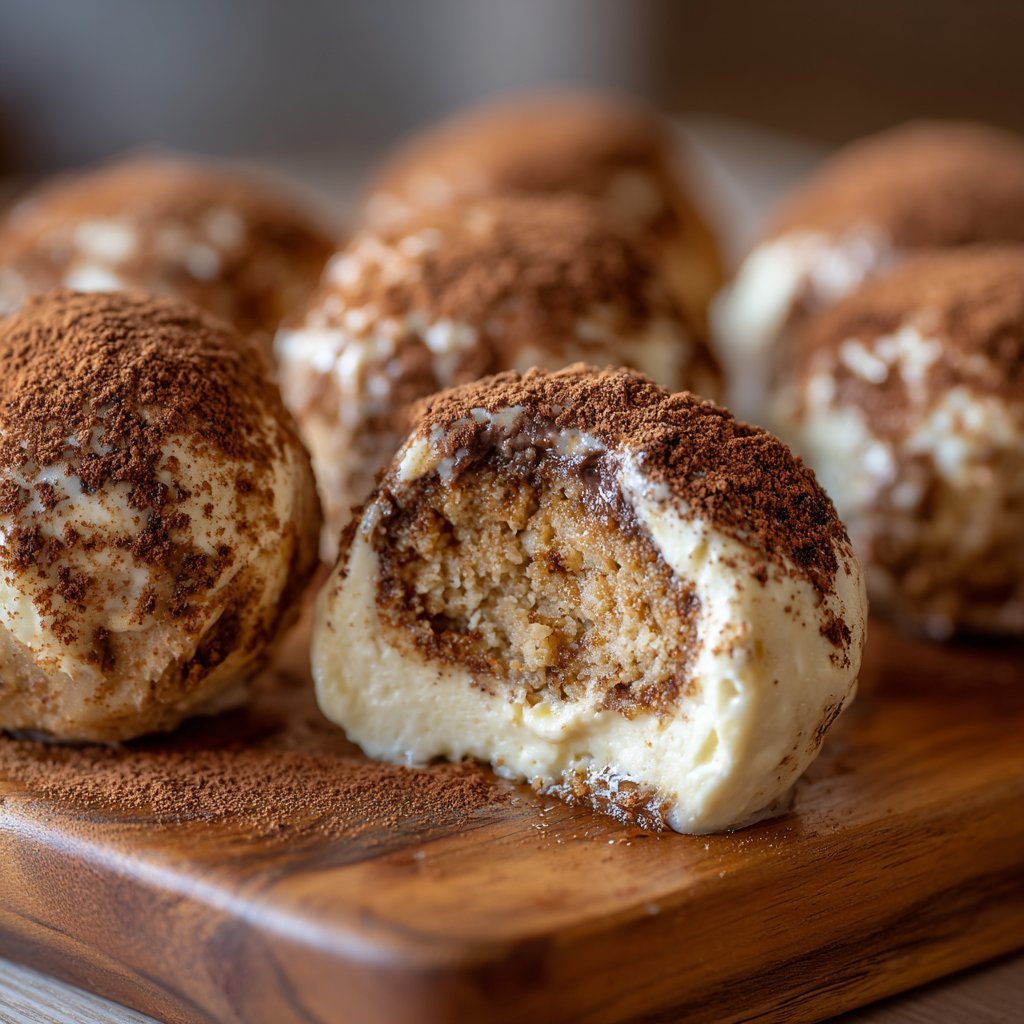
- Now for the fun bit! Scoop out small amounts of the mixture and roll them into little balls. About walnut sized is good. This is where I usually sneak a taste of the mixture, just to check it’s, you know, safe.
- Roll each ball in the cocoa powder, making sure it’s fully coated.
- Place the finished balls on a serving plate. If you want to add grated chocolate, sprinkle it over now.
- Pop them in the fridge for at least 15 20 minutes to firm up a bit. Though honestly, waiting is the hardest part!
Lessons Learned Along the Way (Notes)
From my kitchen to yours, here’s what I figured out:
- Softened cream cheese is KEY. If it’s cold, it’ll be lumpy and horrible to mix. Take it out of the fridge maybe 30 mins before you start?
- The amount of coffee you need can vary *slightly* depending on how dry your biscuits are. Start with less, you can always add a tiny splash more if the mixture is too crumbly to roll. If it’s too wet, add a tiny bit more crushed biscuit or even a tablespoon of desiccated coconut (sounds weird, works!).
- Rolling in cocoa powder is messy! Just embrace it. Don’t wear white.

Mix It Up! (Variations)
I’ve played around a bit with these. Here are some ideas:
- Boozy Kick: Add a bit more rum or liqueur if you like a stronger flavour. Or swap the coffee liqueur for amaretto!
- Chocolate Lovers: Mix a tablespoon of melted dark chocolate into the cream cheese mixture. Yum.
- Orange Zest: A little finely grated orange zest in the cream cheese mixture adds a lovely brightness.
- Failed Experiment: I once tried rolling them in desiccated coconut instead of cocoa. Didn’t work. Looked weird, didn’t taste right at all. Stick to the cocoa, folks. Or maybe finely ground nuts? Haven’t tried that yet.
What You’ll Need (Equipment)
Honestly, you don’t need much. A bowl, a spoon, maybe a food processor (or a plastic bag and a rolling pin!). That’s pretty much it. See? Easy.
Storing Your Precious Balls
Keep them in an airtight container in the fridge. They should last 3-4 days, but honestly, in my house it never lasts more than a day! If you want to make them ahead, they’re totally fine stored overnight.
How I Like To Serve Them
Just piled high on a pretty plate! They’re perfect with a cup of coffee (obviously) or after dinner with a little espresso. My kids like them with milk, which is adorable.
Wisdom From My Mistakes (Pro Tips)
- Don’t skimp on softening the cream cheese. I once tried rushing this step and regretted it because I spent ages trying to bash lumps out.
- Use good quality cocoa powder. It’s literally half the flavour of the coating, so use something decent.
- Chill time is important! They taste better and hold their shape properly if they’ve had time to firm up in the fridge. Don’t serve them straight away, you’ll be disappointed.
- Rolling tip: If the mixture is sticking to your hands too much, pop the whole bowl in the fridge for 5-10 minutes to firm up slightly before rolling. Or wet your hands *very* slightly with water.
Questions You Might Have (FAQ)
Q: Can I use different biscuits?
A: Yeah, probably! As long as they’re fairly dry and plain, like shortbread or even digestives? You’d just need to adjust the amount of liquid maybe. Give it a go!
Q: Are these *really* 10 minutes?
A: Okay, maybe 10 active minutes? Bashing the biscuits, mixing, rolling. If you factor in getting ingredients out and the chill time, obviously not! But the hands on part is super fast, I promise.
Q: Can I freeze them?
A: I haven’t tried freezing these exact ones actually, but I reckon they’d freeze okay before rolling in cocoa. Thaw them in the fridge and then roll. Let me know if you try it!
Q: My mixture is too dry/wet! Help!
A: See my notes section above! Too dry? Add a tiny splash more coffee. Too wet? More biscuit crumbs or even some desiccated coconut works wonders. You got this.
So there you have it! My super speedy, ridiculously easy, totally scoffable 10 minute tiramisu balls. Give ’em a go and tell me what you think!
Ingredients
- 150g ladyfinger biscuits
- 250g mascarpone cheese, softened
- 60ml strong brewed coffee, cooled
- 30g powdered sugar
- 1 tsp vanilla extract
- 30g unsweetened cocoa powder, for coating
Instructions
-
1Place the ladyfinger biscuits in a food processor and pulse until fine crumbs form. Alternatively, place them in a bag and crush with a rolling pin.
-
2In a medium bowl, combine the crushed ladyfinger crumbs, softened mascarpone cheese, cooled strong coffee, powdered sugar, and vanilla extract.
-
3Mix until all ingredients are well combined and a thick, dough-like mixture forms.
-
4Using your hands, roll the mixture into small balls, about 1 inch in diameter.
-
5Place the unsweetened cocoa powder in a shallow dish. Roll each ball in the cocoa powder to coat evenly.
-
6Place the coated balls on a plate or tray. For best results, chill in the refrigerator for at least 15-30 minutes before serving, although they can be eaten immediately.
Approximate Information for One Serving
Nutrition Disclaimers
Number of total servings shown is approximate. Actual number of servings will depend on your preferred portion sizes.
Nutritional values shown are general guidelines and reflect information for 1 serving using the ingredients listed, not including any optional ingredients. Actual macros may vary slightly depending on specific brands and types of ingredients used.
To determine the weight of one serving, prepare the recipe as instructed. Weigh the finished recipe, then divide the weight of the finished recipe (not including the weight of the container the food is in) by the desired number of servings. Result will be the weight of one serving.
Did you make this recipe?
Please consider Pinning it!!