
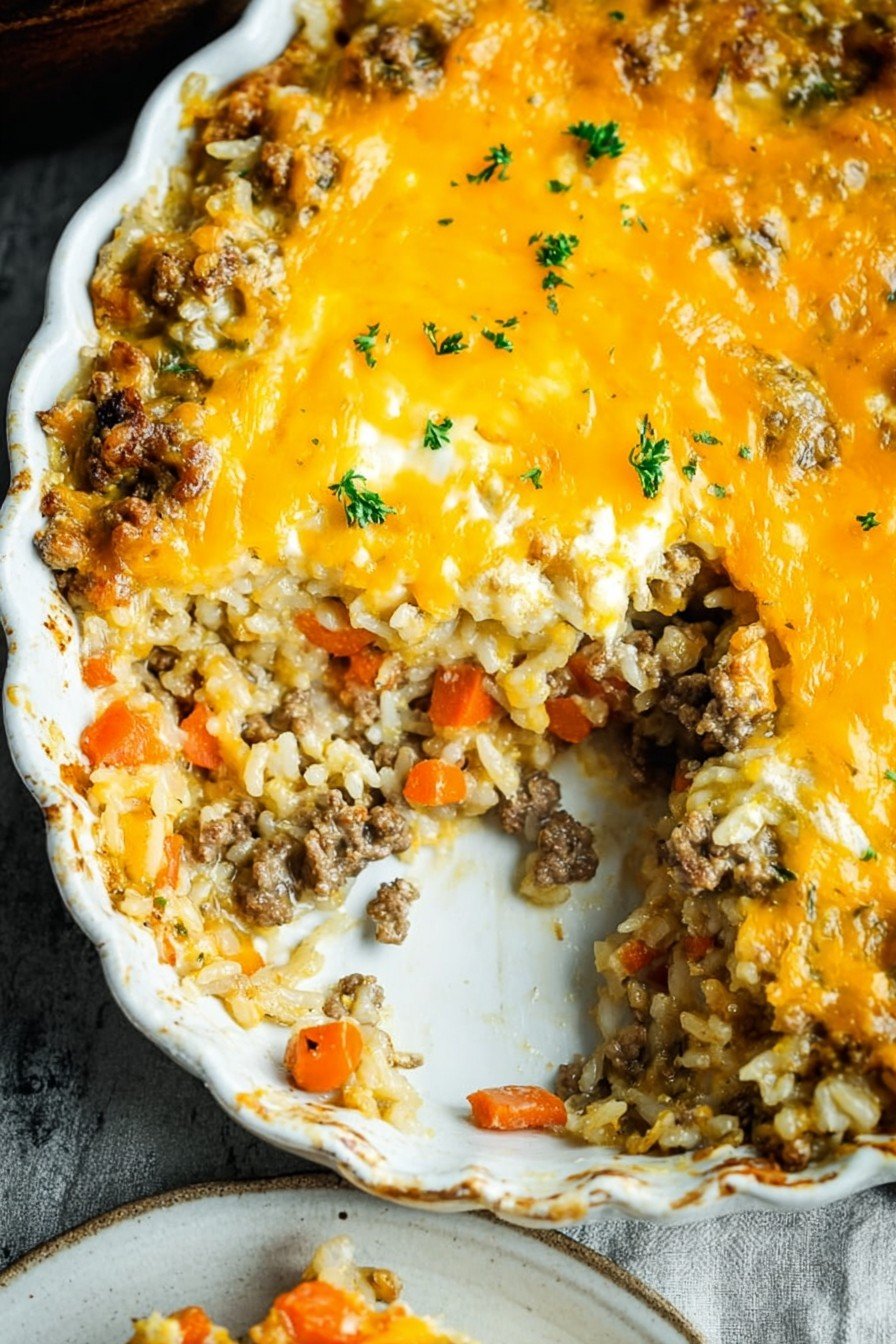
Let Me Tell You About This Cheesy Ground Beef and Rice Casserole…
Alright, so if I had a dollar for every time I made this cheesy ground beef and rice casserole, I’d probably have enough for a small cheese empire by now. (Okay, maybe just a hefty block of cheddar.) This recipe is my secret weapon for those nights when dinner needs to be easy, filling, and most importantly, won’t require me to bribe the kids to eat it. Honest to goodness, I first learned it from my Aunt Joan — who makes everything taste like a hug wrapped in cheese — and I’ve been tweaking it ever since. One time, I even forgot the rice. Don’t recommend.
Why You’ll Absolutely Want to Make This (And Not Just Once)
I break this out whenever I need comfort with minimal fuss; like rainy Saturdays or after way too many errands. My family basically requests it before I even ask what they want for dinner. (If my husband is home late, I swear he can smell it from the driveway). It’s got that miraculous combo: beef for protein, cheese for melty happiness, and rice to soak it all up. Plus, if I’m pressed for time, I’ll just throw in pre-cooked rice—though, honestly, it’s better with fresh. Oh, and the thing that used to drive me bananas? Figuring out how not to make the bottom go all mushy. I think I’ve finally cracked the code.
What You’ll Need (But Don’t Stress, Substitutes Welcome!)
- 1 lb (about 450g) ground beef (or turkey… not as rich, but it works in a pinch)
- 1 medium onion, chopped (my gran always swore by yellow onions; any type is fine, honestly)
- 2 cloves garlic, minced (sometimes I cheat and just use garlic powder if I’m rushed)
- 1 cup uncooked white rice (I’ve tried brown rice—it needed more liquid, and it took ages. Your choice!)
- 2 cups beef broth (or just water with bouillon—been there, no shame)
- 1 can (about 10 oz/285g) cream of mushroom soup (or substitute with cream of chicken if that’s what’s rattling around in your pantry)
- 1 1/2 cups shredded cheddar cheese (Colby-Jack is good too; I once used leftover pizza cheese blend… not mad about it.)
- 1 cup frozen peas or mixed veggies (optional, but I sneak them in for color… and virtue)
- Salt and pepper to taste (start small, you can always add more—learned that the hard way)
- 1/2 tsp paprika (optional, but I like the smoky thing it does)

How To Throw It Together (And Not Get Stressed)
- Crank up your oven: Preheat to 350°F (about 175°C, give or take). Trust me, don’t skip this—I’ve tried to be clever and shove it in early. Nope, took way longer.
- Brown that beef: In a big skillet (something with deep-ish sides is best), cook the ground beef over medium heat with chopped onion until it’s no longer pink. Toss in your garlic for the last min or so—unless you did the garlic powder swap, in which case, just sprinkle it in when you feel like it. Drain off the grease! (Don’t dump it down the sink—yes, I did, and yes, I regretted it.)
- Add the flavor: Stir in soup, broth, rice, paprika, salt, pepper, and, if you’re feeling veggie-adventurous, the frozen peas. Mix it all together—it’s gonna look sloshy, but don’t panic.
- Cheese situation: Stir about half the cheese into the mix. I usually sample it at this point—chef’s privilege, right?
- Bake it off: Pour everything into a greased 9×13-inch baking dish (mine has a chip in the corner, doesn’t matter). Cover tightly with foil—makes a HUGE difference, don’t skip it. Bake for 35-40 min, until rice is tender. If you lift the foil and it looks weird—not to worry, give it a stir and back in she goes for another ten.
- Final cheese hurrah: Yank off the foil, scatter the rest of the cheese, and blast under the broiler for a couple minutes if you like a browned top (which you should, it’s gorgeous). Or just let it melt in the hot oven for 5 min if you’re feeling lazy. Not judging.
Some Notes (Because I’ve Made Every Mistake)
- If your rice sometimes ends up a bit undercooked, try rinsing it before adding. Or just use minute rice, which I swore I’d never do, but well, life happens.
- I actually find a mix of cheddar and pepper jack cheese gives a nice kick, though my youngest claims I’m trying to set his mouth on fire. Exaggeration, I swear.
- Don’t stress if you’ve only got cream of celery soup. Did it once—tasted fine, just a little herby.
Variations I’ve Tried (Plus a Miss or Two)
- Swapped in ground turkey and added mushrooms once. Surprisingly, not bad.
- Added diced bell peppers—looked good, tasted good, but made things a bit “crunchier” than I like. Maybe sauté them first?
- Went wild and used quinoa instead of rice—sorry, just didn’t love it. Maybe it’s me; maybe it’s the quinoa.
- If you like it spicy, a little chopped green chili never hurt anyone (unless you’re my mother, who said her lips went numb).
Stuff You’ll Need (Don’t Panic If You Don’t Have Everything)
- Large skillet or frying pan (I sometimes grab my wok, works just fine!)
- 9×13-inch casserole dish (if you only have a round one, it’s fine, just watch the edges for extra toasty bits)
- Aluminum foil (if you ran out, lay a baking sheet on top. Not perfect, but gets the job done.)
- Wooden spoon or spatula—unless you’re a whisk rebel, which I’ve done. It’s chaos but it works.
How To Store (You Might Not Need This)
If you actually have leftovers (which is rare in our place), just scoop it into a container, toss it in the fridge, and it’ll keep for about 3 days. I think it tastes even better the next day, after everything mingles. Reheats well in the microwave. Freezer? Yeah, it works, though the cheese gets a bit weird. Not bad, just…different.
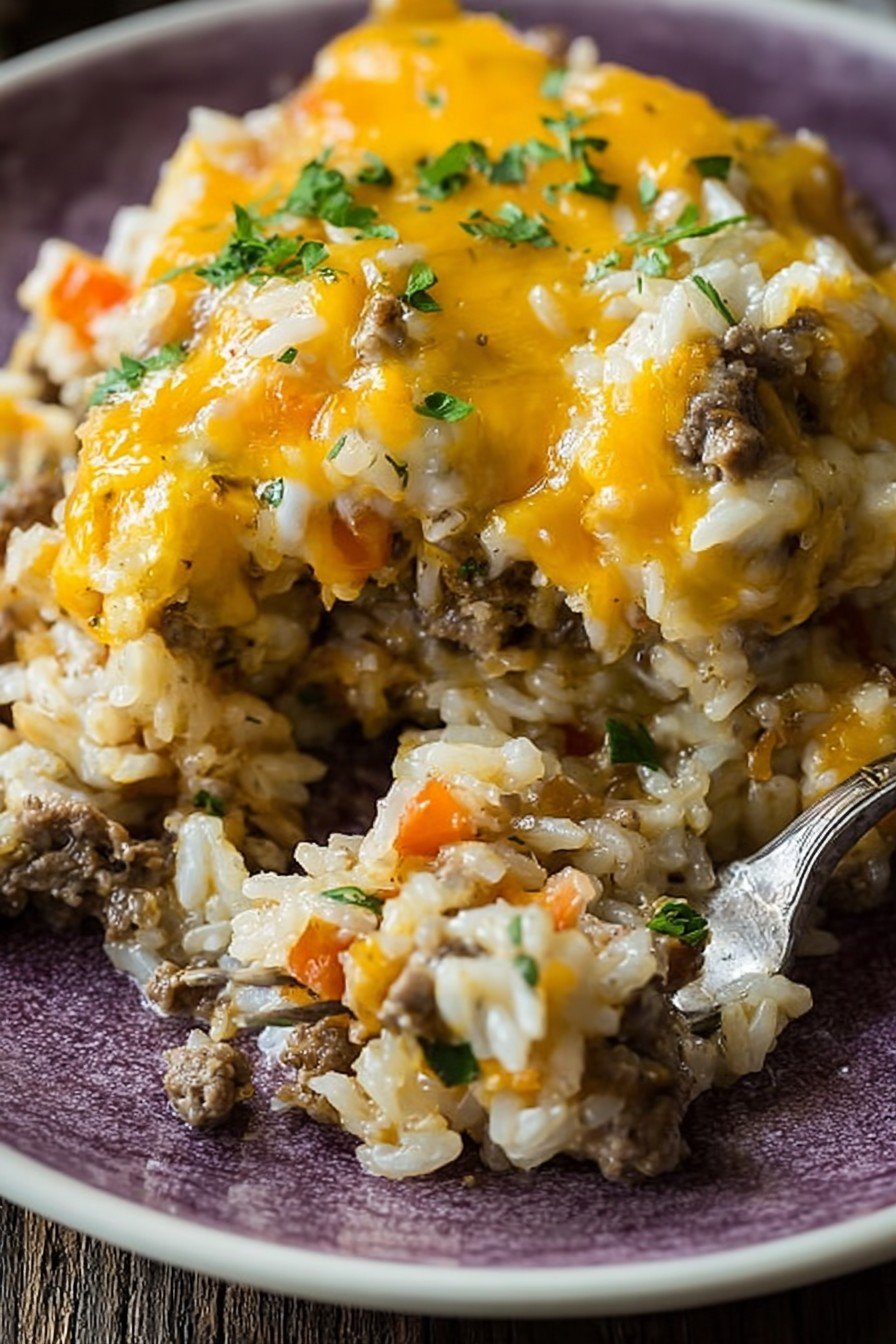
How I Serve It (Our Way, But Make It Yours)
I like to serve this alongside a big green salad—something about the crunch and freshness works for me. My kids demand garlic bread every time, even though it has carbs on carbs. No complaints. Occasionally I’ll just scoop it into bowls and plop on a big spoonful of sour cream. If you wanna get fancy, sliced avocado on top is dreamy.
Pro Tips Learned The Hard Way
- I once rushed the rice—ended up crunchy in the center. Now I check before pulling the foil all the way off. Don’t be me.
- Let it sit for at least 10 minutes before serving—otherwise it falls apart like my resolve in the cheese aisle. No need to be a hero.
- Broil the cheese topping, but keep an eye on it. Almost set off the smoke alarm once (key word: almost).
FAQ (Because These Always Come Up When I Post This Recipe Anywhere)
- Can I make this ahead? Yes, absolutely! Mix everything except the cheese topping and stick in the fridge. Add cheese and bake when you’re ready. If it’s cold, add maybe 10 minutes to the bake time.
- Gluten-free? Actually, swap for gluten-free cream soup and you’re sorted. Rice and everything else is naturally GF. Yay!
- Can I double it for a crowd? For sure, but use a bigger pan or two regular ones, or you end up with a weirdly runny middle. Trust me—I thought I could make a mountain of casserole in one dish. Lesson learned.
- Can it go in a slow cooker? Haven’t tried, but I saw a version on The Kitchn where they did. Looks promising.
- Best place for cheese deals? I usually check Cheese Grotto (no affiliation, just cheese love), or my local market when they’re on sale.
Oh, nearly forgot — my dog Sully once stole a scoop right off the counter, so now I keep the casserole on the far end while it cools. Small price to pay for an enthusiastic taste-tester, I suppose.
Ingredients
- 1 lb (450 g) ground beef
- 1 cup (190 g) long grain white rice, uncooked
- 1 can (10.5 oz/298 g) condensed cream of mushroom soup
- 1 1/2 cups (355 ml) beef broth
- 1 cup (120 g) shredded cheddar cheese
- 1/2 cup (60 g) chopped onion
- 1/2 cup (60 g) chopped bell pepper
- 1 tsp garlic powder
- 1/2 tsp salt
- 1/4 tsp ground black pepper
- 2 tbsp (28 g) butter
Instructions
-
1Preheat oven to 350°F (175°C). Grease a 9×13-inch baking dish with butter.
-
2In a large skillet over medium heat, cook ground beef, onion, and bell pepper until beef is browned and vegetables are softened, about 5-7 minutes. Drain excess fat.
-
3Stir in garlic powder, salt, and pepper. Add uncooked rice, cream of mushroom soup, and beef broth. Mix until well combined.
-
4Transfer the mixture to the prepared baking dish. Cover with foil and bake for 30 minutes.
-
5Remove foil, sprinkle cheddar cheese evenly over the top, and bake uncovered for an additional 10 minutes or until cheese is melted and bubbly.
-
6Let the casserole stand for 5 minutes before serving.
Approximate Information for One Serving
Nutrition Disclaimers
Number of total servings shown is approximate. Actual number of servings will depend on your preferred portion sizes.
Nutritional values shown are general guidelines and reflect information for 1 serving using the ingredients listed, not including any optional ingredients. Actual macros may vary slightly depending on specific brands and types of ingredients used.
To determine the weight of one serving, prepare the recipe as instructed. Weigh the finished recipe, then divide the weight of the finished recipe (not including the weight of the container the food is in) by the desired number of servings. Result will be the weight of one serving.
Did you make this recipe?
Please consider Pinning it!!


