
The Story (or, Why My Socks Are Still Pink)
Every summer, right when the raspberries turn that just-perfect shade of neon red, I get a text from my little sister: “Pie soon?” Which, in our family, is code for “please make a total mess in the kitchen, forget to clean the sink, and bribe me to help pick berries.” I have this blurry memory of the first pie I ever made looking a bit like something that fell out of a spaceship, stained hands and all. Maybe that’s why I keep making it — there’s something homey about scraped knuckles and jammy fingerprints on the counter. The flavor? Oh, let me tell ya, it’s legit summer in every bite. (By the way, raspberry stains never really come out of white t-shirts, if you’re wondering.)
Why You’ll Love This Pie (And Why I Sometimes Swear at It)
I pull out this raspberry pie recipe when I want to impress company — or, if I’m honest, when I just want dessert for breakfast the next day. My family basically treats this like edible gold (if you leave it unattended, kiss that second slice goodbye). Plus, the crust is forgiving; I’ve patched, pinched, and squished it back together more times than I can count. The tangy raspberry filling is equal parts sweet and sharp, and even when it’s a bit runny (which sometimes happens if I rush it—guilty!), everyone still demolishes it. Sometimes, I think it tastes even better with a few rogue seeds stuck in your teeth. Or maybe that’s just me?
What You’ll Need (Don’t Fret—It’s Flexible)
- 2 cups fresh raspberries (or frozen, if it’s winter—just don’t thaw them too much or the pie gets watery. I sometimes mix in a handful of blackberries if I’m short on raspberries.)
- 3/4 cup white sugar (my gran always said to use Caster, but just regular store stuff works fine)
- 3 heaping tbsp cornstarch (don’t sub flour unless there’s no other option, but my neighbor swears by tapioca powder too)
- 1/4 tsp salt
- 1 tbsp lemon juice (I’ve used bottled in a pinch; honestly, it’s totally fine)
- 1 package refrigerated pie crusts (or your favorite homemade version—I just use the store-bought stuff about half the time because… life.)
- 1 egg (for brushing, but sometimes I skip it if I’m feeling lazy)
- 1 tbsp coarse sugar for sprinkling (optional, but the crunch is lovely)
How To Make Raspberry Pie (Just Trust The Process)
- Preheat your oven to 400°F (200°C). Take your pie crusts out of the fridge—or freezer if you forgot, like I often do. Let them warm up a bit so they’re not rock solid. I usually take this opportunity to eat a spoonful of filling, but that’s optional.
- In a biggish bowl, gently toss together the raspberries, sugar, cornstarch, salt, and lemon juice. Use a light hand so you don’t mash up the berries too much—I like having some whole ones hiding in there. It’ll look gloopy, and that’s what you want. (It can seem a bit lumpy, but it’ll all work out.)
- Unroll one of the crusts into your pie dish and press it into the corners (or as close as you can get). If it tears, just patch it with a scrap from the edge—it’s fine, pie is meant to look rustic.
- Spoon in your raspberry filling. Try not to pile it too high; too much and it’ll bubble over like a science experiment. If there’s extra liquid at the bottom of the bowl, I sometimes leave a tablespoon or so behind or else you can get a soupy pie. Don’t stress about it too much, though.
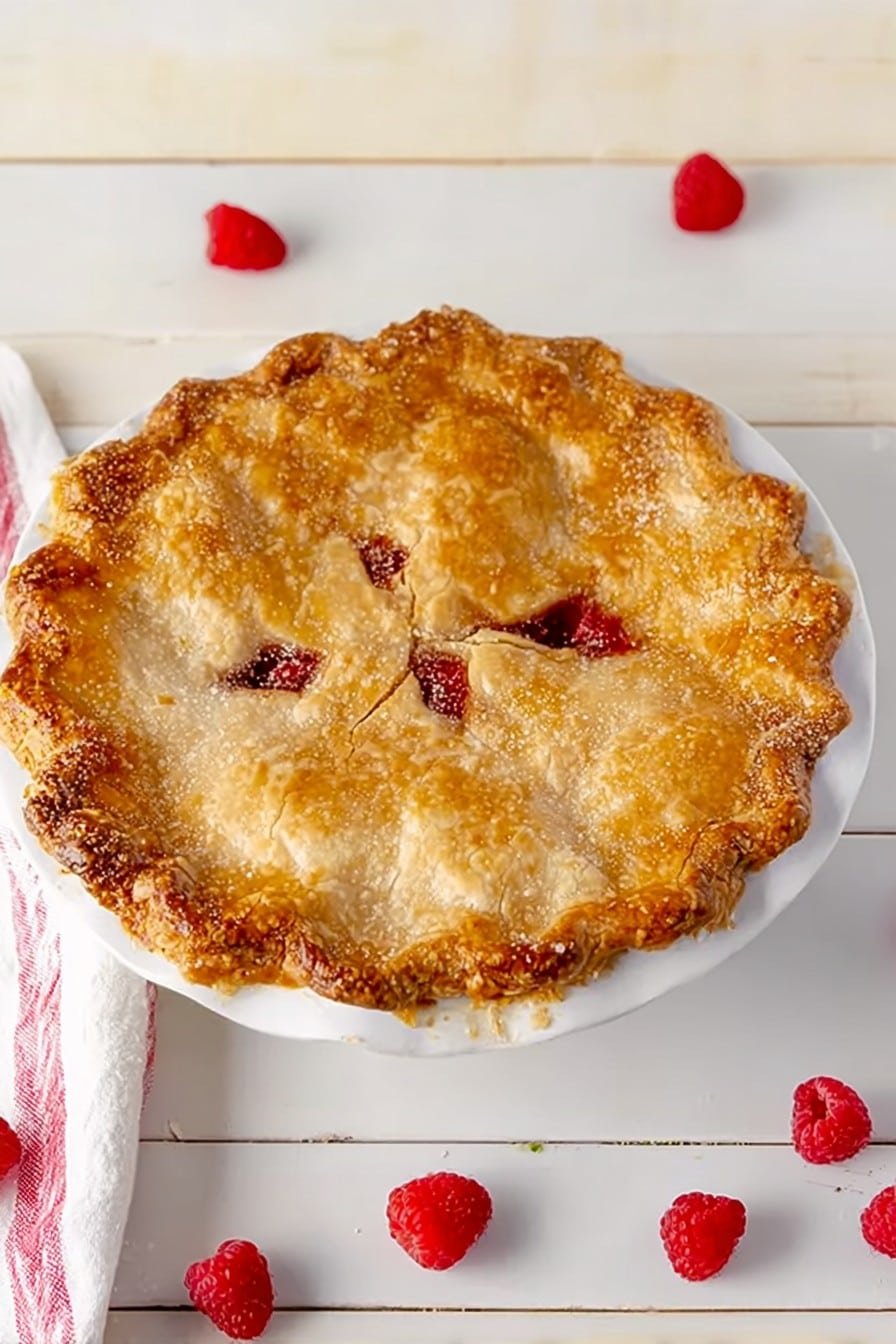
- Top with the second crust. You can do the whole lattice thing if you’re feeling ambitious (I usually just do a plain lid with a few vents cut in—gets the job done). Press and crimp the edges together. If it’s a mess, who cares? Brush the top with beaten egg (or… don’t), and sprinkle coarse sugar if you want a sparkly effect.
- Bake for 20 minutes at 400°F, then lower the heat to 350°F (175°C) for another 30–35 minutes. The crust should look golden, and the filling will be bubbling away. (If the edge browns too fast, use some foil as a shield. On second thought, foil actually works ok, but I’ve definitely also used torn-up parchment when I couldn’t find any.)
- Let it cool all the way before slicing. I know, waiting is the worst part. But if you cut too soon, you’ll have more raspberry soup than pie. (Sometimes I ignore my own advice, to be honest.)
Little Lessons from My Kitchen (AKA: Oops, Well That Didn’t Work)
- If your filling is a bit too soggy, just call it ‘rustic’ and serve with a spoonful of ice cream—they’ll never notice.
- Forgotten the egg wash more times than I’ll admit. The top will still brown—promise.
- Once tried adding cinnamon to the filling and it tasted… odd (not in the good way). Not my best move. But a splash of vanilla? Actually pretty nice.
- If your pie leaks in the oven, don’t sweat it. That’s what parchment’s for.
Variations (Some Winners, Some Not…)
- Mixed berry: Use half raspberries, half blueberries or even strawberries, but I find more than two types sometimes blends into “fruit confusion.”
- Swap the crust: Graham cracker crust makes for more of a summery bar, but honestly, it’s a totally different vibe. Tasty though.
- Once tried a gluten-free crust; it fell apart, but everyone ate it anyway—so, you know, give it a go if you must.
The Gear (A Realist’s Shopping List)
Pie dish (any old one will do—I used a cake tin once, it worked fine), pastry brush (or your fingers, if you can’t find it, seriously just use the back of a spoon), and a big mixing bowl. Oh, and foil or parchment, especially if your oven likes to burn edges.
Storing Your Raspberry Pie (It’s Usually Gone Fast)
Store covered at room temp for a day (though honestly, in my house, it never lasts long enough to worry about mold). If you’re weirdly restrained, it’ll keep another day in the fridge but the crust does get a bit soft. I tend to think it tastes better the next day, but that may just be because of the late-night snacking factor.
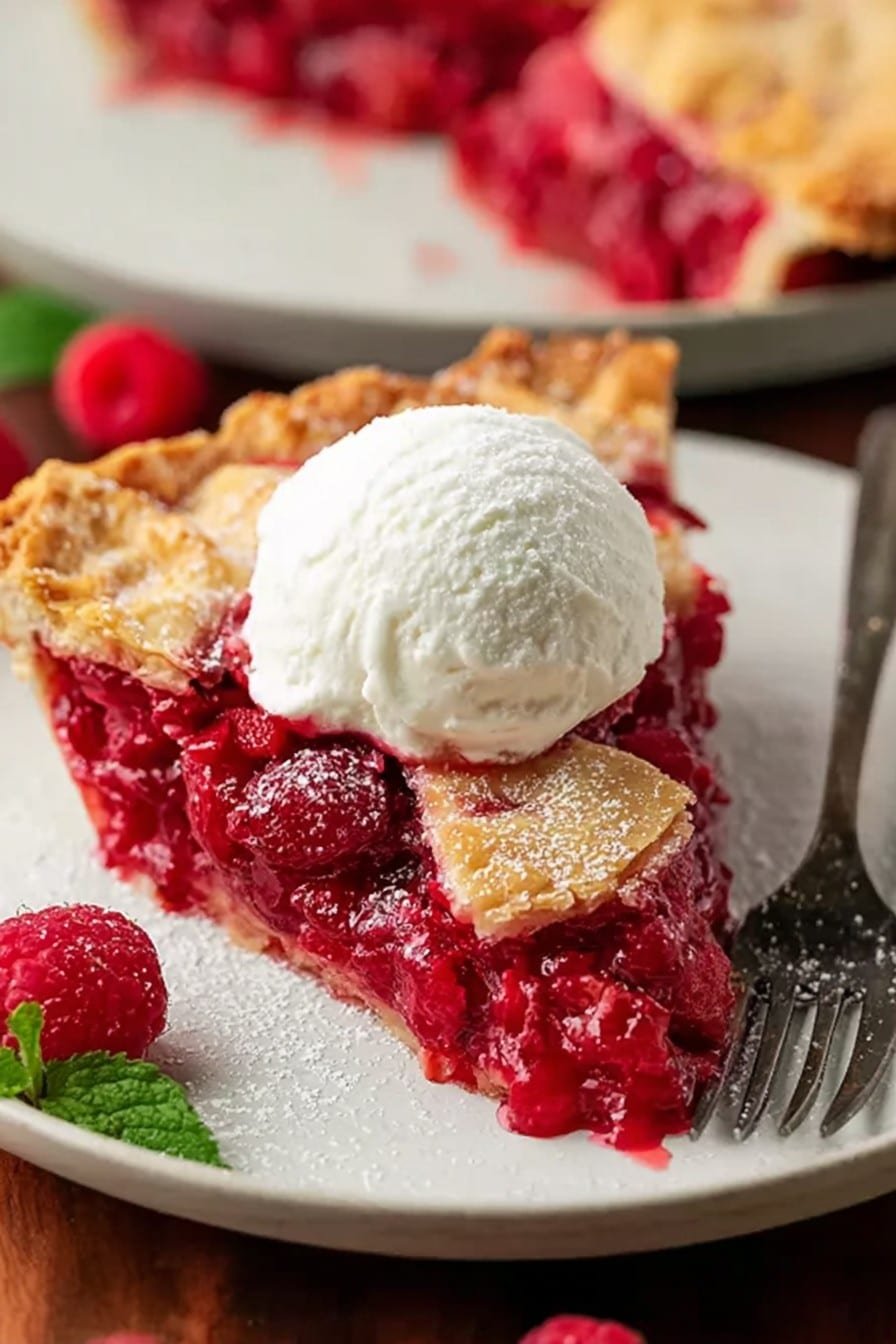
Serving: The Fancy, The Lazy, and The Family Way
I love it slightly warm with a scoop of vanilla on the side—or sometimes, a dollop of whipped cream if I’m feeling posh. My cousin dunks hers straight into her morning coffee (no judgment). Serve however you fancy; it shines on its own, too.
Pro Tips (Learned the Hard Way… and Sometimes the Soft Way)
- I once rushed the cooling time and had fruit soup, not pie. Be patient, trust me!
- If your crust tears, just patch it with leftover dough, sprinkle sugar over it, and call it “artisan.” Works every time.
- Don’t forget to vent the top crust or you might end up cleaning raspberry goo off the oven floor. Oops.
The Nitty Gritty: Real Questions I’ve Heard
- Can I make this with frozen raspberries? Absolutely. Just don’t thaw them all the way; pie comes out too soupy otherwise.
- Do I really need to use cornstarch? Well, unless you like sloshy pie. I once tried skipping it and—let’s just say, we ate it with a straw.
- Why does my pie bubble over? Usually I get a bit too greedy with the filling, so keep it sensible. Extra liquid is the culprit.
- Can I skip the egg wash? Sure thing. The top might not shine (who cares!), but it’ll still taste grand.
- What if I only have a deep dish pan? You might need a bit more filling, but it still works. Just keep an eye on bake time; I sometimes add another 10 minutes.
- Is it ok to use store-bought crust? Ha, yes. Half the time that’s all I use. No one has ever complained—scout’s honor.
Oh—one last thing, if you wind up with leftover pie (rare, but possible), try it cold for breakfast. You might not go back to cereal. Actually, you probably will, but it’ll be worth it for a day. And if you find raspberry stains on your sink a week later, you’re part of a club now!
Ingredients
- 2 cups fresh raspberries (or frozen, if it’s winter—just don’t thaw them too much or the pie gets watery. I sometimes mix in a handful of blackberries if I’m short on raspberries.)
- 3/4 cup white sugar (my gran always said to use Caster, but just regular store stuff works fine)
- 3 heaping tbsp cornstarch (don’t sub flour unless there’s no other option, but my neighbor swears by tapioca powder too)
- 1/4 tsp salt
- 1 tbsp lemon juice (I’ve used bottled in a pinch; honestly, it’s totally fine)
- 1 package refrigerated pie crusts (or your favorite homemade version—I just use the store-bought stuff about half the time because… life.)
- 1 egg (for brushing, but sometimes I skip it if I’m feeling lazy)
- 1 tbsp coarse sugar for sprinkling (optional, but the crunch is lovely)
Instructions
-
1Preheat your oven to 400°F (200°C). Take your pie crusts out of the fridge—or freezer if you forgot, like I often do. Let them warm up a bit so they’re not rock solid. I usually take this opportunity to eat a spoonful of filling, but that’s optional.
-
2In a biggish bowl, gently toss together the raspberries, sugar, cornstarch, salt, and lemon juice. Use a light hand so you don’t mash up the berries too much—I like having some whole ones hiding in there. It’ll look gloopy, and that’s what you want. (It can seem a bit lumpy, but it’ll all work out.)
-
3Unroll one of the crusts into your pie dish and press it into the corners (or as close as you can get). If it tears, just patch it with a scrap from the edge—it’s fine, pie is meant to look rustic.
-
4Spoon in your raspberry filling. Try not to pile it too high; too much and it’ll bubble over like a science experiment. If there’s extra liquid at the bottom of the bowl, I sometimes leave a tablespoon or so behind or else you can get a soupy pie. Don’t stress about it too much, though.
-
5Top with the second crust. You can do the whole lattice thing if you’re feeling ambitious (I usually just do a plain lid with a few vents cut in—gets the job done). Press and crimp the edges together. If it’s a mess, who cares? Brush the top with beaten egg (or… don’t), and sprinkle coarse sugar if you want a sparkly effect.
-
6Bake for 20 minutes at 400°F, then lower the heat to 350°F (175°C) for another 30–35 minutes. The crust should look golden, and the filling will be bubbling away. (If the edge browns too fast, use some foil as a shield. On second thought, foil actually works ok, but I’ve definitely also used torn-up parchment when I couldn’t find any.)
-
7Let it cool all the way before slicing. I know, waiting is the worst part. But if you cut too soon, you’ll have more raspberry soup than pie. (Sometimes I ignore my own advice, to be honest.)
Approximate Information for One Serving
Nutrition Disclaimers
Number of total servings shown is approximate. Actual number of servings will depend on your preferred portion sizes.
Nutritional values shown are general guidelines and reflect information for 1 serving using the ingredients listed, not including any optional ingredients. Actual macros may vary slightly depending on specific brands and types of ingredients used.
To determine the weight of one serving, prepare the recipe as instructed. Weigh the finished recipe, then divide the weight of the finished recipe (not including the weight of the container the food is in) by the desired number of servings. Result will be the weight of one serving.
Did you make this recipe?
Please consider Pinning it!


