
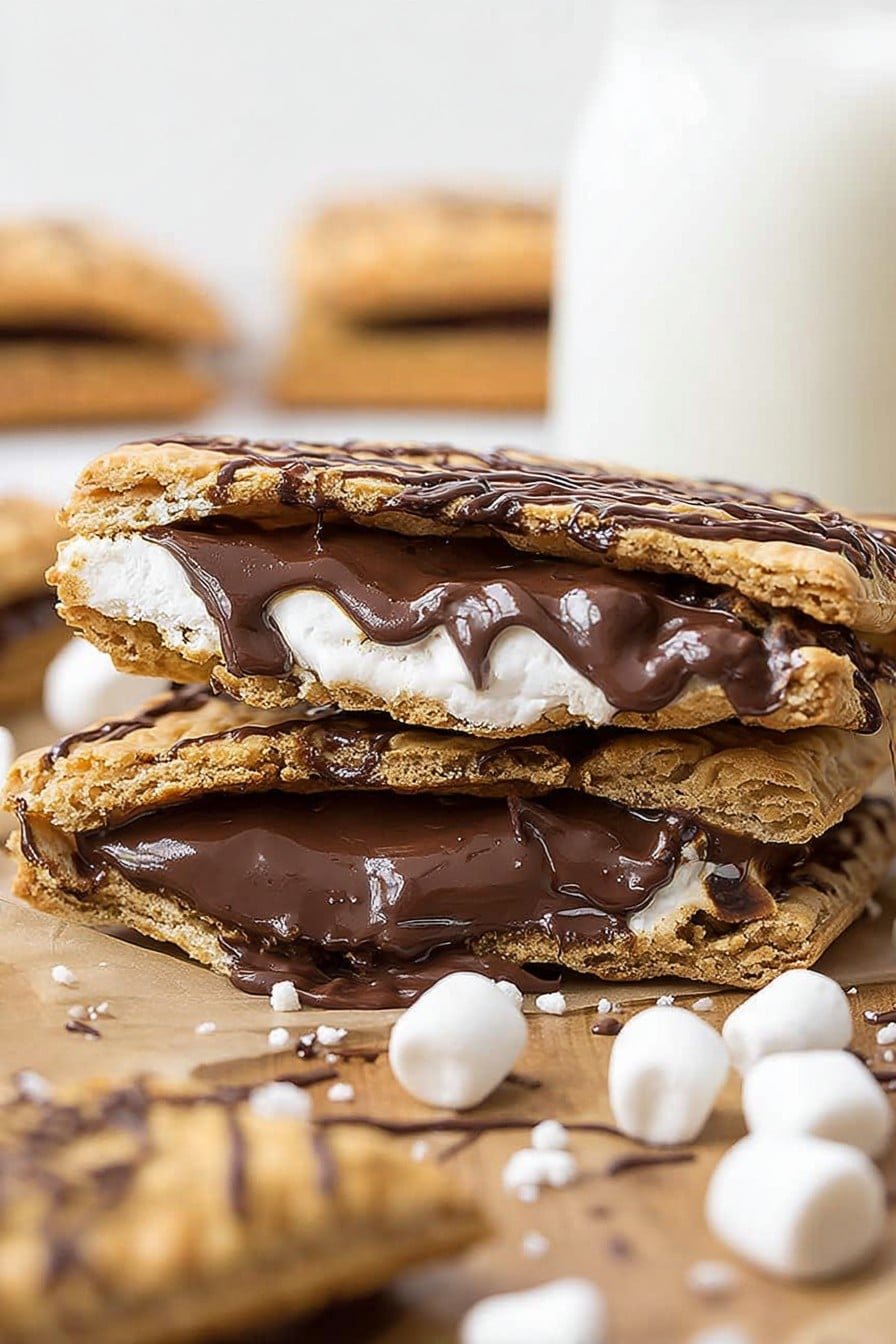
S’mores Pop Tarts: Homemade Campfire Vibes, Rain or Shine
Look, I grew up in the back woods, and my best childhood memories almost always involve sticky marshmallow-covered fingers and that slightly burnt chocolate smell drifting up from the fire. S’mores are basically the campfire version of a group hug, right? Except, well, I don’t always have a campfire handy (not since I almost set my eyebrows on fire that one time). So when the craving hits, these S’mores Pop Tarts hit the spot—right from my kitchen, no fire permits required. My cousin actually called these “a sweet pocket of happiness,” but he also called my lasagna a “cheese casserole,” so who knows? Honestly though, turning S’mores into pop tarts just means no more chasing marshmallows that fell into the ashes. Silver linings!
Why You’ll Love This (Honestly)
I pull out this recipe when we (meaning: I) need a treat that’s both nostalgic and makes the whole house smell like a bakery had a sleepover with Willy Wonka. My family goes bananas for these—especially when the weather’s too grim for a fire. There’s something about flaky pastry hugging all that gooey stuff that makes people smile (even my grumpy neighbor who claims he doesn’t “do sweets” will sneak one when he thinks no one’s looking). I’ll admit, sealing the edges is a bit fiddly, but seriously, you don’t have to be a pastry wizard. If the filling squishes out, just eat the evidence. No one will know!
Here’s What You Need (with a Few Cheats…)
- 1 package refrigerated pie dough (sometimes I use puff pastry instead—makes ’em puffier, less flaky, but who cares?)
- 1/2 cup chocolate chips (any: milk, dark, or whatever “baking chocolate” you find in your pantry… I once used a whole chocolate bar, just smashed it up)
- 1/2 cup mini marshmallows (or big ones, chopped up—it gets a bit sticky, fair warning)
- 4-5 graham crackers, crushed (my grandmother insists on Honey Maid, but lets be real: any brand works)
- 1 egg (for brushing—sometimes I skip this, but it’s shinier with)
- 1/4 cup powdered sugar (for the glaze—I’ve replaced this with regular sugar in a pinch, the texture’s a bit off but not tragic)
- 1 tablespoon milk (or honestly, water works if you’re out)
- Extra chocolate and marshmallow for drizzling/scattering (totally optional but kinda fun)
So, Here’s the (Loose) Game Plan
- Preheat your oven to 375°F (190°C). I’m bad at preheating, I always forget, but it really helps here—makes the pastry crispier. Line a baking tray with parchment, so things don’t stick like last time.
- Roll out your pie dough a bit if it’s thick, then cut it into rectangles—about 3×4 inches each. Don’t stress if they’re not perfect, mine never are, and they still bake up fine.
- On half the rectangles, spoon a little pile of chocolate chips, marshmallows, and some graham cracker crumbs. I tend to overfill (can’t help myself) but you may want to keep a small border clear for sealing the edges. If it gets messy, just lick your fingers (it’s your kitchen!).
- Top with the other rectangle pieces. Press around the edges with a fork to seal ’em up—don’t freak out if some filling pops through; that’s the best part!
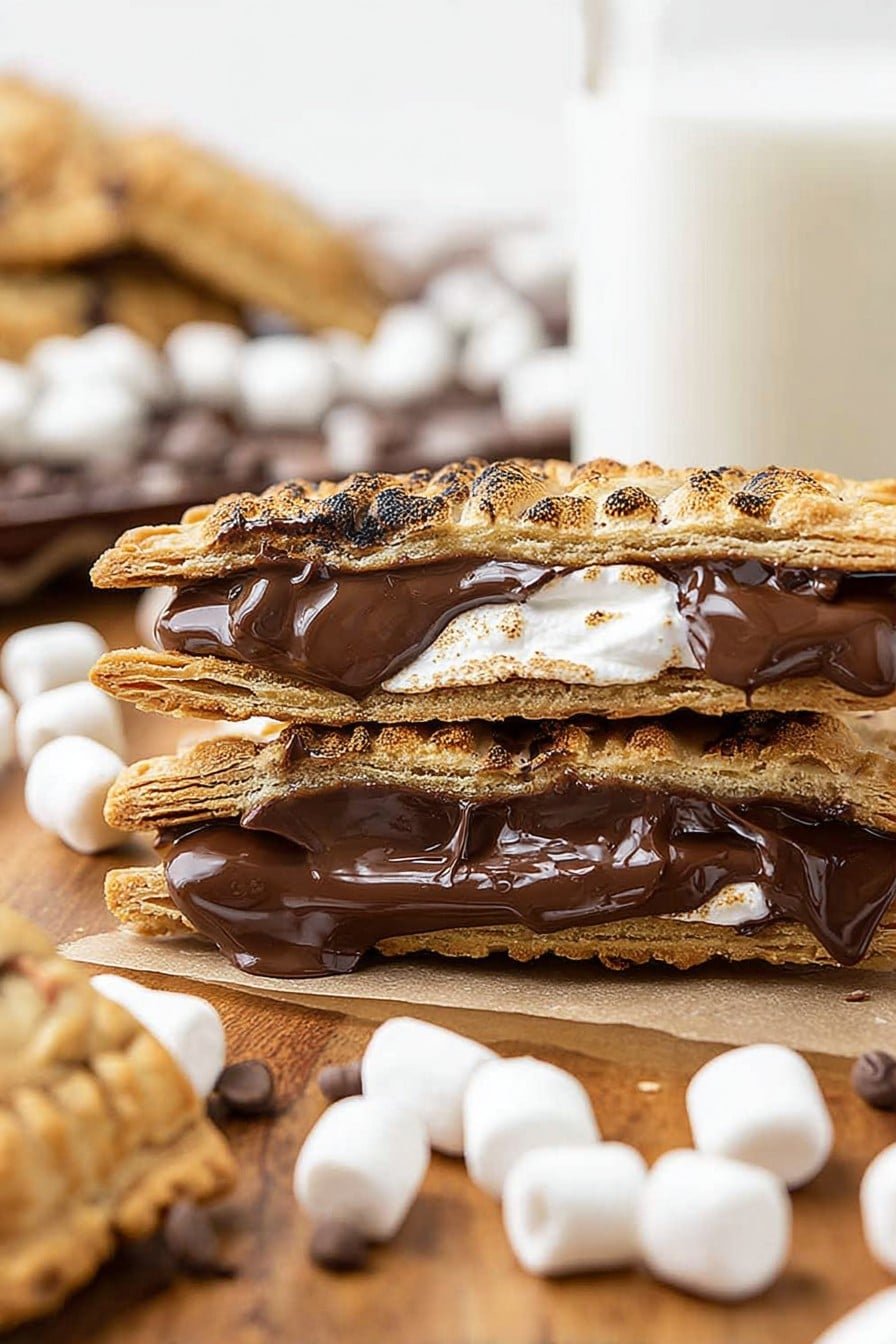
- Beat the egg and brush it lightly over the tops. Totally optional but gives a nice golden touch.
- Bake for 14 to 16 minutes, until golden. Sometimes my oven just refuses to brown the tops so I stick them under the broiler for 30 seconds (don’t walk away: I learned the hard way, burnt marshmallow = sad pop tart).
- Let them cool a bit—yes, you’ll want to devour them instantly, but the filling’s hotter than lava at first.
- Mix the powdered sugar and milk in a bowl to make a quick glaze, then drizzle it over the cooled tarts. Scatter some extra chocolate or marshmallow bits if you’re feeling extra.
Notes from My Messy Kitchen
- I once skipped the glaze and just dusted powdered sugar on top; it was fine but a bit less exciting.
- The filling can spill out the edges—just scoop it up; it tastes great regardless. Sometimes I even dunk the pop tarts in the extra goo.
- If your pastry’s stubbornly sticky, try chilling it for 10 minutes before assembling. (Or just sprinkle some flour—though not too much or it gets tough, I learned that the annoying way.)
The Variations (and One Flop…)
- I tried subbing peanut butter for half the chocolate—pretty delicious, like a Reese’s s’more, but the peanut butter does ooze a bit.
- Tried putting jam instead of chocolate on a whim—wasn’t really my thing but to each their own!
- If you wanna get fancy, add a pinch of sea salt on top before baking. Game changer for sweet-salty folks.
If You Don’t Have All the Equipment…
You really just need a baking sheet and some parchment. No pastry cutter? Use a pizza wheel or just a knife (I sometimes tear it, honestly). I forgot a pastry brush once—I used my (clean) fingers, worked okay! Don’t let gear stop you; make do, get creative.
How To Store ‘Em (If There’s Any Left)
Let them cool and pop them into an airtight container. Supposedly these will last 2 days at room temp, but in my house, they’re always gone by the next morning, so don’t hold me to that. Refrigerate if you want them to keep longer, but they might get a bit chewier. They’re kinda best fresh, in my honest opinion.
How I Like To Serve
I love sharing these warm, with mugs of milky coffee or hot chocolate—maybe cozy socks on. My cousin dunks his in cold milk and claims that’s “the only way.” During the holidays, I stick some red and green sprinkles on the glaze and suddenly they’re festive. Makes me laugh every time.
My Pro Tips (Learnt the Hard Way)
- Take your time sealing the edges—one time I hurried and every single pop tart leaked like a chocolate volcano. Tasty, but messy kitchen disaster.
- Actually, I find it works better if you freeze the assembled pop tarts for five minutes before baking, but only if you remember (which I rarely do).
- Don’t overload the marshmallow or it’ll disappear in the oven. But you’ll totally want to anyway, I always do—guess I never learn!
FAQ (No Silly Questions, Promise)
- Can I use homemade pie dough?
- Absolutely, and I sometimes do when feeling ambitious. But store-bought is just fine and way less work. Your secret’s safe.
- My glaze is runny—what gives?
- Add a little more powdered sugar. Or just drizzle extra, no one’s judging! Thick or thin, it’s tasty either way.
- Can I make these ahead?
- You can prep and chill them (unbaked) in the fridge for a few hours, then bake when you’re ready. I do this on busy weekends. Or just eat the leftovers straight from the fridge—I won’t tell.
- I don’t eat eggs, what can I brush on top?
- Try a splash of milk or even melted butter in a pinch—the crust just won’t be as glossy. Or skip entirely. They’ll taste fine.
- Do these taste good the next day?
- I think they do! The glaze soaks in a little, makes them extra chewy. My brother prefers them fresh though—guess it’s a personal debate.
So there you go—pop tarts that taste like a campfire party, minus the bug bites (and hopefully, no burnt eyebrows). Enjoy!
Ingredients
- 1 package refrigerated pie dough (sometimes I use puff pastry instead—makes ’em puffier, less flaky, but who cares?)
- 1/2 cup chocolate chips (any: milk, dark, or whatever “baking chocolate” you find in your pantry… I once used a whole chocolate bar, just smashed it up)
- 1/2 cup mini marshmallows (or big ones, chopped up—it gets a bit sticky, fair warning)
- 4-5 graham crackers, crushed (my grandmother insists on Honey Maid, but lets be real: any brand works)
- 1 egg (for brushing—sometimes I skip this, but it’s shinier with)
- 1/4 cup powdered sugar (for the glaze—I’ve replaced this with regular sugar in a pinch, the texture’s a bit off but not tragic)
- 1 tablespoon milk (or honestly, water works if you’re out)
- Extra chocolate and marshmallow for drizzling/scattering (totally optional but kinda fun)
Instructions
-
1Preheat your oven to 375°F (190°C). I’m bad at preheating, I always forget, but it really helps here—makes the pastry crispier. Line a baking tray with parchment, so things don’t stick like last time.
-
2Roll out your pie dough a bit if it’s thick, then cut it into rectangles—about 3×4 inches each. Don’t stress if they’re not perfect, mine never are, and they still bake up fine.
-
3On half the rectangles, spoon a little pile of chocolate chips, marshmallows, and some graham cracker crumbs. I tend to overfill (can’t help myself) but you may want to keep a small border clear for sealing the edges. If it gets messy, just lick your fingers (it’s your kitchen!).
-
4Top with the other rectangle pieces. Press around the edges with a fork to seal ’em up—don’t freak out if some filling pops through; that’s the best part!
-
5Beat the egg and brush it lightly over the tops. Totally optional but gives a nice golden touch.
-
6Bake for 14 to 16 minutes, until golden. Sometimes my oven just refuses to brown the tops so I stick them under the broiler for 30 seconds (don’t walk away: I learned the hard way, burnt marshmallow = sad pop tart).
-
7Let them cool a bit—yes, you’ll want to devour them instantly, but the filling’s hotter than lava at first.
-
8Mix the powdered sugar and milk in a bowl to make a quick glaze, then drizzle it over the cooled tarts. Scatter some extra chocolate or marshmallow bits if you’re feeling extra.
Approximate Information for One Serving
Nutrition Disclaimers
Number of total servings shown is approximate. Actual number of servings will depend on your preferred portion sizes.
Nutritional values shown are general guidelines and reflect information for 1 serving using the ingredients listed, not including any optional ingredients. Actual macros may vary slightly depending on specific brands and types of ingredients used.
To determine the weight of one serving, prepare the recipe as instructed. Weigh the finished recipe, then divide the weight of the finished recipe (not including the weight of the container the food is in) by the desired number of servings. Result will be the weight of one serving.
Did you make this recipe?
Please consider Pinning it!


