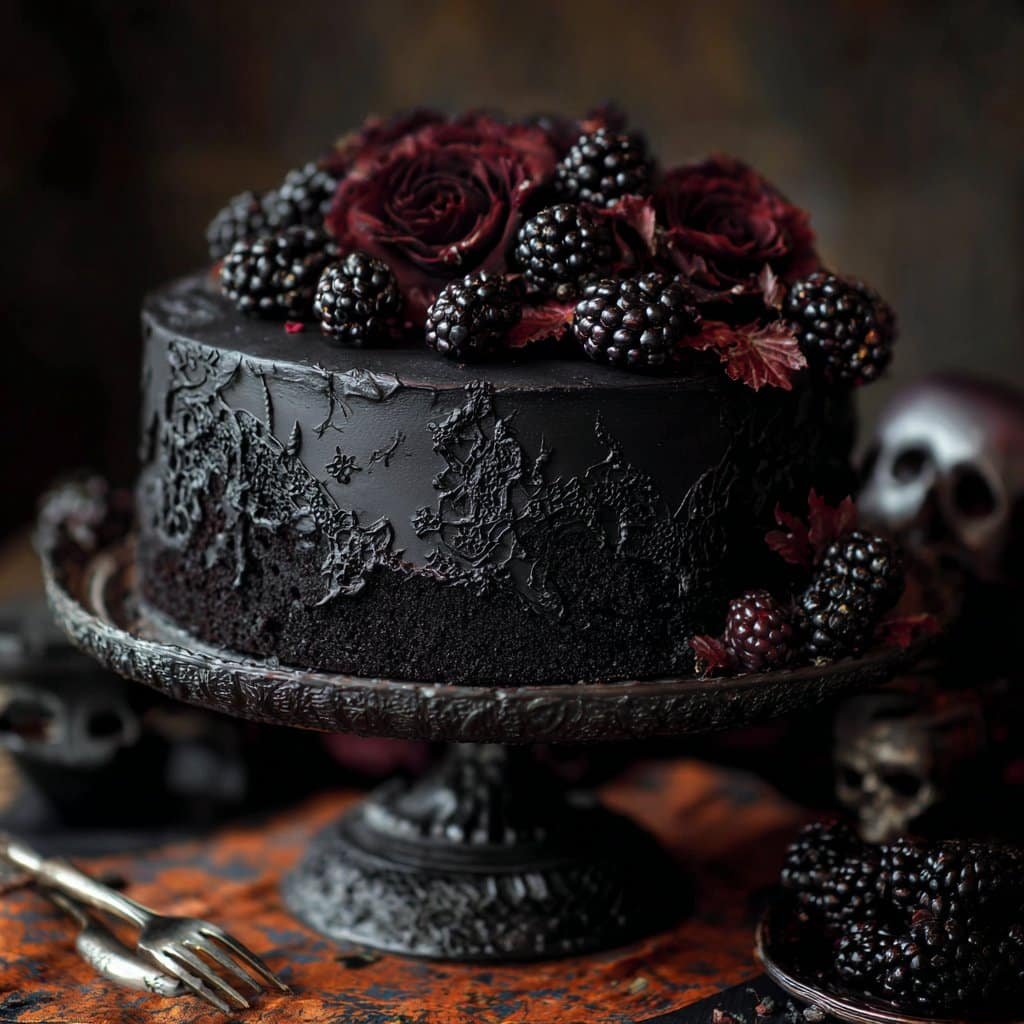
Let’s Talk About This Black Velvet Halloween Cake
Alright, so the first time I made this cake, it was one of those last-minute, “Oh crikey, I promised to bring dessert to the Halloween party” situations. You ever get that cold sweat when you realize the cake needs to be impressive, maybe a bit mysterious (like, is it chocolate? Is it something else?), and also kinda spooky? Well, here we are. This Black Velvet Halloween Cake has since become my go-to, mostly because it’s basically a chocolate cake in a goth costume, and honestly—who doesn’t love chocolate dressed up for a party?
There was one year I tried to pipe little spiderwebs on it and, well, let’s just say they looked more like confused starfish. But nobody cared because the cake itself was so good. And if you ask my cousin Jamie, it’s officially the only cake he wants every October now. Oh, and if you’re wondering if black food coloring is going to stain everything—let’s just say, maybe don’t wear your favorite white jumper when baking this. Learned that the hard way.
Why You’ll Love This (Or, Why I Keep Making It)
I make this when I want to win Halloween, basically. My family goes mad for it because it’s rich and fudgy but not so sweet it knocks your socks off. (Although, I did once overdo the sugar by accident, and the kids didn’t complain, but the adults needed an extra cuppa.)
Also: It’s one of those cakes that looks fancy, but it’s honestly easier than most layer cakes. If you like a cake that’s a tiny bit dramatic (I mean, it’s black), and also not a faff to decorate, this is your new October favorite. I even made it in July once because, why not?
What You’ll Need (Swaps Included)
- 2 cups all-purpose flour (or use cake flour if you want it fluffier, but honestly, regular works fine)
- 1 and 3/4 cups granulated sugar (sometimes I swap in brown sugar for extra depth; it’s not traditional but who’s checking?)
- 3/4 cup unsweetened cocoa powder (I like Dutch-process, but natural is grand too—my gran swore by Hershey’s)
- 2 teaspoons baking powder
- 1/2 teaspoon baking soda
- 1 teaspoon salt
- 3/4 cup buttermilk (in a pinch, I’ve done the lemon+milk trick and it worked surprisingly well)
- 1/2 cup vegetable oil (melted coconut oil is nice if you’re feeling fancy)
- 2 large eggs
- 2 teaspoons vanilla extract (sometimes I do a splash extra—life’s too short for bland cake)
- 1 cup hot coffee (I use decaf if it’s for the kids, but you do you)
- Black gel food coloring (don’t use the liquid stuff, it just doesn’t get dramatic enough)
For the frosting:
- 1 cup unsalted butter, room temp (or salted if you’re a rebel, just skip the pinch of salt)
- 3-4 cups powdered sugar, sifted (start with 3, or you’ll be swimming in sugar)
- 1/2 cup cocoa powder
- 1/4 cup heavy cream (milk works if you’re out)
- 1 teaspoon vanilla
- More black gel food coloring
How I Actually Make This (Step By Step-ish)
- Preheat your oven to 350F (180C). Grease two 8-inch round cake pans. I line the bottoms with parchment, but if you forget and it sticks, just call it “rustic”.
- In a big mixing bowl, whisk flour, sugar, cocoa, baking powder, baking soda, and salt. It’ll look like a dusty mess; this is normal.
- In another bowl (or just push the dry stuff to the side if you’re lazy like me), mix buttermilk, oil, eggs, and vanilla. Pour this wet mix into the dry and stir just until it’s combined. It always looks lumpy—don’t panic.
- Pour in the hot coffee and stir. The batter will suddenly look very thin and you’ll think you ruined it. You didn’t. Give it a couple of good stirs (this is where I sneak a taste).
- Add black gel food coloring until it’s as dark as your Halloween soul; I usually end up using a small spoonful (maybe a teaspoon?), but honestly just keep going until it looks right.
- Divide the batter between your pans—roughly equal, but you can always trim and snack later. Pop them in the oven for about 30 to 34 minutes. Poke with a toothpick—it should come out with a few crumbs but not wet.
- Let the cakes cool in pan for 10 minutes, then turn them out onto a rack. Don’t stress if one cracks a bit; frosting covers most sins.
- For the frosting: Beat butter until fluffy (a stand mixer is nice, but I’ve done it with a wooden spoon and a bit of rage). Add sifted powdered sugar, cocoa, vanilla, and a pinch of salt. Dribble in cream until it’s spreadable. Add black gel food coloring until it’s proper spooky.
- Frost cooled cakes. If you want to get fancy, do a crumb coat first. Or just slap it on and call it a monster cake—no one will mind.
Notes (Aka Things I Learned the Hard Way)
- Don’t use liquid food coloring. I tried once—ended up with grey cake. Still tasty, just…not Halloweeny.
- If your cake domes in the oven, just slice off the hump and eat it while nobody’s looking.
- The cake tastes even better the next day—something magic happens overnight, I swear.
- If you forget the parchment paper, run a knife around the edge and say a quick prayer. Usually works.
Variations I’ve Actually Tried
- Once I swapped in orange zest and a splash of orange juice for a chocolate orange vibe. Actually, it was surprisingly good—gave it a Terry’s Chocolate Orange thing.
- I tried red food coloring for a “bloody velvet” look; it just went weird brown. Wouldn’t recommend.
- You can toss in chocolate chips or chopped candy bars between layers (Snickers was a win, actually).
Equipment (But Don’t Stress)
- Two 8-inch round cake pans (or just do one big pan and cut it in half, but watch the bake time)
- Electric mixer is handy for the frosting, but I’ve done it by hand when my mixer died (arms were sore, but cake was worth it)
- Parchment paper is nice, but if you’re out, greasing the heck out of the pan usually works
Oh, and if you don’t have a wire rack for cooling? I’ve just put the cakes on a chopping board before. Works fine, just don’t let them steam themselves soggy.
Storing Leftovers (If You Have Any…)
So, technically, you can keep this cake covered at room temp for two days, or in the fridge for up to five (but wrap it up tight or it’ll go dry). That said, in my house, it’s never survived longer than a day because my sister “just checks the frosting” every hour or so. If you do fridge it, let it come to room temp before eating—it’s way better that way.
How I Like to Serve It
We usually slice it thick and serve with a scoop of vanilla ice cream or a little whipped cream (the spray can kind, because why not?). On Halloween, sometimes I stick little plastic spiders or candy eyeballs on top, just for a laugh. My brother-in-law eats it for breakfast the next day, and honestly, I can’t blame him.
Pro Tips (Learned the Hard Way)
- Once, I tried to frost the cake while it was still warm. Big mistake—frosting slid right off and I almost cried. Let it cool, trust me.
- If you rush the mixing, you’ll get lumps of flour. Actually, now that I think about it, a few lumps don’t hurt. But don’t go overboard.
- Using too much food coloring can make your tongue black for days. Not a bad thing for Halloween, but just warning you.
FAQ (From Yours Truly and a Few Pals)
- Can I make this ahead? Oh absolutely! I think it tastes even better the next day. Just keep it wrapped up.
- Is there a way to make it gluten free? I haven’t tried, but I reckon swapping the flour for a 1-to-1 gluten-free blend would work. Let me know if you try it!
- Do I really need the coffee? Actually, you can use hot water if you like. Coffee just deepens the chocolate flavor, but it’s not a dealbreaker.
- How do I get it super black? I use Wilton black gel—that stuff is magic. If you want more coloring tips, check out Sally’s Baking Addiction’s guide.
- Can I freeze the cake? Yup! I wrap slices in plastic and freeze. Thaw overnight in fridge. It’s still good, but a tad drier if I’m honest.
- Is this kid friendly? For sure, just maybe ease up on the food coloring if you’re worried about stained hands—or let ‘em go wild, up to you.
By the way, if you ever want to see a truly wild Halloween cake (and feel massively underqualified), check out Baking Mad’s black velvet cake. Makes me feel better about my lopsided layers every time.
Anyway, that’s my Black Velvet Halloween Cake—give it a whirl, and let me know if you come up with a variation that actually works (unlike my red food dye disaster). Happy baking, and watch out for black tongues!
Ingredients
- 2 cups all-purpose flour
- 1 1/2 cups granulated sugar
- 3/4 cup unsweetened cocoa powder
- 1 1/2 teaspoons baking powder
- 1 teaspoon baking soda
- 1/2 teaspoon salt
- 3 large eggs
- 1 cup buttermilk
- 1/2 cup vegetable oil
- 1 tablespoon black gel food coloring
- 1 teaspoon vanilla extract
- 1 cup hot water
- 8 oz cream cheese, softened (for frosting)
- 1/2 cup unsalted butter, softened (for frosting)
- 3 cups powdered sugar (for frosting)
- 1 teaspoon vanilla extract (for frosting)
Instructions
-
1Preheat oven to 350°F (175°C). Grease and line two 9-inch round cake pans.
-
2In a large bowl, whisk together flour, sugar, cocoa powder, baking powder, baking soda, and salt.
-
3Add eggs, buttermilk, oil, black gel food coloring, and vanilla extract. Mix until well combined.
-
4Gradually add hot water to the batter, mixing until smooth. Divide batter evenly between prepared pans.
-
5Bake for 30-35 minutes or until a toothpick inserted in the center comes out clean. Cool cakes completely.
-
6For the frosting, beat cream cheese and butter until smooth. Add powdered sugar and vanilla extract, and beat until fluffy. Frost the cooled cakes and decorate as desired.
Approximate Information for One Serving
Nutrition Disclaimers
Number of total servings shown is approximate. Actual number of servings will depend on your preferred portion sizes.
Nutritional values shown are general guidelines and reflect information for 1 serving using the ingredients listed, not including any optional ingredients. Actual macros may vary slightly depending on specific brands and types of ingredients used.
To determine the weight of one serving, prepare the recipe as instructed. Weigh the finished recipe, then divide the weight of the finished recipe (not including the weight of the container the food is in) by the desired number of servings. Result will be the weight of one serving.
Did you make this recipe?
Please consider Pinning it!!