
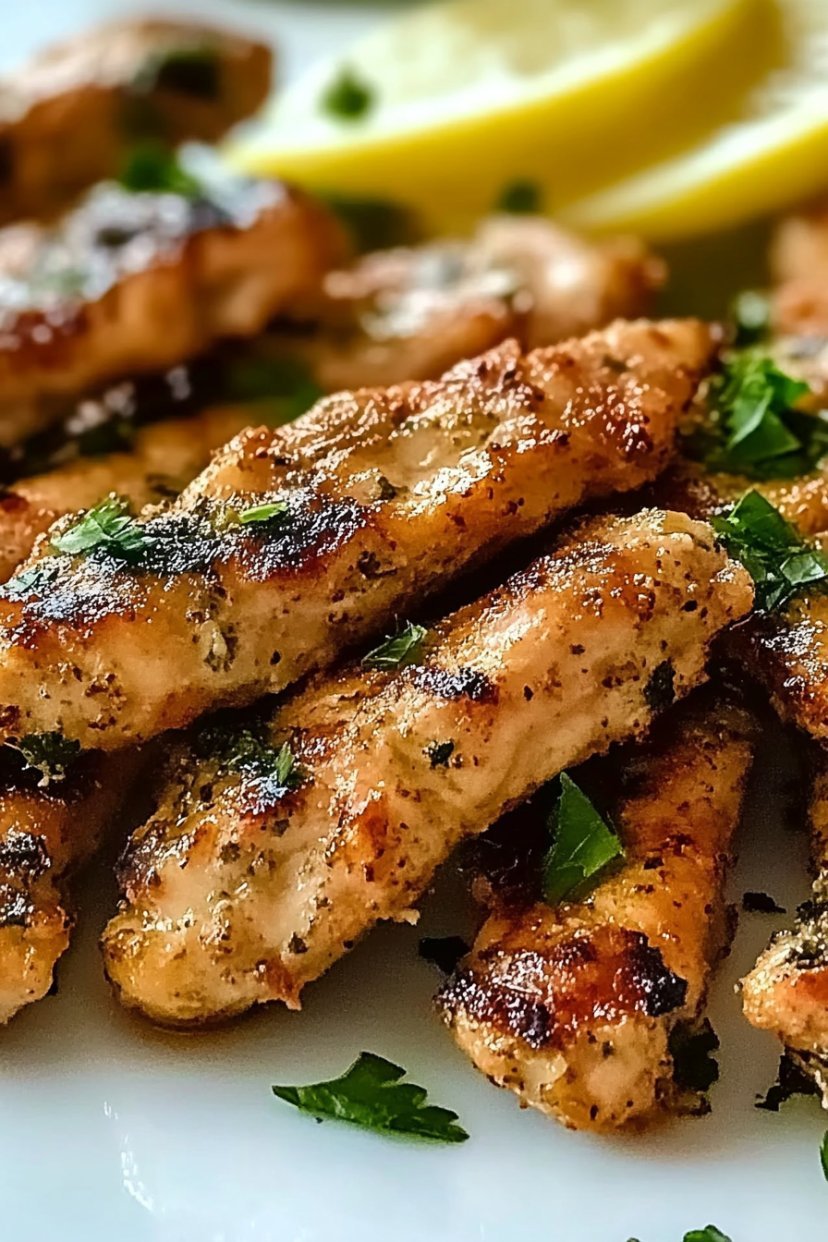
Okay, Let’s Talk Chicken Tenders!
Right, chicken tenders. Everyone loves ’em, yeah? But sometimes they can be a bit… boring. Store bought ones are okay in a pinch, but homemade? Game changer. I remember the first time I tried adding Greek flavors – oregano, lemon, garlic – to the breading. It was one of those ‘why didn’t I think of this sooner?!’ moments. My kids went absolutely bonkers for them, and honestly, so did I. Now, these Crispy Greek Chicken Tenders are a regular thing in our house, especially on busy weeknights when I need something quick but still totally delicious. Forget soggy tenders, these are *properly* crispy.
Why You’ll Be Obsessed (Like Me!)
Honestly? I make these when I want something comforting but also kinda impressive without *actually* being difficult. My family goes crazy for this because they’re packed with flavor – way more interesting than your average tender. Plus, getting that perfect crispy coating? So satisfying. (I used to struggle with getting things crispy, let me tell you, it involved a lot of sighing and maybe one slightly burnt batch I pretended never happened). These are pretty forgiving though, and the Greek yogurt marinade makes the chicken super tender inside. Win win!
So, What Do You Need? Gather Your Bits!
- Chicken: About 1 lb (maybe 500g?) boneless, skinless chicken breasts or tenderloins. Tenderloins are easier ’cause they’re already the right shape, but breasts work fine, just slice ’em up into strips.
- For the Marinade:
- Plain Greek yogurt: About 1/2 cup. Full fat is yummiest, but low fat works too.
- Lemon: Juice of half a lemon, maybe a bit of zest if you’re feeling fancy.
- Garlic: 2-3 cloves, minced. Or, you know, use the jarred stuff if you’re short on time, I won’t tell. Probably about a teaspoon?
- Dried Oregano: 1 generous teaspoon. Greek oregano is brilliant if you can find it – it just has a different vibe, more earthy.
- Salt & Pepper: To taste, maybe 1/2 tsp salt and 1/4 tsp pepper to start.
- For the Crispy Coating:
- Flour: About 1/2 cup all purpose flour.
- Panko Breadcrumbs: 1 cup. Panko is key for the crunch! Regular breadcrumbs are okay, but panko gives it that extra *oomph*.
- More Dried Oregano: Another teaspoon. Yes, more!
- Garlic Powder: 1/2 teaspoon.
- Onion Powder: 1/2 teaspoon.
- Paprika: 1/2 teaspoon (smoked paprika is nice too!).
- Salt & Pepper: Another pinch of each.
- Egg: 1 large egg, beaten with a splash of water.
- For Frying (or Baking!):
- Oil: A neutral oil with a high smoke point if you’re frying, like vegetable, canola, or avocado oil. You’ll need enough for shallow frying, maybe an inch deep? Or just cooking spray if you’re baking/air frying.
- Optional for Serving: Lemon wedges, fresh parsley, homemade tzatziki sauce (highly recommend!), pita bread.
Oh, I nearly forgot! Sometimes if I don’t have plain Greek yogurt, I’ve used sour cream in the marinade. It’s slightly different tang but still works a treat.
Let’s Get Cooking: The Fun Part!
- Marinate that Chicken: If you’re using chicken breasts, slice them into roughly even tender shapes. Like, finger sized? Pop the chicken pieces into a bowl. Add the Greek yogurt, lemon juice (and zest if using), minced garlic, the first lot of oregano, salt, and pepper. Give it a good mix, make sure every piece is coated. Cover it up and stick it in the fridge for at least 30 minutes. Honestly, an hour or two is even better if you have the time. It really lets the flavors sink in.
- Set Up Your Breading Station: This is where things can get a *little* messy, but it’s worth it. You need three shallow dishes or plates.
- Dish 1: The flour.
- Dish 2: The beaten egg with a splash of water.
- Dish 3: Mix the panko breadcrumbs, the second teaspoon of oregano, garlic powder, onion powder, paprika, and another pinch of salt and pepper. Give it a good stir.
- Bread the Tenders: Okay, take a piece of chicken form the marinade, let any excess yogurt drip off (don’t wipe it all off though!). Dredge it lightly in the flour, shake off any excess. Then dip it completely in the beaten egg. Finally, press it firmly into the panko mixture, making sure it’s coated all over. Really pack it on there! Set the coated tender on a clean plate or wire rack. Repeat with all the chicken pieces. (This is usually where I sneak a taste of the panko mixture… don’t judge).
- Time to Cook ‘Em! You’ve got options here:
- Shallow Frying (My fave for crispiness!): Heat about an inch of oil in a large skillet or Dutch oven over medium high heat. You want it shimmering, maybe around 350°F (175°C). A cube of bread should turn golden brown in about 30 seconds. Carefully place a few tenders in the hot oil – don’t overcrowd the pan! Fry for about 3-4 minutes per side, until golden brown and cooked through. The internal temp should be 165°F (74°C).
- Baking: Preheat your oven to 400°F (200°C). Place the breaded tenders on a baking sheet lined with parchment paper (or lightly greased). Spray the tops generously with cooking spray. Bake for 15-20 minutes, flipping halfway through, until golden and cooked through. They won’t be *quite* as crispy as fried, but still really good!
- Air Frying: Preheat your air fryer to 380°F (190°C). Spray the basket and the tenders with cooking spray. Cook in batches for about 10-12 minutes, flipping halfway, until golden and crispy. Air fryers are magic for this stuff.
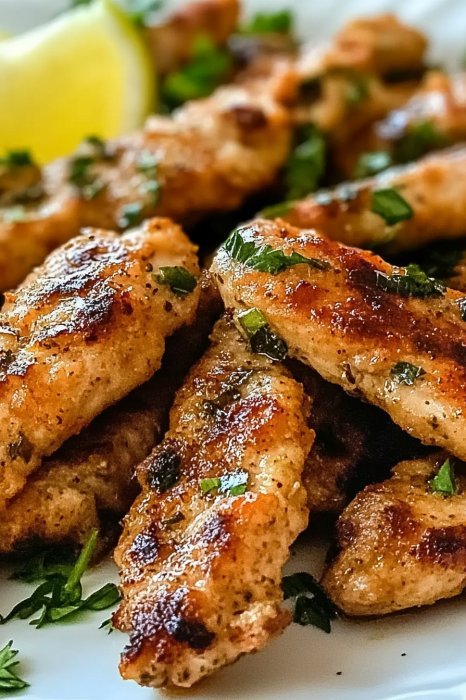
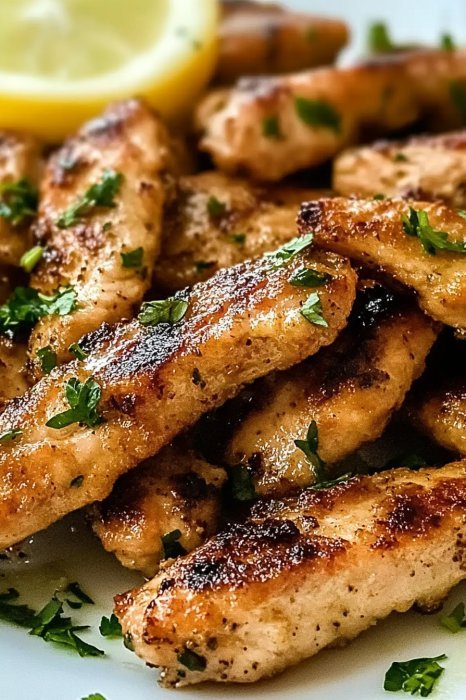
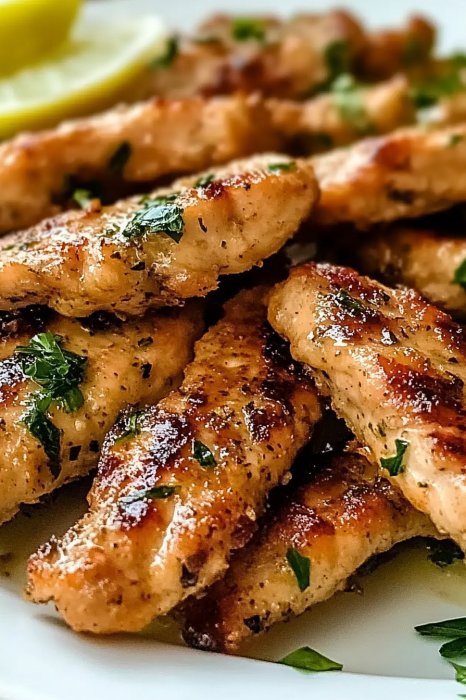
- Drain & Serve: If you fried them, transfer the cooked tenders to a wire rack set over paper towels to drain any excess oil. This helps keep them crispy! Don’t just pile them on paper towels, the bottom gets soggy, trust me. Serve ’em up hot with lemon wedges and that lovely tzatziki!
Little Notes From My Kitchen
Don’t skip the marinating time if you can help it; it makes the chicken way more tender and flavorful. Also, pressing the panko on firmly is super important for getting that coating to stick and become properly crunchy. Oh, and let the oil get hot enough before frying – if it’s too cool, the tenders just soak up oil and get greasy. Yuck.
Fancy Trying Something Different? (Variations!)
Sometimes I add a pinch of red pepper flakes to the breading for a little kick. Or a bit of dried dill in the marinade is nice too! I once tried adding feta cheese crumbles to the breading… it sounded good in theory? But it mostly just melted and made a bit of a mess in the pan. Wouldn’t recommend that one, haha. Sticking with dried spices in the coating seems to be the way to go.
What Gear Do You Need?
You’ll need bowls for marinating and breading, shallow dishes for the breading station (pie plates work great!), and either a large skillet for frying, a baking sheet, or an air fryer. A meat thermometer is dead useful for checking they’re cooked through, but you can also just cut into one to check (make sure there’s no pink!). A wire rack for draining is best if frying, but honestly, you can make do by propping them up on some scrunched kitchen roll on a plate if you absolutely have to.
Storing the Leftovers (If Any!)
These Crispy Greek Chicken Tenders are definitely best eaten fresh while they’re super crunchy. If you *do* have leftovers (which, seriously, rarely happens here!), store them in an airtight container in the fridge for up to 2-3 days. Reheat them in the oven or air fryer to get some crispiness back – the microwave makes them kinda sad and soggy, though it’s edible in a pinch I suppose. I actually think the flavors meld even more overnight sometimes.
How We Like to Eat Them
My absolute favorite way is just with a big dollop of tzatziki for dipping and a squeeze of fresh lemon juice over the top. Sometimes we stuff them into pita bread with some lettuce, tomato, and red onion for a quick gyro style wrap. They’re also brilliant chopped up on top of a Greek salad! Proper versatile.
Pro Tips (Learned the Hard Way!)
- Don’t overcrowd the pan! I once tried to fry too many at once because I was impatient. Big mistake. It dropped the oil temperature way down, and they came out pale and oily instead of golden and crisp. Cook in batches, it’s worth the extra few minutes.
- Make sure the chicken isn’t dripping wet form the marinade when you put it in the flour. Let the excess drip off, otherwise you get clumps.
- Taste your panko mix! Before you coat all the chicken, taste a pinch of the panko mixture. Need more salt? More oregano? Adjust it now!
Quick Q&A – Things You Might Ask!
Can I make these gluten free?
Totally! Just swap the all purpose flour for a GF blend and use gluten free panko breadcrumbs. Works like a charm.
Is the Greek yogurt essential?
It really helps tenderize the chicken and adds flavour. As I said, sour cream works okay, or even buttermilk could probably do the job in a pinch, though the flavour profile would change a bit.
Help! My breading fell off!
Ah, the classic problem! Make sure you press the panko on firmly. Also, ensuring the sequence (flour -> egg -> panko) is followed helps it stick. And don’t mess with them too much while they’re cooking, let them form a crust.
Can I freeze them?
Yes! You can freeze them either before or after cooking. To freeze uncooked: bread them, place on a baking sheet in the freezer until solid, then transfer to a freezer bag. Cook from frozen (add extra cooking time). To freeze cooked: let them cool completely, then freeze the same way. Reheat form frozen in the oven or air fryer until hot and crispy.
Go on, give these Crispy Greek Chicken Tenders a try! Let me know how they turn out. I reckon you’ll be chuffed.


