Let Me Tell You About My Crock Pot Chicken Thigh Days
So, picture this: It was one of those gray, slightly grumpy Tuesdays—rain on the window, laundry mountain still lurking in the hallway, and me with exactly zero desire to hover over a stove. Enter: Crock Pot Chicken Thighs. It’s basically my culinary security blanket when adulting feels extra… adulty. And you know, there’s something sort of magical about tossing together a heap of ingredients and letting them do all the heavy lifting while you get on with the weird parts of your day (or, let’s be honest, hide from it with a book). I kinda learned this one by accident when I totally misjudged the shopping list, but hey—it worked out, and now it’s my go-to. Also, my younger kid calls it ‘dinosaur chicken’ because… reasons?

Why You’ll Love This (Trust Me!)
I make this when I’ve half-forgotten to plan dinner (which, let’s be honest, is most Mondays in my world). My family goes a bit wild for this recipe because the chicken comes out super juicy every time, and honestly, they dunk it in the sauce like it’s a sport. Plus, you pile everything in and walk away. I used to overthink it, but now I just chuck everything in with a bit of hope. Side note: For a while I tried to swap the thighs with chicken breasts—they looked prettier, but somehow the flavor just wasn’t there. So, stick with the juicy thighs, okay?
Ingredients (With My Personal Twists)
- 6-8 bone-in, skinless Chicken Thighs (if you’ve only got boneless, those work too, they just cook a smidge faster; my grandma always said you need the bone but I say no bones about it, up to you!)
- 1/2 cup chicken broth (sometimes I sneak in some white wine if I’m feeling fancy or just out of broth)
- 1/4 cup soy sauce (I’ve used coconut aminos in a pinch, couldn’t taste the difference)
- 2 tablespoons honey (or brown sugar if honey mysteriously disappeared)
- 4 garlic cloves, smashed (garlic powder works, but honestly the real deal is worth it)
- 1 teaspoon smoked paprika (or just regular paprika, don’t stress it)
- 1 teaspoon dried thyme (I grab Italian seasoning sometimes when the thyme jar escapes me)
- Salt and pepper, just a pinch of each
- (Optional and highly recommended) A handful of sliced mushrooms or half an onion, chopped—just for a deeper vibe
What I Do: Directions (Some Are Precise, Some Are Not)
- First, if you’re into it, give those chicken thighs a quick sprinkle of salt and pepper on both sides. Sometimes I just toss them in the pot straight off the tray, not gonna lie.
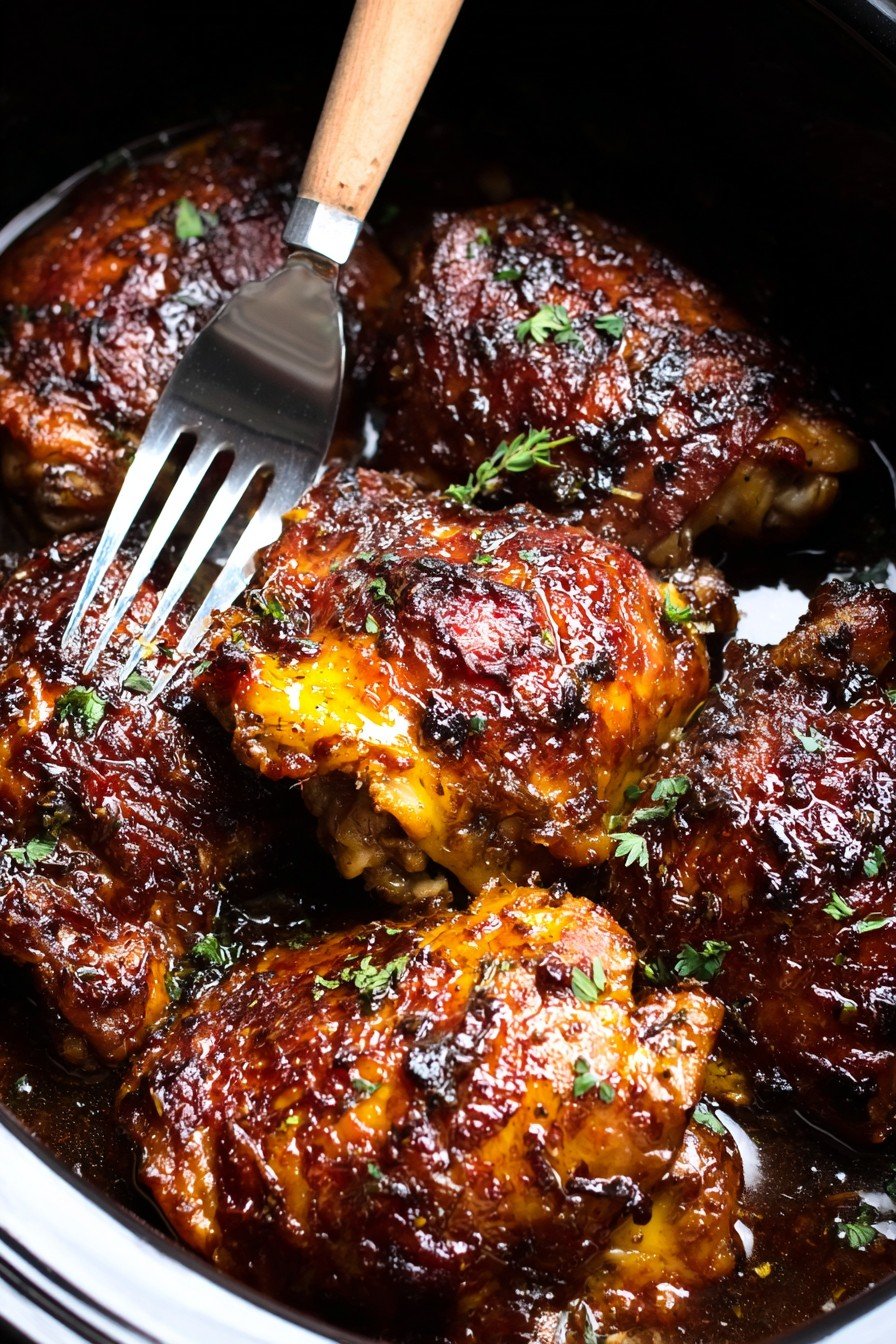
- Layer the thighs in the bottom of your Crock Pot—it usually looks awkward and lumpy, but that’s how you know it’ll taste good. Add the mushrooms or onion if you’re feeling snazzy.
- Whisk together the broth, soy sauce, honey, garlic, paprika, and thyme in a jug or mug (honestly whatever’s easier to wash). Pour it over the chicken. It won’t look like enough liquid; don’t worry. It works out.
- Pop the lid on, set to low for about 6 hours. Or high for 3-4 if you’re impatient (but on second thought, low is better for flavor, trust me—I learned this the hard way when I tried to speed things up and the chicken got weirdly dry).
- Now comes the most important step: Walk away. Seriously. Forget about it. I usually use this time to wrestle with life, binge something silly, or take a wild guess at the age of that cheese hiding in the fridge.
- If you want the sauce thicker, scoop the thighs out at the end and let the sauce bubble up on high for 10-20 minutes, uncovered. Or just pour it on as-is. Sometimes I’m too hungry to bother.
Notes From Someone Who’s Messed Up a Few Times
- If you use skin-on thighs, you get more flavor, but the sauce ends up greasy. Learned that one the messy way.
- The sauce is amazing on mashed potatoes. Actually, I think it tastes even better after an overnight in the fridge—but I rarely get that lucky.
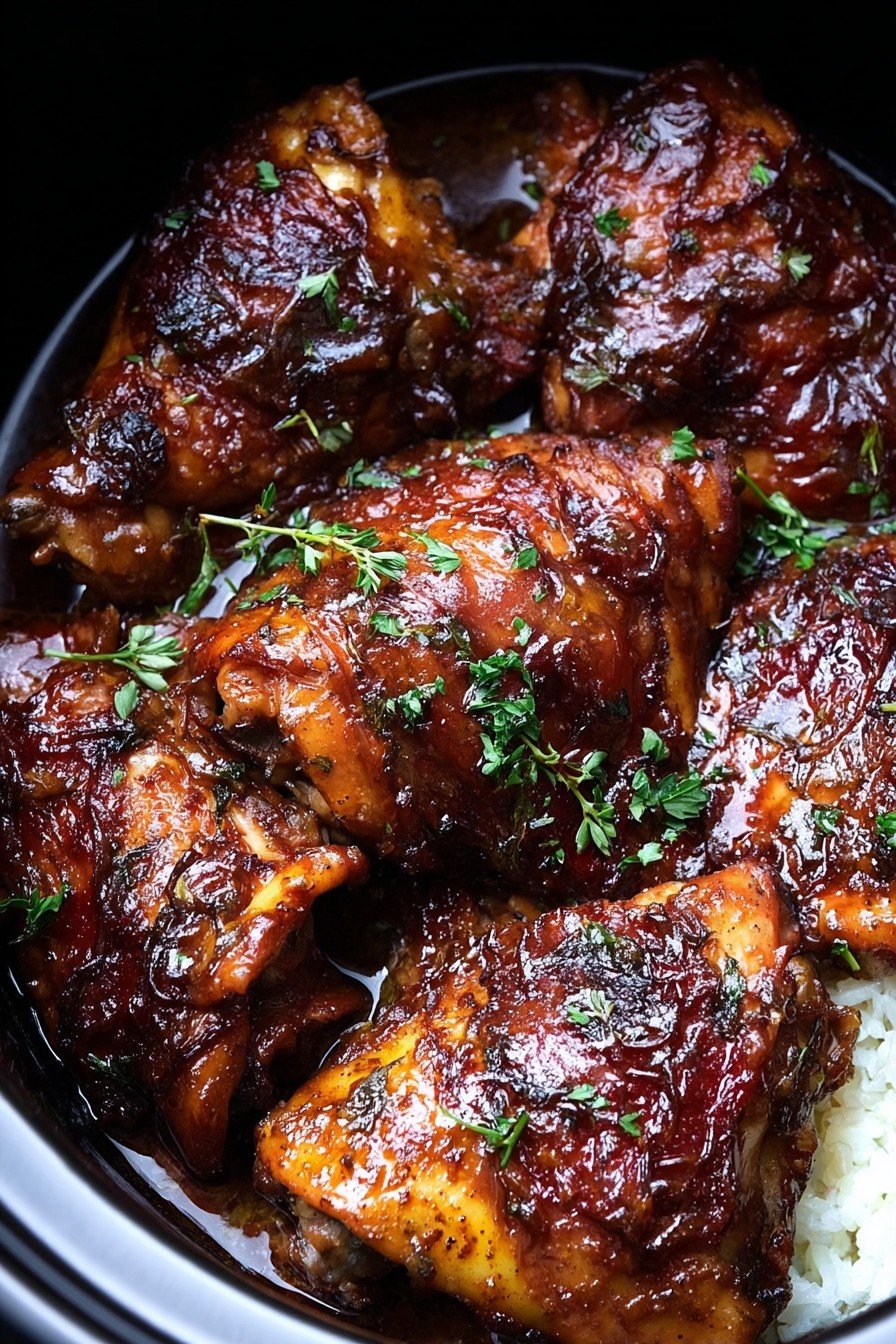
- The honey can catch and caramelize in the pot, so if you see some dark bits, don’t freak out. It’s tasty.
Variations I’ve Actually Tried (And One I Regret)
- Sweet and sassy: Add a splash of pineapple juice, skip the broth. Turned out surprisingly good—tropical vibes.
- Ultra garlic: Double the garlic and throw in half a lemon. Friends liked it, my stomach did not. Oh well.
- I once tried tossing in root vegetables, thinking I’d do a “one pot meal” thing. Honestly, they just turned kinda mushy and weird. Learn form my mistakes!
What You’ll Need (And If You Don’t Have It…)
- A Crock Pot, obviously. I use my battered old 6-quart, but a smaller one is fine if you scale down. No Crock Pot? Gently bake everything in a covered dish at 300°F for a couple hours. Not exactly the same, but good enough if the cravings hit!
- A fork for testing doneness (though I usually just poke at it, real chef style)
- The willpower to not eat half the chicken straight from the pot
How Long Does It Keep? (Though It Never Lasts Here)
Technically, you can store leftovers in the fridge, covered up tight, for 3-4 days. But, honestly, in my house this stuff gets gobbled up by lunch the next day. Sometimes I even find a single lonely thigh sitting in the fridge at midnight and, well, you don’t need details…
How My Family Eats It (And A Little Tradition)
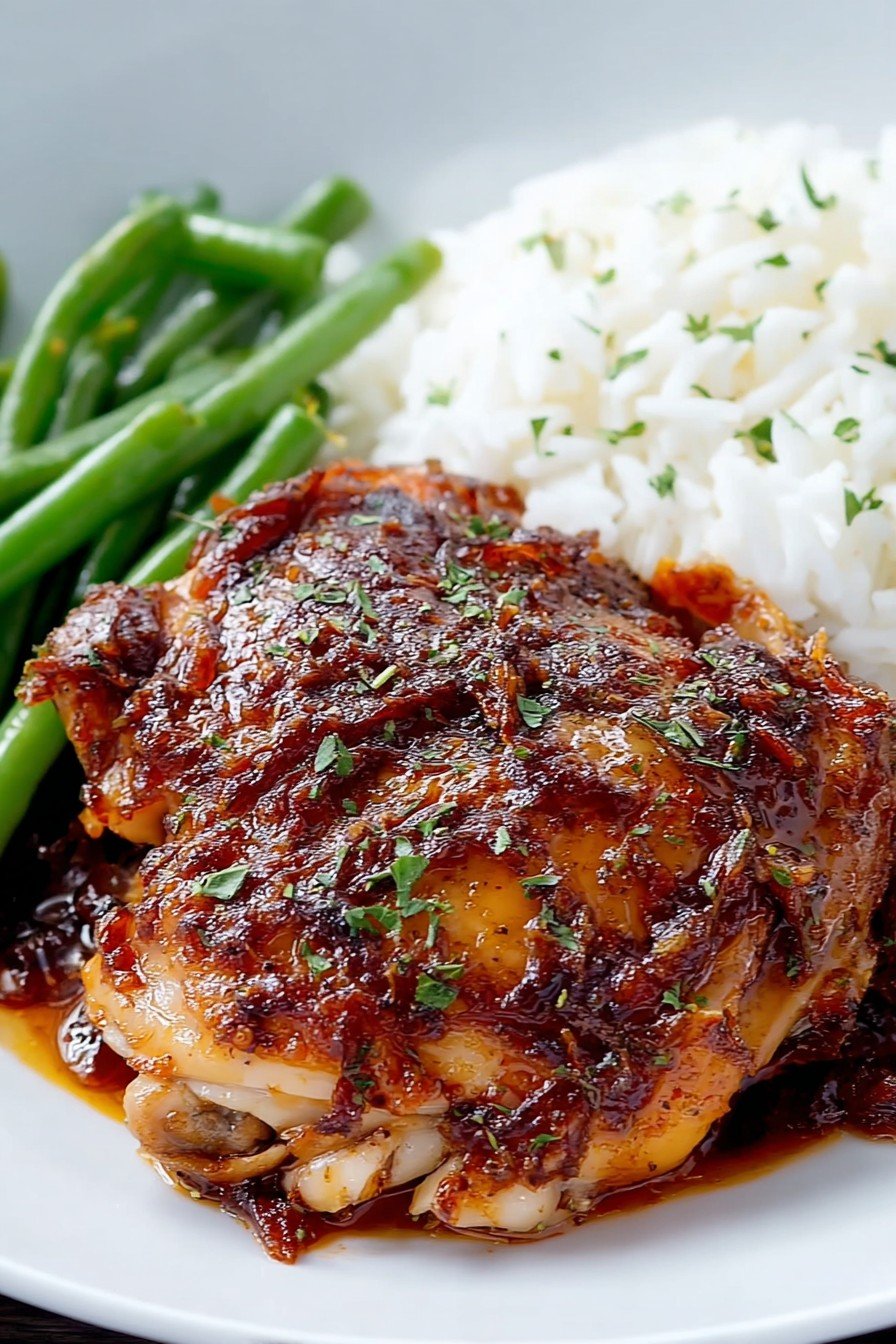
We usually pile it over buttery mashed potatoes, or sometimes fluffy rice if I remember to get the rice cooker going on time (let’s be real, I don’t always). For a classic “Sunday dinner” vibe, I serve green beans on the side. But one cousin swears by a scoop of the chicken on top of fries—says it’s like Canadian poutine, but with Southern flair. We sometimes eat it straight out of mugs for a lazy TV dinner, no judgement.
Lessons Learned — Pro Tips The Rocky Way
- Don’t skip the browning if you have time. I tried once to just throw in the chicken, and, well, it tasted fine, but didn’t have that bit of oomph.
- If you rush it on high heat for less than 3 hours, you’ll just get kinda stringy chicken. Patience is a (delicious) virtue here.
- Also, don’t panic if the sauce looks thin at first; it thickens up once cooled a bit, and even better, soaks into your sides.
Curious Minds: Real-Life Questions I’ve Gotten
- Can I use chicken breasts instead?
- You totally can, but they sometimes come out less juicy. I prefer thighs—more forgiving, you know?
- Do I need to sear the chicken first?
- I used to skip this because I’m lazy, but a quick sear adds more flavor. Up to you (if you only have five minutes before running out the door, don’t stress).
- Can I freeze leftovers?
- Yep! They reheat pretty well, but sometimes the sauce gets a bit grainy. A little stir fixes it. They never last long enough to freeze at my place, but sure.
- Why is mine a bit bland?
- Add a pinch more salt, and maybe a squeeze of lemon—you’d be surprised how it wakes up the flavors.
- My Crock Pot is ancient and temperamental… will it work?
- Absolutely. In fact, I think older Crock Pots have a certain magic to them. Just check the chicken is fully cooked—165°F, or until it looks done and falls apart easily (also, don’t lick your fingers at this step if it’s not cooked yet… ask me how I know).
And just between us, if the house smells amazing by lunchtime, you know you did it right. Bonus points if you actually remember to make a side. Enjoy—and let me know your quirky tweaks!
Ingredients
- 6 bone-in, skinless chicken thighs
- 1 teaspoon salt
- 1/2 teaspoon black pepper
- 1 teaspoon garlic powder
- 1 teaspoon paprika
- 1 cup low-sodium chicken broth
- 1 medium onion, sliced
- 2 carrots, peeled and chopped
- 2 tablespoons olive oil
- 1 teaspoon dried thyme
Instructions
-
1Season the chicken thighs with salt, black pepper, garlic powder, and paprika.
-
2Heat olive oil in a skillet over medium-high heat and brown the chicken thighs for 2-3 minutes per side.
-
3Place the sliced onion and chopped carrots in the bottom of the crock pot.
-
4Transfer browned chicken thighs to the crock pot and sprinkle dried thyme over the top.
-
5Pour chicken broth over the chicken and vegetables.
-
6Cover and cook on low for 6 hours, or until the chicken is tender and fully cooked. Serve hot.
Approximate Information for One Serving
Nutrition Disclaimers
Number of total servings shown is approximate. Actual number of servings will depend on your preferred portion sizes.
Nutritional values shown are general guidelines and reflect information for 1 serving using the ingredients listed, not including any optional ingredients. Actual macros may vary slightly depending on specific brands and types of ingredients used.
To determine the weight of one serving, prepare the recipe as instructed. Weigh the finished recipe, then divide the weight of the finished recipe (not including the weight of the container the food is in) by the desired number of servings. Result will be the weight of one serving.
Did you make this recipe?
Please consider Pinning it!!


