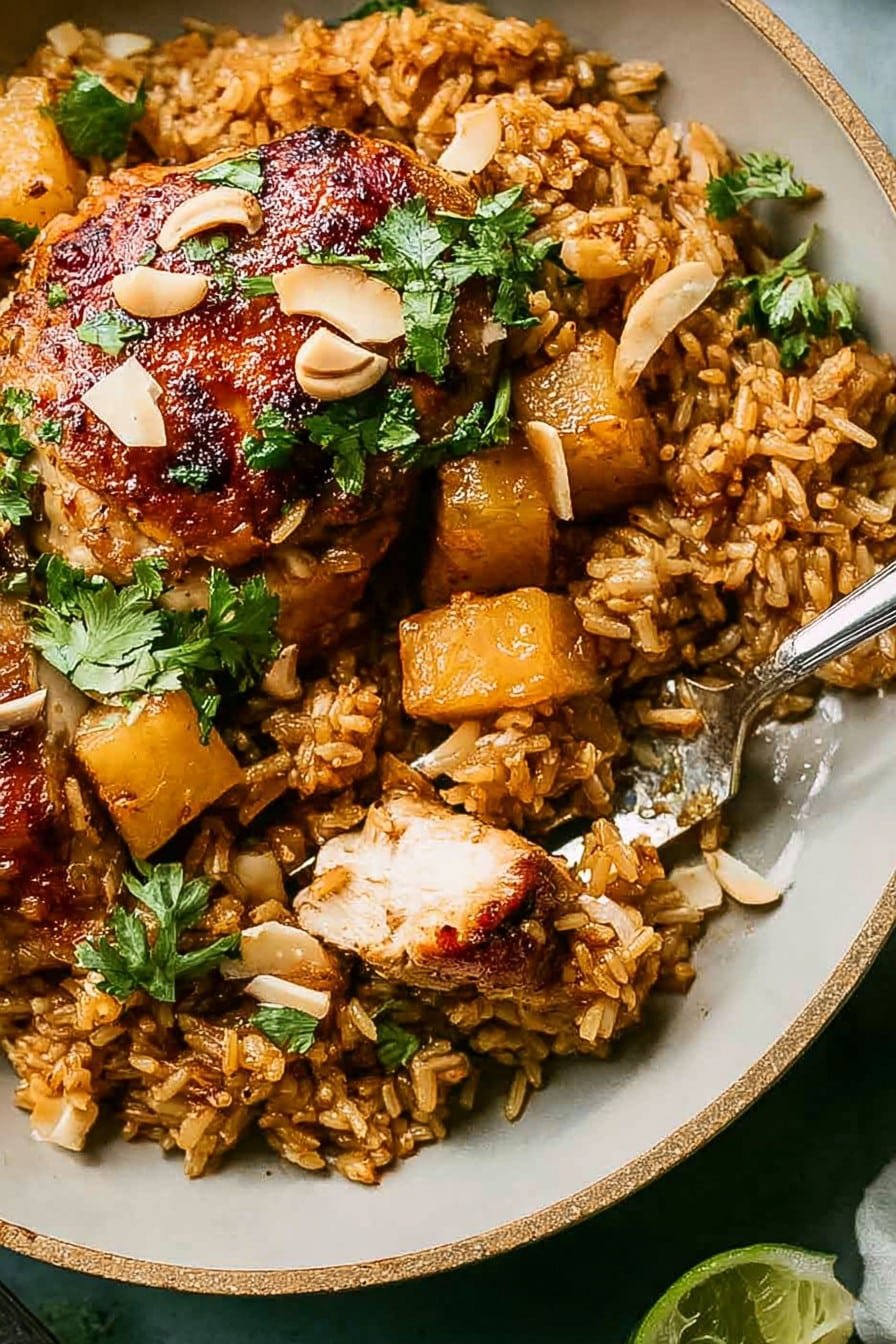
Let’s Talk: Why I Keep Coming Back to This One Pot Hawaiian Chicken and Coconut Rice
I’ll admit it—I have a real soft spot for meals that trick people into thinking you’ve gone all out, when really, you just wanted to use as few pans as possible and still wow your own tastebuds. The first time I made this One Pot Hawaiian Chicken and Coconut Rice was on a muggy Tuesday (house fan on, dog watching my every move). I was impatiently hungry, and frankly, the promise of only having one pot to wash afterwards was the true MVP. Plus, there’s just something about pineapples and coconut that makes dinner feel like a holiday—tropical escapism for the win.
Why You’ll Love This (I Mean, I Sure Do)
I usually whip this up when I can’t stand the thought of an hour of dishes (or, you know, when I forgot to defrost anything fancy). My family basically does a little dance when they smell it cooking; it’s like dinner and a tiny luau all at once. Also, I’m not saying it’s magic, but it does sort of fix a case of the weekday blues (at least for me). And hey, there was a point when my rice kept coming out less creamy than I wanted—turns out, you’ve gotta keep the lid on tight, even if you’re nosey like me and want to peek.
What You’ll Need (And What You Can Swap)
- 1.5 lbs (about 680g) boneless, skinless chicken thighs (sometimes I’ll use chicken breasts if that’s all that’s left—less juicy, but it works in a pinch)
- 2 tablespoons olive oil (honestly, any neutral oil, even that random canola, will do)
- 1 medium onion, diced (a red onion works too, just makes things more colorful)
- 3 cloves garlic, minced (my aunt always doubled it—your call!)
- 1 can (14 oz/400ml) coconut milk (full fat, though once I accidentally grabbed light, and it was still tasty)
- 1 1/2 cups (about 300g) jasmine rice (I’ve tried basmati in a crazy moment—result: not bad, but a bit less ‘Hawaiian’ somehow)
- 1 can (14 oz/400g) pineapple chunks, drained, reserve juice (fresh pineapple if you’re feeling fancy, but the juice matters for the flavor)
- 1 cup chicken stock (or veggie if that’s what’s in your fridge—it’s all good)
- 2 tablespoons soy sauce (my grandma swore by Kikkoman, but I can never tell the difference in this recipe)
- 1 tablespoon brown sugar (I once used honey—result: a bit stickier, but still yum)
- 1 teaspoon salt (plus more to taste)
- 1/2 teaspoon black pepper
- 1/2 teaspoon smoked paprika (or regular, or skip altogether; no pressure)
- 1/2 cup chopped fresh cilantro, to serve (parsley is a fine stand-in if you’re cilantro-averse; no judgment)
- Lime wedges, for serving (optional, but I think they make it sing)
How To Make It – Here’s My Less-Than-Perfect Process
- First, grab your biggest, heaviest pot (Dutch oven if you have it, but a deep saucepan never failed me—yet). Heat up the oil over medium-high. Toss in the chicken thighs, season with salt, pepper, and paprika, then brown both sides till they look happy (about 3-4 minutes per side). You want some color, not necessarily full doneness at this point. Remove chicken and set aside for a sec. Try not to eat any, but…well, I sometimes do.
- Lower the heat a notch, chuck in the diced onion and garlic. Cook till they’re softish and smelling great, maybe 3 minutes. If anything sticks, just splash a bit of stock in to help it along.
- This bit’s important: Put the rice in with the onions and toast it for about a minute. This is where I usually sneak a taste of the onion bits (hot, but worth it).
- Pour in the coconut milk, chicken stock, soy sauce, brown sugar, and the reserved pineapple juice. Give it a good stir, scraping all the nice browned stuff off the bottom (flavor jackpot).
- Add the pineapple chunks and nestle the chicken thighs back in. It looks a bit crowded but trust me, they’ll all get along.
- Bring the whole shebang to a lazy simmer, then put the lid on tight (seriously, keep it shut—steam is your friend here!). Turn the heat to low and let it bubble gently for about 20-25 minutes. Don’t stir; let the magic happen. If you peek and it’s looking too dry, splash a bit more stock or water. Don’t stress if it looks swampy at first; it sorts itself out by the end.
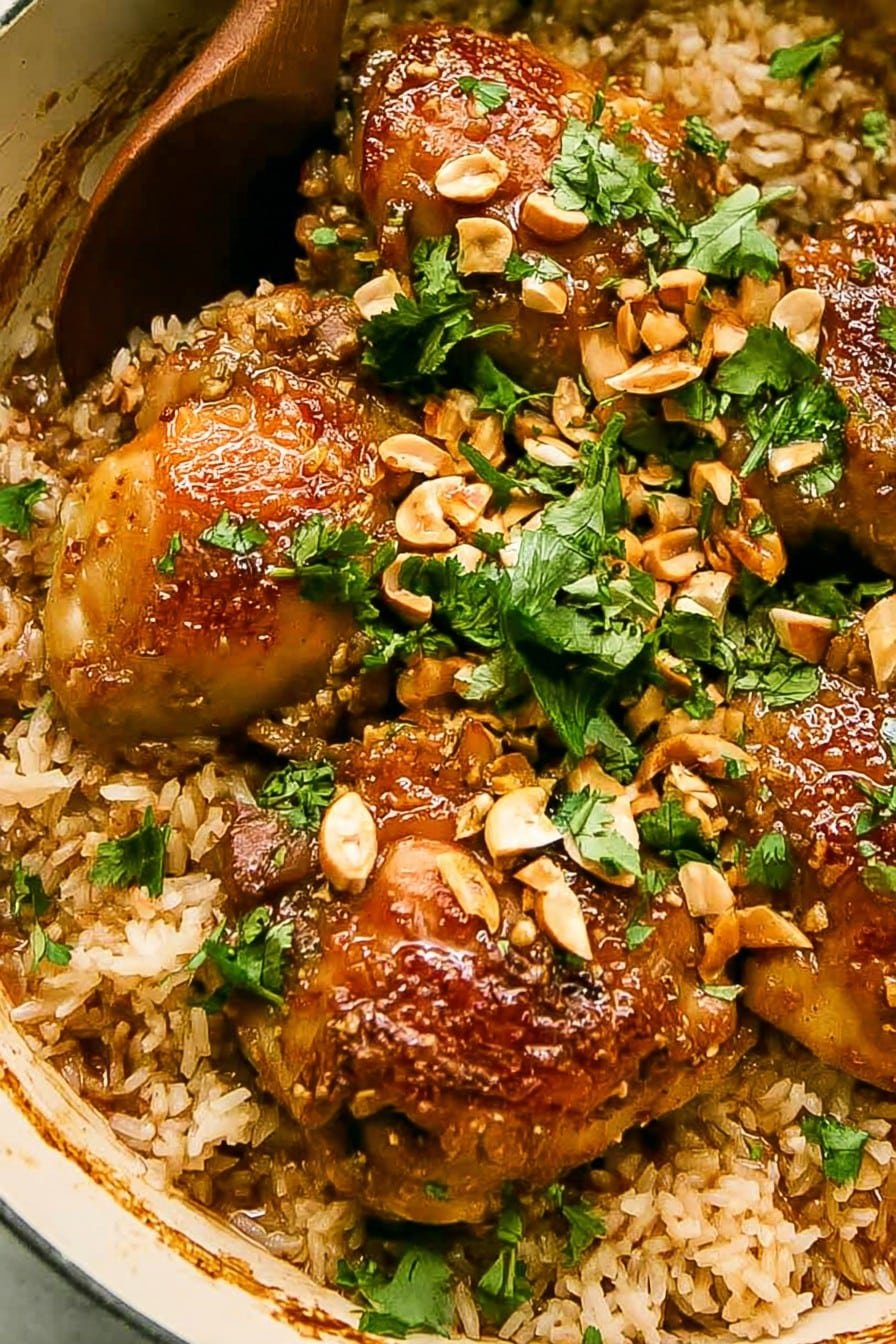
- When the rice is soft and everything smells like you’re on holiday, remove from heat. Let it sit (lid still on) for 5-10 minutes—time for a quick tidy or a sneaky Instagram photo?
- Fluff up the rice with a fork, scatter fresh cilantro or parsley, and finish with some lime wedges on the side. Eat while warm (though I reckon leftovers are even better—I love it cold, too).
Notes (The Stuff I Learned the Hard Way)
- Don’t rush the first chicken browning—it really does build flavor. One time I tried skipping, and the whole pot was just sort of blah.
- Use full-fat coconut milk unless you’re absolutely desperate. I did once use light and almost emailed myself a warning.
- If you get a tough patch of rice at the bottom, honestly, that crispy bit’s my favorite part (unpopular opinion at home, though).
- Oh, and double-check that your lid actually fits. I used a too-small one once—whoops. Let’s just say, crunchy rice town.
If You Want to Mix Things Up (My Experiments, Good and Bad)
- Once tossed in a handful of cashews at the end—nice crunch.
- Tried subbing mango for pineapple: it sounded good in my head, but didn’t really work (too mushy!)
- Shredded coconut sprinkled over the top is fun, especially if you lightly toast it.
- A spoonful of sriracha mixed in adds a sneaky kick if that’s your thing.
Gear You’ll Want (But Don’t Panic If You’re Short)
I mostly use an old Dutch oven that’s seen better days, but you can get away with a deep nonstick pan with a lid. No lid? Cover with foil and plop a baking sheet on top (done that once, and hey, it worked just fine). Wooden spoon is nice but, honestly, a big spatula does the trick too.
Storing Leftovers (But, I Mean, If You Even Have Any?)
This keeps in the fridge in an airtight container for up to three days—but honestly, in my house it never lasts more than a day! It reheats well (microwave, low power, little splash of water if the rice is dry), and honestly, I sometimes eat it cold standing at the fridge. No shame in that game.
Serving Ideas (When I’m Feeling Extra)
I love it just as is, but sometimes I put out a little bowl of extra pineapple and lime wedges. My cousin insists on a drizzle of sweet chili sauce. One time, we even had it with a side of pickled red onions—accidentally made too many that week! On really special occasions, I serve it in hollowed-out pineapple halves…which is wildly impractical but looks cool on Instagram.
Lessons I’ve Learned—Call Them Pro Tips
- I once tried to rush that final steam and ended up with chewy rice. Don’t—let it sit, it’s worth it.
- If you stir too soon after adding liquids, the rice sulks and gets gummy. So, hands off for a bit.
- Leaving the lid ajar ‘just for a minute’ seemed harmless; actually, I find it works better if you just leave it alone.
FAQ—These Are Actual Questions From the Family Group Chat
- Can I use chicken breast instead of thighs? Yep, I’ve done it. Just don’t overcook—breast dries quicker; keep an eye out.
- My rice is soggy! What gives? Usually means too much liquid, or sometimes your lid wasn’t as tight as you thought. It’s fixable, though: take off the lid, let it steam out on low for a few more minutes.
- I don’t like cilantro. Any alternatives? Loads! Parsley is the obvious sub; once, my neighbor sprinkled chopped green onions and it actually slapped.
- What size can of coconut milk—those labels are confusing? I use the 14 oz/400ml. If yours is a bit less, just add an extra splash of stock. No one will know.
- What if I don’t have a Dutch oven? Deep skillet with a lid works. Or improvise: foil plus another pan as a weight; I’ve done both in a kitchen crisis.
- Is it okay to double this recipe? Oh, totally—but you might need a bigger pot. Or just make two batches; trust me, the leftovers taste even better.
So there you go, the full scoop. If you try it, let me know—preferably before the food coma kicks in.
Ingredients
- 1.5 lbs (about 680g) boneless, skinless chicken thighs (sometimes I’ll use chicken breasts if that’s all that’s left—less juicy, but it works in a pinch)
- 2 tablespoons olive oil (honestly, any neutral oil, even that random canola, will do)
- 1 medium onion, diced (a red onion works too, just makes things more colorful)
- 3 cloves garlic, minced (my aunt always doubled it—your call!)
- 1 can (14 oz/400ml) coconut milk (full fat, though once I accidentally grabbed light, and it was still tasty)
- 1 1/2 cups (about 300g) jasmine rice (I’ve tried basmati in a crazy moment—result: not bad, but a bit less ‘Hawaiian’ somehow)
- 1 can (14 oz/400g) pineapple chunks, drained, reserve juice (fresh pineapple if you’re feeling fancy, but the juice matters for the flavor)
- 1 cup chicken stock (or veggie if that’s what’s in your fridge—it’s all good)
- 2 tablespoons soy sauce (my grandma swore by Kikkoman, but I can never tell the difference in this recipe)
- 1 tablespoon brown sugar (I once used honey—result: a bit stickier, but still yum)
- 1 teaspoon salt (plus more to taste)
- 1/2 teaspoon black pepper
- 1/2 teaspoon smoked paprika (or regular, or skip altogether; no pressure)
- 1/2 cup chopped fresh cilantro, to serve (parsley is a fine stand-in if you’re cilantro-averse; no judgment)
- Lime wedges, for serving (optional, but I think they make it sing)
Instructions
-
1First, grab your biggest, heaviest pot (Dutch oven if you have it, but a deep saucepan never failed me—yet). Heat up the oil over medium-high. Toss in the chicken thighs, season with salt, pepper, and paprika, then brown both sides till they look happy (about 3-4 minutes per side). You want some color, not necessarily full doneness at this point. Remove chicken and set aside for a sec. Try not to eat any, but…well, I sometimes do.
-
2Lower the heat a notch, chuck in the diced onion and garlic. Cook till they’re softish and smelling great, maybe 3 minutes. If anything sticks, just splash a bit of stock in to help it along.
-
3This bit’s important: Put the rice in with the onions and toast it for about a minute. This is where I usually sneak a taste of the onion bits (hot, but worth it).
-
4Pour in the coconut milk, chicken stock, soy sauce, brown sugar, and the reserved pineapple juice. Give it a good stir, scraping all the nice browned stuff off the bottom (flavor jackpot).
-
5Add the pineapple chunks and nestle the chicken thighs back in. It looks a bit crowded but trust me, they’ll all get along.
-
6Bring the whole shebang to a lazy simmer, then put the lid on tight (seriously, keep it shut—steam is your friend here!). Turn the heat to low and let it bubble gently for about 20-25 minutes. Don’t stir; let the magic happen. If you peek and it’s looking too dry, splash a bit more stock or water. Don’t stress if it looks swampy at first; it sorts itself out by the end.
-
7When the rice is soft and everything smells like you’re on holiday, remove from heat. Let it sit (lid still on) for 5-10 minutes—time for a quick tidy or a sneaky Instagram photo?
-
8Fluff up the rice with a fork, scatter fresh cilantro or parsley, and finish with some lime wedges on the side. Eat while warm (though I reckon leftovers are even better—I love it cold, too).
Approximate Information for One Serving
Nutrition Disclaimers
Number of total servings shown is approximate. Actual number of servings will depend on your preferred portion sizes.
Nutritional values shown are general guidelines and reflect information for 1 serving using the ingredients listed, not including any optional ingredients. Actual macros may vary slightly depending on specific brands and types of ingredients used.
To determine the weight of one serving, prepare the recipe as instructed. Weigh the finished recipe, then divide the weight of the finished recipe (not including the weight of the container the food is in) by the desired number of servings. Result will be the weight of one serving.
Did you make this recipe?
Please consider Pinning it!


