

Okay, Let’s Talk Strawberry Banana Pudding!
Alright y’all, gather ’round because I’m about to share something near and dear to my heart – my go-to Strawberry Banana Pudding recipe. This isn’t some fancy, complicated dessert. Nope. This is the kind of thing you whip up for a Sunday dinner, a potluck, or honestly, just because it’s Tuesday and you need a little sweetness. I remember my aunt making a version of this every summer, and the smell of vanilla wafers and bananas just *is* summer to me. Mine’s got strawberries thrown in because, well, everything’s better with strawberries, right?
Why This Pudding Gets Devoured Every Single Time
Look, I make this when I need a guaranteed crowd-pleaser. My family goes absolutely bonkers for it because it’s just pure comfort food. It’s creamy, it’s sweet (but not *too* sweet, you know?), and that combo of soft pudding, slightly softened cookies, and fresh fruit is just *chef’s kiss*. Plus, it’s a fantastic way to use up those bananas that are getting a little spotty on the counter – we’ve all been there! (And don’t even get me started on trying to make fiddly French macarons, this is SO much less stressful).
What You’ll Need (My Way)
- Instant Vanilla Pudding Mix: Two small boxes (like the 3.4 oz size). Listen, my grandmother swore by the cook-and-serve kind, bless her heart, and it *is* lovely, but on a weeknight? Instant pudding is my best friend. Jell-O brand is classic, but store brand works just fine.
- Cold Milk: Whatever the pudding boxes call for, usually around 4 cups total for two small boxes. Whole milk makes it richer, but 2% is fine too.
- Sweetened Condensed Milk: One standard can (14 oz). This is kinda the secret weapon for creaminess, don’t skip it!
- Cool Whip or Whipped Topping: One tub (8 oz), thawed. Or hey, whip your own heavy cream with a little sugar if you’re feeling fancy! About 2 cups of liquid heavy cream should do it.
- Vanilla Extract: A splash, maybe 1 teaspoon? I rarely measure this precisely.
- Vanilla Wafers: A whole box (like 11-12 oz). Nilla Wafers are the classic gold standard, but shortbread cookies or even those chessmen cookies work in a pinch.
- Bananas: About 4-5 ripe (but not mushy!) bananas, sliced.
- Fresh Strawberries: A pound (around 16 oz), hulled and sliced. Sometimes finding *really* good strawberries feels like winning the lottery, doesn’t it? Just get the best you can find.

Putting It All Together
- Make the Pudding Base: First things first, grab a big bowl. Whisk together the instant pudding mix and the cold milk for a couple of minutes, just like the box says. Let it sit for maybe 5 minutes to thicken up a bit. It should get nice and pudding-y.
- Creamy Goodness Time: Now, gently fold in the sweetened condensed milk and the vanilla extract. Stir it all together until it’s smooth. Then, fold in the thawed Cool Whip (or your homemade whipped cream). Try not to deflate it too much! This mixture is basically heaven. This is where I usually sneak a taste… or three.
- Layering Magic: Get your dish ready. A 9×13 inch baking dish or a pretty trifle bowl works great. Spread a thin layer of the pudding mixture on the bottom. Just enough to cover it.
- Cookie Time: Arrange a single layer of vanilla wafers over the pudding. Pack ’em in there pretty snug.
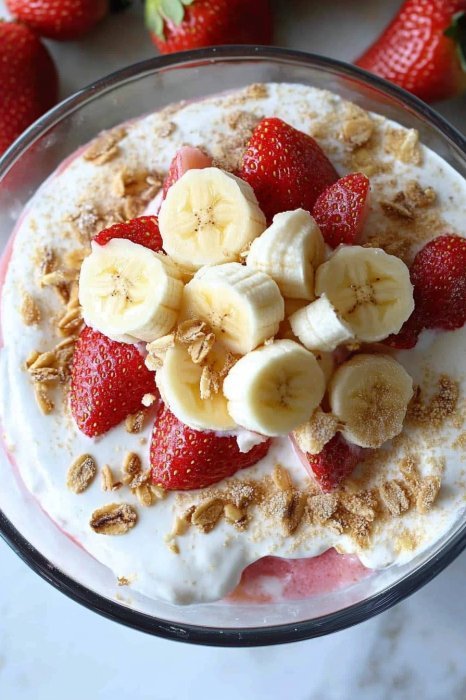
- Fruit Layer 1: Layer sliced bananas over the cookies, then layer sliced strawberries over the bananas.
- Pudding Layer 2: Spread about half of the remaining pudding mixture over the fruit.
- Repeat!: Add another layer of cookies, then bananas, then strawberries.
- Final Touch: Top it all off with the rest of the pudding mixture, spreading it evenly. Sometimes I like to crush a few extra cookies to sprinkle on top right before serving, but that’s totally optional. Don’t worry if it looks a bit wierd or messy at this stage – it always does! Trust the process.
- Chill Out: Cover the dish tightly with plastic wrap (press it gently onto the surface of the pudding to prevent a skin form forming) and pop it in the fridge. It needs to chill for *at least* 4 hours, but honestly, overnight is even better. This lets the cookies soften and the flavors meld together. Seriously, patience is key here.
Some Notes from My Kitchen
- Make sure those bananas aren’t *too* ripe. A little green at the stem is actually okay; they’ll soften in the pudding. Super brown, mushy bananas can make the whole thing taste a bit… funky.
- Don’t skimp on the chilling time! It really does make a difference to the texture and flavor. It needs time for the cookies to get perfectly soft.
- If you’re using a trifle bowl, make those layers look pretty! Press the sliced fruit right up against the glass. For a regular dish, just focus on even layers.
Fun Twists I’ve Tried (and One Flop!)
Sometimes I swap the vanilla wafers for shortbread cookies or even graham crackers (though graham crackers get softer faster). Adding a layer of toasted coconut is pretty amazing too! Once, I tried adding pineapple along with the strawberries and bananas… let’s just say it wasn’t my best idea. The acidity did something strange to the pudding. Stick with berries or just bananas!
What Gear You Might Need
You really don’t need much. A big mixing bowl, a whisk (or an electric hand mixer makes the pudding part easier, not gonna lie), a spatula for folding, and a dish to assemble it in. A 9×13 inch glass baking dish is perfect, or if you have a fancy trifle bowl, now’s its time to shine! But really, any deep-ish container will do the job.

Storing the Leftovers (If Any!)
Cover it tightly with plastic wrap and keep it in the fridge. It’s *best* eaten within 2-3 days. The cookies get progressively softer, and the bananas can start to weep a bit after day 3. Though honestly, in my house it never, ever lasts more than a day! It just vanishes.
How We Like to Eat It
We just scoop it into bowls! Straight from the fridge is best. Sometimes, if I’m feeling extra, I’ll add a dollop of fresh whipped cream and maybe one perfect strawberry slice on top right before serving. My kids always fight over the corner pieces with the most cookies.
Tips I Learned the Hard Way
- I once tried rushing the pudding making step, didn’t let the instant pudding fully set before adding the other stuff… regretted it! The final pudding was a bit thin. Let it thicken first!
- Also, make sure your Cool Whip is fully thawed, otherwise you get weird icy bits. Not pleasant.
- Don’t assemble it *too* far in advance if you want distinct layers. Overnight is great, but after 2 days, it starts to become one delicious homogenous (but less pretty) mixture.
Quick Q&A – Stuff People Ask Me
- Can I use Cook & Serve pudding instead of instant?
- Totally! Just make sure you prepare it according to its package directions and let it cool *completely* before you fold in the condensed milk and whipped topping. It takes longer, but some folks swear by the taste.
- What about frozen strawberries?
- Hmm, I usually use fresh because frozen ones release a LOT of water as they thaw, which can make your pudding a bit runny. If you *must* use frozen, thaw them completely and drain them really, really well first. Maybe even pat them dry. Fresh is definitely better here though.
- Can I make this Strawberry Banana Pudding ahead of time?
- Oh, absolutely! Like I said, it’s actually *better* made at least 4 hours ahead, or even the day before you plan to serve it. Perfect for prepping before guests arrive when you’re fixin’ to have a get-together.
- Is there a way to make it gluten-free?
- Yep! Just swap the vanilla wafers for your favorite gluten-free vanilla cookies or shortbread. Check your pudding mix and other ingredients too, but usually, the cookies are the main gluten source here.
Okay, I think that covers just about everything! This Strawberry Banana Pudding really is simple, delicious, and always a winner. Let me know if you try it!


