
Let’s Chat About This Strawberry Shortcake Cake
Okay, so here’s the thing: Strawberry Shortcake Cake (with sponge cake) is one of those desserts that’s a total showstopper, but it’s secretly easier than it looks. The first time I made it, I was probably a smidge too ambitious—trying to impress my sister-in-law who’s an actual pastry chef (not that that made me nervous or anything, cough). But honestly, it’s now my favorite not-too-fancy, totally impressive dessert to whip out for birthdays, BBQs, or when I’ve just impulse-bought too many strawberries at the farmers’ market. I will warn you: my dog once tried to sneak a bite. She has good taste.
Why I Keep Coming Back to This Cake
I trot this cake out whenever strawberries are peak perfection—sweet, juicy, just begging for a pile of whipped cream on top. My family goes bonkers for this (the whipped cream usually disappears mysteriously fast). Honestly, I like it because even if my sponge is a bit uneven, layering on the berries and cream makes everything look—and taste—like it was supposed to be rustic. Also, if you’ve ever tried making classic shortcakes and ended up with dry dough bricks… this feels practically foolproof in comparison; I can’t claim I’ve never had a soggy moment, though.
What You’ll Need (and Where You Can Improvise)
- 4 large eggs, room temperature (when I forget to let them warm up, no real harm, but it whips better when I remember)
- 120g (about 1 cup) granulated sugar (I use regular old store brand—my grandma loved fancy cane sugar, but, well…)
- 120g (about 1 cup) all-purpose flour (sometimes I swap half for cake flour if I feel fancy)
- 2 tablespoons milk
- 2 tablespoons melted unsalted butter (I’ve used margarine once or twice, but butter just tastes better)
- 1 teaspoon vanilla extract (imitation is fine—real vanilla is king but expensive!)
- 500g (about 1 lb) fresh strawberries, hulled and sliced (sub frozen in a pinch, but only if you’re desperate—they get mushy)
- 1–2 tablespoons sugar for the berries (adjust this if your strawberries are mega-sweet already, or forget it entirely like I have before)
- 400ml (about 1 2/3 cups) heavy cream for whipping
- 2 tablespoons powdered sugar (or more if you’ve got a real sweet tooth—taste and see)
- Another splash of vanilla for the cream (optional, but why not?)
How I Actually Make the Cake
- First up, the sponge. Preheat your oven to 350°F (180°C). Grab an 8-inch round pan, line the bottom with parchment paper, then spray or butter the sides. (No parchment? Just butter. It’ll stick a little more but that’s life.)
- Eggs + sugar action. Crack the eggs into a big bowl. Add the sugar. Beat with a hand mixer (or a whisk if you’ve got energy to spare) for at least 7 minutes, until it’s super pale, fluffy, and about tripled in volume. Do a little arm shake if you’re tired, nobody’s watching.
- Sift and fold. Sift in the flour. Use a spatula to gently fold it in—big, floaty strokes. Don’t over-mix. It’ll look a bit weird at first; keep going gently and it’ll mostly smooth out.
- Add liquids. Stir the milk, melted butter, and vanilla together in a cup. Pour it around the edge of the batter. Fold it in gently. I used to dump it in the middle and got weird dense patches, so around the edge really does help (funny how that works!)
- Bake it! Scrape the batter into your pan. Bake for 23–28 minutes, until golden and the top springs back when poked (or a toothpick comes out clean). Don’t freak if it domes—it settles as it cools.
- Cool the sponge. Let it chill in the pan 10 min, then flip onto a rack to finish cooling. I always want to rush this and regret it. Cracked once or twice. Still tasty.
- Macreate the berries. Toss sliced strawberries with the sugar in a bowl. Let them hang out while the sponge cools. (This is when I test a few—quality control, right?)
- Whip the cream. Just before assembling, beat the cold heavy cream with powdered sugar (and a dash more vanilla, if you like) until you get nice soft peaks. If you go past that into butter territory, no worries—just gently fold in a splash of milk, it’ll soften up a touch.
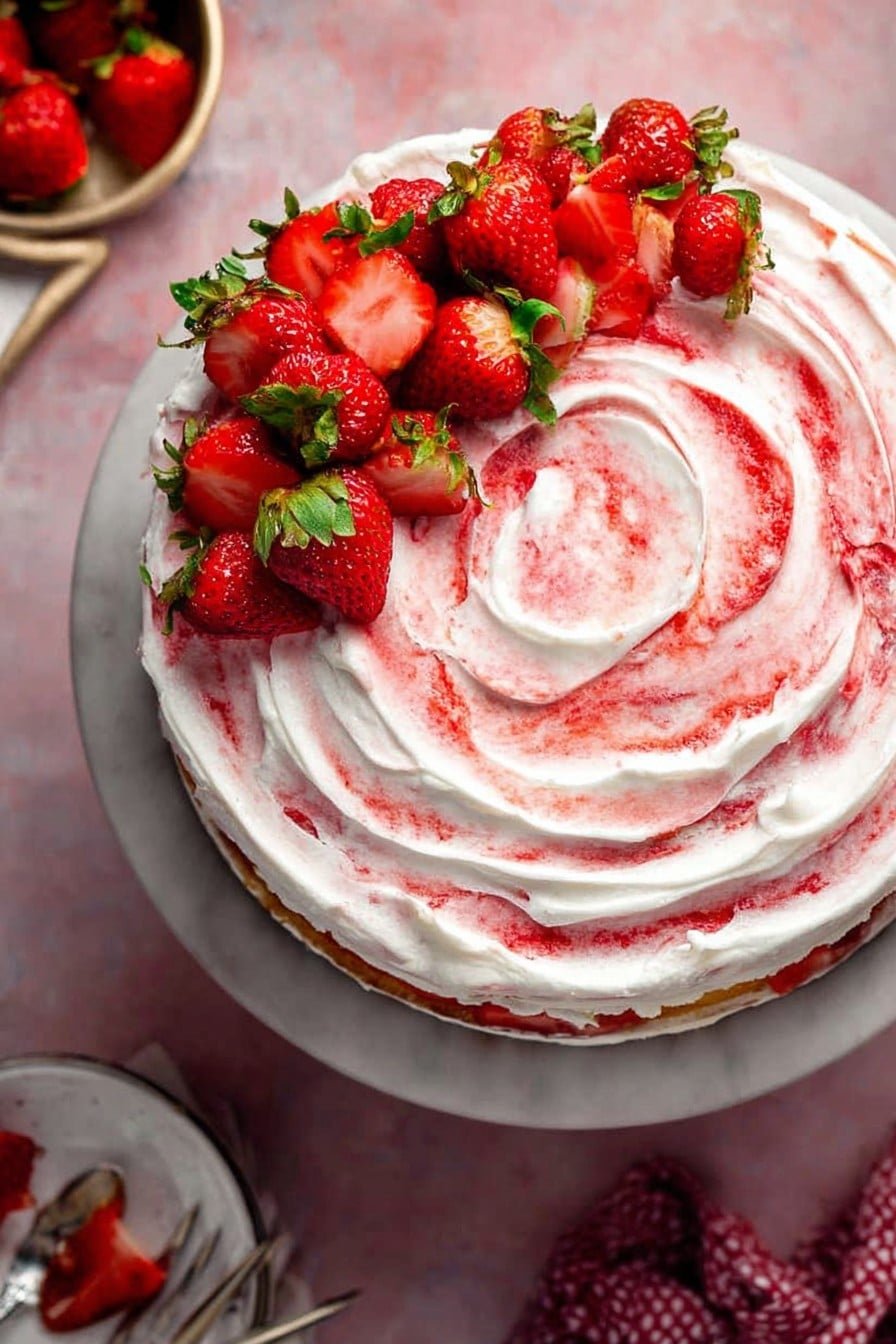
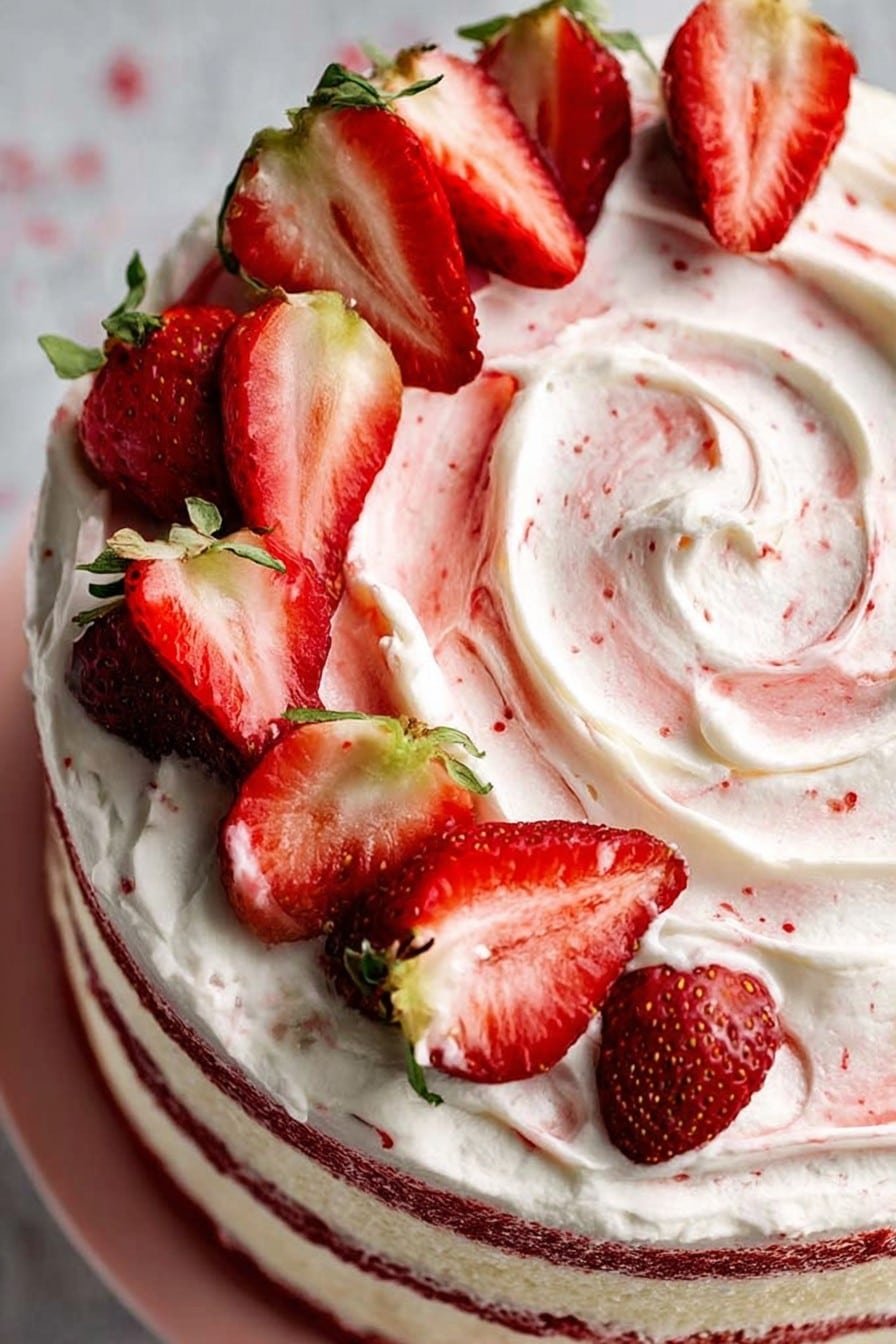
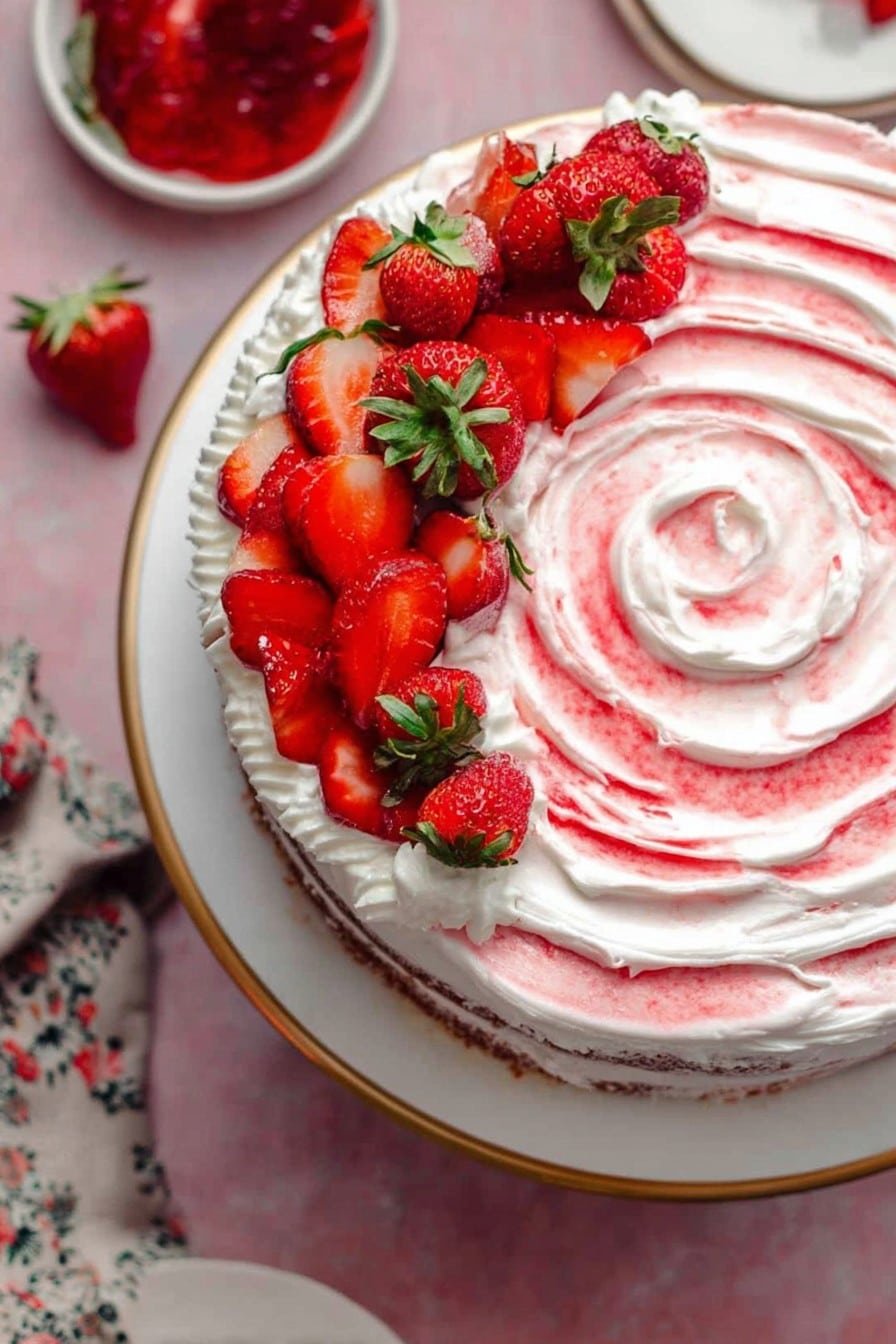
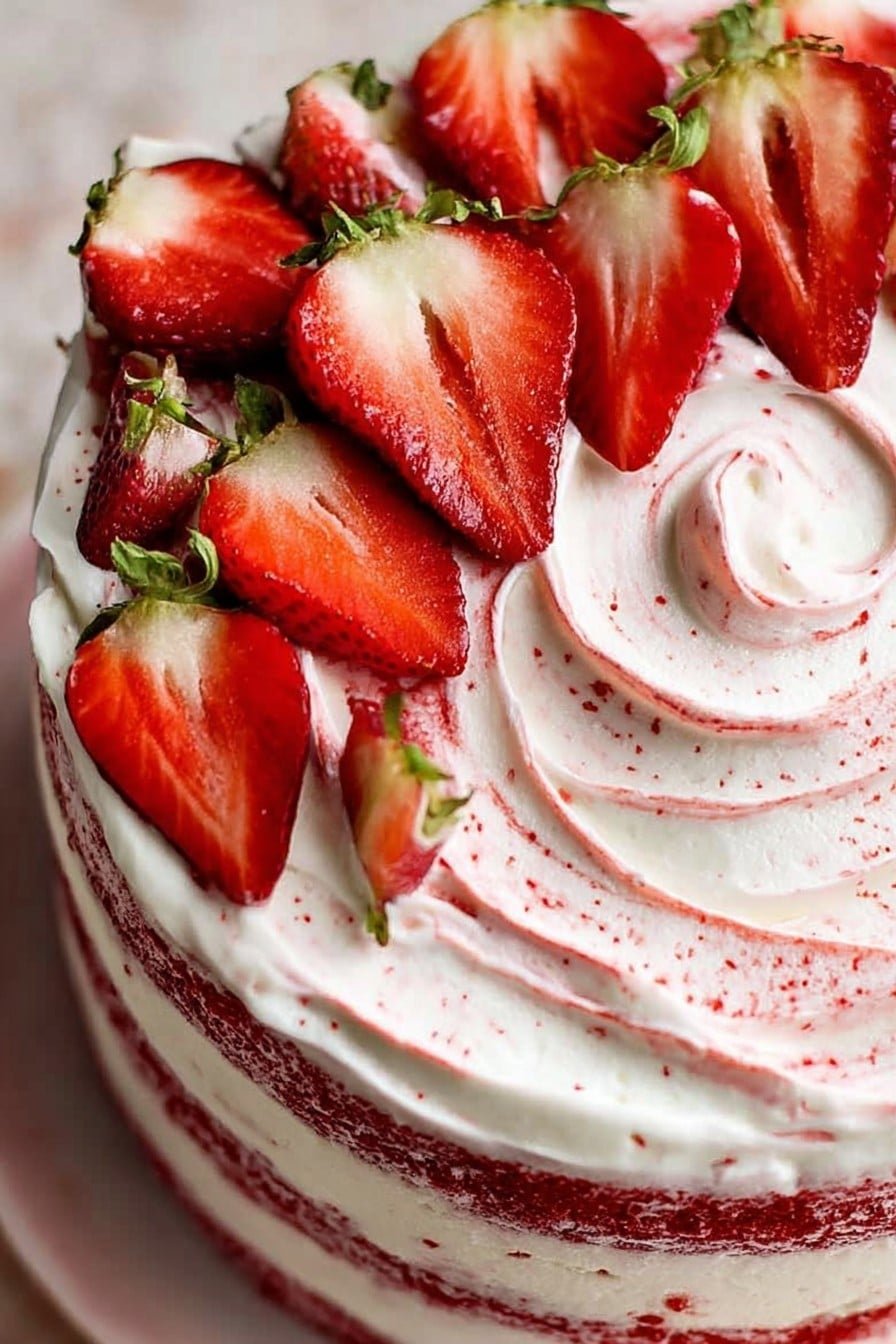
- Assembly time! Slice the sponge in half horizontally with a bread knife (cue nerves). Lay the bottom on a plate. Top with about half the juicy berries, letting some syrup soak in, then spread half the whipped cream on top (no need for perfection—rustic is in, didn’t you know?).
- Second layer. Place the other sponge half on top. Pile on the rest of the berries and the rest of the cream. I like to swirl the cream with the back of a spoon. Sometimes my son adds extra berry slices on top because “it looks fancy”—he’s not wrong!
- Chill, or eat right away. You can refrigerate for an hour to let it all settle, but I’ve also just served it immediately. It slices nicer after a chill, but frankly, it’s grabbable either way.
Stuff I’ve Noticed (Notes from my clumsy adventures)
- If you forget to bring eggs to room temp, it’ll still mostly work. Warmer is fluffier though (science, I guess).
- The cake will look a little sad and flat when first out of the oven. Don’t panic! The filling perks everything up.
- I sometimes end up with a few sticky bits at the edge, especially if I skip the parchment. Still tastes grand.
Variations I’ve Played With
- I swapped in blueberries once (it was fine, but strawberry is the star for a reason—don’t let anyone tell you otherwise.)
- Lemon zest in the sponge gives it a springtime zing; didn’t love it with orange, oddly enough.
- For a boozy twist, dribble a splash of limoncello or sherry over the sponge before the berries. Adults only, obviously!
What If You’re Missing a Tool?
I’ll just say it: I swear you don’t need a stand mixer. Whisk and elbow grease works in a pinch (turn on a podcast and go for it). No cake rack? I’ve used an upside-down colander. Not perfect, but it gets the job done. Once, I made this in a square pan. Still tasty.
How I Store (what’s left… if anything)
So honestly, it only ever lasts maybe 24 hours in my house. But if you do have leftovers, wrap it up and pop it in the fridge—it’ll keep for up to 2 days. Sometimes the strawberries make the cake a bit soft by day two. (I kinda love it that way, like a trifle.)
How to Serve—my two cents
We like to give big, messy slices, and someone always fights for that extra spoonful of berry syrup left in the bowl. Once, we had it with a scoop of vanilla ice cream (never a bad idea). My nephew claims it tastes best straight form the fridge late at night. Who am I to argue?
If I Could Give One Pro Tip (Learned the Hard Way)
Don’t try to “save time” by cutting the cake when it’s hot. It tears and the cream runs everywhere—a delicious mess, but trust me, cool it first.
People Often Ask (FAQs Straight from My Kitchen)
- Can I use store-bought sponge cake?
- Yeah, you can—but it’s never quite the same! When I’m really pinched for time, I’ve done it. Just go heavier on the berries and cream, and no one complains (at least, not out loud).
- Can I make it in advance?
- Sure! Actually, I think it tastes better the next day after everything melds. The only catch: the sponge gets softer, which I actually like, but it’s not as tidy-looking. Your call.
- Is there a gluten-free version?
- I tried with gluten-free flour blend once, and it was a bit dense, but still edible. Maybe add an extra egg for more lift.
- What if my cream won’t whip?
- Usually the cream’s too warm—chill your bowl and whisk. Or use an ice bag around the bowl if it’s a heatwave (been there!).
And there we go, friend! Go make this, let it get a little messy, and enjoy every bite. If you can’t finish it, my address is available for donations—just kidding (sort of!).
Ingredients
- 4 large eggs, room temperature
- 120g (about 1 cup) granulated sugar
- 120g (about 1 cup) all-purpose flour
- 2 tablespoons milk
- 2 tablespoons melted unsalted butter
- 1 teaspoon vanilla extract
- 500g (about 1 lb) fresh strawberries, hulled and sliced
- 1–2 tablespoons sugar for the berries
- 400ml (about 1 2/3 cups) heavy cream for whipping
- 2 tablespoons powdered sugar
- Another splash of vanilla for the cream (optional)
Instructions
-
1First up, the sponge. Preheat your oven to 350°F (180°C). Grab an 8-inch round pan, line the bottom with parchment paper, then spray or butter the sides. (No parchment? Just butter. It’ll stick a little more but that’s life.)
-
2Eggs + sugar action. Crack the eggs into a big bowl. Add the sugar. Beat with a hand mixer (or a whisk if you’ve got energy to spare) for at least 7 minutes, until it’s super pale, fluffy, and about tripled in volume. Do a little arm shake if you’re tired, nobody’s watching.
-
3Sift and fold. Sift in the flour. Use a spatula to gently fold it in—big, floaty strokes. Don’t over-mix. It’ll look a bit weird at first; keep going gently and it’ll mostly smooth out.
-
4Add liquids. Stir the milk, melted butter, and vanilla together in a cup. Pour it around the edge of the batter. Fold it in gently. I used to dump it in the middle and got weird dense patches, so around the edge really does help (funny how that works!)
-
5Bake it! Scrape the batter into your pan. Bake for 23–28 minutes, until golden and the top springs back when poked (or a toothpick comes out clean). Don’t freak if it domes—it settles as it cools.
-
6Cool the sponge. Let it chill in the pan 10 min, then flip onto a rack to finish cooling. I always want to rush this and regret it. Cracked once or twice. Still tasty.
-
7Macreate the berries. Toss sliced strawberries with the sugar in a bowl. Let them hang out while the sponge cools. (This is when I test a few—quality control, right?)
-
8Whip the cream. Just before assembling, beat the cold heavy cream with powdered sugar (and a dash more vanilla, if you like) until you get nice soft peaks. If you go past that into butter territory, no worries—just gently fold in a splash of milk, it’ll soften up a touch.
-
9Assembly time! Slice the sponge in half horizontally with a bread knife (cue nerves). Lay the bottom on a plate. Top with about half the juicy berries, letting some syrup soak in, then spread half the whipped cream on top (no need for perfection—rustic is in, didn’t you know?).
-
10Second layer. Place the other sponge half on top. Pile on the rest of the berries and the rest of the cream. I like to swirl the cream with the back of a spoon. Sometimes my son adds extra berry slices on top because “it looks fancy”—he’s not wrong!
-
11Chill, or eat right away. You can refrigerate for an hour to let it all settle, but I’ve also just served it immediately. It slices nicer after a chill, but frankly, it’s grabbable either way.
Approximate Information for One Serving
Nutrition Disclaimers
Number of total servings shown is approximate. Actual number of servings will depend on your preferred portion sizes.
Nutritional values shown are general guidelines and reflect information for 1 serving using the ingredients listed, not including any optional ingredients. Actual macros may vary slightly depending on specific brands and types of ingredients used.
To determine the weight of one serving, prepare the recipe as instructed. Weigh the finished recipe, then divide the weight of the finished recipe (not including the weight of the container the food is in) by the desired number of servings. Result will be the weight of one serving.
Did you make this recipe?
Please consider Pinning it!


