
Okay, so baked yogurt—have you tried it? Because honestly, it was a total game changer for me the first time I made it. One of those happy kitchen accidents, really. Picture it: me desperately craving something creamy and sweet but with the fridge looking about as sad as my rainy Sunday plans. And there sits this big tub of plain Greek yogurt, staring back. Long story short, a quick rummage, a lightbulb moment, toss it all together, and—BOOM—baked yogurt, but without the sugar crash (or the sugar, honestly). My family had no idea there wasn’t even a drizzle of honey in the first batch! They now call it my “magic fridge dessert.”
Plus, there’s something oddly soothing about eating it warm out of the oven, or chilly from the fridge. The texture always surprises me—a bit like pudding, a bit like cheesecake, but not quite either. Anyway, I’ll stop rambling and tell you why you’ll love making it.
Why You’ll Love This Recipe—Scout’s Honor!
I probably make this baked yogurt (sugar free) every month, especially when I want to show off just a little, but only have like three ingredients handy. It’s the only dessert my dad requests seconds of—he claims it tastes like “fancy hotel food” (dad doesn’t really do subtlety). And the best part for me? No faffing about with water baths or fancy gear—just mix, bake, and hope you remembered to preheat the oven (I do forget that more than I’ll admit).
Also, as someone who has been burned (not literally, but you know what I mean) by runny baked desserts, I love how forgiving this is. Even if the top colors a bit too much or the sides look odd, it always sets up nicely. My only frustration: waiting for it to cool before stealing a sample bite!
Gather Your Ingredients (Substitutions Totally Allowed)
- 1 cup plain Greek yogurt (sometimes I use regular yogurt if that’s all I’ve got—just drain it a bit first)
- 1/2 cup milk (any milk works, I’ve even tried oat milk—you do you)
- 1/4 cup condensed milk, sugar free (I buy the store version, but my friend insists homemade is better)
- 1-2 teaspoons vanilla extract (sometimes I just splash it in, measuring is for the precise folk)
- Pinch of salt (optional, but my granny always threw it in—can’t argue with that logic)
The Steps – Honest Directions from My Kitchen
- Preheat your oven to 180°C (350°F). Believe me, don’t skip this step—cold ovens + impatient desserts = uneven results (been there).
- In a mixing bowl, whisk together the Greek yogurt, milk, sugar free condensed milk, vanilla extract, and salt. Go at it until it’s smooth—no need to be gentle, it won’t mind. If using regular yogurt, drain some of the whey out first (just plonk it in a sieve for a bit).
- Pour the mixture into small oven-safe ramekins or a baking dish. Honestly, I’ve even used teacups in a pinch.
- Set the ramekins or baking dish on a baking tray (makes it easier to get in and out of the oven, trust me, wobbly ramekins + hot oven racks = disaster).
- Bake for about 20-25 minutes, or until the edges are just set and the center still has a little wobble. If it looks a bit puffed or golden on top, that’s perfect. Sometimes mine takes 30 minutes—depends on how thick I’ve left the mixture.
- Let it cool to room temp—this is where I have to occupy myself, or I’ll poke at it too soon. Then refrigerate for at least 1-2 hours (or overnight if you have willpower, so it gets nice and firm).
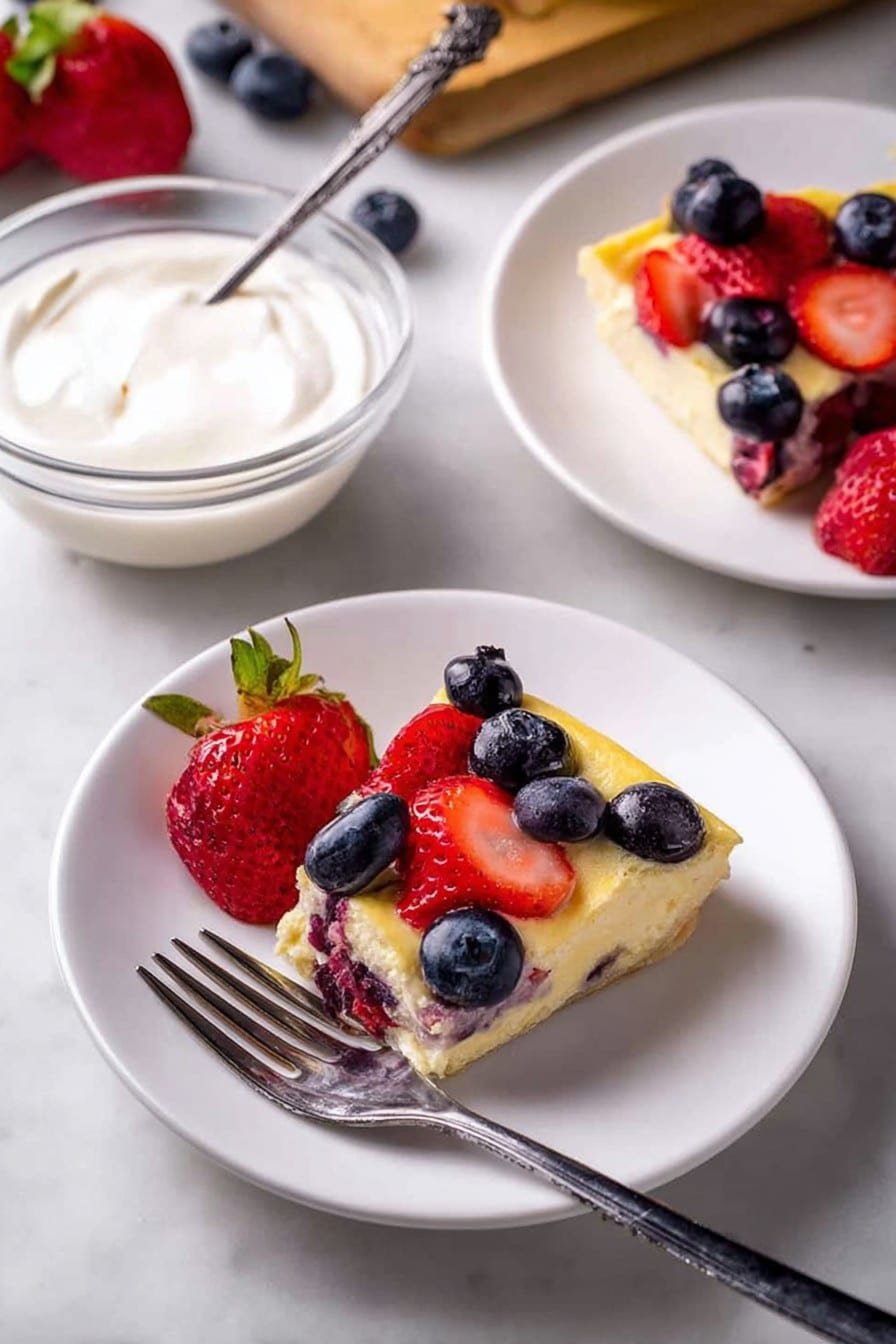
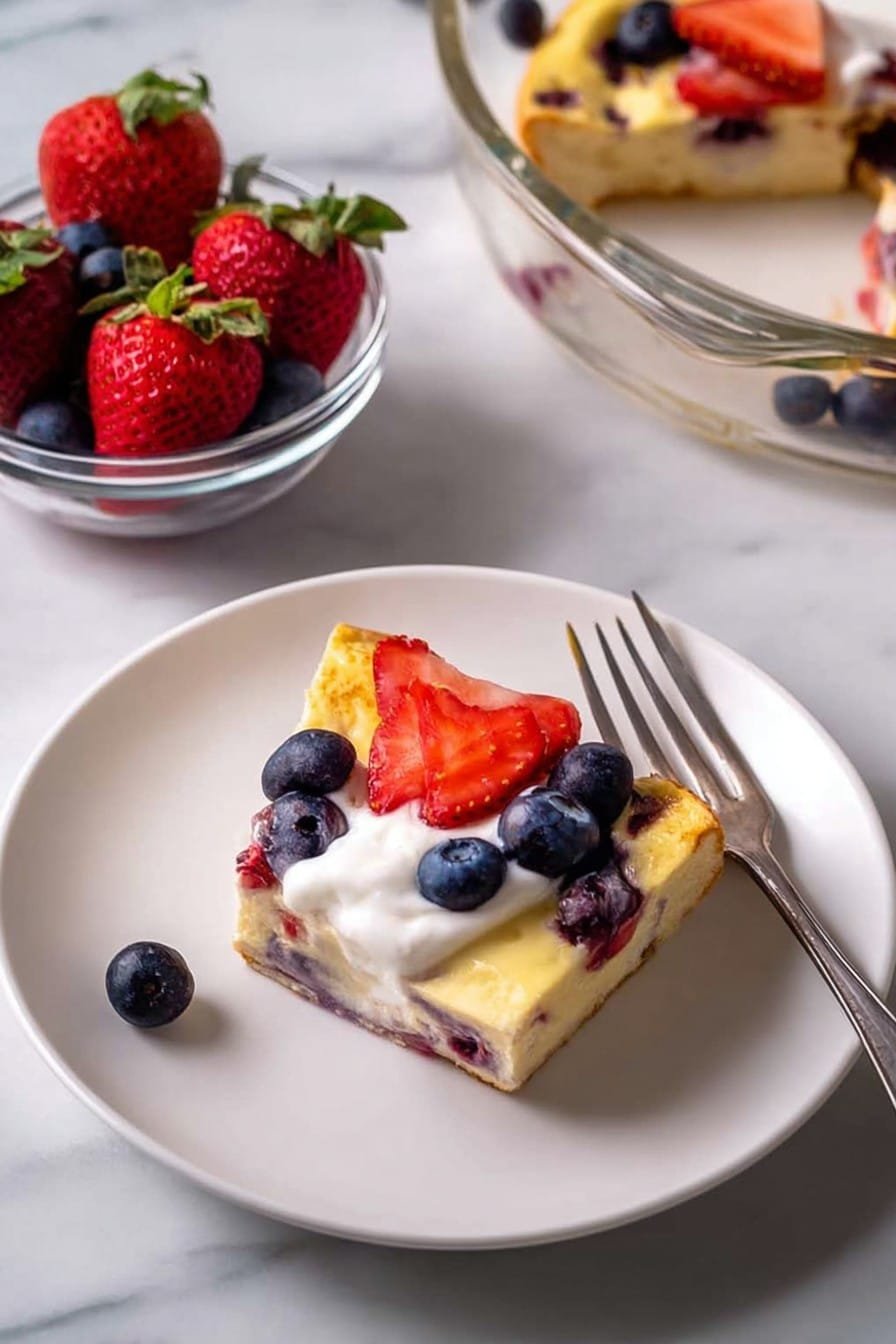
- Serve chilled, maybe with some fresh berries, slivered pistachios, or a little dusting of cinnamon if you’re feeling fancy.
It’s Not Perfect—But That’s Why I Love It (Notes)
- If you use regular milk, it’s a bit looser, but I actually don’t mind it that way.
- I once tried flavoured yogurt (mango), but honestly—it just tasted weirdly artificial. Stick to plain.
- The salt brings out the tanginess, but it’s not essential.
- Every oven has its quirks, so don’t panic if the top gets little cracks. That’s the yogurt showing personality.
My Failed Experiments (& a Couple Successes): Variations
- Lemon zest: Tossed some in—delicious. So zingy!
- Cardamom: Just a pinch for an Indian twist, but don’t overdo it or you’ll feel like you’re eating a scented candle (ask me how I know).
- Chopped nuts: Pistachios and almonds give a nice crunch.
- Skip the condensed milk: I tried swapping in coconut cream, but it just wasn’t the same. Too gloopy, not sweet enough.
Equipment Chat (Or, What If You Don’t Have Ramekins?)
I always say ramekins are ideal, but you can totally use a Pyrex dish, ceramic cups, or even a muffin tin (did that once when all else was in the dishwasher). Just grease ’em lightly if you’re not using ceramic. Oh, and if all else fails, line a plain baking pan with parchment—it’ll taste the same, just maybe look a bit, um, rustic?
How I (Try to) Store It
Keep it in the fridge, covered, for up to 3 days—though honestly, it never lasts past breakfast the next morning. If you need to transport it, just pop a lid on or use cling film (yes, cling film is my patchy solution for most things).
How We Serve Baked Yogurt at My Place
Straight out of the ramekin for my son, who can’t be bothered with plates. For me, a scoop of berries and a dusting of cinnamon or cardamom on top (still can’t decide which I like better). My sister crumbles a cookie over hers, which actually tastes pretty fab, but don’t tell her I said that.
Stuff I Learned the Hard Way (Pro Tips)
- If you underbake it, it’s yogurt soup. If you overbake it—well, let’s just say, cardboard territory. So keep an eye in those last five minutes (I once tried walking the dog, came back to yogurt bricks).
- Don’t be tempted to up the milk. More liquid means MUCH longer to set—ask my impatient self.
- Use full-fat yogurt if possible. I tried using the low-fat stuff once, and it tasted like diet food (not in a good way).
FAQ—Because Folks Always Ask!
- Can I make this vegan? I get this a lot. You probably could if you use coconut yogurt and a plant-based condensed milk; just know it’ll turn out a bit more custardy.
- What if I don’t have sugar free condensed milk? Use normal (if you don’t mind some sugar). Or mix Greek yogurt with a bit of sweetener, though it won’t be quite as creamy.
- Can I freeze baked yogurt? Technically yes, but the texture gets weird—grainy, almost like it’s been through a snowstorm. I wouldn’t bother.
- Is it supposed to look kind of wobbly? Yep! When you take it out of the oven, a gentle wobble in the centre means it’ll be set and silky once chilled.
- Can I add fruit? Sure! Just stir in chopped fruit before baking (berries work best). But—if you use juicy fruit, drain it first so the yogurt doesn’t get sad and watery.
Anyway, if you try this baked yogurt (sugar free), let me know how yours turns out. Or better yet, tell me what you put on top. Because honestly, my fridge is always open to suggestions.
Ingredients
- 1 cup plain Greek yogurt (sometimes I use regular yogurt if that’s all I’ve got—just drain it a bit first)
- 1/2 cup milk (any milk works, I’ve even tried oat milk—you do you)
- 1/4 cup condensed milk, sugar free (I buy the store version, but my friend insists homemade is better)
- 1-2 teaspoons vanilla extract (sometimes I just splash it in, measuring is for the precise folk)
- Pinch of salt (optional, but my granny always threw it in—can’t argue with that logic)
Instructions
-
1Preheat your oven to 180°C (350°F). Believe me, don’t skip this step—cold ovens + impatient desserts = uneven results (been there).
-
2In a mixing bowl, whisk together the Greek yogurt, milk, sugar free condensed milk, vanilla extract, and salt. Go at it until it’s smooth—no need to be gentle, it won’t mind. If using regular yogurt, drain some of the whey out first (just plonk it in a sieve for a bit).
-
3Pour the mixture into small oven-safe ramekins or a baking dish. Honestly, I’ve even used teacups in a pinch.
-
4Set the ramekins or baking dish on a baking tray (makes it easier to get in and out of the oven, trust me, wobbly ramekins + hot oven racks = disaster).
-
5Bake for about 20-25 minutes, or until the edges are just set and the center still has a little wobble. If it looks a bit puffed or golden on top, that’s perfect. Sometimes mine takes 30 minutes—depends on how thick I’ve left the mixture.
-
6Let it cool to room temp—this is where I have to occupy myself, or I’ll poke at it too soon. Then refrigerate for at least 1-2 hours (or overnight if you have willpower, so it gets nice and firm).
-
7Serve chilled, maybe with some fresh berries, slivered pistachios, or a little dusting of cinnamon if you’re feeling fancy.
Approximate Information for One Serving
Nutrition Disclaimers
Number of total servings shown is approximate. Actual number of servings will depend on your preferred portion sizes.
Nutritional values shown are general guidelines and reflect information for 1 serving using the ingredients listed, not including any optional ingredients. Actual macros may vary slightly depending on specific brands and types of ingredients used.
To determine the weight of one serving, prepare the recipe as instructed. Weigh the finished recipe, then divide the weight of the finished recipe (not including the weight of the container the food is in) by the desired number of servings. Result will be the weight of one serving.
Did you make this recipe?
Please consider Pinning it!


