
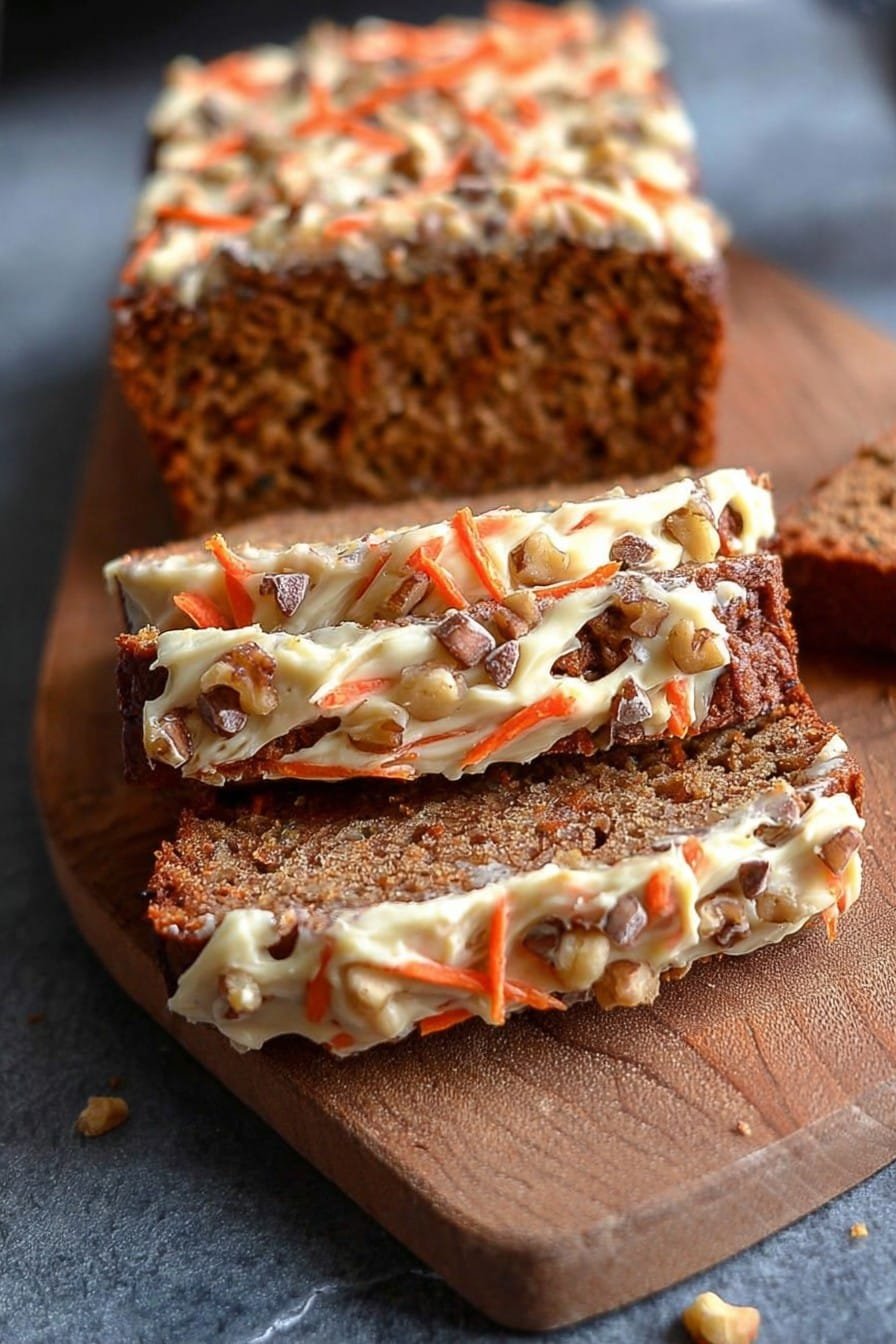
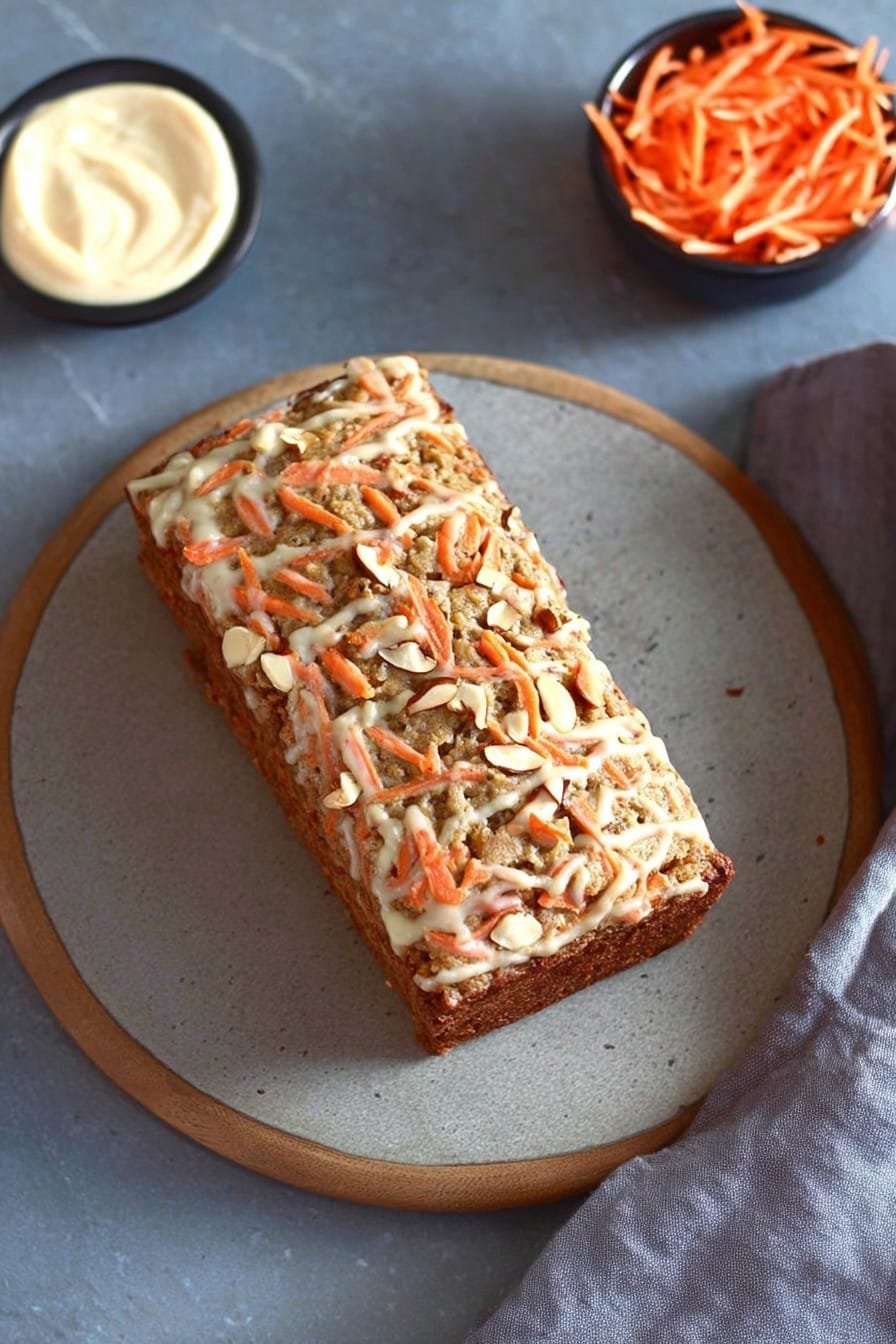
Let Me Tell You About This Banana Carrot Bread
I have this thing with overripe bananas—they seem to stalk me (honestly). There I am, every other Sunday, staring at that spotty bunch on my counter and then, out of nowhere, the craving for banana bread strikes again. Only this time, I thought: why not throw some carrots in the mix? Bit unexpected, I know. The first time I made this, I was halfway through grating the carrots before I realized I’d committed, and, well, my kitchen smelled like a cross between a cake shop and a salad bar. Spoiler: absolute win.
One time I even convinced my friend’s picky kid this was just “super bread”—he inhaled it. Who knew vegetables could sneak in so easily! And if you’re like me and enjoy a fat slice with your slapdash morning coffee, you’re about to have a new favorite.
Why You’ll Love Making This (Trust Me, It’s Worth It)
I make this when my bananas are past their prime, and when I feel slightly guilty about neglecting those poor carrots in the back of the fridge. My family goes a bit mad for this bread, except for my brother, who pretends he’s above sweet loaves (then keeps coming back for ‘just one more slice’). Sometimes, it’s the only way I get anyone to eat carrots around here. Plus, it’s barely any fuss—no fancy stand mixer required unless you’re feeling extravagant.
Oh, and bonus: your kitchen will smell like “heaven with a hint of carrot patch”—which is the best possible way, unless you hate carrot patches. In that case, just trust me, it’s nice.
What You’ll Need (And What I Use When I’m Lazy)
- 1 cup mashed overripe bananas (about 2 large bananas—when in doubt, more banana is rarely bad!)
- 1 cup finely grated carrot (sometimes I skip peeling but shh, don’t tell my mom)
- 2 large eggs, at room temperature (cold from the fridge is fine in a pinch)
- 1/2 cup light brown sugar (my grandma swore by dark muscovado, but honestly light works too)
- 1/2 cup neutral oil (like canola or sunflower—melted butter gives a richer taste, so I switch it up when feeling fancy)
- 1 tsp vanilla extract (real or imitation—flavor’s what matters)
- 1 3/4 cups all-purpose flour (whole wheat sometimes makes it ‘healthier’—almost)
- 1 1/2 tsp baking powder
- 1/2 tsp baking soda
- 1/2 tsp salt (sea salt, or the “whatever’s closest” variety)
- 1 tsp cinnamon (add ginger or nutmeg if you love spice)
- 1/4 cup chopped walnuts or pecans (optional, or toss in chocolate chips if you’re chaos-inclined)
- 1/4 cup raisins (optional, but didn’t wow my family. Your call!)
How To Make Banana Carrot Bread (Or, How I Do It)
- Preheat your oven to 350°F (about 175°C). Grease a 9×5 inch loaf pan with oil or spray, or—I’ve used parchment paper when I feel like being fancy.
- In one bowl, mash those bananas until they’re mostly smooth—chunky is fine, don’t sweat it. Add the grated carrot. Toss in eggs, brown sugar, oil, and vanilla. Whisk it up until it’s all best friends in there.
- In another bowl, grab your flour, baking powder, baking soda, salt, and cinnamon (and any extra spices if you’re feeling wild). Stir it up with a fork. No need to sift unless you want the upper arm workout.
- Pour wet into dry. Fold gently—overmixing equals rubbery bread, which nobody asks for. Lumpy batter here is good.
- If you’re adding nuts or raisins (or chocolate chips, you wizard), gently fold them in now. This is where I usually sneak a taste. Unapologetically.
- Transfer batter to your pan. Smooth the top just a bit—it always looks prettier that way, though no judgment if you forget.
- Bake for 55-65 minutes. Start checking around the 50-minute mark. If a toothpick (or a spaghetti noodle, which I totally use sometimes) comes out clean or with a few crumbs, you’re golden.
- Let cool in the pan for about 10-15 minutes, then turn out onto a rack. I often fail at waiting for it to be completely cool… warm slices are the best anyway.
Notes From My Many Attempts (a.k.a., Things I Wish I Knew Earlier)
- The carrot can be a real rebel and clump up—just fluff it with your fingers before mixing in.
- If you use butter instead of oil, the bread’s a bit richer, but a touch denser. Not a huge deal, just different.
- Sometimes, I sprinkle a little raw sugar on top before baking for a crunchy lid. Try it if you like crunch.
Experiments—What Worked (And What Didn’t)
- Once swapped in half whole wheat flour—pretty great! Just add a bit extra banana if it seems dry.
- I tried shredded coconut once—it was… odd. Maybe you’ll love it. But my family staged a gentle intervention.
- Blueberries in place of raisins = yes! But bake a bit longer, as it gets oddly moist.
- I accidentally forgot the baking soda one time; bread was edible but a bit sad—don’t do that.
Do You Really Need Fancy Equipment?
Honestly, a wooden spoon and a bowl does the trick. Sometimes I use my stand mixer for the ‘look’ of professionalism, but the old-fashioned way totally works. No loaf pan? A cake tin will do, though you might get a stubby loaf. (My cousin made muffins with this recipe and said they were grand—just bake for less time!)
Keeping It Fresh (Doesn’t Usually Last Here)
So, wrap your bread in plastic wrap or keep it in a tin at room temp—it’s good for a couple days, maybe three if you hide it behind the cereal. Slices freeze well, separated with a bit of parchment. But let’s be honest, it rarely gets that far before someone nicks the last slice!
Serve It Up How You Like
I love it best with a slick of salted butter (heaven). Sometimes, if I’m feeling sweet, I’ll go for a drizzle of honey. I had a pal who toasted a slice and slathered it with cream cheese—said it was a stunner for breakfast. Truth be told, there’s no wrong way.
Pro Tips Learned the (Slightly) Hard Way
- I once tried to rush the cooling, and the bread crumbled like nobody’s business. Actually, it’s best to let it set a while, no matter how impatient you’re feeling.
- Don’t skip greasing the pan. I did, and half the loaf clung to the bottom like it was its long-lost twin.
- If you’re low on bananas, add a bit of applesauce to make up the difference. It’s saved me on more than one absentminded baking day.
FAQ (People Actually Ask Me These!)
Can I freeze Banana Carrot Bread?
Yes, definitely! Slice it first, so you can just grab a bit and zap in the toaster. No need to brave the permafrost of the whole loaf.
Can I skip the nuts?
Of course. My niece is allergic and I’ve made it nut-free plenty. You could try seeds (like pumpkin or sunflower) if you want a little crunch, or just skip them altogether. No biggie.
Can I make this vegan?
I haven’t tried it myself, but a friend swapped in flax eggs and plant oil, said it worked well. You might need to play with the liquid a bit, though.
Is it okay to use store-bought grated carrots?
It’s faster, but they’re drier and sometimes a bit tough. If that’s all you’ve got, maybe give them a quick soak and blot dry.
Can I use self-raising flour?
Maybe, but drop the baking powder and soda and just cross your fingers? Joking (sort of); it should work, but you’ll get a different crumb. I tend to stick with plain for safety’s sake.
Oh! Before I forget—one time I just went rogue and tossed a handful of chocolate chips on top before baking. That was a riot…and a mini-meltdown when my youngest realized there weren’t any in the second loaf. Mum life, eh?
Ingredients
- 1 cup mashed overripe bananas (about 2 large bananas—when in doubt, more banana is rarely bad!)
- 1 cup finely grated carrot (sometimes I skip peeling but shh, don’t tell my mom)
- 2 large eggs, at room temperature (cold from the fridge is fine in a pinch)
- 1/2 cup light brown sugar (my grandma swore by dark muscovado, but honestly light works too)
- 1/2 cup neutral oil (like canola or sunflower—melted butter gives a richer taste, so I switch it up when feeling fancy)
- 1 tsp vanilla extract (real or imitation—flavor’s what matters)
- 1 3/4 cups all-purpose flour (whole wheat sometimes makes it ‘healthier’—almost)
- 1 1/2 tsp baking powder
- 1/2 tsp baking soda
- 1/2 tsp salt (sea salt, or the “whatever’s closest” variety)
- 1 tsp cinnamon (add ginger or nutmeg if you love spice)
- 1/4 cup chopped walnuts or pecans (optional, or toss in chocolate chips if you’re chaos-inclined)
- 1/4 cup raisins (optional, but didn’t wow my family. Your call!)
Instructions
-
1Preheat your oven to 350°F (about 175°C). Grease a 9×5 inch loaf pan with oil or spray, or—I’ve used parchment paper when I feel like being fancy.
-
2In one bowl, mash those bananas until they’re mostly smooth—chunky is fine, don’t sweat it. Add the grated carrot. Toss in eggs, brown sugar, oil, and vanilla. Whisk it up until it’s all best friends in there.
-
3In another bowl, grab your flour, baking powder, baking soda, salt, and cinnamon (and any extra spices if you’re feeling wild). Stir it up with a fork. No need to sift unless you want the upper arm workout.
-
4Pour wet into dry. Fold gently—overmixing equals rubbery bread, which nobody asks for. Lumpy batter here is good.
-
5If you’re adding nuts or raisins (or chocolate chips, you wizard), gently fold them in now. This is where I usually sneak a taste. Unapologetically.
-
6Transfer batter to your pan. Smooth the top just a bit—it always looks prettier that way, though no judgment if you forget.
-
7Bake for 55-65 minutes. Start checking around the 50-minute mark. If a toothpick (or a spaghetti noodle, which I totally use sometimes) comes out clean or with a few crumbs, you’re golden.
-
8Let cool in the pan for about 10-15 minutes, then turn out onto a rack. I often fail at waiting for it to be completely cool… warm slices are the best anyway.
Approximate Information for One Serving
Nutrition Disclaimers
Number of total servings shown is approximate. Actual number of servings will depend on your preferred portion sizes.
Nutritional values shown are general guidelines and reflect information for 1 serving using the ingredients listed, not including any optional ingredients. Actual macros may vary slightly depending on specific brands and types of ingredients used.
To determine the weight of one serving, prepare the recipe as instructed. Weigh the finished recipe, then divide the weight of the finished recipe (not including the weight of the container the food is in) by the desired number of servings. Result will be the weight of one serving.
Did you make this recipe?
Please consider Pinning it!


