
Let’s Chat: Why These Cookies Just Make My Holidays
Every Christmas, when the house turns into what I can only describe as an explosion of flour, cocoa, and slightly off-key caroling, Chocolate Thumbprint Christmas Cookies are my go-to. There’s just something about making these (usually with the help of my chaotic children and a spatula so old it’s probably pre-internet) that kicks off the season. I still remember the year our dog snuck two off the rack while we were distracted by “Jingle Bell Rock.” Chocolate everywhere, dog included. Sigh. But hey, that’s what makes the holidays memorable, right?
Why You’ll Love This (Or, Why My Family Does!)
I make this recipe when I want to impress, but also when I just want something chocolatey and slightly messy. My family basically turn into cookie maniacs for these (can’t really blame them—they’re the perfect combo of soft crumb, fudgy centers, and kind of look fancy even though they’re so easy). And, if you’re someone who dreads having to temper chocolate or make royal icing, don’t worry! This cookie is as chill as they come. If dough stuck under your fingernails bugs you, well… sorry. I still haven’t solved that one.
Gathering Your Cookie Arsenal (Ingredients)
- 1 cup unsalted butter, room temp (I’ll admit, salted works in a pinch—you’ll get a little salty-sweet magic)
- 2/3 cup sugar (I use whatever’s in the sugar canister; light brown? Go for it.)
- 2 large eggs, divided (save a yolk! Or eat it raw like my weird cousin… kidding. Don’t do that.)
- 1 teaspoon vanilla (My grandmother demanded Nielsen-Massey but the $2 bottle from the corner shop seems just fine to me)
- 2 cups plain flour (honestly, I ran out once and used half whole wheat—nobody noticed)
- 1/2 cup unsweetened cocoa powder
- 1/4 teaspoon salt (give or take, I barely measure this one)
- For the center: 1/2 cup chocolate chips/chunks (milk, dark, whatever—you do you)
- 1/4 cup heavy cream (whole milk if you’re out of cream, it works, just less silky)
- Sprinkles or chopped nuts (optional, but the more the merrier, right?)
How It’s Done: My Step-by-Step (Well, More or Less)
- Start by creaming together the butter and sugar in a bowl (stand mixer if you have one, good old elbow grease if not). Really beat it until fluffy—don’t rush this, I’ve tried, and it turned into a sad, dense lump.
- Mix in one egg yolk and the vanilla. Pause for a second. Marvel at the lovely yellow swirl (or maybe that’s just me).
- In a separate bowl, whisk the flour, cocoa powder, and salt. Combine this with the butter-sugar goodness. It’ll look a bit dry at first, but keep at it—magically it comes together. (Don’t worry if it clumps.)
- Chill the dough for 20-30 minutes. I know skipping feels tempting, but the cookie gods get cross if you do—plus, it’s loads easier to shape when cold.
- Preheat your oven to 350°F/175°C. Or do this earlier if you’re the organized sort! I… usually forget until the dough is stiff as a brick.
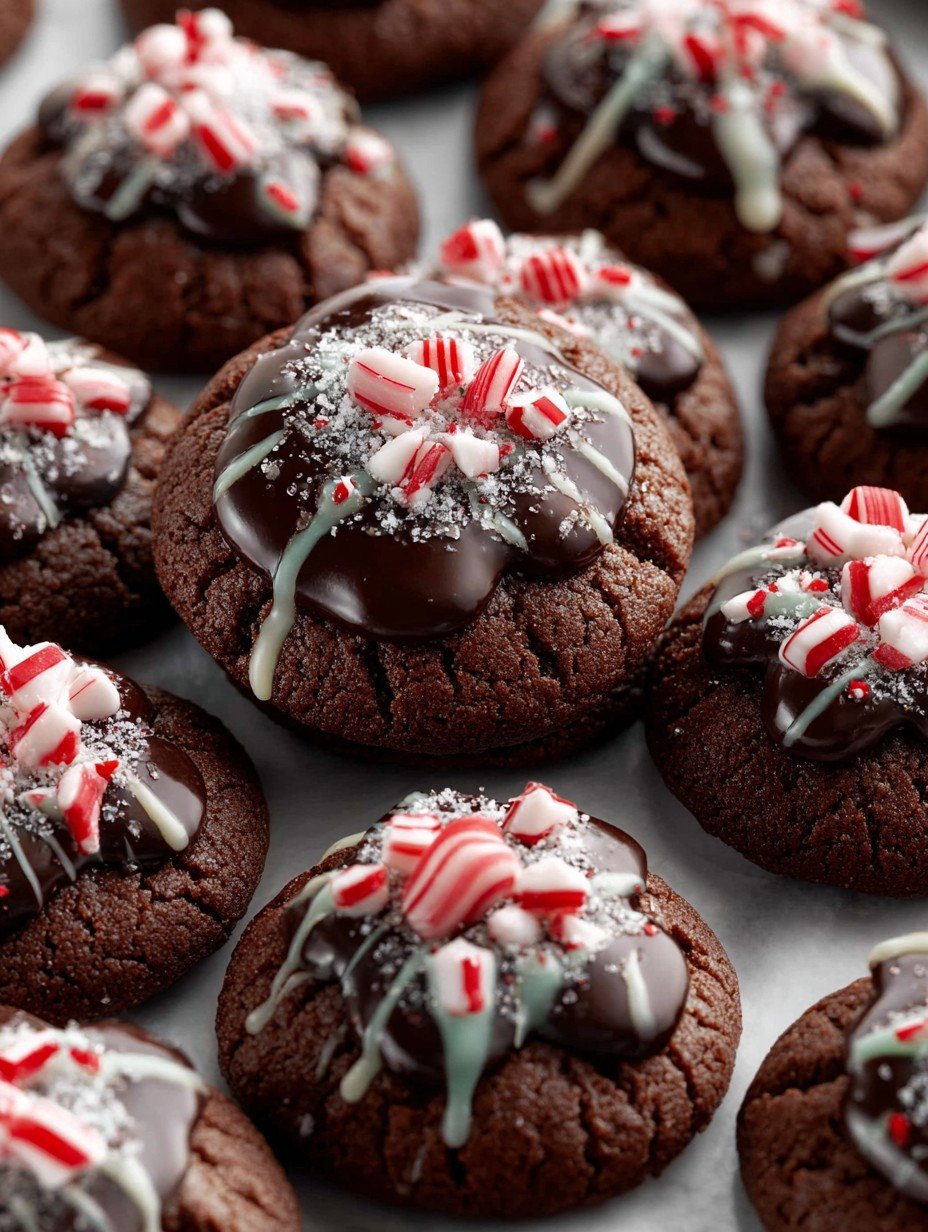
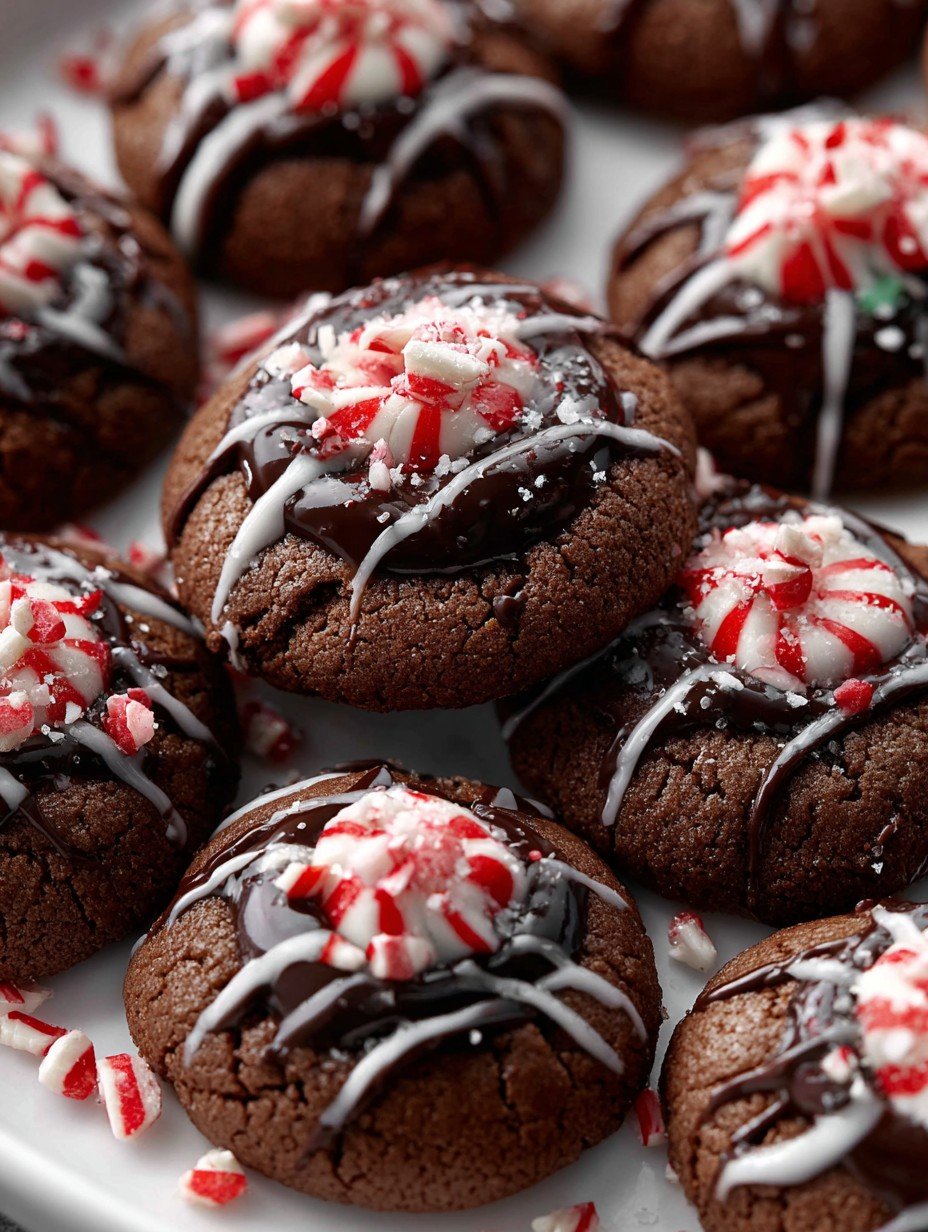
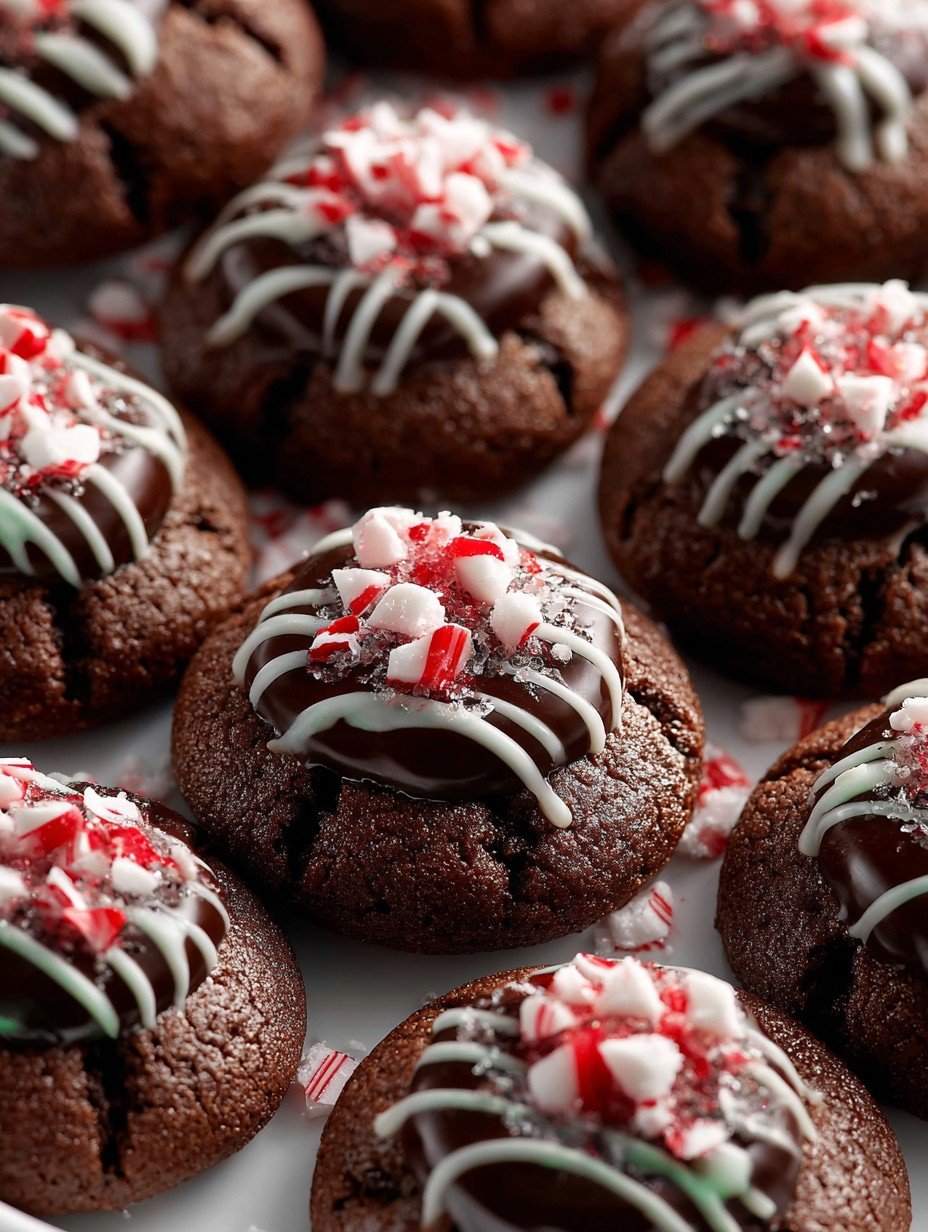
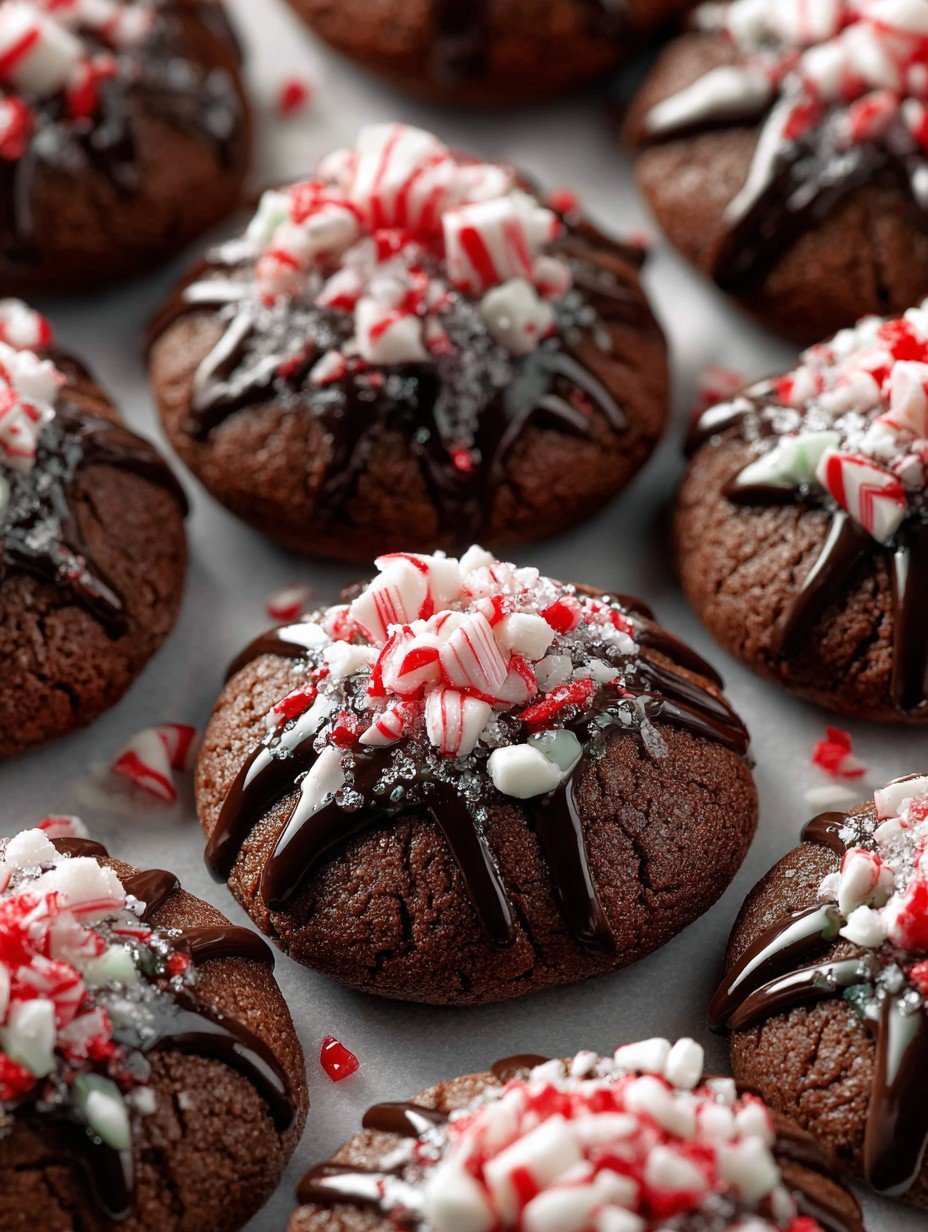
- Take out the dough, scoop out little walnut-sized blobs, roll ‘em up, and place on a lined sheet. Here’s where the thumbprint magic happens—press your thumb (or if you’re fancy, the back of a teaspoon) gently in the center of each. Don’t break all the way through!
- Bake for 10–12 min. They firm up as they cool, so don’t overthink it if they look soft. Out of the oven, let them cool a bit; this is where I usually sneak a taste (burn my tongue every single year).
- Meanwhile, melt the chocolate and cream together in a little bowl over a pot of simmering water (or quick burst in the microwave, stirring every 10 sec). If it separates a little, just whisk like mad, and it should come right.
- Spoon that molten chocolate into the little thumbprint wells. If you want, add sprinkles or nuts, but I say go with your heart here.
- Let set until the centers firm up. Or don’t; impatience happens, and gooey centers taste pretty great with cold milk.
Little Notes I’ve Gathered (Trial and Error Department)
- Actually, if the dough cracks a bit when you press it—that’s fine! Just smoosh it back together.
- I’ve learned the hard way that overbaking leads to very crunchy thumbprints; not my favorite, but hey, they make great DIY holiday ice cream toppers that way.
- This dough will try to stick to your hands. If that’s driving you up the wall, a dusting of cocoa on your palms helps (as does humming loudly to distract yourself).
What Happens When You Change Things Up (My Variations)
Sometimes I swap the chocolate center for a dollop of raspberry jam—sounds odd, tastes fantastic. Peppermint extract in the chocolate? Festive! I tried white chocolate once, but it ran all over the tray (delicious but a total mess). I’ve even mixed crushed peppermints into the dough—my kids thought it was too minty, but Santa ate his, so… who’s right?
Gear You’ll (Probably) Want—But Don’t Panic If You Don’t Have It
- A stand mixer or hand mixer is easiest. But, like I said, rolling up your sleeves and using a wooden spoon works—just maybe play some good tunes.
- Baking sheet (I use my trusty old one, too warped to lie flat, but it still works!)
- Parchment paper (If you’re out, butter and a dusting of flour keeps sticking in check, mostly)
- A microwave for quick chocolate melting helps, but a small saucepan and bowl over boiling water is classic.
Storing the Leftovers—If You Have Any (Rare In My House)
Put the cooled cookies in an airtight box. They’ll last three-ish days at room temp (I think they taste even richer day two), or longer if you pop ‘em in the fridge. But, in my house, they get devoured before the next morning tea, so I can’t promise anything. For longer storage, freeze in layers between wax paper. Thaw at room temp… in theory. (Here’s a fun guide on freezing cookies if you need more deets!)
How I Like to Serve These
I’m partial to serving them with strong coffee on Christmas morning (okay, and late at night, and sometimes as a midnight snack if I wake up hungry). Sometimes we put them on a plate for Santa—or, when we’re feeling fancy, they go on the best china with a sprig of rosemary for ‘ambiance’. My daughter likes them dipped in hot chocolate—yes, double chocolate, sue me.
Nuggets From the Trenches (Learned The Hard Way)
- I once skipped chilling the dough because I was in a hurry. That did not end well. The cookies all melted into one giant cookie “lake.” Delicious, but fork-requiring.
- Don’t fill the thumbprints while the cookies are super hot—otherwise, the centers stay runny. (Unless gooey is your vibe.)
- Actually, I’ve found checking them at 9 mins is wise—every oven’s a world unto itself. Don’t trust the timer alone!
A Few Random FAQs That Have Come My Way
Do these freeze well?
Oh yes, they do! Just try to layer them so they don’t stick together. I mean, they can be pried apart frozen, but it gets crumbly. If you’re eating frozen cookies at 2 a.m., who am I to judge?
Can I make these gluten-free?
Absolutely! I’ve had decent luck with the King Arthur Baking 1-for-1 blend (here’s the one I use). You might need a splash more cream to keep the dough from getting sandy.
Is there a dairy-free version?
I’ve subbed in vegan butter (the Earth Balance sticks aren’t bad), and coconut cream for the filling. Not quite the same richness, but solid in a pinch!
Do I really need to chill the dough?
Yes. Yes you do. I know, I know—it’s annoying. But otherwise, you’ll get flat, wild-looking cookies. Trust me, it’s not cute.
Can kids help make these?
For sure! This is the part where you accept that your kitchen will become a disaster zone, but the thumb printing is perfect for little helpers. (Just don’t expect all the chocolate to actually end up in the cookies…)
Oh, and if you’re curious about more Christmas baking (or need other ideas to keep small hands busy), check out Sally’s Christmas Cookie list. I use it for inspiration every year!
If you’ve made it this far, congrats—go make those Chocolate Thumbprint Christmas Cookies, make a mess, and maybe accidentally start a family tradition. And hey, if the dog nabs one? Consider it good luck for the year. Cheers!
Ingredients
- 1 cup unsalted butter, softened
- 1/2 cup granulated sugar
- 1 large egg yolk
- 1 teaspoon vanilla extract
- 2 cups all-purpose flour
- 1/4 cup unsweetened cocoa powder
- 1/4 teaspoon salt
- 1 cup semi-sweet chocolate chips
- 3 tablespoons heavy cream
- Festive sprinkles, for decoration (optional)
Instructions
-
1Preheat the oven to 350°F (175°C). Line two baking sheets with parchment paper.
-
2In a large bowl, cream together unsalted butter and granulated sugar until light and fluffy. Add egg yolk and vanilla extract, mixing well.
-
3In a separate bowl, whisk together all-purpose flour, unsweetened cocoa powder, and salt. Gradually add to the wet ingredients and mix until a soft dough forms.
-
4Roll dough into 1-inch balls and place on prepared baking sheets. Use your thumb to press a deep indentation in the center of each ball.
-
5Bake for 11-12 minutes. If needed, gently press centers again to maintain the indentation. Let cookies cool completely.
-
6For the ganache filling, microwave chocolate chips and heavy cream in 30-second intervals, stirring until smooth. Spoon chocolate ganache into the center of each cookie and top with festive sprinkles if desired.
Approximate Information for One Serving
Nutrition Disclaimers
Number of total servings shown is approximate. Actual number of servings will depend on your preferred portion sizes.
Nutritional values shown are general guidelines and reflect information for 1 serving using the ingredients listed, not including any optional ingredients. Actual macros may vary slightly depending on specific brands and types of ingredients used.
To determine the weight of one serving, prepare the recipe as instructed. Weigh the finished recipe, then divide the weight of the finished recipe (not including the weight of the container the food is in) by the desired number of servings. Result will be the weight of one serving.
Did you make this recipe?
Please consider Pinning it!!


