So, Let’s Talk Dutch Baby Pancakes
Alright, picture this: it’s Sunday morning, birds chirping (you know, in theory), and I’m trying to look like that relaxed person who has it all together. This dish? My secret weapon. I first saw a Dutch Baby Pancake at a brunchy get-together—my aunt Maggie pulled it out of the oven and honestly, I thought it was Yorkshire pudding gone rogue. Flash-forward, now it’s the one thing my kids will pop out of bed for… well, that and the promise of pancakes shaped like, I kid you not, a puffy cloud. If you’ve never made one, it’s like a giant pancake with airs and graces.
Why You’ll Love This (Or, Why I Keep Making It)
I usually whip up a Dutch Baby Pancake when I’m not up for flipping individual pancakes—seriously, who has that kind of patience before the first cup of coffee? My family goes wild for the drama of it rising in the oven (bonus points for showmanship). And, well, if you’re like me and prone to burning at least one side of a regular flapjack, this one’s honestly kind of foolproof. Except for the time I forgot the pan in the oven and nearly set off the smoke alarm; but hey, live and learn, right?
Gathering Your Ingredients (Plus Substitutions)
- 3 large eggs (room temp is best, but sometimes I just use them straight from the fridge—can’t tell the difference, honestly)
- 1/2 cup (about 60g) all-purpose flour (I’ve swapped in spelt flour in a pinch, comes out a bit nuttier)
- 1/2 cup milk (any percent works; oat milk didn’t thrill me, but almond milk’s not bad)
- 2 tablespoons sugar (sometimes I do 1 tbsp if I’m planning a super sweet topping)
- 1/2 teaspoon vanilla extract (my gran swore by Bourbon vanilla, but the cheap stuff works too)
- 1/4 teaspoon salt
- 2-3 tablespoons butter (honestly, I eyeball it; I mean, more is more here)
How I Make a Dutch Baby Pancake (In Real Life)
- Turn your oven on to 220°C (425°F). Stick a 10-inch ovenproof skillet (I use a good ol’ cast-iron pan, but that one metal baking dish I have works in a pinch) inside as it preheats. Don’t skip preheating the pan or you’ll have a sad, stuck-on pancake. Trust me… I’ve made this mistake more than once.
- Beat together eggs, flour, milk, sugar, vanilla and salt. Some folks use a blender, but I’m usually too lazy to wash it—whisk works fine. Batter will be pretty thin. Don’t worry if there’s a few lumps; the oven sorts it out.
- Once your pan is nuclear hot, toss in the butter and swirl it around until melted and sizzling. Tilt the pan to coat sides (yes, even the sides—my otherwise unstickable pancake once glued itself to the pan at this stage).
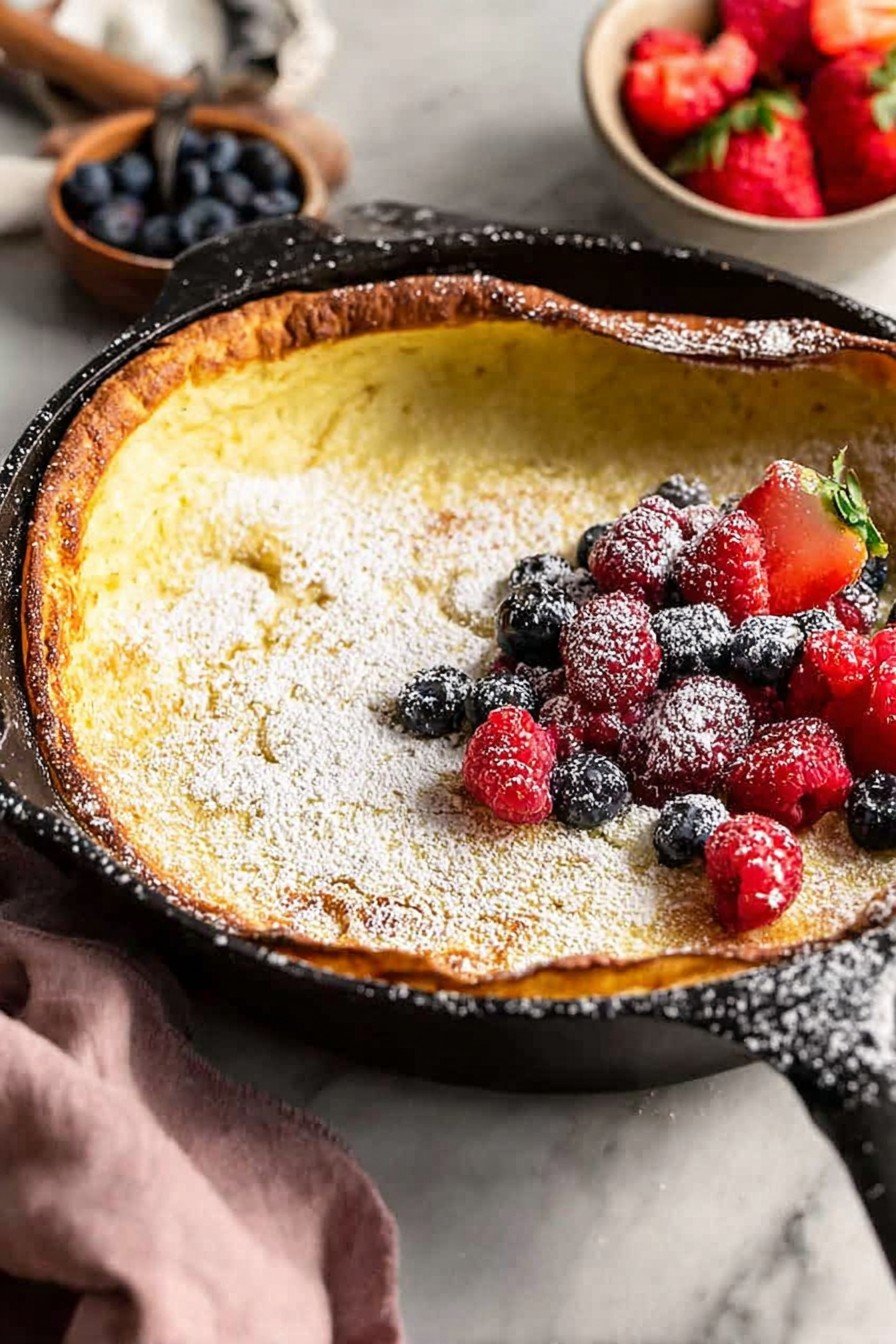
- Pour the batter into the pan. Back in the oven it goes. And now—the waiting game. Bake for 20 minutes. DO NOT open the oven, tempting as it is, especially if you want the sides to get all puffy and dramatic.
- This is where I sneak a peek through the oven window and do a small kitchen dance. When it’s golden and embarrassingly puffy at the edges (center might be a bit custardy, that’s normal), pull it out and stare in awe.
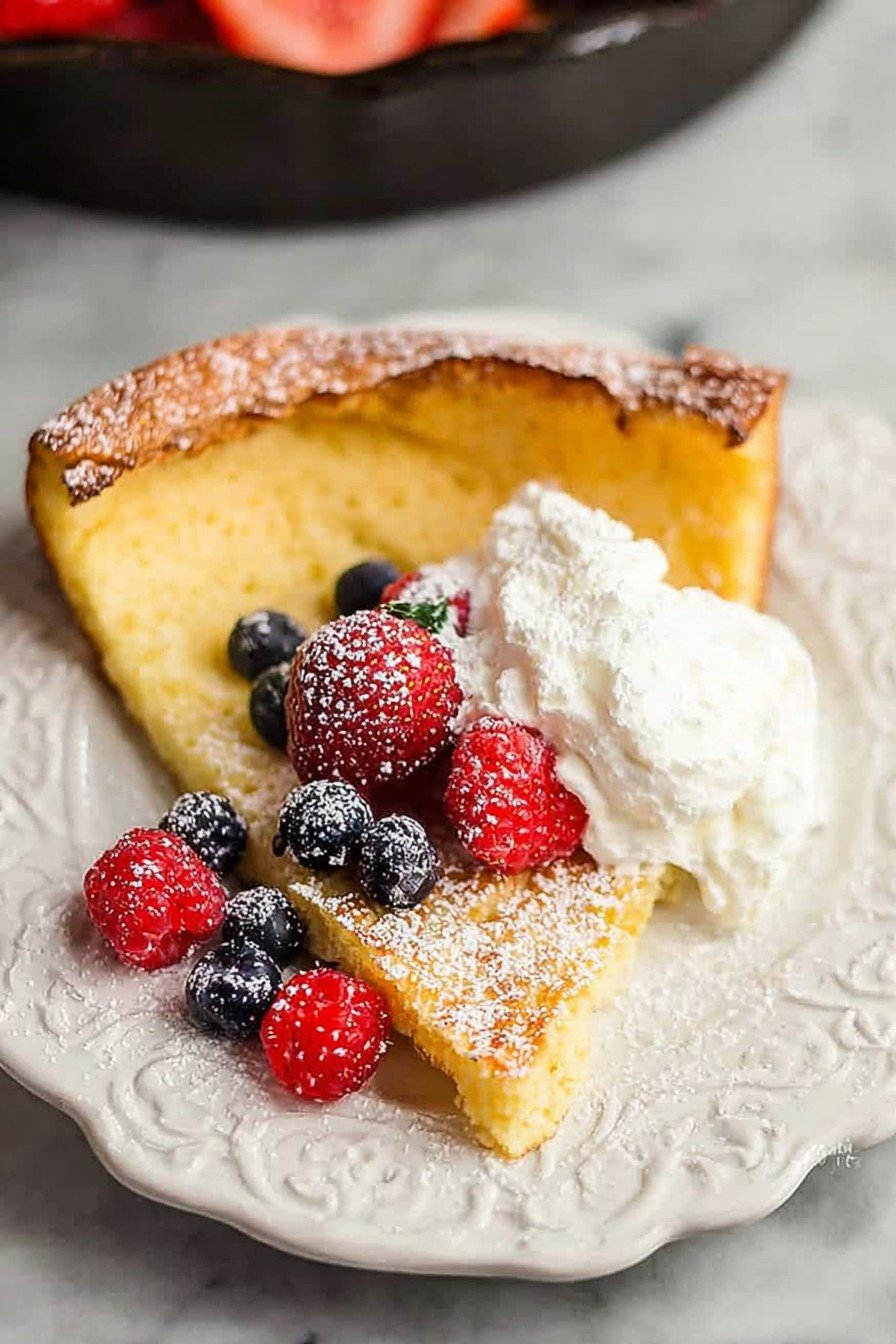
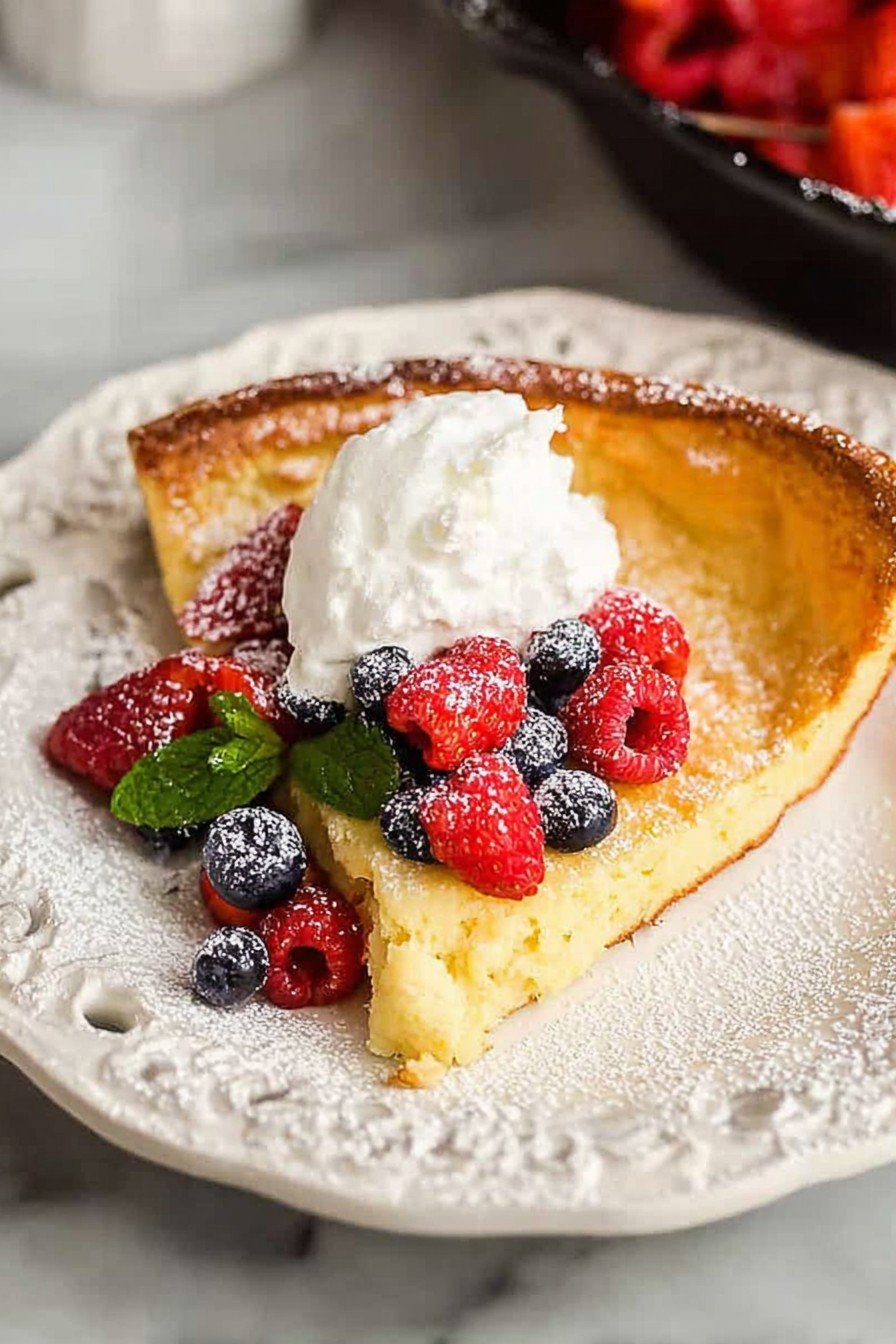
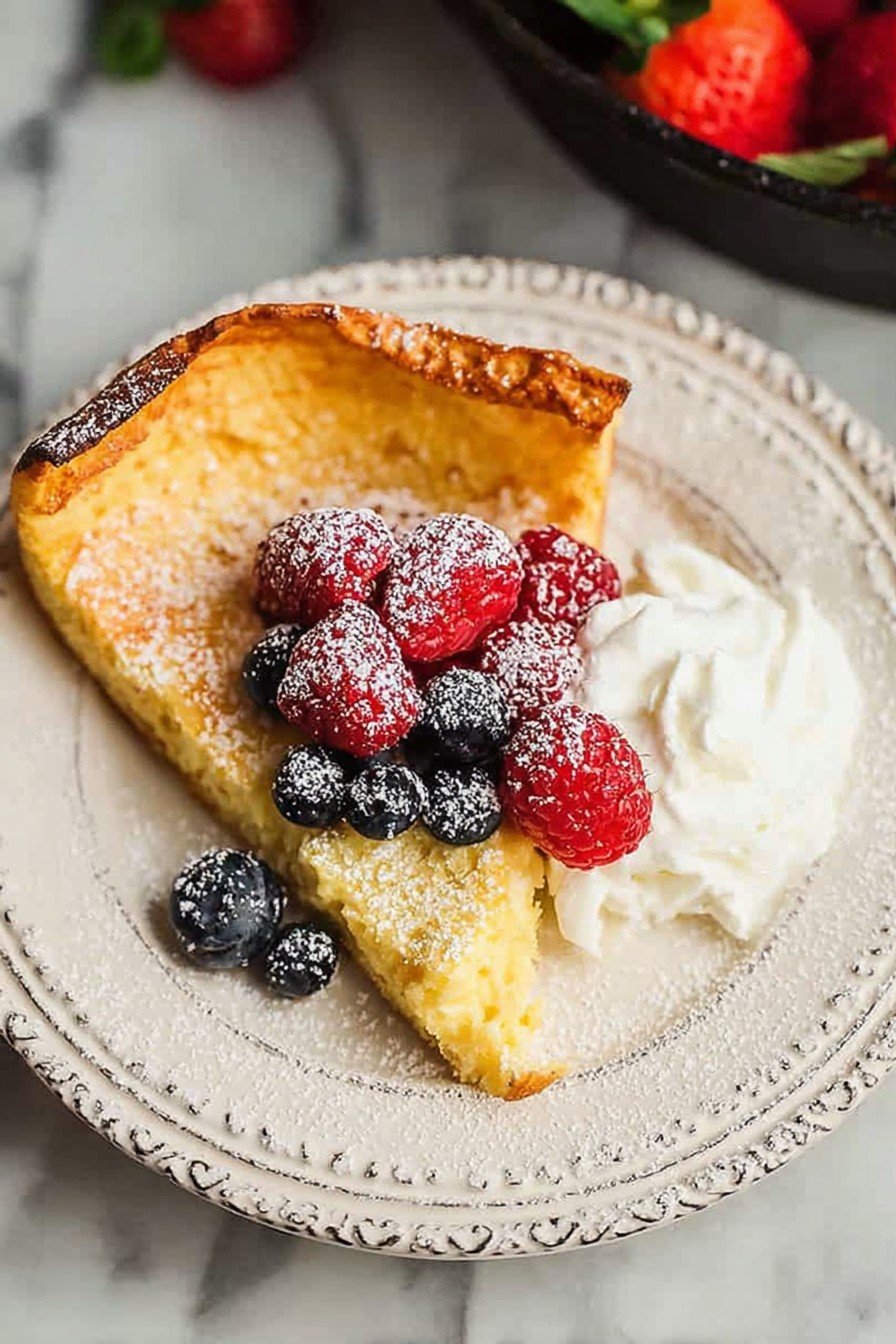
- Serve right away because it’ll start to deflate like a popped balloon. Honest, it’s still delicious either way.
Notes from My Non-Perfect Kitchen
- If you let the batter sit 15 minutes, it’s a bit lighter. But… most mornings I don’t wait and it’s still grand.
- Whole milk makes it richer, but whatever is in the fridge usually wins.
- Sometimes I forget to measure the sugar. Never noticed much difference; must have a sweet tooth!
What I’ve Tried (Some Hits, Some Misses)
- Swapping in a hint of lemon zest in the batter—lovely and bright.
- Mixing in cocoa powder (once by accident, but truth be told, tasted a bit like a chocolate omelette… wouldn’t recommend).
- Chucking in sliced apples—good except they make the pancake a little denser in the middle (so if you like it custardy, go wild).
What If I Don’t Have a Cast Iron Skillet?
Everyone always says cast iron is essential, but I’ve used my dodgy old glass pie plate, and it worked fine (okay, a little less puff, but, eh, still tasted ace). I’ve even used a metal cake tin—needed extra butter though. Just don’t use anything plastic, obviously. If you’re keen, Serious Eats did a fun breakdown on skillet choices that’s pretty thorough.
How I Keep (Or Try to Keep) Leftovers
Technically, you can wrap up leftovers and fridge them for a day or two. But honestly, in my house, a Dutch Baby never sees tomorrow. If (and this is a big if) there are pieces the next day, I think it tastes even better at room temp with a bit of jam or, weirdly, cold sausage. Yep. Try it?
If You Want to Get Fancy with Serving
Lemon wedges and powdered sugar are my classic fallback—I think it cuts through the richness. Sometimes we do berries (frozen or fresh—nobody cares at 9am), apple slices fried in a bit of butter, or, for birthdays, a dollop of Nutella. And, apparently, a shot of espresso poured over (thanks to my Italian neighbour). Don’t knock it till you try it?
Wisdom From Having Messed This Up
- I once dumped the batter into a cold pan—result: stuck, sad pancake. Preheat, my friend, preheat.
- Rushed the baking—took it out early. Texture was like undercooked scrambled eggs (fix: always let it go brown on the edges).
- Letting the butter burn before the batter goes in gives it a weird taste. Actually, just keep an eye out at this step.
Real (and Occasionally Odd) Dutch Baby Pancake Questions
- Can I make this gluten-free?
- Yep, my cousin uses that DIY gluten-free flour blend. Honestly, it barely changes the texture; just make sure your pan is super non-stick.
- What if I don’t have a blender or hand mixer?
- No stress—just whisk like you mean it, or, if you’re feeling cheeky, shake it all up in a big jar until smoothish.
- Why did my Dutch Baby Pancake deflate?
- That’s normal. It puffs up like mad in the oven and then collapses after—like my enthusiasm on Mondays. Still tastes great.
- Could you make this savory?
- Absolutely, just skip the sugar and vanilla. Maybe add cheese, herbs, bacon, whatever you fancy. I’ve chucked in sun-dried tomatoes for a Mediterranean twist—it’s different, but not half bad!
Oh, side note, did you know the Dutch Baby is technically not Dutch but probably German in origin? Go figure; I only learned that recently after years of winging it. Anyway, hope you give it a try—even if you get a lumpy one, it’ll taste grand. And that’s half the fun.
Ingredients
- 3 large eggs
- 1/2 cup all-purpose flour
- 1/2 cup whole milk
- 2 tablespoons granulated sugar
- 1/2 teaspoon vanilla extract
- 1/4 teaspoon salt
- 3 tablespoons unsalted butter
- Powdered sugar, for serving
Instructions
-
1Preheat the oven to 425°F (220°C). Place a 10-inch oven-safe skillet in the oven to heat.
-
2In a blender, combine eggs, flour, milk, sugar, vanilla extract, and salt. Blend until smooth and well combined.
-
3Carefully remove the hot skillet from the oven. Add the butter and swirl to coat the bottom and sides.
-
4Pour the batter into the hot, buttered skillet. Immediately return the skillet to the oven.
-
5Bake for 18–20 minutes, or until the pancake is puffed and golden brown around the edges.
-
6Remove from the oven, dust with powdered sugar, and serve immediately with your favorite toppings.
Approximate Information for One Serving
Nutrition Disclaimers
Number of total servings shown is approximate. Actual number of servings will depend on your preferred portion sizes.
Nutritional values shown are general guidelines and reflect information for 1 serving using the ingredients listed, not including any optional ingredients. Actual macros may vary slightly depending on specific brands and types of ingredients used.
To determine the weight of one serving, prepare the recipe as instructed. Weigh the finished recipe, then divide the weight of the finished recipe (not including the weight of the container the food is in) by the desired number of servings. Result will be the weight of one serving.
Did you make this recipe?
Please consider Pinning it!!