Okay, Let Me Tell You About Hawaiian Roll Sliders…
You know when you just wanna whip up something that gets all the “oohs” and nobody minds if cheesy stuff drips down their chin? That’s these Hawaiian roll sliders. The first time I made them, I was hurrying before a last-minute game night—totally underestimated how fast they’d disappear. Honestly, half the reason I make these is because I get to eat a couple out of the pan before anyone notices (don’t rat me out!). My mom says I’m a slider fiend, which sounds about right. One time, I tried to make a double batch, and let’s just say the bottom of my oven has never been the same.
Why You’ll Love This (Promise I’m Not Overselling)
I make this when I’m pressed for time but don’t wanna show up with just a bag of chips—again. My family goes wild for these, even the picky eaters (and, trust me, I have a cousin who treats onions like biohazards). Sometimes, I’ll throw in what I’ve got in the fridge; the recipe’s sort of a guideline, not a law. Oh, and the melty cheese situation? If you can find a polite way to eat these, I salute you because I never have. One little frustration: the tops sometimes brown unevenly, but honestly, who cares once you take a bite?
Those Magical (and Adaptable) Ingredients
- 1 pack Hawaiian sweet rolls (King’s Hawaiian is what I grab, but off-brand works fine…my neighbor swears by ALDI’s version!)
- 8-10 slices deli ham (turkey or roast beef are also fab—sometimes I just use whatever’s on sale)
- 6-8 slices Swiss cheese (cheddar if you want it sharper, or pepper jack for a kick)
- 3 tablespoons butter, melted (if I’m really rushing, olive oil… doesn’t taste quite the same but still good)
- 1 tablespoon Dijon mustard (yellow’s fine too—my aunt despises Dijon)
- 1 tablespoon brown sugar (optional, but adds that, you know, oomph)
- 1 teaspoon Worcestershire sauce (I probably only use this half the time honestly)
- 1/2 teaspoon garlic powder
- Poppy seeds or sesame seeds to sprinkle on top (I forget these half the time—it’s still tasty, ha!)

How I Usually Make Them (And Sometimes Mess Up)
- Preheat your oven to about 350°F (yeah, about—my oven’s ancient and runs hot, so I check early).
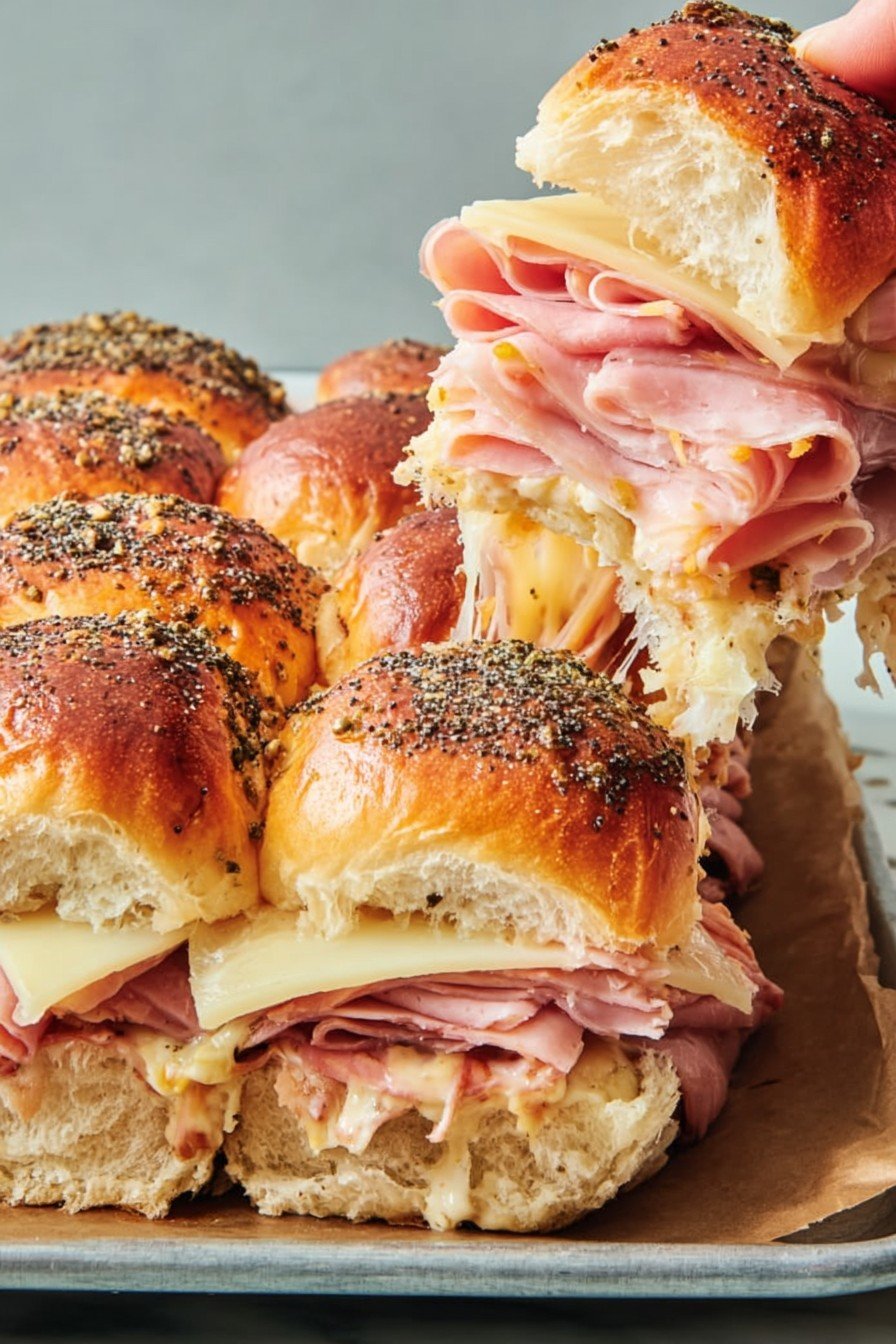
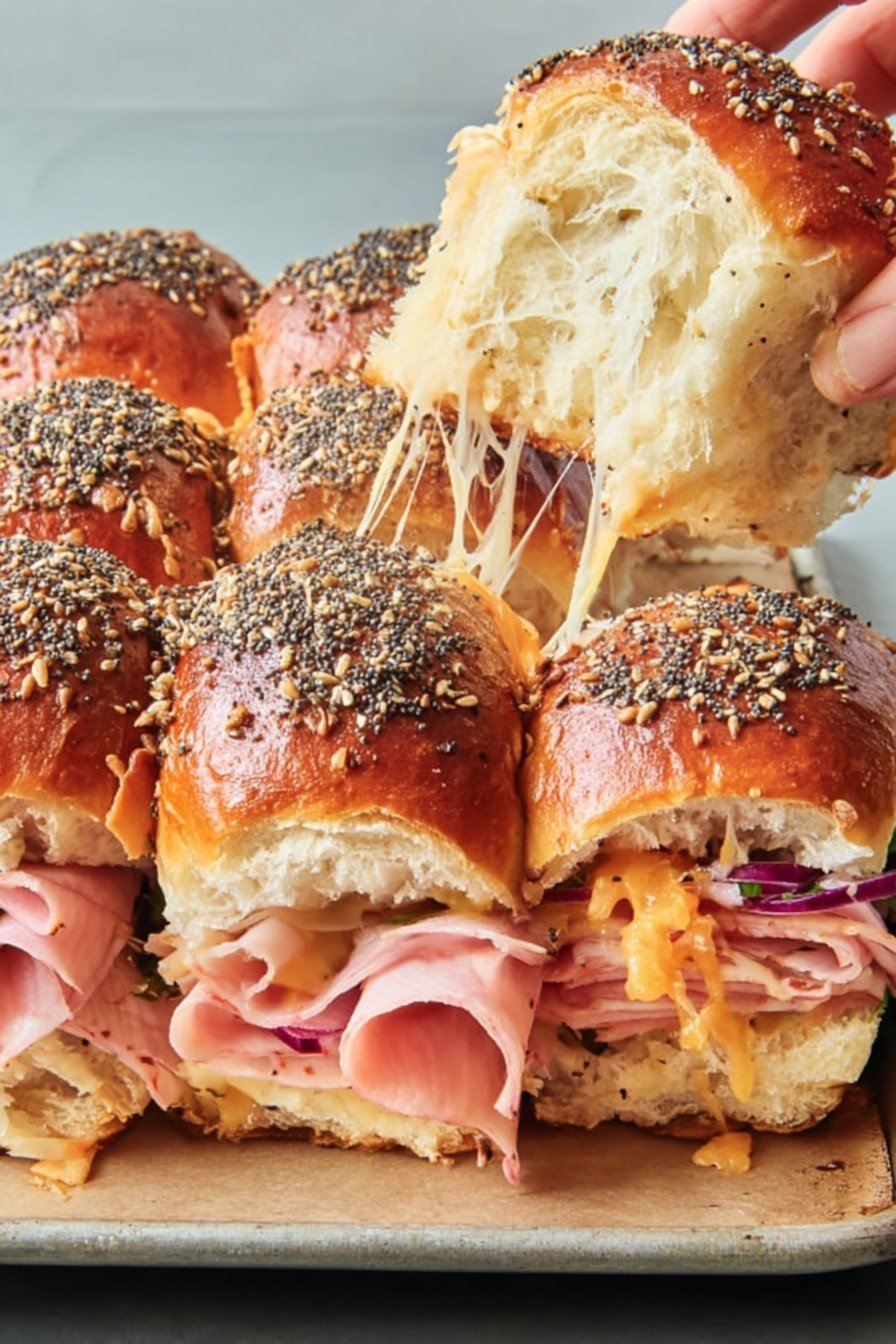
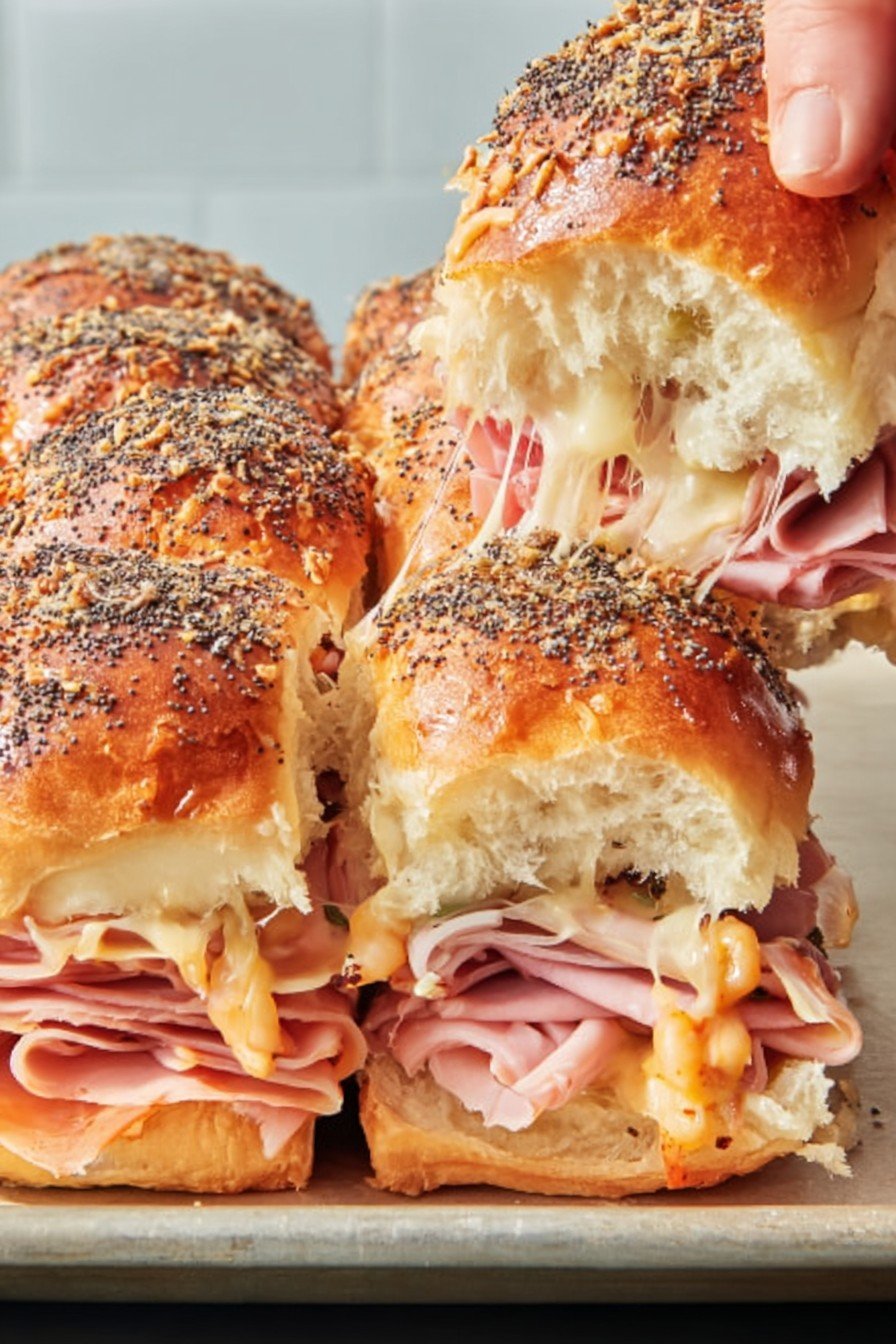
- Leave the rolls stuck together and slice them horizontally (a big serrated bread knife helps; once used a steak knife and… destroyed the top layer; lesson learned).
- Lay the bottom half in a baking dish, and start layering—first ham, then cheese. I sometimes break the cheese up for full coverage, but honestly, you do you.
- Put the tops back on (kinda like a cheesy sandwich blanket).
- Mix the melted butter with mustard, brown sugar, Worcestershire, and garlic powder. Glop it over the rolls—yes, it’s a lot of sauce, but that’s the point!
- Sprinkle on seeds (if you remember them; if not, just pretend you chose the minimalist approach).
- Bake uncovered 18-22 minutes. The cheese should be bubbling (this is where I usually sneak a taste from an edge… shh.).
- Let ‘em cool just a bit, but… I rarely wait more than a couple of minutes myself. Use a spatula or just dive in—no judgment.
My Not-So-Fancy Notes
- The first time I made these, I forgot the sauce. They were still decent, but now I never skip it—it makes a huge difference.
- If you only have shredded cheese, no biggie—just pile it on.
- I’ve also noticed that parchment paper under the rolls saves so much cleanup drama, especially if you’re a little, uh, heavy-handed with the butter like me.
Wild Variations And Epic Fails
- Tried them with leftover pulled pork once—way too messy, but the flavor was wild! Maybe not for company, though.
- Did a veggie version with sautéed mushrooms and spinach. It was better than I expected! My nephew refused to try it, though (can’t win ’em all).
- Honestly, BBQ sauce instead of the butter mixture did not work out for me. It got soggy. Maybe someone else can make it work though?
What If You Don’t Have a Baking Dish?
I like using a ceramic 9×13, but sometimes I’ve just stacked them on a foil-lined cookie sheet—worked okay! I even once used my old pizza stone, but then butter ran everywhere. It was…an adventure. Not one I’d repeat, but you live and learn, right?
Storing Them (Not That They Last Long!)
Supposedly, you can keep leftovers in an airtight container in the fridge for 2-3 days (tbh, in my house, I’m lucky if there’s a crumb left the next morning). I actually think these taste better warmed up the next day, but some folks like them cold straight from the fridge—totally a personal call.
How I Like to Serve These (And a Weird Family Tradition)
For game day, I put the whole baking dish on the coffee table (on a trivet, so the table survives) and let everyone grab and go. Sometimes, we’ll do a side of potato chips or homemade potato wedges. During the holidays, my cousin insists on serving these with little cocktail toothpicks stuck in each one, like that magically makes it classy.
Stuff I’ve Learned the Hard Way (Pro Tips or, How Not To Panic)
- Once I tried cutting the rolls after baking… absolute mess. Slice them before, or you’ll be wrestling them apart.
- I’ve been tempted to skip the resting stage at the end, but actually, I find it works better if you let it sit for a minute—cheese stays together better, less chaos.
- If you rush the sauce step, sometimes the tops don’t stay crisp—spend that extra minute slathering it on. Trust me!
FAQs (Real Questions, Real Answers)
Can I make these ahead of time?
Sure can! I’ll often assemble a few hours ahead and just bake when ready. (Wouldn’t do overnight though, gets too soggy—learned that the hard way.)
Is it possible to use gluten-free rolls?
Yup! I’ve tried these homemade ones. Texture’s a little different, but still delish!
Can I add extra meat?
Absolutely. I’ve stacked it to the ceiling (sorta)—just keep in mind, it might get tricky to bite. Happier problem to have, honestly.
Could I use a toaster oven?
You know, I never have, but my neighbor swears by it for half-batches. Just keep an eye—the edges brown quick!
What about freezing leftovers?
Never tried it—seems like the bread might get weird. But if you do, let me know how it goes!
Whoops, almost forgot: I once dropped a whole batch getting them out of the oven. Don’t do that.
Ingredients
Instructions
-
1Preheat the oven to 350°F (175°C). Line a baking dish with parchment paper.
-
2Without separating the rolls, slice the Hawaiian rolls in half horizontally. Place the bottom halves in the prepared dish.
-
3Layer the ham slices evenly over the rolls, then top with the Swiss cheese. Cover with the top halves of the rolls.
-
4In a small bowl, whisk together melted butter, Dijon mustard, honey, poppy seeds, dried onion flakes, salt, and pepper.
-
5Brush the butter mixture generously over the tops of the rolls.
-
6Cover with foil and bake for 10 minutes. Remove foil and bake an additional 5 minutes, or until the tops are golden and cheese is melted. Serve warm.
Approximate Information for One Serving
Nutrition Disclaimers
Number of total servings shown is approximate. Actual number of servings will depend on your preferred portion sizes.
Nutritional values shown are general guidelines and reflect information for 1 serving using the ingredients listed, not including any optional ingredients. Actual macros may vary slightly depending on specific brands and types of ingredients used.
To determine the weight of one serving, prepare the recipe as instructed. Weigh the finished recipe, then divide the weight of the finished recipe (not including the weight of the container the food is in) by the desired number of servings. Result will be the weight of one serving.
Did you make this recipe?
Please consider Pinning it!!