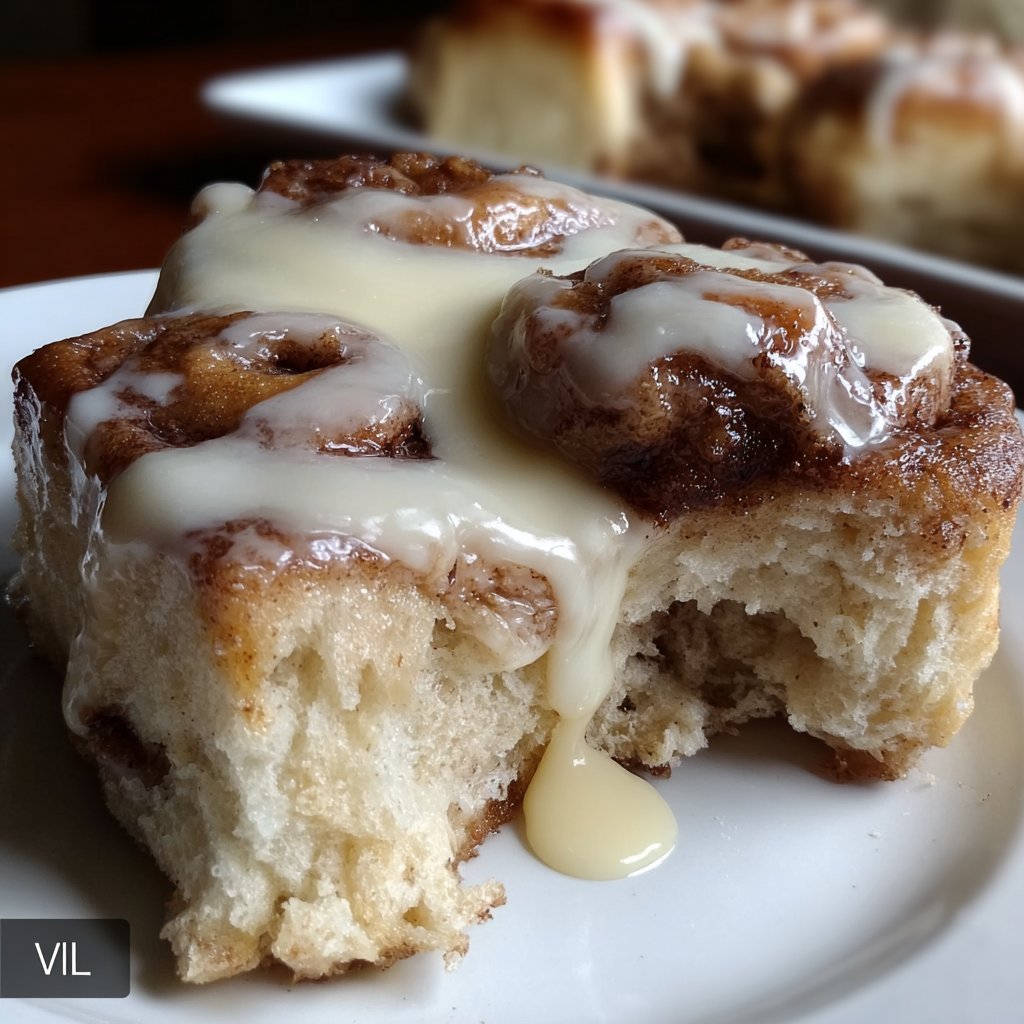
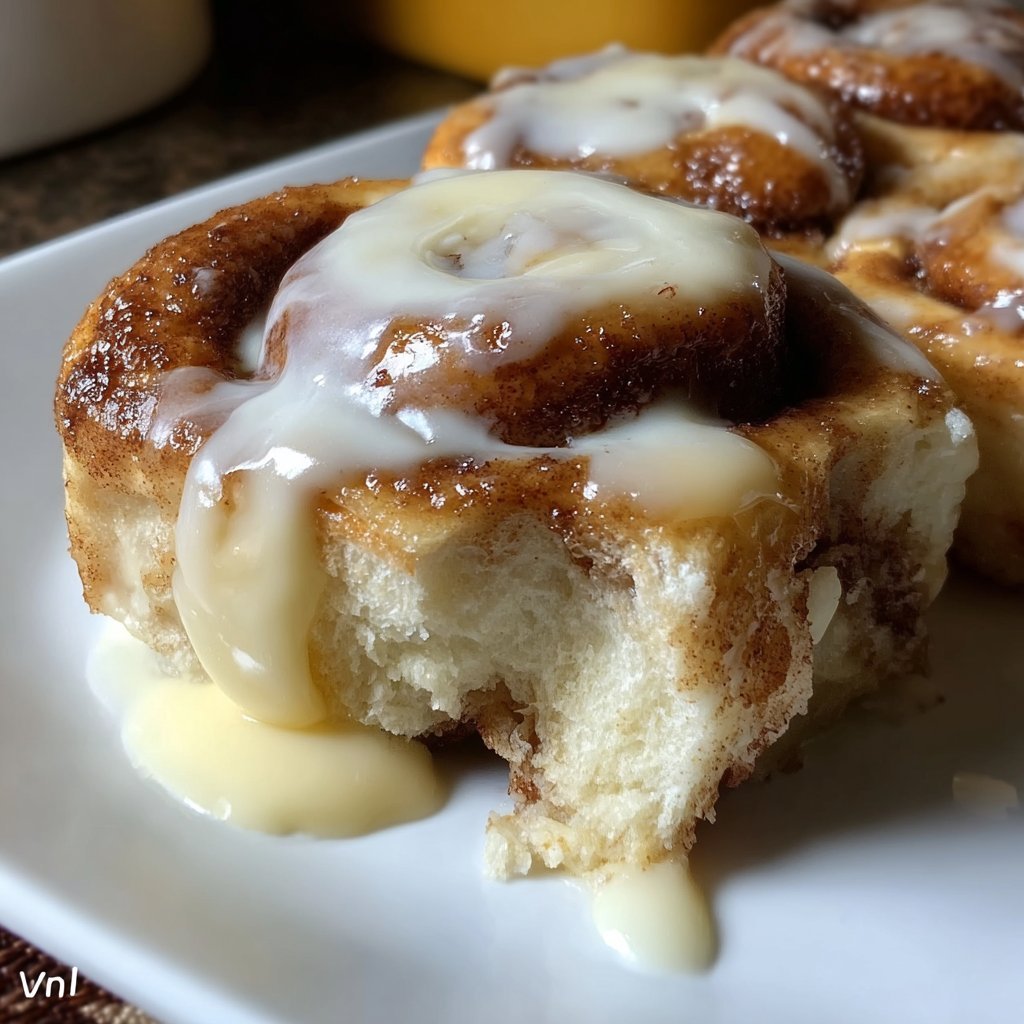
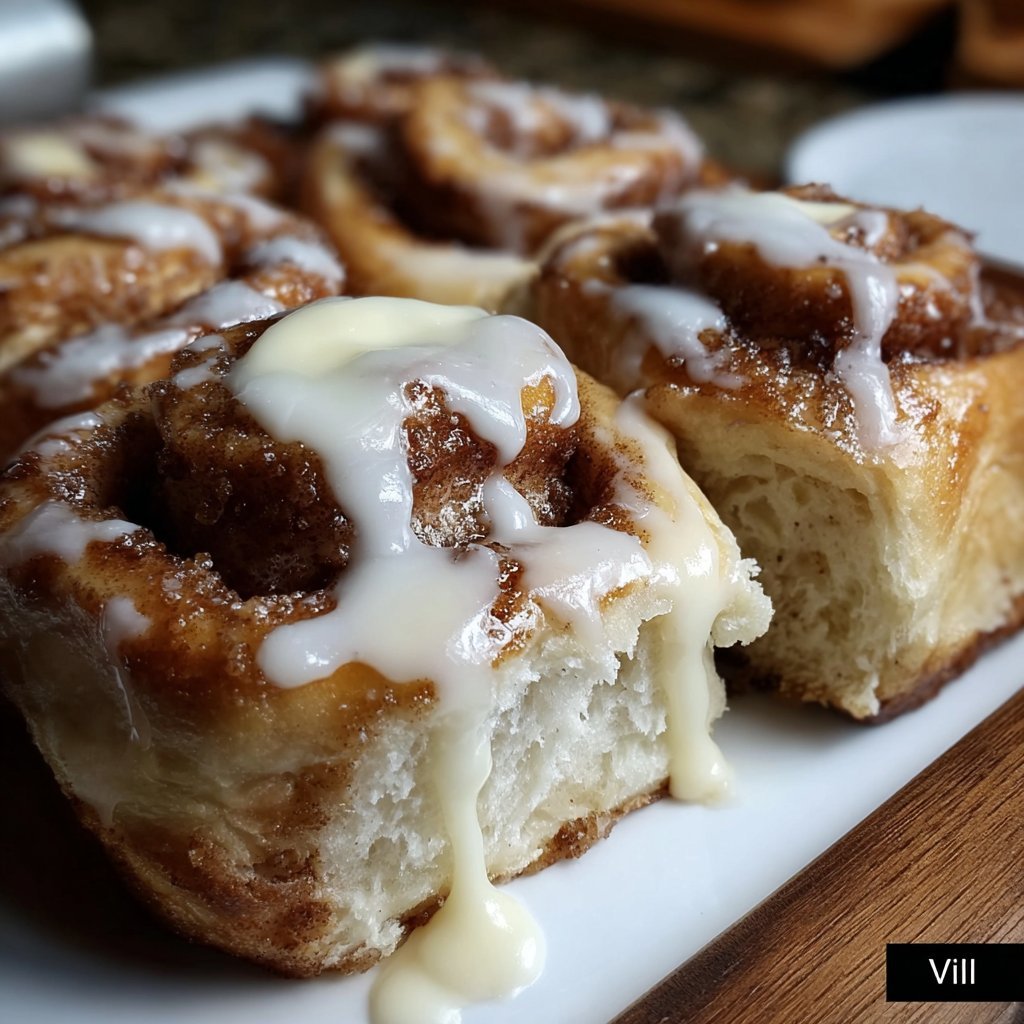
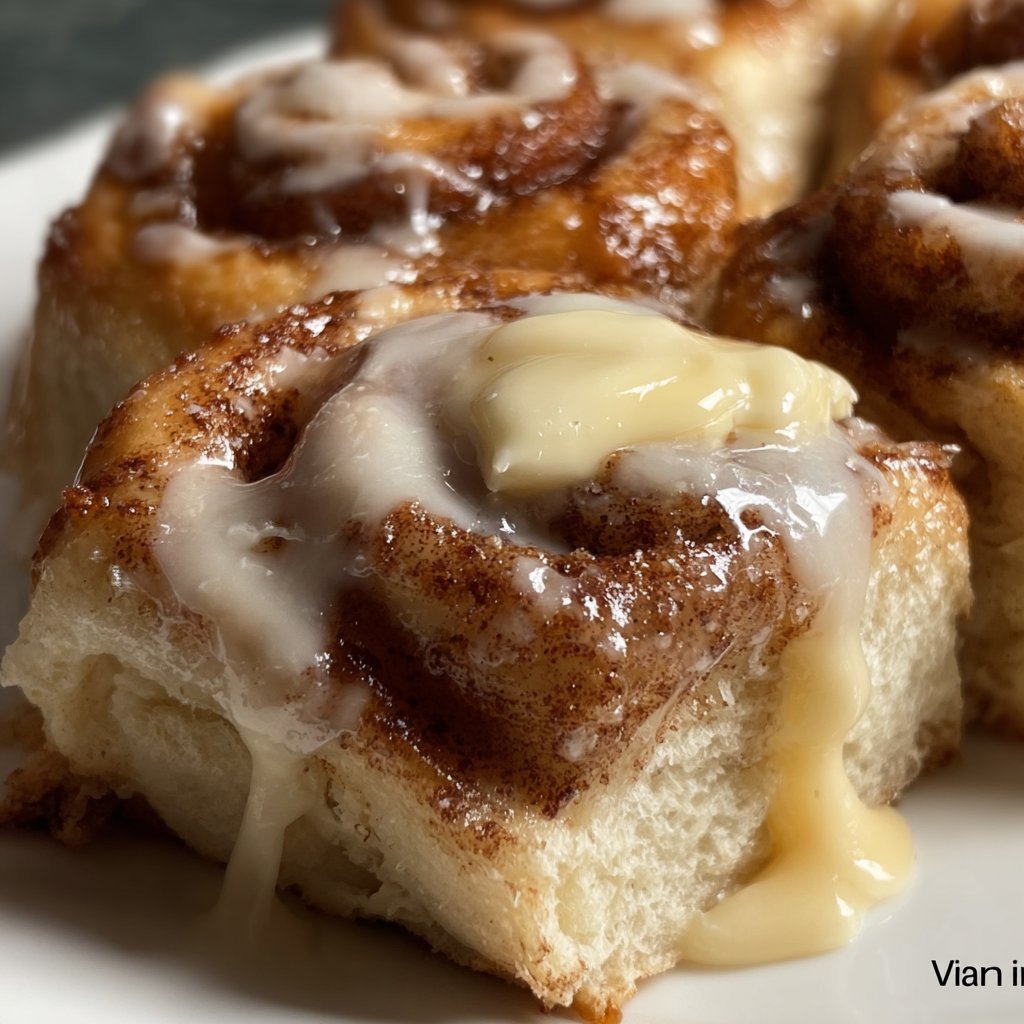
My Go-To Lazy Weekend Treat: King’s Hawaiian Cream Cheese Cinnamon Rolls
Okay, lemme tell you, I am *not* a baker. Like, at all. Yeast scares me, proofing makes me sweat, and honestly, the idea of waiting hours for dough to rise? Nah. But I LOVE cinnamon rolls, right? So I was messing around one Sunday morning, staring at a pack of King’s Hawaiian rolls I had leftover from… well, I don’t even remember what. And I had this crazy idea. What if I just… stuffed them? With cinnamon roll stuff? And then drowned them in a creamy, dreamy cream cheese glaze? Y’all. This happened. And my life hasn’t been the same since. It’s so ridiculously easy, feels kinda cheaty, but tastes like you spent all day slaving away. Perfect for brunch, holidays, or just when you need a serious comfort food hug.
Why You’ll Totally Dig These Rolls
Look, I make this when I need something ridiculously delicious that requires minimal effort. (Because, life, you know?) My family? They absolutely lose their minds for these because the King’s Hawaiian rolls are already so soft and sweet, they just soak up all that buttery cinnamon goodness and the glaze? Oh mercy, the glaze. It’s thick, tangy, and sweet, just like a good cream cheese frosting oughta be. Plus, zero stress about dough rising or kneading! It’s the kind of recipe you can make in your pajamas, messy hair and all (which, let’s be real, is how most of my cooking happens). It’s a winner, truly.
Alright, Here’s What You’ll Need
You probably have most of this stuff hangin’ around already. Don’t sweat it too much if you’re missing something, we can work around it!
- One 12 pack of King’s Hawaiian Sweet Rolls (the big ones, not the minis! Though I bet minis would work too, you’d just need more)
- 1/2 cup (1 stick) unsalted butter, softened (if it’s not soft, zap it for like, 10 seconds. Don’t melt it though!)
- 1/4 cup packed light brown sugar
- 1 tablespoon ground cinnamon (use good quality cinnamon, it makes a difference! I like Penzey’s, but any fresh stuff is fine)
- A pinch of salt (just a tiny bit to balance the sweet)
**For the Cream Cheese Glaze:**
- 4 ounces cream cheese, softened (the block kind, not the spreadable stuff in a tub!)
- 1/4 cup unsalted butter, softened
- 1 1/2 cups powdered sugar (you might need a little more or less, depends on how thick you like it)
- 1/2 teaspoon vanilla extract (Good vanilla is key here! Don’t skimp!)
- 1-3 tablespoons milk or heavy cream (start with 1 and add until it’s pourable, but still thick)
Let’s Get This Done! (It’s Easy, Promise)
- Preheat your oven to 350°F (175°C). Get a baking dish ready. A 9×13 works, or really, anything that holds the rolls snugly in a single layer. I just use a glass casserole dish.
- Take your King’s Hawaiian rolls and slice them in half horizontally. Like, cut ’em through the middle so you have tops and bottoms. Keep them connected if they are, or pull them apart first, doesn’t really matter.
- In a small bowl, mix together that softened butter, brown sugar, cinnamon, and pinch of salt until it makes a paste. This is your filling! It’ll smell amazing, this is where I usually sneak a taste… don’t tell anyone.
- Spread the bottom halves of the rolls evenly with this cinnamon sugar mixture. Get it right to the edges!
- Put the tops back on the rolls. Gently press them down a little.
- Arrange the rolls in your baking dish. They should fit pretty well.
- Cover the dish loosely with foil and bake for about 10-15 minutes. You just want them warmed through and the filling a little melty and fragrant.
- While they’re baking, make the glaze! In a medium bowl, beat the softened cream cheese and butter together until smooth and creamy. An electric mixer is easiest here, but a whisk and some elbow grease totally works too.
- Gradually add the powdered sugar, beating until it’s all combined and smooth. It’ll be super thick.
- Stir in the vanilla extract.
- Add milk or cream, one tablespoon at a time, beating after each addition, until the glaze is the consistency you like. I like it thick enough to coat but still pourable.
- Once the rolls are out of the oven, immediately drizzle that glorious cream cheese glaze all over the tops. Get into the cracks! Don’t be shy.
- Serve warm! Though honestly, they’re pretty darn good at room temp too.
Little Things I’ve Learned Along the Way
* Make sure your cream cheese and butter for the glaze are *really* soft. Like, leave ’em on the counter for an hour. If they’re cold, you’ll get lumps and nobody wants lumpy glaze, right?* Don’t overbake the rolls. They’re already cooked, you’re just warming them up and melting the filling. If you bake ’em too long, they can get a little tough. Keep an eye on ’em.* Sometimes I lightly butter the baking dish first, just because. I’m not sure it’s strictly necessary, but it makes cleanup a tiny bit easier maybe?
Fun Ways to Switch It Up
I’ve played around a bit. Once, I added some finely chopped pecans to the filling which was pretty good, added a nice crunch. Another time, I tried putting some apple pie filling in there, thinking ‘apple cinnamon!’, but it just made the rolls kinda soggy and weird. Stick to the classics, I say! You could maybe add a sprinkle of flaky sea salt over the glaze at the end? Ooh, maybe. Or try adding a touch of maple extract to the glaze for a maple pecan vibe. Hmm, now I gotta try that.
Stuff You’ll Need (Equipment-Wise)
Honestly, nothing fancy. You need a mixing bowl or two, a spoon or rubber spatula for mixing the filling, maybe a fork or whisk for the glaze, and a baking dish. If you don’t have an electric mixer for the glaze, don’t fret! A regular whisk and some arm power will get it done, it just takes a minute longer. And maybe a measuring cup and spoons. That’s about it.
Keeping ‘Em Fresh (Ha!)
Store any leftovers (lol, *if* you have any) in an airtight container at room temperature for a day, or in the fridge for a couple of days. Reheat gently in the microwave for that fresh-baked feel. Though honestly, in my house it never lasts more than a day before they mysteriously disappear. Seriously, it’s like a magic trick.
My Favorite Way to Eat These
Warm, with a big ol’ cup of coffee. Preferably on a Saturday or Sunday morning when I have nowhere to be. Sharing them with friends or family makes them even better, of course. Sometimes I’ll add a little sprinkle of extra cinnamon on top of the glaze just for looks.
Mistakes I Made So You Don’t Have To
Okay, so I once tried rushing the glaze by using cold cream cheese right out of the fridge and it was a lumpy disaster. Like, no amount of beating would make it smooth. So yeah, *really* soften that cream cheese and butter. And also, don’t try to pack too much filling in there, it’ll just ooze out everywhere in the oven. A nice, even layer is perfect.
Burning Questions Answered (Maybe)
* **Can I make these ahead of time?** You can assemble the rolls with the filling and put them in the baking dish the night before. Cover ’em tight and stick ’em in the fridge. Then just bake them in the morning! Make the glaze fresh though, it’s better that way.* **What if I only have salted butter?** That’s totally fine! Just omit the pinch of salt in the filling recipe. You might wanna use unsalted butter for the glaze if you can though.* **My glaze is too thick/thin! Help!** Easy fix! Too thick? Add milk or cream, a teaspoon at a time, beating until it’s right. Too thin? Whisk in a little more powdered sugar, maybe a couple tablespoons at a time.* **Could I use different rolls?** You *could*, but the King’s Hawaiian are just perfect for this because they’re so soft and slightly sweet already. Other rolls might be too dense or not have the right texture. It’s kinda the secret sauce of this particular recipe!* **Is this *really* easier than making cinnamon rolls from scratch?** Um, YES. By about a million percent. Trust me on this.There you have it! My ridiculously easy, outrageously delicious King’s Hawaiian Cream Cheese Cinnamon Rolls. Give ’em a shot, I bet they’ll become a favorite at your place too!