
Hey friend! So, listen, you know how some recipes just *feel* like home? Like a warm hug on a chilly day? For me, that’s this vanilla custard pie. My Grandma Betty used to whip this up, and the smell of vanilla filling the kitchen is just burned into my brain form childhood. Making it now, it just brings back all those good feelings. It’s not fussy, it’s just pure, simple goodness. It’s the kind of thing you bring to a potluck and everyone asks for the recipe, or honestly, just make it for yourself because you deserve it!
Why You’ll Fall for This Pie
Okay, so why this one? Well, honestly, I make this when I need something comforting that isn’t chocolate (I know, weird sometimes, right?). My family goes absolutely bonkers for this because it’s not overly sweet, just smooth and creamy with that pure vanilla flavor. It’s perfect for holidays, weeknights, Tuesdays (why not?). Plus, once you get the hang of the custard, it feels pretty impressive, but really, it’s deceptively easy. (Though I totally burnt the crust once because I forgot about it. Live and learn, eh?).
Okay, Here’s What You’ll Need
Gather ’round! Here’s the stuff:
- 1 unbaked 9-inch pie crust: Store-bought is totally fine! Seriously, no shame in the pre-made game when you’re in a hurry. Pillsbury’s okay, but check your local grocery for a good frozen butter crust too. Or if you’re feeling fancy, a homemade butter crust is next level.
- 4 large eggs: Room temperature if you can swing it, but honestly, straight form the fridge works most times for me.
- 3/4 cup (150g) granulated sugar: Just plain old white sugar.
- 1/4 teaspoon salt: Balances everything out. Don’t skip it!
- 3 cups (710ml) whole milk: Okay, this is where I *might* insist a little. Whole milk really gives you the creamiest custard. 2% will work, but it won’t be *quite* as rich. Skim? Nah, don’t even bother for this one.
- 2 teaspoons pure vanilla extract: Use the good stuff! Mexican vanilla extract is my favorite here, it’s just so warm.
- A pinch of nutmeg (optional): My grandma always added just a tiny grate over the top before baking. It’s not traditional everywhere, but I love it.
Let’s Get Cookin’!
Alright, deep breaths, you got this. It’s easier than it looks!
- Preheat your oven to 375°F (190°C). Pop your unbaked pie crust into your pie plate. You can crimp the edges all pretty, or just leave ’em rustic. Whatever floats your boat.
- In a medium bowl, whisk together the eggs, sugar, and salt until it looks kinda pale yellow and a little frothy. This takes maybe a minute or two by hand.
- Now, gently warm the milk in a saucepan over medium heat. Don’t boil it! Just until it’s steamy around the edges. You should be able to dip your finger in (carefully!) and it feels hot but not scalding.
- This is the slightly crucial bit, called tempering. Slowly, in a thin stream, pour about half of the warm milk into your egg mixture while whisking CONSTANTLY. This warms the eggs up so they don’t scramble when they hit the hot milk.
- Pour the warmed egg mixture back into the saucepan with the remaining milk. Whisk it all together.
- Put the saucepan back over medium-low heat. Stir CONSTANTLY with a whisk or a wooden spoon. You need to keep it moving! Scrape the bottom and sides. This is where it will thicken. It might take 5-10 minutes. You’ll know it’s ready when it coats the back of a spoon and you can run your finger through it and the line holds. Don’t let it boil! If you see bubbles, turn the heat down immediately.
- Take the pan off the heat. Stir in the vanilla extract. This is where I usually sneak a tiny taste. Shhh, our secret!
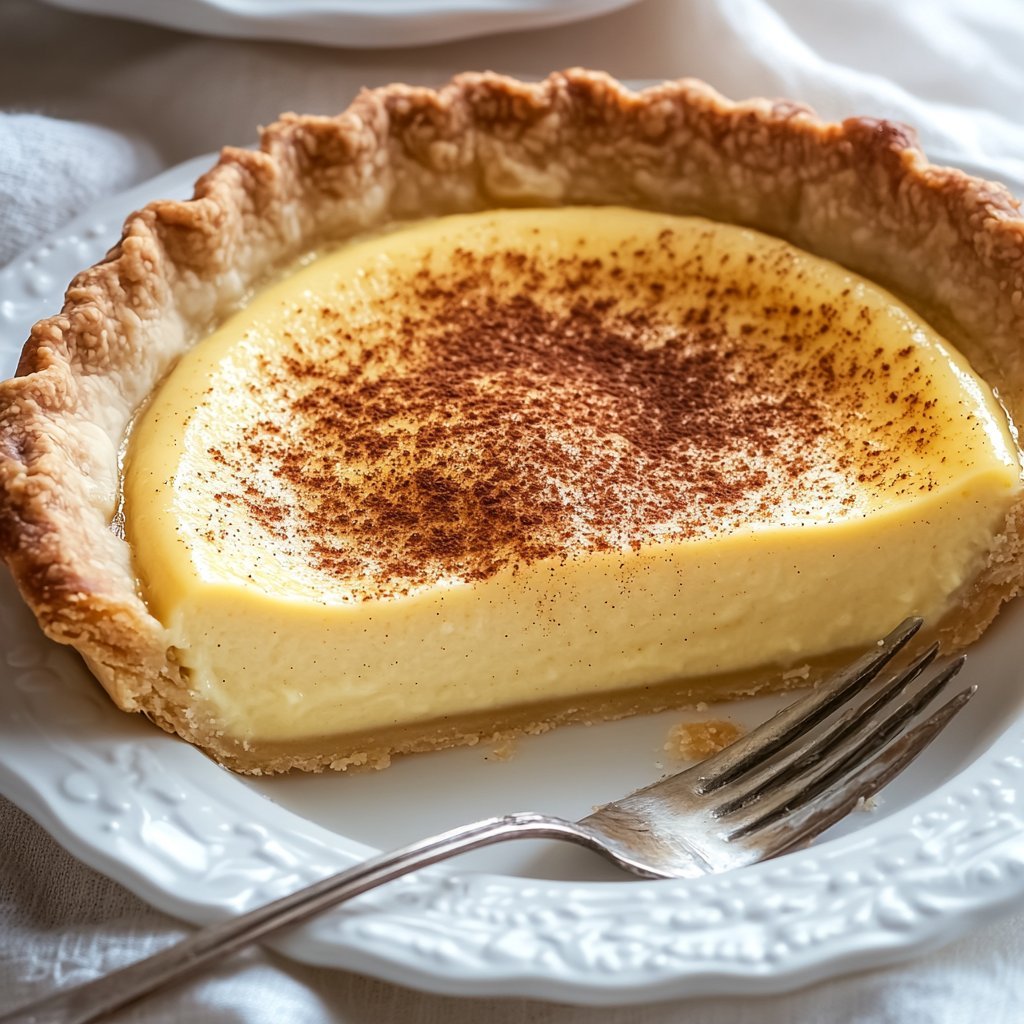
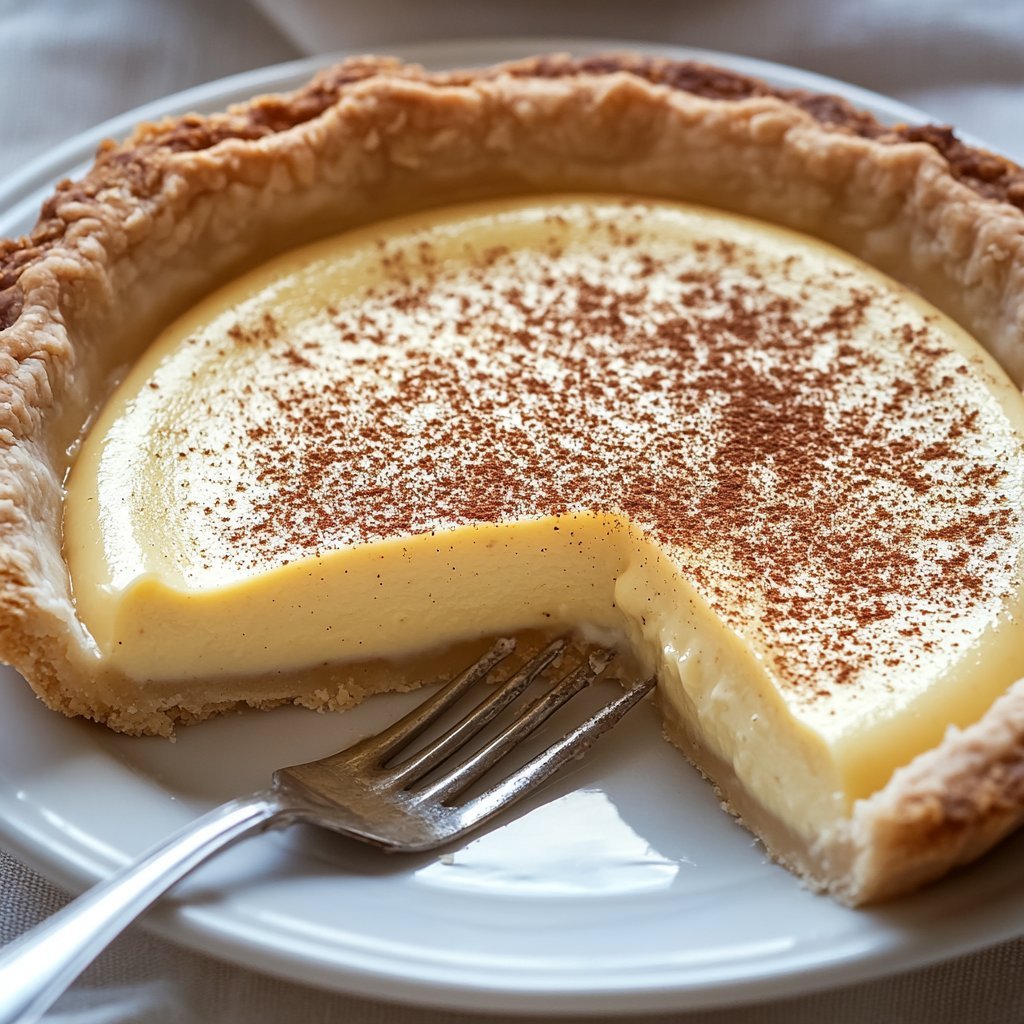
- Pour the beautiful, smooth custard into your unbaked pie crust. If you’re using nutmeg, grate a little over the top now.
- Carefully place the pie in the preheated oven. Bake for 30-40 minutes, or until the edges are set and the center is still slightly wobbly (like jello!). The wobble should be small, not like liquid. The top should look set.
- Let it cool completely on a wire rack. This is the hardest part, honestly. It needs to cool for *at least* 2-3 hours, but ideally, chill it in the fridge for a few hours, or even overnight. I swear it tastes better cold.
Stuff I’ve Learned (So You Don’t Have To)
- Don’t rush the cooling: Seriously, a warm custard pie is just… not right. Let it set up properly, it’s worth the wait.
- Watch the milk: Heating the milk is important, but boiling it can mess things up. Just warm it through.
- Stir constantly: When thickening the custard on the stove, don’t walk away! It can go from perfect to scrambled eggs in a hot second.

Experiment Time! (Some Worked, Some Didn’t)
Okay, so I’ve played around a bit. Adding a swirl of caramel before baking? Yum! Chocolate chips? Also good, though it makes it less of a *pure* vanilla custard pie, obviously. I once tried adding fresh berries to the custard before baking and, well, it was a watery, weird mess. So yeah, maybe add fruit on top *after* it’s baked and cooled.
Tools of the Trade
You’ll need a whisk (a good balloon whisk is definately helpful), a saucepan, a pie plate, and a couple of bowls. If you don’t have a whisk, a fork works in a pinch for the eggs, but get a whisk if you can, it makes life easier!
Keeping it Fresh (If it Lasts)
Cover any leftover pie loosely with plastic wrap or pop it in an airtight container and keep it in the fridge. It’ll last for 3-4 days, though honestly, in my house it never lasts more than a day! It’s best eaten cold, straight form the fridge.
How We Eat It
We usually just eat it plain, because the custard is the star. But a dollop of fresh whipped cream? Chef’s kiss! My dad likes a tiny sprinkle of cinnamon sometimes, weirdo. But you do you!
Pro Tips (Learned the Hard Way)
I once tried rushing the tempering step, poured the hot milk in too fast, and ended up with eggy bits in my custard. Had to strain it, which was a pain. So yeah, slow and steady wins the race there. Also, don’t overbake it! A little wobble is good. An overbaked custard gets rubbery, and nobody wants that.
Burning Questions You Might Have
Q: Can I use a gluten-free crust?
A: Yeah, totally! Just follow the package directions for baking. The custard doesn’t care what kind of crust it’s in!
Q: My custard looks lumpy! What happened?
A: Oh no! You probably cooked the eggs a little too fast or didn’t stir enough. You can try pushing it through a fine-mesh sieve before pouring it into the crust. It helps!
Q: Can I make this ahead of time?
A: Absolutely! It needs to chill anyway, so making it the day before you plan to serve it is perfect. It gives the flavors time to meld, and it sets up beautifully overnight.
Hope you give this a try! It’s a classic for a reason. Enjoy!


1 comment
What if I only have salted butter?