
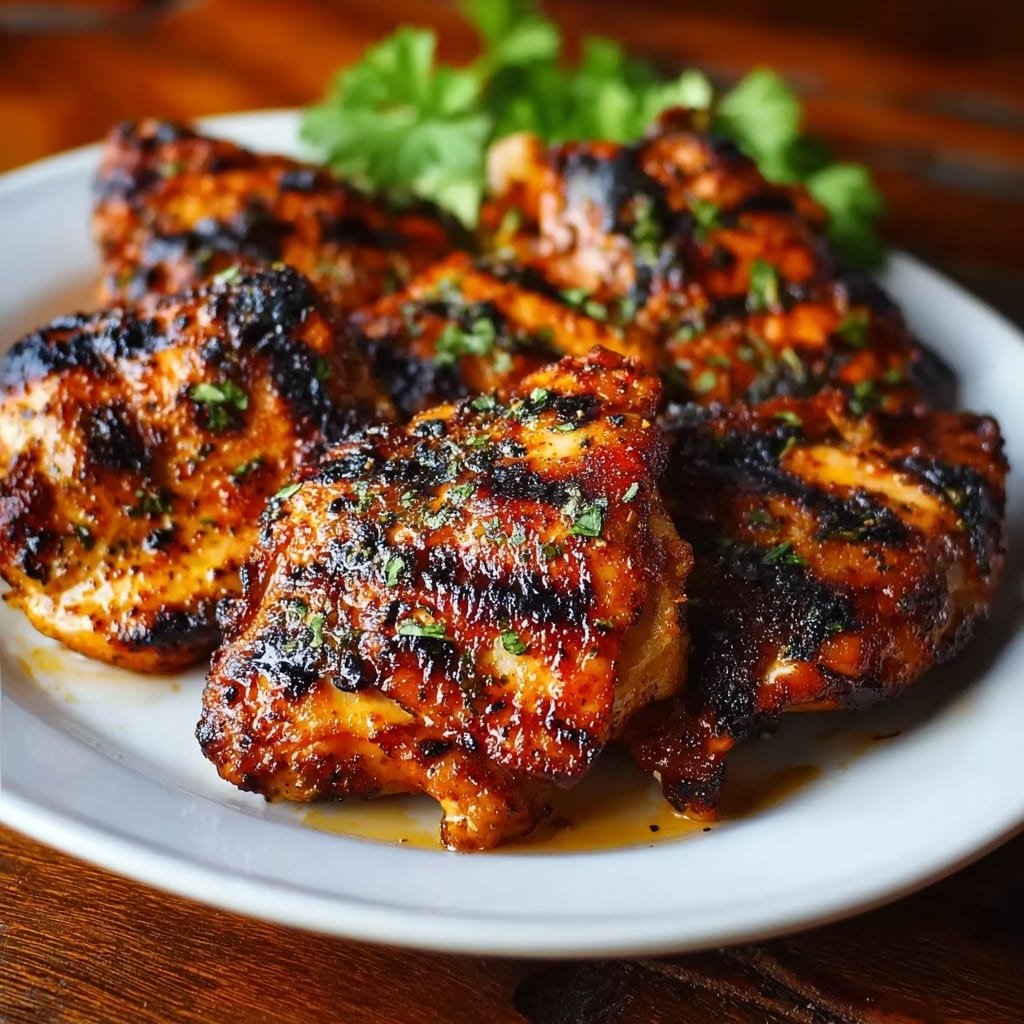
Let Me Tell You About My Grilled Chicken Thighs (And The Time I Nearly Set Off the Smoke Alarm)
Alright—here’s the scoop. These grilled boneless chicken thighs are honestly my midweek superpower. I think the first time I tried making them, I was just out of college, balancing a tiny kettle BBQ on a balcony that seemed more interested in storing bikes than doing any actual grilling (I probably should’ve just used the oven, but stubbornness is my love language). A couple of smoky mishaps later—plus that one time the wind carried my paper plate clean off the deck—I nailed a simple, healthy dinner that doesn’t try to steal the spotlight, but somehow always gets it. These days, it’s my most-requested meal—by family, friends, random neighbors who notice the smell. Can’t say I blame ‘em.
Why You’ll Love This (Or, Why My Family Won’t Let Me Make Anything Else On Tuesdays)
I make these chicken thighs any night I want something easy but not boring. My family goes a bit overboard for them—they even called dibs before I finished grilling last time. Honestly, I sometimes get irked at how quickly these disappear (I hardly get leftovers!). If you’ve ever stood in your kitchen thinking, “what can I make that’s healthy but doesn’t require math,” this one’s for you. Also, no big marinating drama. We’re talking minutes not hours. On days when I’m running late (pretty often), I just throw together my favorite marinade right before grilling, and it still works. If there was a cooking Olympics for low effort, these thighs would probably take silver. Gold is for someone else—maybe those show-off rotisserie chickens.
What You’ll Need: Ingredients List With My Honest Substitutions
- 1.5 pounds boneless, skinless chicken thighs (sometimes I use bone-in, but they take a bit longer—still great though)
- 3 tablespoons olive oil (my grandmother swore by sunflower oil, but, honestly, go with whatever’s not expired)
- 2 cloves garlic, minced (or about 1 teaspoon garlic powder if you’re out—been there!)
- 1 tablespoon lemon juice (vinegar if you’re in a pinch; lime works too, I’ve tried both)
- 1 teaspoon smoked paprika (sometimes I use regular; it’s fine; I won’t tell)
- 1 teaspoon dried oregano (fresh if you want to show off, but dried does the job most days)
- 3/4 teaspoon salt (or just a good pinch—nobody likes bland chicken)
- 1/2 teaspoon ground black pepper (sometimes a little cayenne if I’m feeling wild)
- Spray oil or a touch more olive oil for the grill grates (unless you enjoy scraping later; your call)
Let’s Cook—Directions With A Few Wobblier Moments
- Pat the chicken thighs dry with paper towels—don’t skip this or you’ll get sad, soggy bits. (I once forgot and, let’s just say, it was… extra juicy.)
- In a big-ish bowl, whisk up the olive oil, garlic, lemon juice, paprika, oregano, salt, and pepper. Sometimes I just dump and swirl if I’m in a rush—it works fine.
- Toss in the chicken thighs and coat them really well. Use your hands unless raw chicken freaks you out (it used to freak me out; now it’s just Tuesday). Let it marinate for 10–15 minutes, or up to an hour—but if you’re starving, just leave them while you heat the grill.
- Preheat your grill to medium-high heat (about 400°F/200°C if you want to be precise). If it’s an old charcoal sort, aim for that hot-but-not-scorching thing.
- Give the grill grates a spray or rub with oil, so the chicken won’t glue itself down. Or use grill pans if that’s what you have.
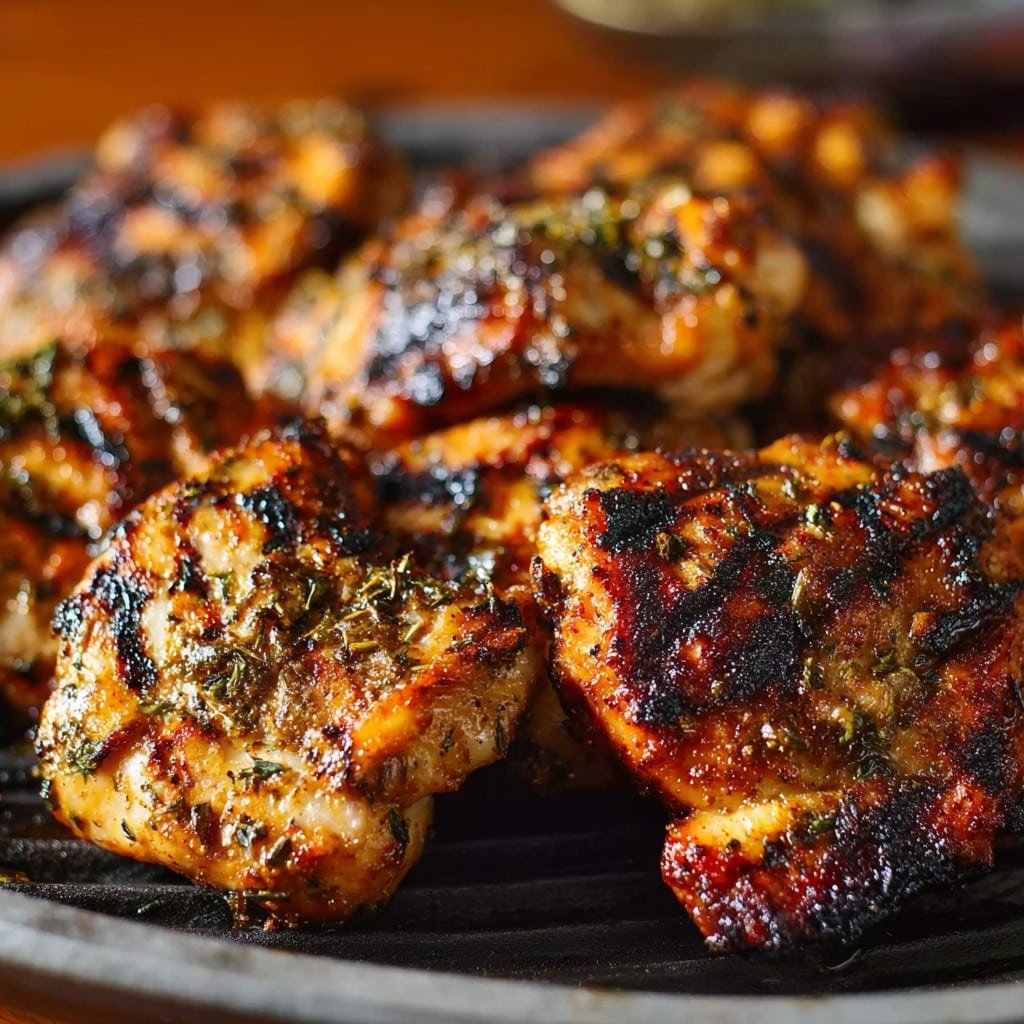
- Lay the thighs out flat—not stacked or folded weirdly. Grill for about 5–7 minutes per side, depending on thickness; flip once, when they release easily. Don’t panic if they get “extra caramelized” aka a bit charred. That’s honestly the best part.
- Check for doneness—the official advice is an internal temp of 165°F (74°C). I usually just poke the fattest bit with a knife and see if the juices run clear—very unscientific, but it works for me.
- Transfer to a plate and let them rest 5 minutes. Or don’t—if you’re as impatient as my cousin. But the flavor’s better if you wait.
Some Notes—Things I’ve Learned The Hard (Or Tasty) Way
- If your marinade looks thin, that’s fine—it soaks in better that way.
- Once I tried marinating overnight. Oddly, it didn’t taste much different. Save yourself the hassle.
- Don’t fuss about perfect grill marks. It’ll taste the same in your mouth.
Variations—Or Experiments That (Mostly) Worked
- Switched paprika for chipotle powder—smokier, spicier, maybe even better.
- Used lime instead of lemon, and threw in some chopped cilantro. That was an actual hit.
- Threw everything in a bag and left it for 2 hours once. Not much changed, so… eh.
- Once tried BBQ sauce as a marinade. Burned the heck out of the thighs. Wouldn’t recommend unless you like cleaning sticky grates for days after!
Equipment—But Don’t Sweat If You’re Missing Stuff
- Grill (gas or charcoal—you could even do these on a stovetop grill pan or cast iron skillet. Done it, works fine.)
- Tongs for flipping. Or a spatula, or, if you’re really desperate, a fork (but I nearly lost one between the grates once, so, eh).
- Bowl for marinating—actually, a gallon-sized freezer bag is less clean-up. Up to you.
- Paper towels for drying the chicken, unless you want a lake in your kitchen.
Storage Info—But Honestly, Good Luck Having Leftovers
If you do manage to hide some, stick them in an airtight container and refrigerate up to 3 days. They reheat well (I think they’re even better the next day, but that’s me). You can slice leftovers into salads or wraps. Freezing? Technically, yes, but I’m yet to do it because these evaporate fast around here.
How I Serve These—Just Cause Everyone Asks
I like to put the hot chicken thighs over a big messy salad, maybe some toasted pita if I’m feeling fancy, or with grilled corn in summertime. Other days, straight up with rice or potato wedges (the British kind, not the American ones, if you know what I mean). At family BBQs, it’s always a fork-in-each-hand scramble for the best bits; nobody’s complained yet.
Pro Tips—Or How I’ve Messed Up So You Don’t Have To
- Don’t rush the resting. I skipped it once and the juices ran everywhere but my plate (sad times).
- If your grill is sticking, oil it after it gets hot, not before. Trust me, you’ll see the difference.
- Also, don’t stack the thighs on the grill. I tried to “save space”—big mistake. Gummy chicken where they overlapped. Ew.
FAQ (And The Things People Yell To Me From Across The Backyard)
- If I don’t have a grill, can I use the oven?
- Oh, for sure. Just whack them under the broiler at about 450°F—it’s not quite the same flavor, but it works. I actually prefer it sometimes when it’s raining cats and dogs outside (which, in my town, happens a lot).
- Bone-in or boneless? What’s genuinely easier?
- Boneless is a breeze, but if all you have is bone-in, just add 3–5 minutes per side. No need to panic.
- Can I double this?
- Absolutely! I sometimes do for bigger gatherings, though sometimes the last few pieces get a bit neglected. Maybe set a timer?
- How spicy is this?
- Not much, unless you add the cayenne. For the heat-haters in my crew, I stick to just black pepper.
- What sides go best?
- I love them with a sharp, crunchy slaw or just plain old steamed green beans. Oh, and a cold beer if the grill’s outside—just saying.
And if you make these, let me know your tweaks… I’m always on the hunt for the next (slightly accidental) upgrade.
Ingredients
- 1.5 pounds boneless, skinless chicken thighs (sometimes I use bone-in, but they take a bit longer—still great though)
- 3 tablespoons olive oil (my grandmother swore by sunflower oil, but, honestly, go with whatever’s not expired)
- 2 cloves garlic, minced (or about 1 teaspoon garlic powder if you’re out—been there!)
- 1 tablespoon lemon juice (vinegar if you’re in a pinch; lime works too, I’ve tried both)
- 1 teaspoon smoked paprika (sometimes I use regular; it’s fine; I won’t tell)
- 1 teaspoon dried oregano (fresh if you want to show off, but dried does the job most days)
- 3/4 teaspoon salt (or just a good pinch—nobody likes bland chicken)
- 1/2 teaspoon ground black pepper (sometimes a little cayenne if I’m feeling wild)
- Spray oil or a touch more olive oil for the grill grates (unless you enjoy scraping later; your call)
Instructions
-
1Pat the chicken thighs dry with paper towels—don’t skip this or you’ll get sad, soggy bits. (I once forgot and, let’s just say, it was… extra juicy.)
-
2In a big-ish bowl, whisk up the olive oil, garlic, lemon juice, paprika, oregano, salt, and pepper. Sometimes I just dump and swirl if I’m in a rush—it works fine.
-
3Toss in the chicken thighs and coat them really well. Use your hands unless raw chicken freaks you out (it used to freak me out; now it’s just Tuesday). Let it marinate for 10–15 minutes, or up to an hour—but if you’re starving, just leave them while you heat the grill.
-
4Preheat your grill to medium-high heat (about 400°F/200°C if you want to be precise). If it’s an old charcoal sort, aim for that hot-but-not-scorching thing.
-
5Give the grill grates a spray or rub with oil, so the chicken won’t glue itself down. Or use grill pans if that’s what you have.
-
6Lay the thighs out flat—not stacked or folded weirdly. Grill for about 5–7 minutes per side, depending on thickness; flip once, when they release easily. Don’t panic if they get “extra caramelized” aka a bit charred. That’s honestly the best part.
-
7Check for doneness—the official advice is an internal temp of 165°F (74°C). I usually just poke the fattest bit with a knife and see if the juices run clear—very unscientific, but it works for me.
-
8Transfer to a plate and let them rest 5 minutes. Or don’t—if you’re as impatient as my cousin. But the flavor’s better if you wait.
Approximate Information for One Serving
Nutrition Disclaimers
Number of total servings shown is approximate. Actual number of servings will depend on your preferred portion sizes.
Nutritional values shown are general guidelines and reflect information for 1 serving using the ingredients listed, not including any optional ingredients. Actual macros may vary slightly depending on specific brands and types of ingredients used.
To determine the weight of one serving, prepare the recipe as instructed. Weigh the finished recipe, then divide the weight of the finished recipe (not including the weight of the container the food is in) by the desired number of servings. Result will be the weight of one serving.
Did you make this recipe?
Please consider Pinning it!


