
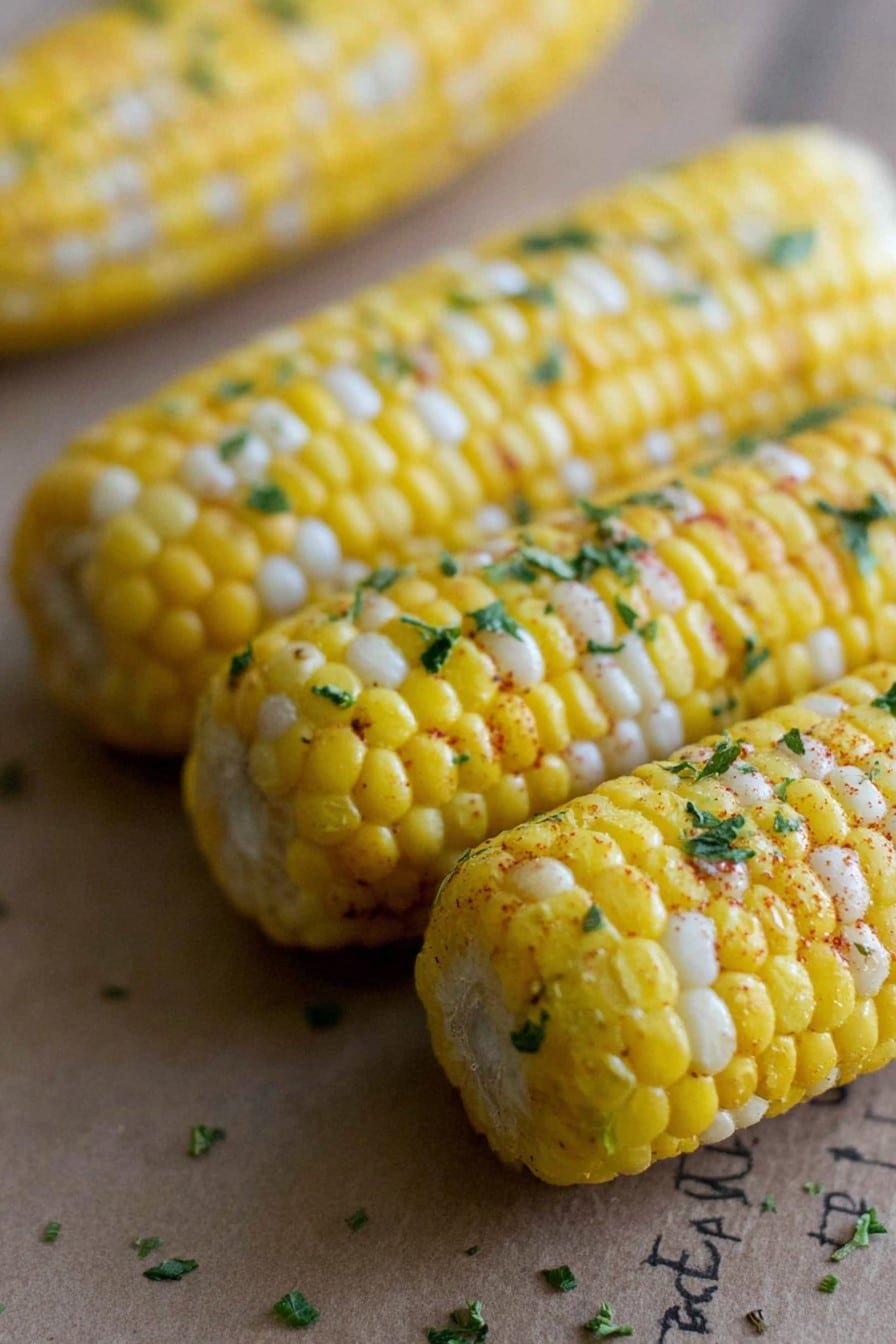
Alright, let me just start by saying—corn on the cob in the air fryer is a game changer. I stumbled on this by accident, honestly. One late summer evening, I realized the grill hadn’t been cleaned since last year (woops), and I just wasn’t up for a whole production. That’s when the air fryer called my name. Now, my kitchen may not be Instagram-ready, but let me tell you, my family wanted more before I’d even finished my first ear. If you’re after the taste of summer with basically zero bother, you are my people.
Why You’ll Probably Get Hooked on This
I make this when there’s just no time (because who needs a million steps when you’re hungry?). My family goes a bit wild for that little hint of char—like we roasted it over a fire, except the only flames are probably from a scented candle on the counter. Honestly, I used to dread boiling a giant pot of water just for corn, and half the time I’d forget it on the stove. And have you noticed how air fryer recipes just make you feel like you have your life together? Or is that just me?
Here’s What Goes In (and What Doesn’t, If You’re Crafty)
- 4 ears of fresh corn, shucked and silks mostly removed (but sometimes I use frozen when I’m lazy; just takes a bit longer—my uncle swears you can’t tell the difference, but, well, I think you can)
- 1 tablespoon olive oil (or go rogue with melted butter; I do that when I’m feeling extra fancy or, honestly, when the olive oil is hiding)
- 1/2 teaspoon kosher salt (regular table salt totally does the trick; my grandma was a Morton’s loyalist but anything’s fine)
- 1/4 teaspoon black pepper (sometimes I swap in smoked paprika for a little adventure—no one complains)
- Optional: a sprinkle of garlic powder, a squeeze of lime, or a handful of chopped cilantro if you’re feeling zesty
Let’s Do This: Air Fryer Corn Step by Step
- Preheat the air fryer to 400°F (about 200°C). If your machine doesn’t preheat—don’t sweat it. I forget half the time and things still turn out tasty.
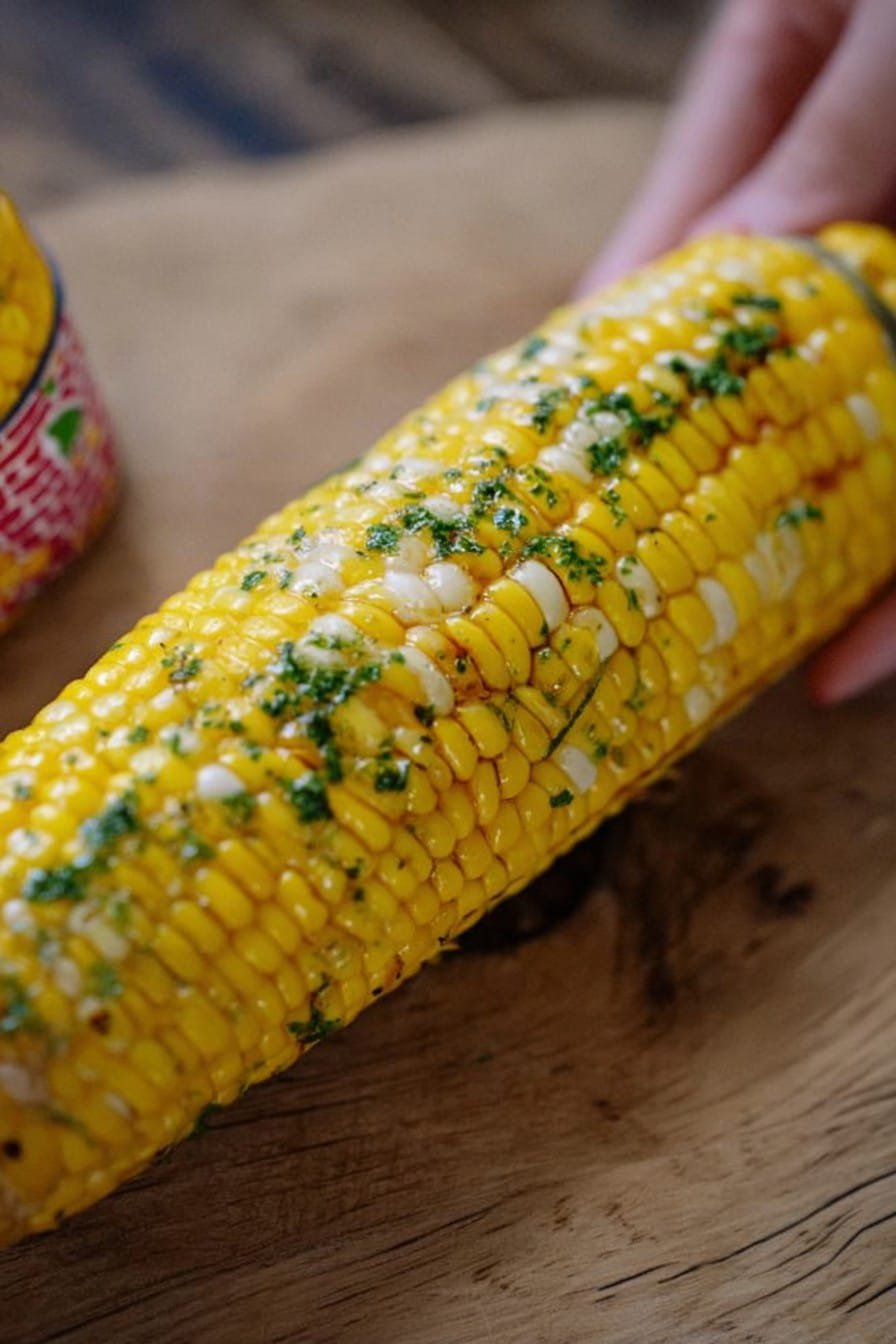
- Rub each ear of corn all over with olive oil (or butter, remember?), getting into every nook and cranny. It’s a bit of a slippery job—don’t wear your nice shirt.
- Sprinkle on the salt, pepper, and anything else you fancy. I usually wiggle the corn around to coat it evenly—don’t get fussy if it’s patchy, it all mellows in the fryer.
- Arrange the ears in your air fryer basket. If your basket’s not huge, you might have to break the cobs in half or stack ‘em. It’s not a beauty contest.
- Cook for about 10-12 minutes, flipping halfway. You’re aiming for toasty golden spots and a bit of, well, char. If it looks a tad dry, I give it a brush with more oil (or butter—there’s a trend here).
- This is the part where I sneak a bite (shhh). If it’s juicy and sweet, it’s done. If not, give it another 2-3 minutes. Don’t stress if it looks a little uneven; honestly, the crispy bits are the best bits.
Notes From My Not-So-Perfect Kitchen
- When I tried stacking three cobs, the bottom one cooked faster. Actually, I find that rotating them around helps (like musical chairs for corn).
- If you end up with a little scorched patch, just turn it over or eat that side first—it’s “smoky flavor,” promise.
- Fresh corn is awesome, but I’ve even used those vacuum-packed ones in winter. Not as sweet, but in a pinch, they work. Just dry them with a kitchen towel first so you get more char.
Variations a.k.a. When I Got Creative
- Cheesy Mexican-style: After air frying, I slather on mayo or sour cream, then crumbly cheese and Tajín. Once, I used Greek yogurt instead—honestly? Too tangy for me. But maybe you’ll like it!
- Herb butter: Mix some chopped herbs (parsley, basil, dill) into your butter before brushing it on. Makes it feel a bit posh.
- Spicy hit: Sprinkle chili flakes before cooking—just don’t overdo, or the kids will revolt.
Do I Really Need an Air Fryer? And Other Gear Talk
Sure, the air fryer makes this silly easy, but if you don’t have one, you could try the oven on broil. Stack the cobs on a wire rack—might not be the exact same, but pretty close. I wouldn’t do this in a regular toaster oven though; trust me, it gets awkward. Oh, and tongs help, but I’ve also just used a big spoon. Whatever works, right?
Storing It (But We Never Have Leftovers…)
Supposedly you can stash cooked corn in the fridge for up to 2 days, tightly wrapped. I only know this because I had to test it twice—mostly, ours disappears before anyone even thinks of leftovers. It tastes good cold too, if you’re weird like me and snack straight from the fridge (late night kitchen raids are real).
Favorites for Serving (Family Quirks and All)
We eat this right off the cob, but sometimes I slice the kernels into salads for a “fancy” side. My cousin likes to dunk hers in a big blob of ranch—no judgment here. And, actually, I love it with just more melted butter and a shake of flaky salt. Simple, but makes you smile.
Little Lessons I’ve Learned the Hard Way
- I once tried cranking the heat up higher thinking it would be faster—not only did it char, but the kitchen smelled like a campfire. Stick to around 400°F. Patience is kinda key.
- Don’t skip flipping halfway. I did, and believe me, only half the corn looked edible. Oops.
- Light pressure with the oil, especially if using butter. Too much and you get soggy spots instead of crispy edges. It’s a balance, like most things in life.
Wait, Didn’t Someone Ask Me This Before? (FAQs!)
- Can I use frozen corn? Yep. It might need a tiny bit extra time. Just pat it dry first or you won’t get that char action.
- Should I wrap corn in foil? I used to think so, but actually, no. You want the heat to touch the kernels for max flavor (and lazy clean-up, honestly).
- What if my air fryer’s super small? Break the cobs in half. Or just cook them in batches—it’s worth the wait, promise.
- How do I know when it’s done? The best way? Poke with a fork and if it’s tender (and smells a bit nutty), you’re golden. Or just taste a kernel, like I always do even when I say I won’t.
Anyway—if you end up with corn on your shirt, I say you did it right. Enjoy!
Ingredients
- 4 ears of fresh corn, shucked and silks mostly removed (but sometimes I use frozen when I’m lazy; just takes a bit longer—my uncle swears you can’t tell the difference, but, well, I think you can)
- 1 tablespoon olive oil (or go rogue with melted butter; I do that when I’m feeling extra fancy or, honestly, when the olive oil is hiding)
- 1/2 teaspoon kosher salt (regular table salt totally does the trick; my grandma was a Morton’s loyalist but anything’s fine)
- 1/4 teaspoon black pepper (sometimes I swap in smoked paprika for a little adventure—no one complains)
- Optional: a sprinkle of garlic powder, a squeeze of lime, or a handful of chopped cilantro if you’re feeling zesty
Instructions
-
1Preheat the air fryer to 400°F (about 200°C). If your machine doesn’t preheat—don’t sweat it. I forget half the time and things still turn out tasty.
-
2Rub each ear of corn all over with olive oil (or butter, remember?), getting into every nook and cranny. It’s a bit of a slippery job—don’t wear your nice shirt.
-
3Sprinkle on the salt, pepper, and anything else you fancy. I usually wiggle the corn around to coat it evenly—don’t get fussy if it’s patchy, it all mellows in the fryer.
-
4Arrange the ears in your air fryer basket. If your basket’s not huge, you might have to break the cobs in half or stack ‘em. It’s not a beauty contest.
-
5Cook for about 10-12 minutes, flipping halfway. You’re aiming for toasty golden spots and a bit of, well, char. If it looks a tad dry, I give it a brush with more oil (or butter—there’s a trend here).
-
6This is the part where I sneak a bite (shhh). If it’s juicy and sweet, it’s done. If not, give it another 2-3 minutes. Don’t stress if it looks a little uneven; honestly, the crispy bits are the best bits.
Approximate Information for One Serving
Nutrition Disclaimers
Number of total servings shown is approximate. Actual number of servings will depend on your preferred portion sizes.
Nutritional values shown are general guidelines and reflect information for 1 serving using the ingredients listed, not including any optional ingredients. Actual macros may vary slightly depending on specific brands and types of ingredients used.
To determine the weight of one serving, prepare the recipe as instructed. Weigh the finished recipe, then divide the weight of the finished recipe (not including the weight of the container the food is in) by the desired number of servings. Result will be the weight of one serving.
Did you make this recipe?
Please consider Pinning it!


